Most farmhouse Christmas kitchen guides get it wrong — they hand you a cart full of burlap and call it a plan. The kitchens that actually stop people mid-scroll are the ones where one warm light source, a real garland, and a single bowl of something red do all the heavy lifting.
We spent serious time browsing Etsy, Target, and IKEA to bring you only what’s worth your attention this year — and every idea here lands somewhere between $8 and $1,850. Inside, you’ll find 23 curated farmhouse Christmas kitchen ideas spanning rustic farmhouse, modern farmhouse, vintage retro, and warm natural-wood styling, with budget and luxury versions compared side by side and shoppable product links for each one. In 2026 the shift is toward quieter holiday decorating: fewer pieces, better texture, and greenery that looks alive instead of plastic.
Bookmark this before you scroll away — it’s the kind of guide you’ll come back to. And stay until the end — we break down the most common mistakes that can ruin these looks. 📌 Save this to Pinterest for later — you’ll want to revisit these ideas.
This post contains affiliate links. If you buy through them, we may earn a small commission at no extra cost to you.
1. Mason Jar Fairy-Light Trees Along a Shiplap Shelf
The reason this shelf reads as one designed moment instead of a craft project is rhythm. Tall frosted bottlebrush trees sit at both ends, and the mason jars — each holding a tangle of warm fairy lights and a pinch of faux snow — step down in height between them. Everything shares the same two colors: crisp white shiplap and deep green. That’s it. The wood shelf and the butcher block below do the warming, so the lights never have to compete.
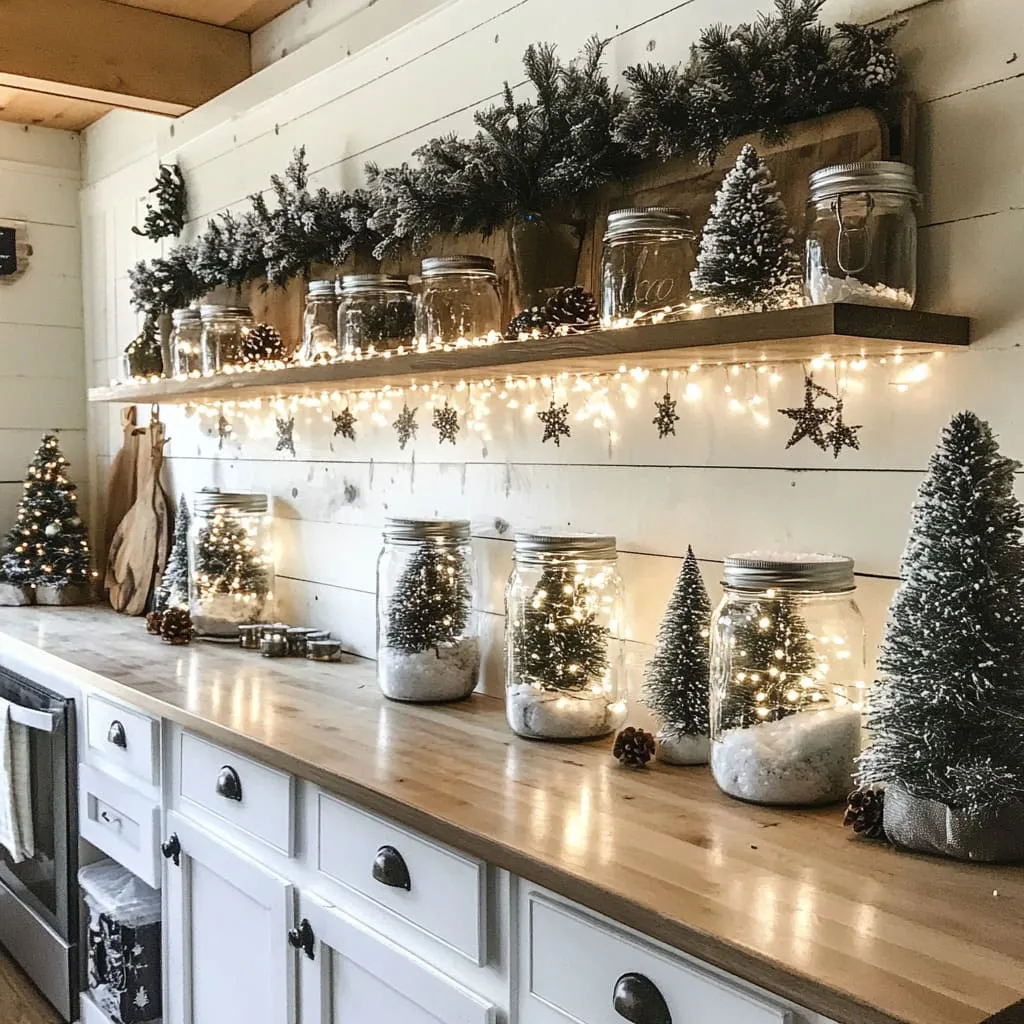
- Fill clean mason jars two-thirds full with faux snow and a loose coil of warm-white fairy lights.
- Feed the battery pack out the back and tuck it behind the jar.
- Drop one small frosted bottlebrush tree into each jar.
- Group the jars in odd numbers — three or five — and vary heights by propping one on a stack of two books.
- Clip a few star-shaped clips along the shelf edge so the glow spills upward.
Roughly 40 minutes of work and $25–$40 for five jars, assuming you already own the trees.
2. A Mercury Glass Globe Pendant Above Draped Evergreen
Take away the big mercury glass globe pendant and the garland has nowhere to go — it just hangs there. The pendant gives all that draping a center of gravity, and its silvered, slightly tarnished finish picks up the same green as the evergreen without matching it exactly. It also throws a soft, broken light that makes aged white cabinets look warmer than they actually are. If you’re rebuilding this kitchen, spend your money here and keep everything else quiet.
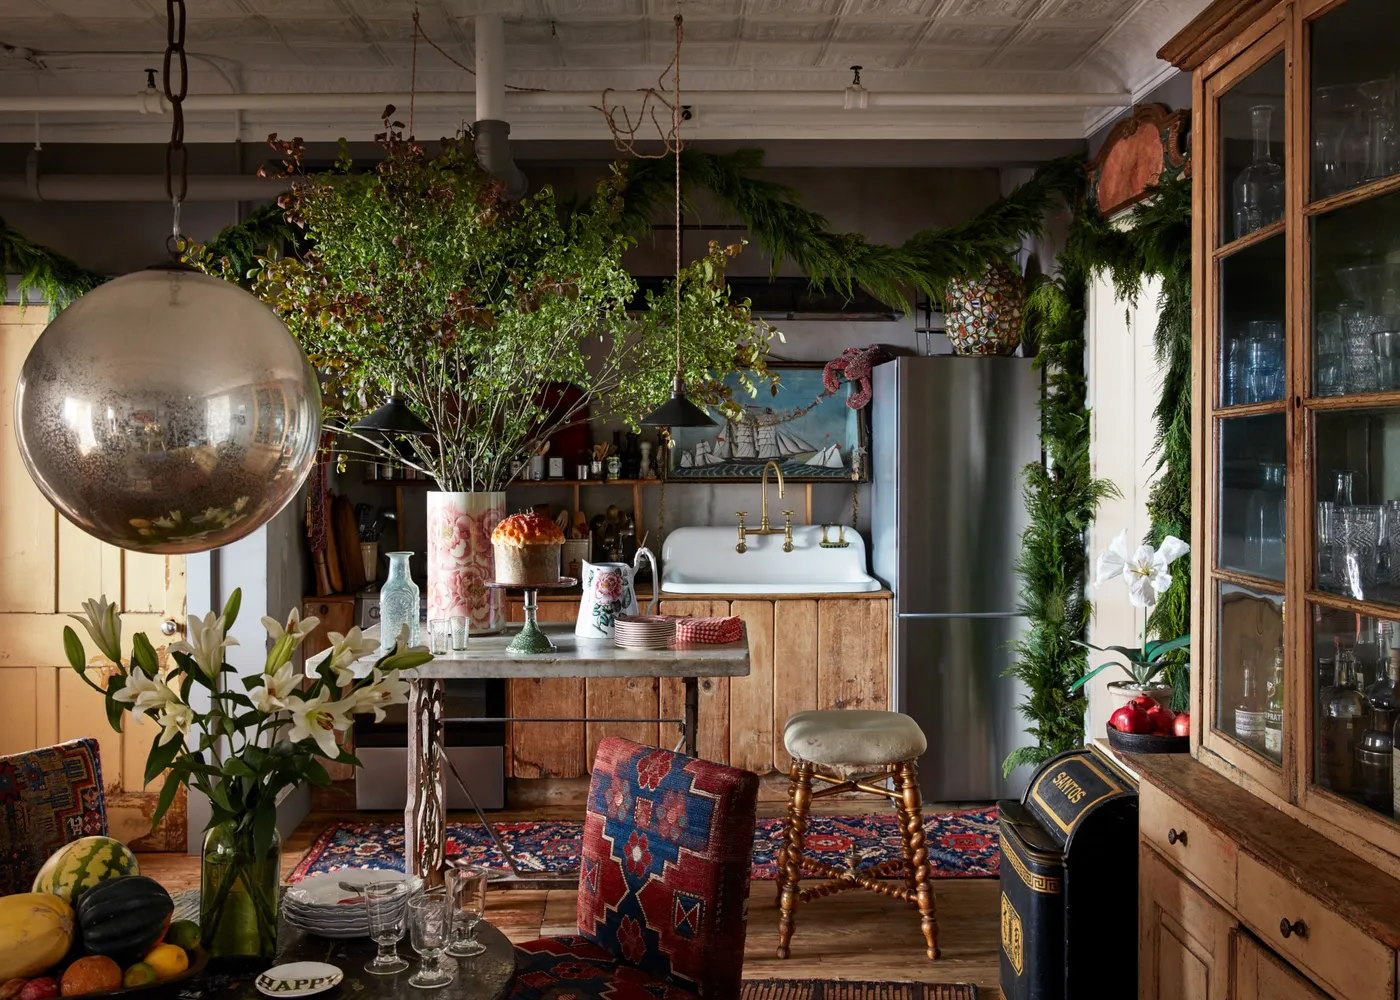
Here’s the formula: 65% aged white and natural wood, 20% forest green, 10% brass and silver, 5% pattern from the rug. That last 5% is doing more than it looks — the red-and-blue patterned rug is the only place a third color appears, which is exactly why the greenery reads as calm instead of busy. Swap the rug for plain jute and you’d need to move that color somewhere else, maybe a striped runner or a stack of vintage tins.
3. Vintage Christmas Cards Tied Up With Red Ribbon Bows
Genuine vintage holiday cards run $4–$12 each at estate sales and on Etsy, and a set of eight can hit $90 before you frame a single one. The workaround: print scans of your own family’s old cards, or pick up a pack of vintage reproduction postcards for about $12, slide them into simple wooden or gold frames from IKEA, and tie them with 1-inch red satin ribbon from a craft store. Total: $25–$35 for a whole cabinet run. Compare that with Idea #4, where the same collected feeling lives inside a glass cabinet instead of on the doors.
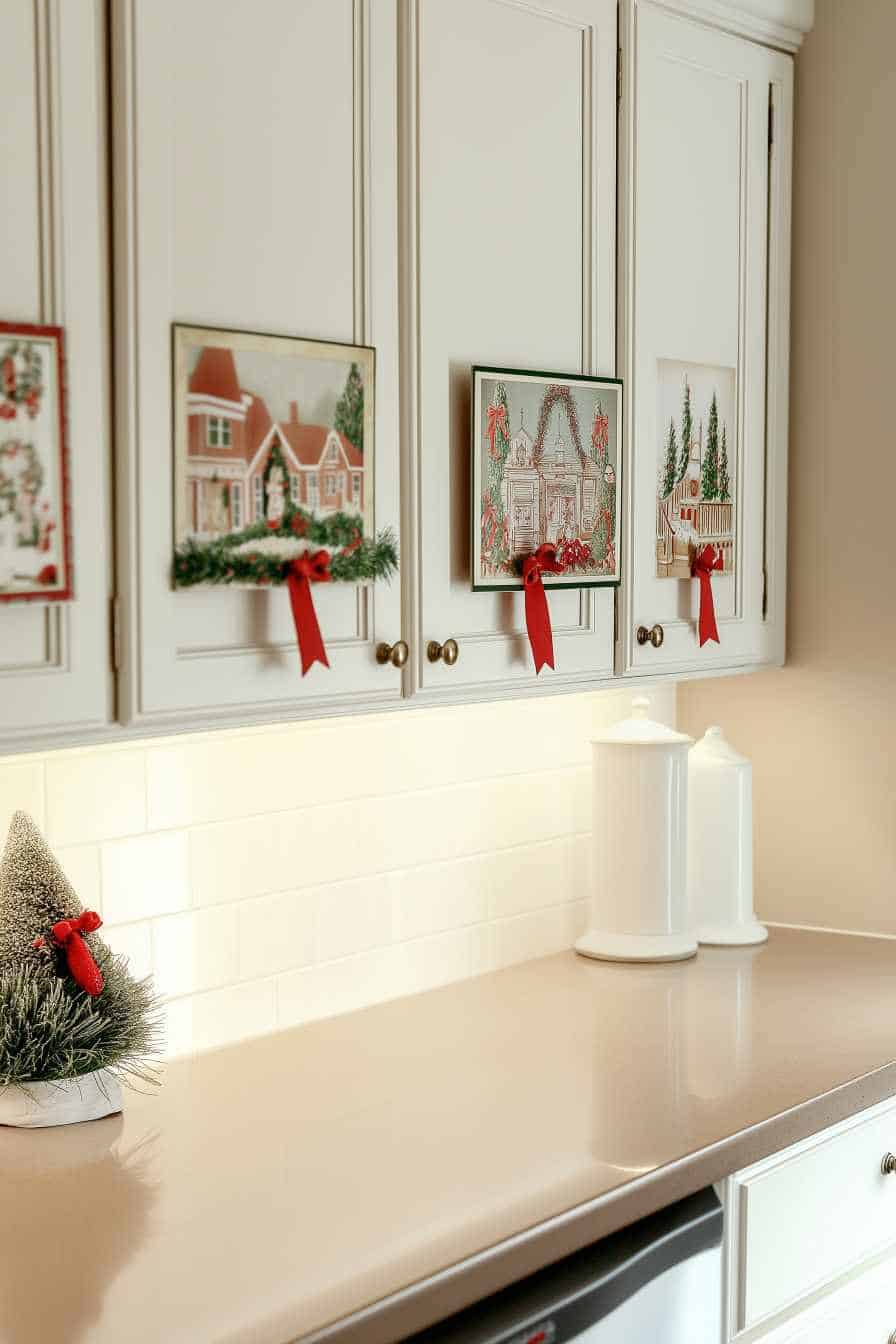
Align the bottoms of the frames, not the tops. Cabinet doors usually have a horizontal rail near the bottom, and a straight bottom line makes the arrangement look deliberate rather than random. Keep frames at 4×6 inches, space them 16 to 20 inches apart, and skip the door right above the dishwasher. And never use adhesive on a cabinet door — run the ribbon over the top of the door and tape it on the inside face.
4. A White Ceramic Village Inside a Rustic Glass Cabinet
Glass doors usually make a cabinet feel like a display case. Here they make it feel cozy, because everything inside is the same two colors — crisp white ceramics and pine green — and the wood frame supplies all the warmth. Scale does the rest: the little ceramic houses sit lower and smaller than the dishware behind them, so your eye travels up instead of stalling on one shelf. The pieces doing the work:
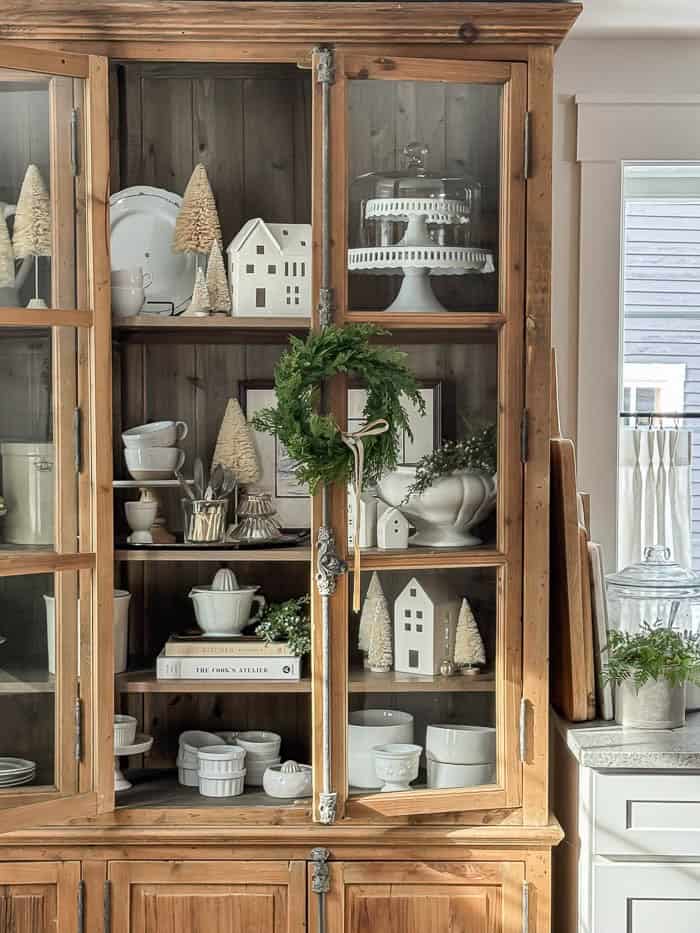
- Three to five white ceramic houses, no more
- Frosted bottlebrush trees in two heights
- Everyday white dishware, kept visible rather than hidden
- One small evergreen wreath on the center door hardware
The small pine wreath hung from the vertical hardware between the doors is the whole trick. Without it, this is just a nicely styled cabinet. With it, the cabinet becomes part of Christmas the second you walk in — and you never had to move a single dish.
5. Frosted Garland and a Wooden Trough of Tiny Trees
- Wipe the cabinet tops with a dry cloth and let them dry completely.
- Press clear adhesive hooks onto the cabinet top, never on the face frame — one every 18 inches.
- Loop floral wire around the garland stem and over the hook, leaving an inch of slack so the frost doesn’t flatten.
- Fluff each branch forward and tuck the wired stem behind the first branch so no wire shows.
- Set the wooden trough of bottlebrush trees below and let the garland’s edge overlap it slightly.
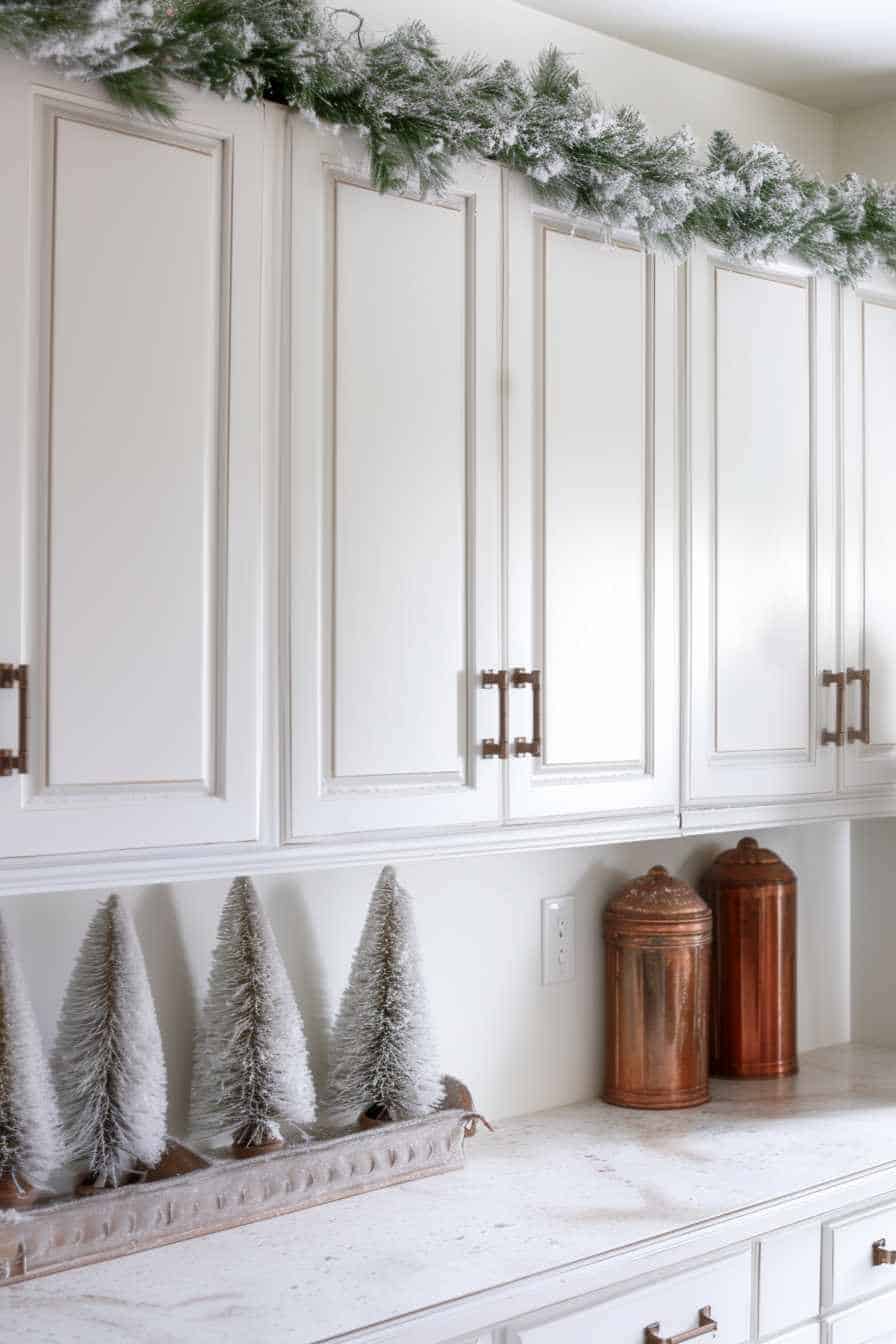
About 45 minutes and $30–$60, depending on how much garland you need. This is the low-effort cousin of Idea #1 — same palette, less fiddling.
Faux frosted garland sheds. Not dramatically, but enough that you’ll spot white flecks on the counter for the first week. Shake it out over a trash can before it goes up and you’ll save yourself a week of wiping. Also skip draping greenery over cabinets that hold your daily dishes — you’ll knock it every time you reach for a plate.
6. Ribbon-Tied Window Wreaths Beneath Dark Ceiling Beams
This look wants ceiling height. Exposed beams plus wreaths on every window need at least a 9-foot ceiling; at 8 feet the beams start crowding the upper cabinets. For standard 30- to 36-inch windows, use 16- to 20-inch wreaths — go bigger and you’ll lose daylight. The full arrangement works best in a kitchen of 150 square feet or more. If your space is tighter, borrow the window-wreath idea alone and skip the beams, like the smaller setup in Idea #11.
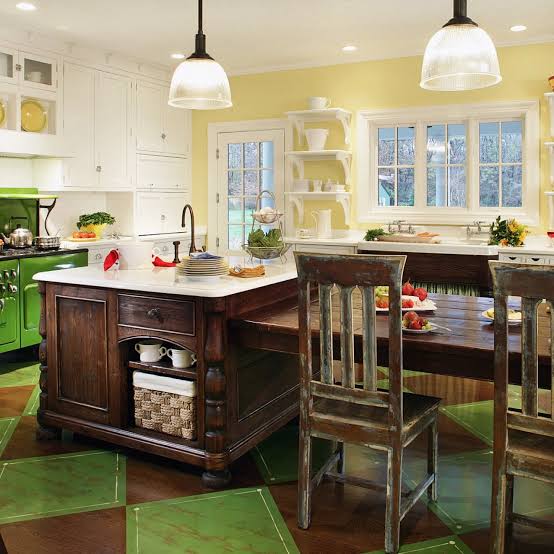
Quiet holiday decorating is the story of this season. Saves for simple greenery and ribbon keep climbing while full-on themed kitchens are flattening out. Part of it is cost — a fresh garland and four wreaths beat a bin of plastic figurines. Part of it is that nobody wants to pack away nine boxes in January. Wreaths and garland are the rare decor that improves the less you add to them.
7. Natural Wood Cabinets and a Single Range-Hood Wreath
Natural wood cabinetry asks more of you than painted wood, especially in a kitchen. Plan on wiping frames weekly and re-oiling every 12 to 18 months — a $20 tin of furniture oil covers a small kitchen about twice. Brass knobs darken with handling, which is patina rather than damage, and they come back with a dab of lemon oil. Sunlight through a south-facing window will shift the wood tone noticeably within a year, so rotate anything you keep on the counter.
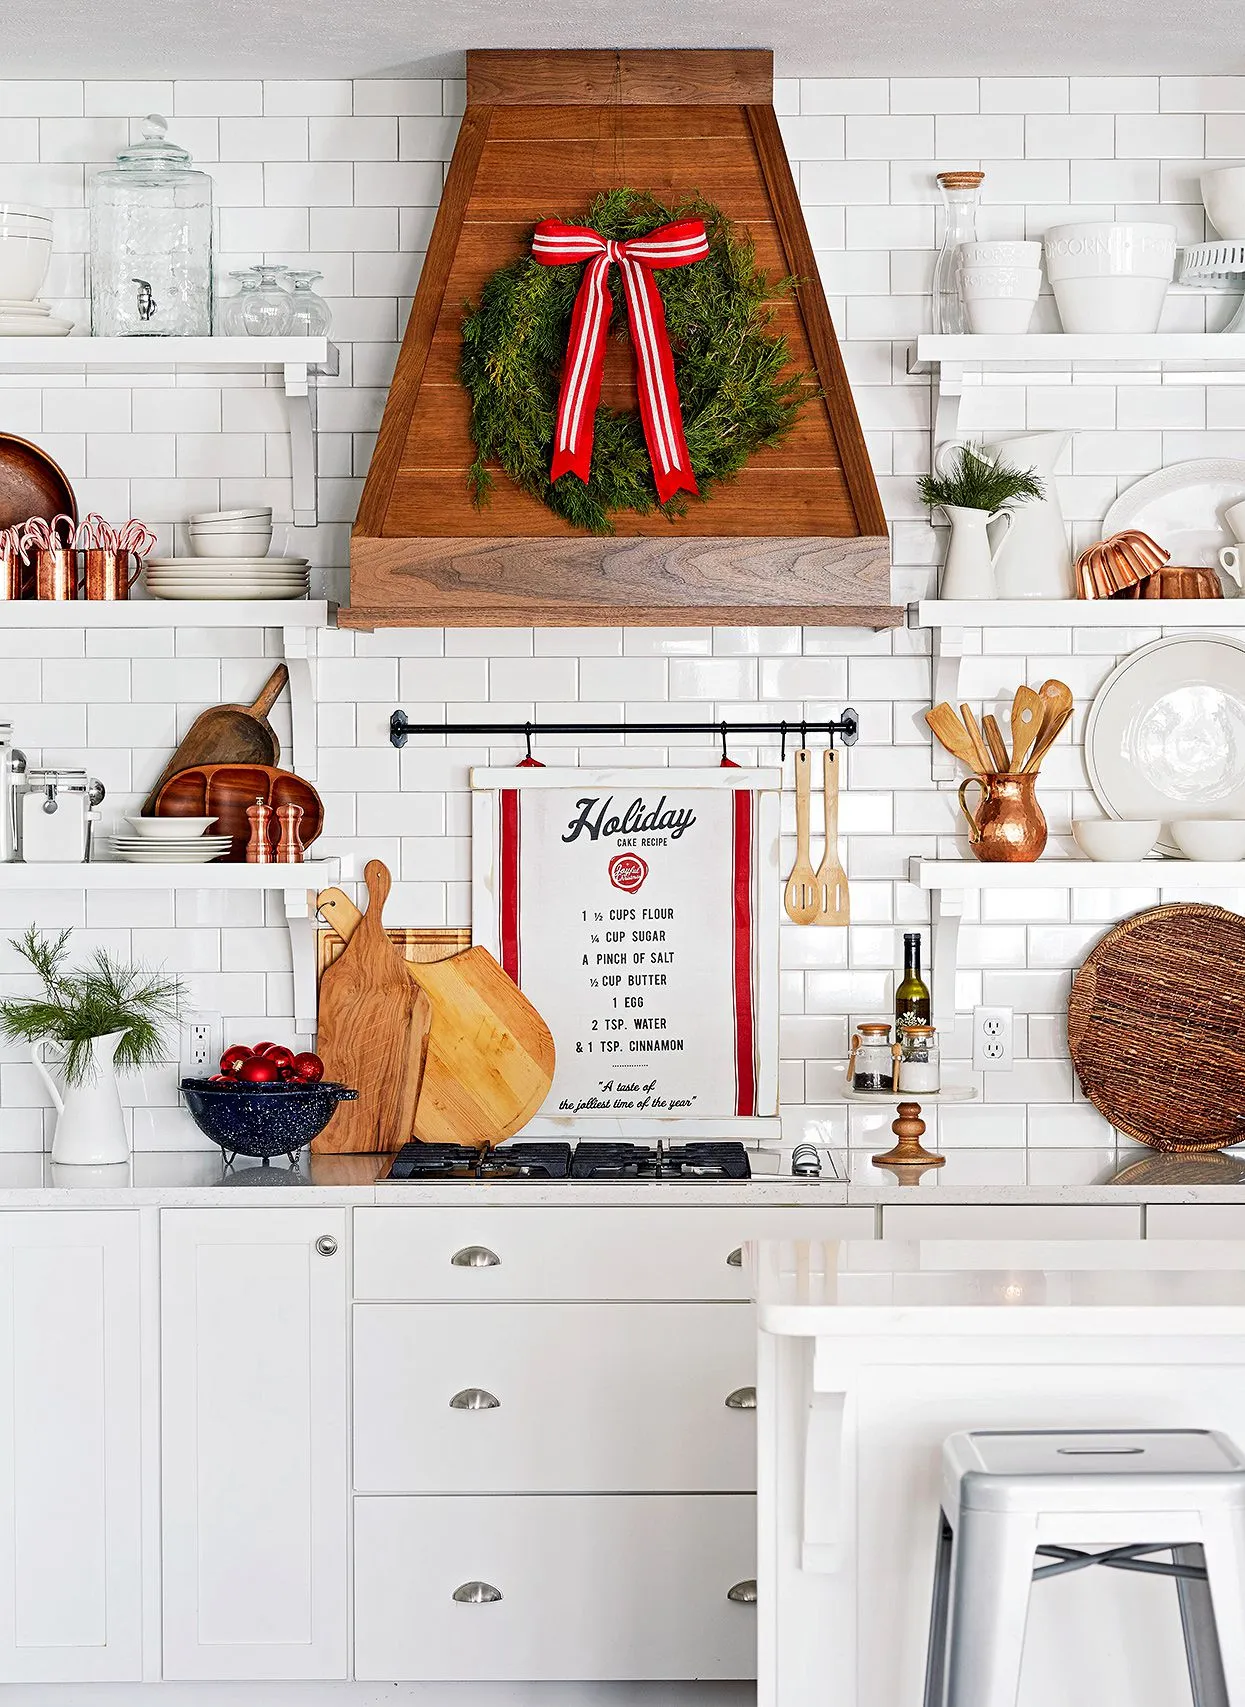
Hanging anything on a working range hood is riskier than it looks. Grease rises, and a fresh wreath turns stiff and grim inside a week. Use faux greenery if you want the look, hang it from the hood trim with wire rather than a hook, and keep it at least 18 inches above the cooktop. Check whether your hood recirculates — those push warm, greasy air straight up through whatever is sitting on top of them.
8. Glass-Pane Oak Cabinets With Matte Black Hardware
- Light oak cabinets with glass uppers: $4,500–$12,000 installed, or $1,200–$2,800 to reface existing boxes
- White quartz counters: $55–$95 per square foot installed
- Subway tile backsplash: $400–$900 in materials for a standard run
- Stainless range and hood: $1,100–$3,200
- Matte black hardware: $6–$14 per pull
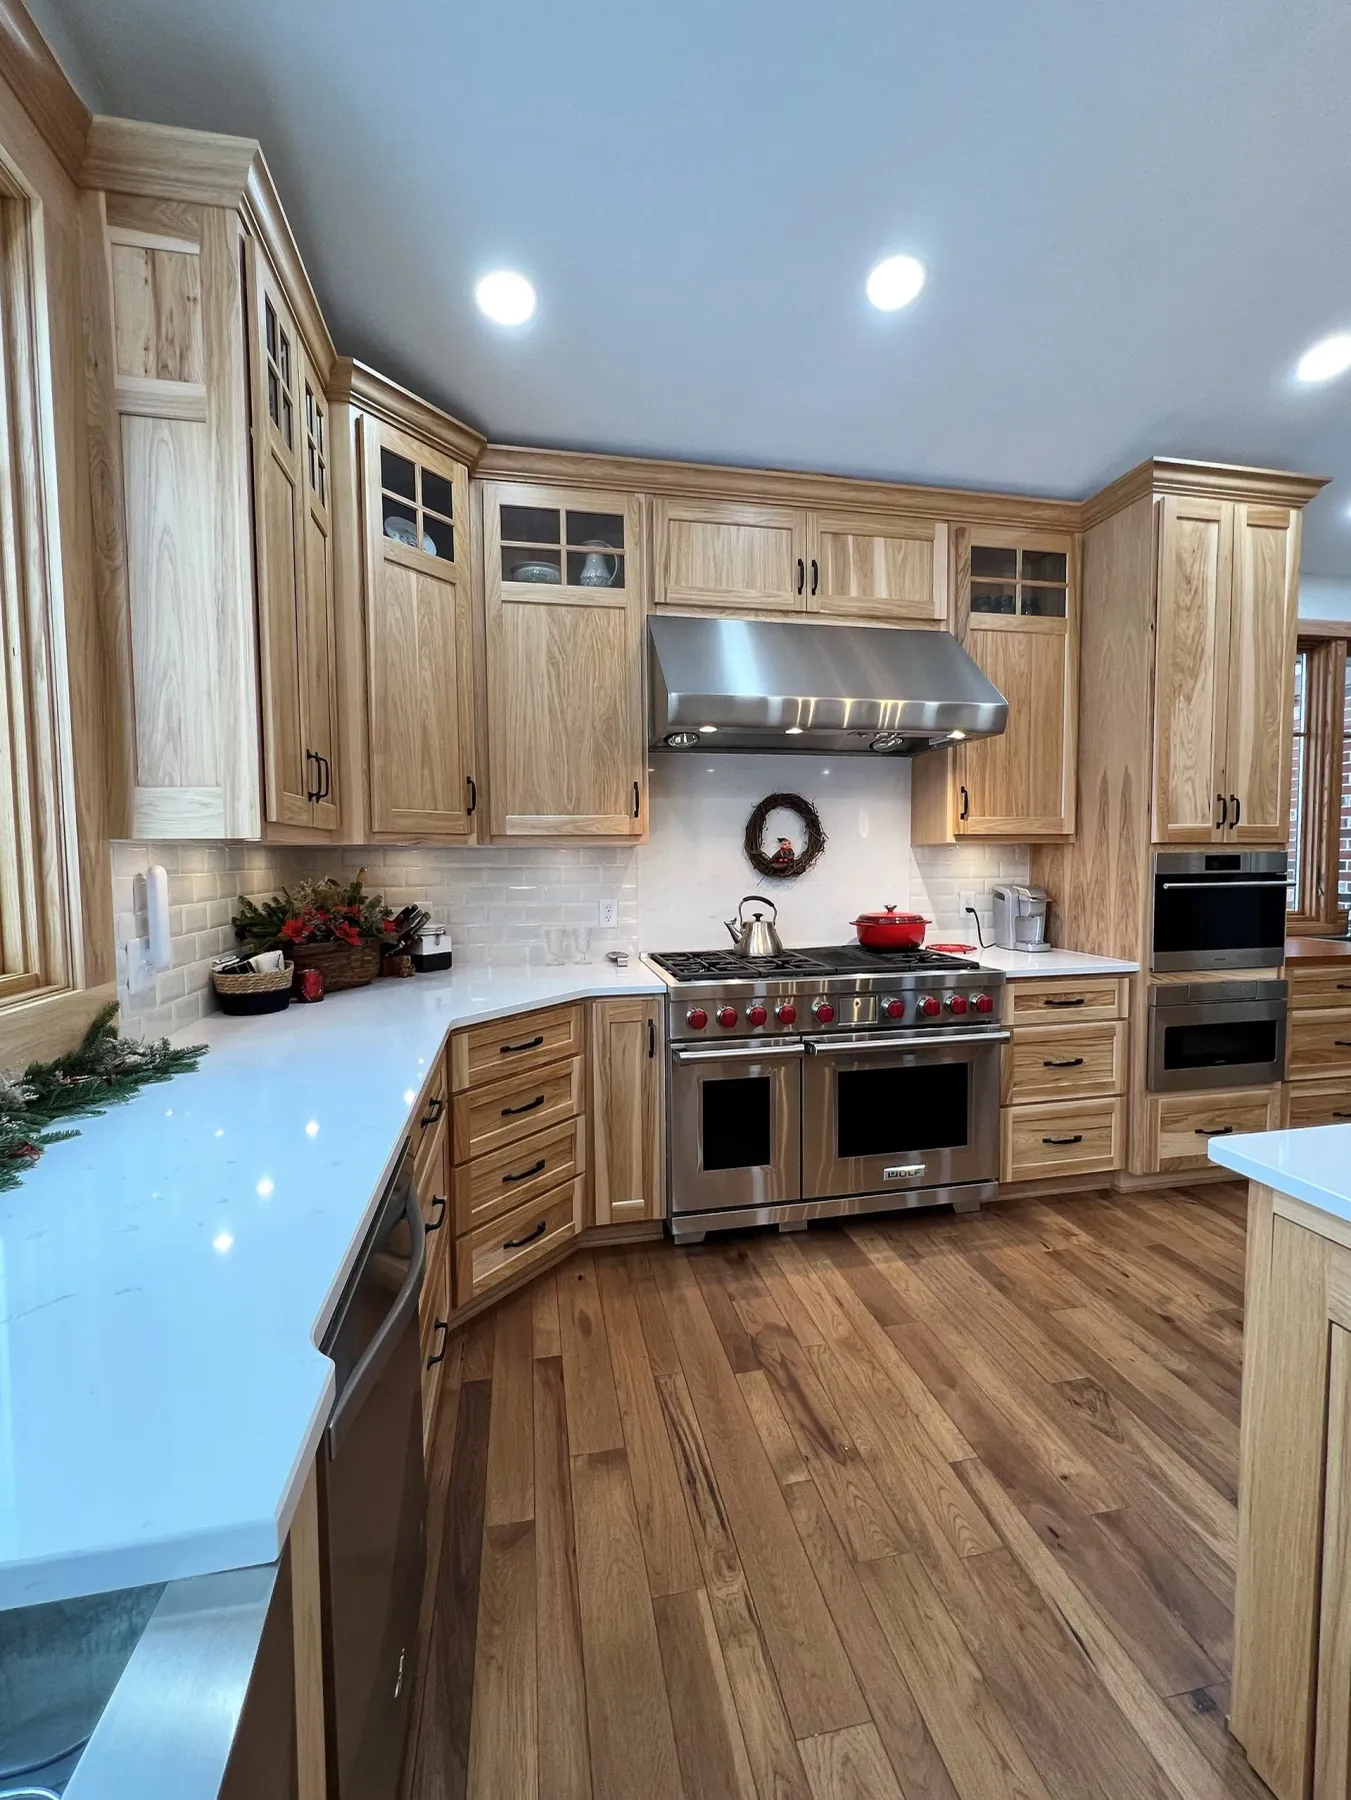
Total to recreate: roughly $7,000–$19,000, or $2,500–$5,000 if you keep your cabinet boxes and reface.
Glass-front uppers look best in kitchens at least 10 feet wide. The panes need breathing room, and in a narrow galley they just become a mirror of whatever is across the room. This layout assumes 8-foot ceilings; with 9 feet you can add a short stacked glass row above. Tight kitchens can borrow the palette without the glass — white quartz, subway tile, light wood lowers, done.
9. Oversized Red and Gold Ornaments on a Hood Garland
Count the colors: 55% charcoal and stainless, 25% evergreen, 15% red, 5% gold. That gold is doing heavy lifting. The brass bells and ribbon edges are the only warm metal in an otherwise cool grey room, which is why this garland reads rich instead of gaudy. Recreate the same formula with navy cabinets and copper bells and the balance holds. Swap the gold for silver and the whole thing turns frosty rather than festive — which is fine, just decide on purpose.
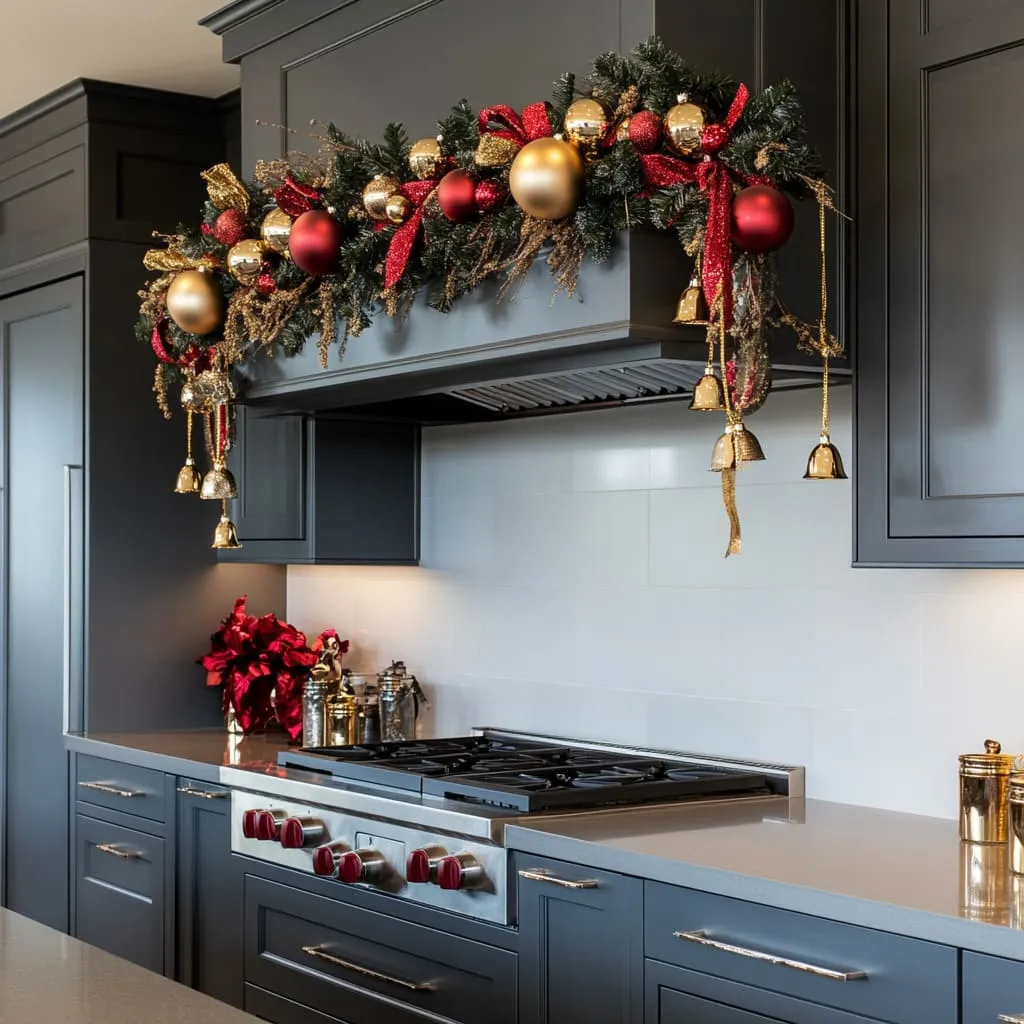
An ornament garland is one of the cheapest looks in this article. Dollar stores sell shatterproof baubles in red and gold for about $1.25 for six, and ribbon ties look better than wired hangers anyway. A $6 spool of gold-edged ribbon goes further than you’d think. Thrift stores sell brass bells by the bag for a few dollars, and they’re better made than anything new at that price. A full 9-foot garland lands under $45.
10. Sage Green Cabinets Lit by Red Candles on the Island
Keep your red to two candles. Ten- to twelve-inch tapers in plain brass holders sit at counter height, which is exactly where festive color belongs — anything taller starts competing with the garland on the upper cabinets. Put them on the island rather than the perimeter counters, because an island gets seen from every angle and never ends up hidden behind a faucet. Flameless tapers look nearly identical and cost about the same if you have kids or a curious cat.
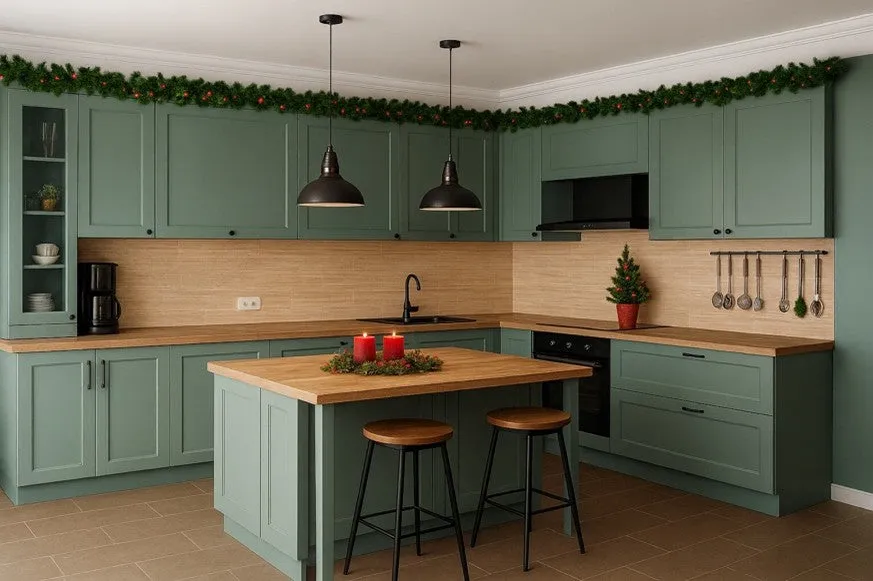
Sage green with wood counters is forgiving, but the island still needs room. Leave 42 inches of clear walkway on the working side and 36 inches minimum everywhere else — tighter than that and two people can’t cook together. This look suits kitchens from 120 to 250 square feet. Below 120, skip the island and run the garland on the uppers only. Above 250, see how Idea #23 handles the same wood-and-green palette at double the size.
11. Pine Garland Over the Window With Mini Cabinet Wreaths
- Measure the window width — the garland should overhang it by 6 to 10 inches on each side
- Count your cabinet doors and plan an odd number of wreaths, not one on every door
- Check door swings so no wreath gets crushed against an appliance
- Confirm your hardware finish — brass wreath hangers look wrong beside chrome pulls
- Note which way the window faces; north-facing kitchens need warmer bulb temperatures
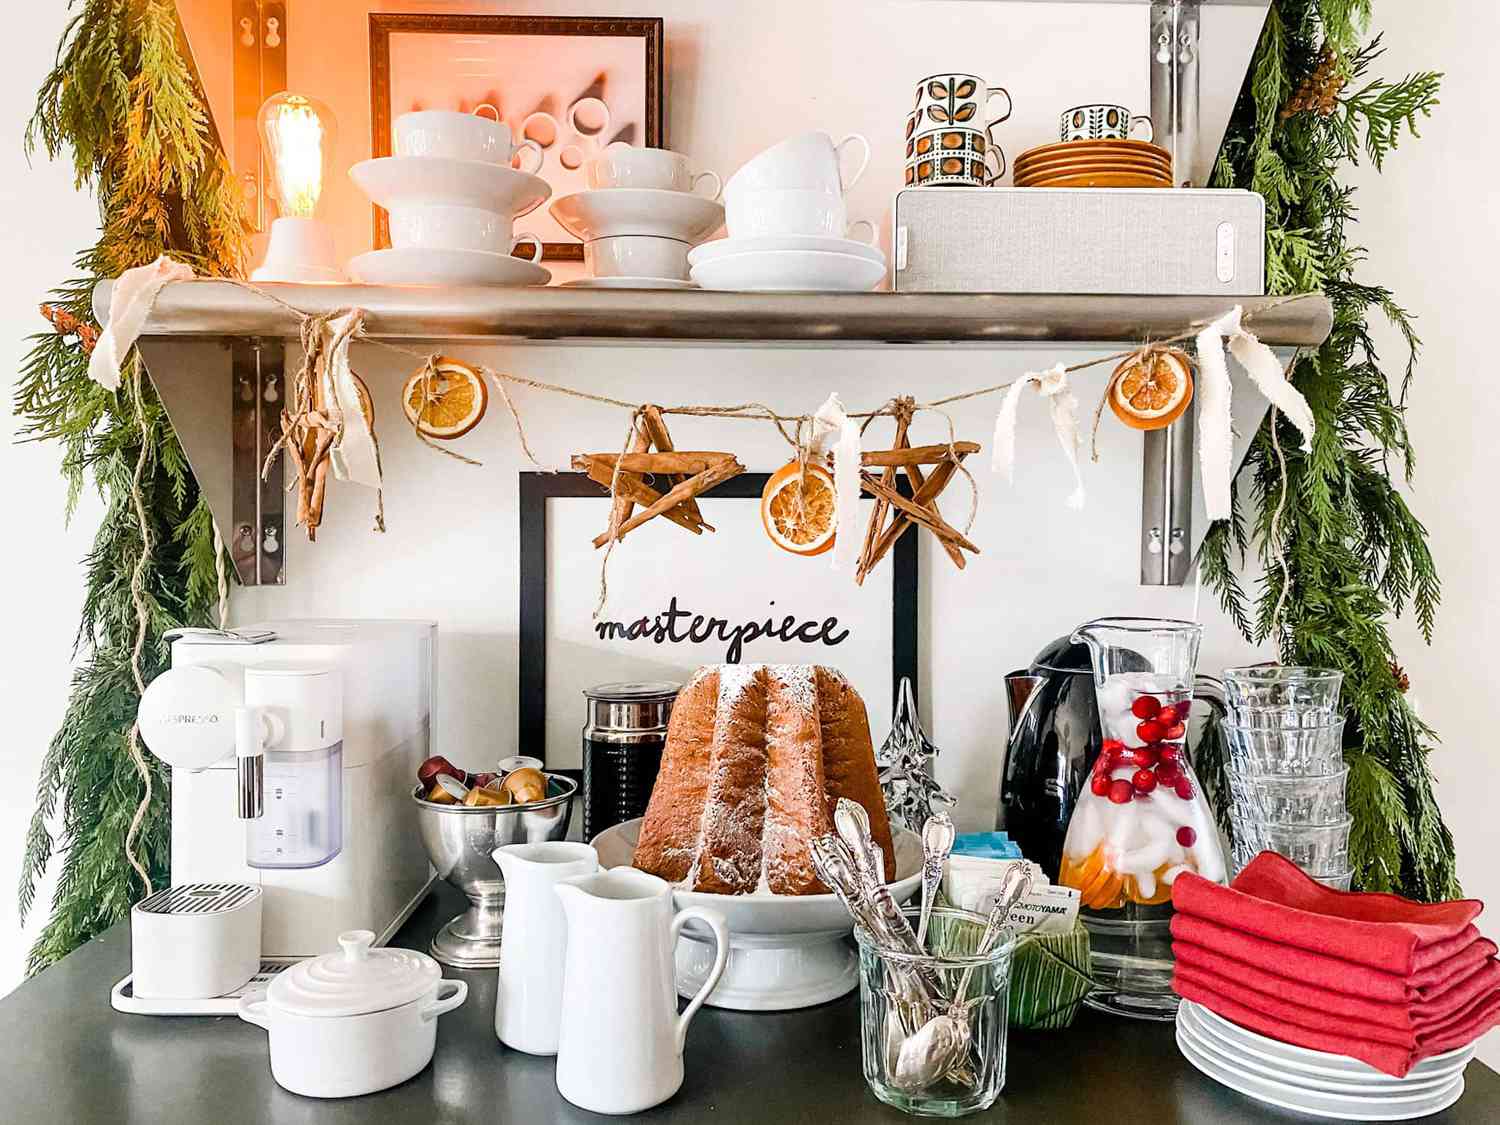
The fresh pine garland over the window is the one thing here. Everything else is borrowed — the wreaths echo it, the shelving frames it, the subway tile is just background. Roping a window in real greens makes a kitchen feel like it’s been decorated for a hundred years, and it costs less than a single figurine. Mist it every few days, or choose cedar, which holds its needles longer than pine.
12. A Tiny Pine Wreath, Two White Candles, One Pinecone
- Start with a textured base — a folded white knit throw or a chunky linen runner.
- Set two white pillar candles at different heights, one on a small riser.
- Place the mini wreath slightly off-center so it overlaps the knit edge.
- Add one brown pinecone for a third, darker texture.
- Step back and remove anything that repeats a texture you already have.
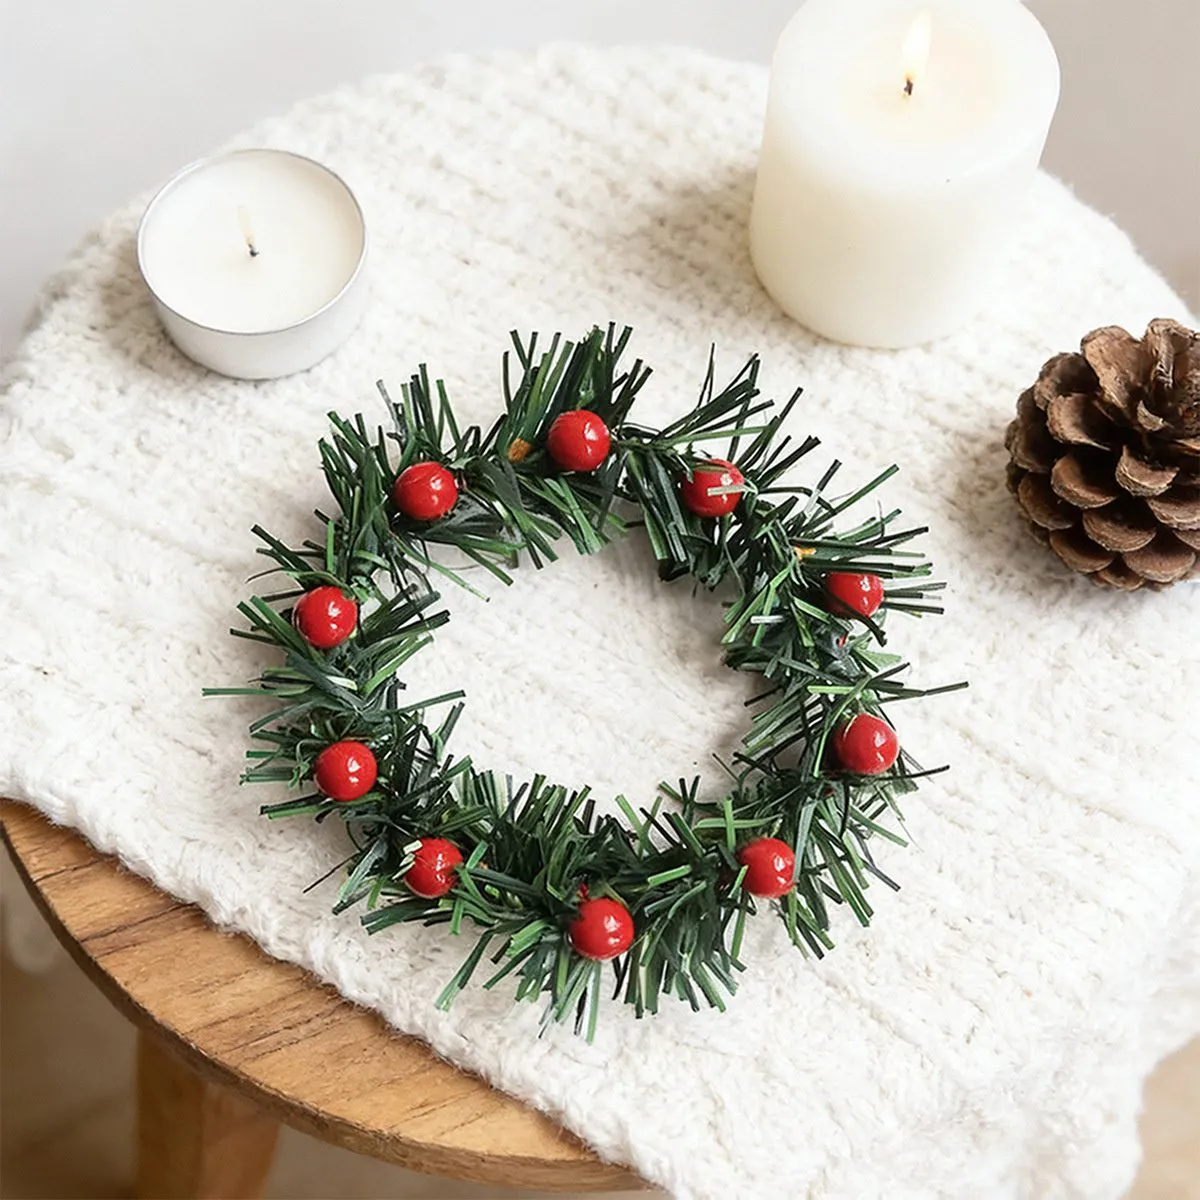
Ten minutes, most of it spent rearranging. Under $25 if you thrift the candles.
- 50% white knit and cream candle wax
- 30% deep green from the wreath
- 15% bright red berries
- 5% natural brown pinecone
That’s the entire recipe, and it scales up to a whole countertop: keep cream dominant, let green do the middle work, and treat red as seasoning. Move the red from berries to a ribbon and the mood shifts from rustic to tailored without changing anything else.
13. A Brass Gallery Rail Shelf Over Blue-Gray Subway Tile
Gallery rails exist so small objects don’t walk off the shelf. Mount it 18 to 20 inches above the counter, keep the shelf 8 to 10 inches deep, and let the rail run its full length. Then obey the three-object rule per shelf: one tall (wooden mills), one medium (the nutcracker), one small (a framed landscape no bigger than 5×7). Past three, the rail stops looking like a detail and starts looking like a fence holding back clutter.
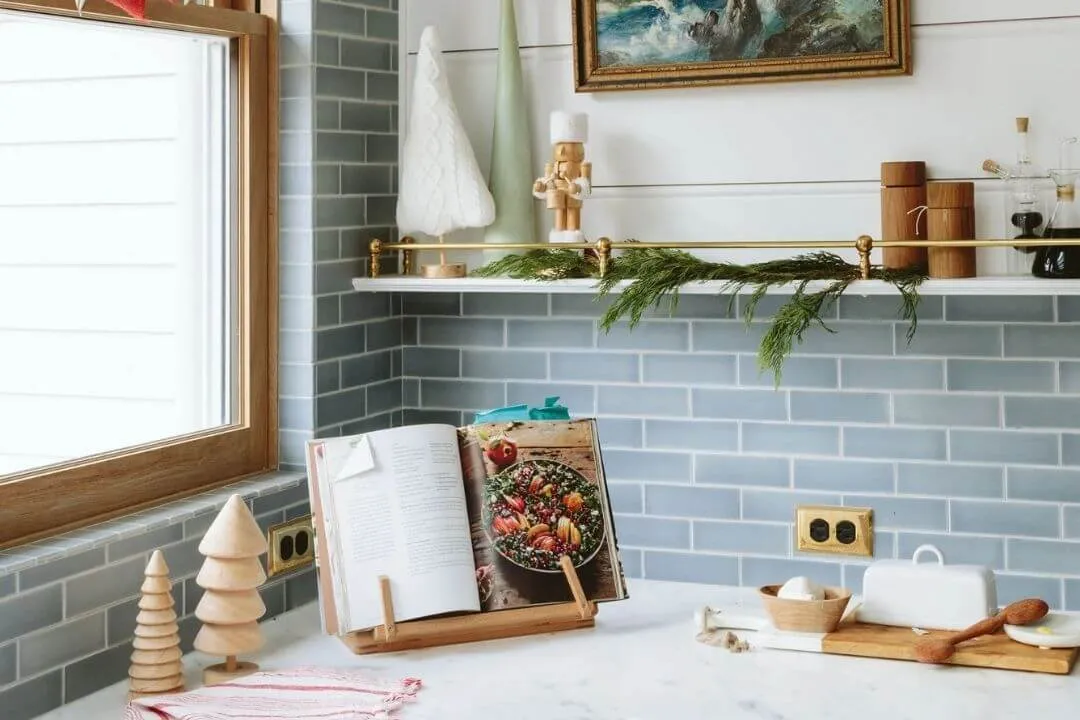
Cool blue-grey tile against warm wood and brass is a temperature contrast, and that’s the reason this corner feels collected instead of themed. The open cookbook on its wooden stand anchors the counter and gives your eye a low, quiet shape before it climbs to the shelf. The miniature trees repeat the cone shape three times — enough to register as a pattern without tipping into a collection. If you’d rather keep everything behind doors, Idea #8 runs the same wood-and-white palette with glass uppers.
14. A River Stone Fireplace Framing a Towering Christmas Tree
This is a big-room look. The fireplace runs floor to ceiling, the tree clears 10 feet, and the exposed beams want 12-foot ceilings to breathe. Plan on 300 square feet or more, and leave 36 inches between the tree and any heat source. If your dining room is closer to 150 square feet, take the whole idea down a size: a 7-foot tree, one lit wreath on the stone, and skip the red walls entirely.
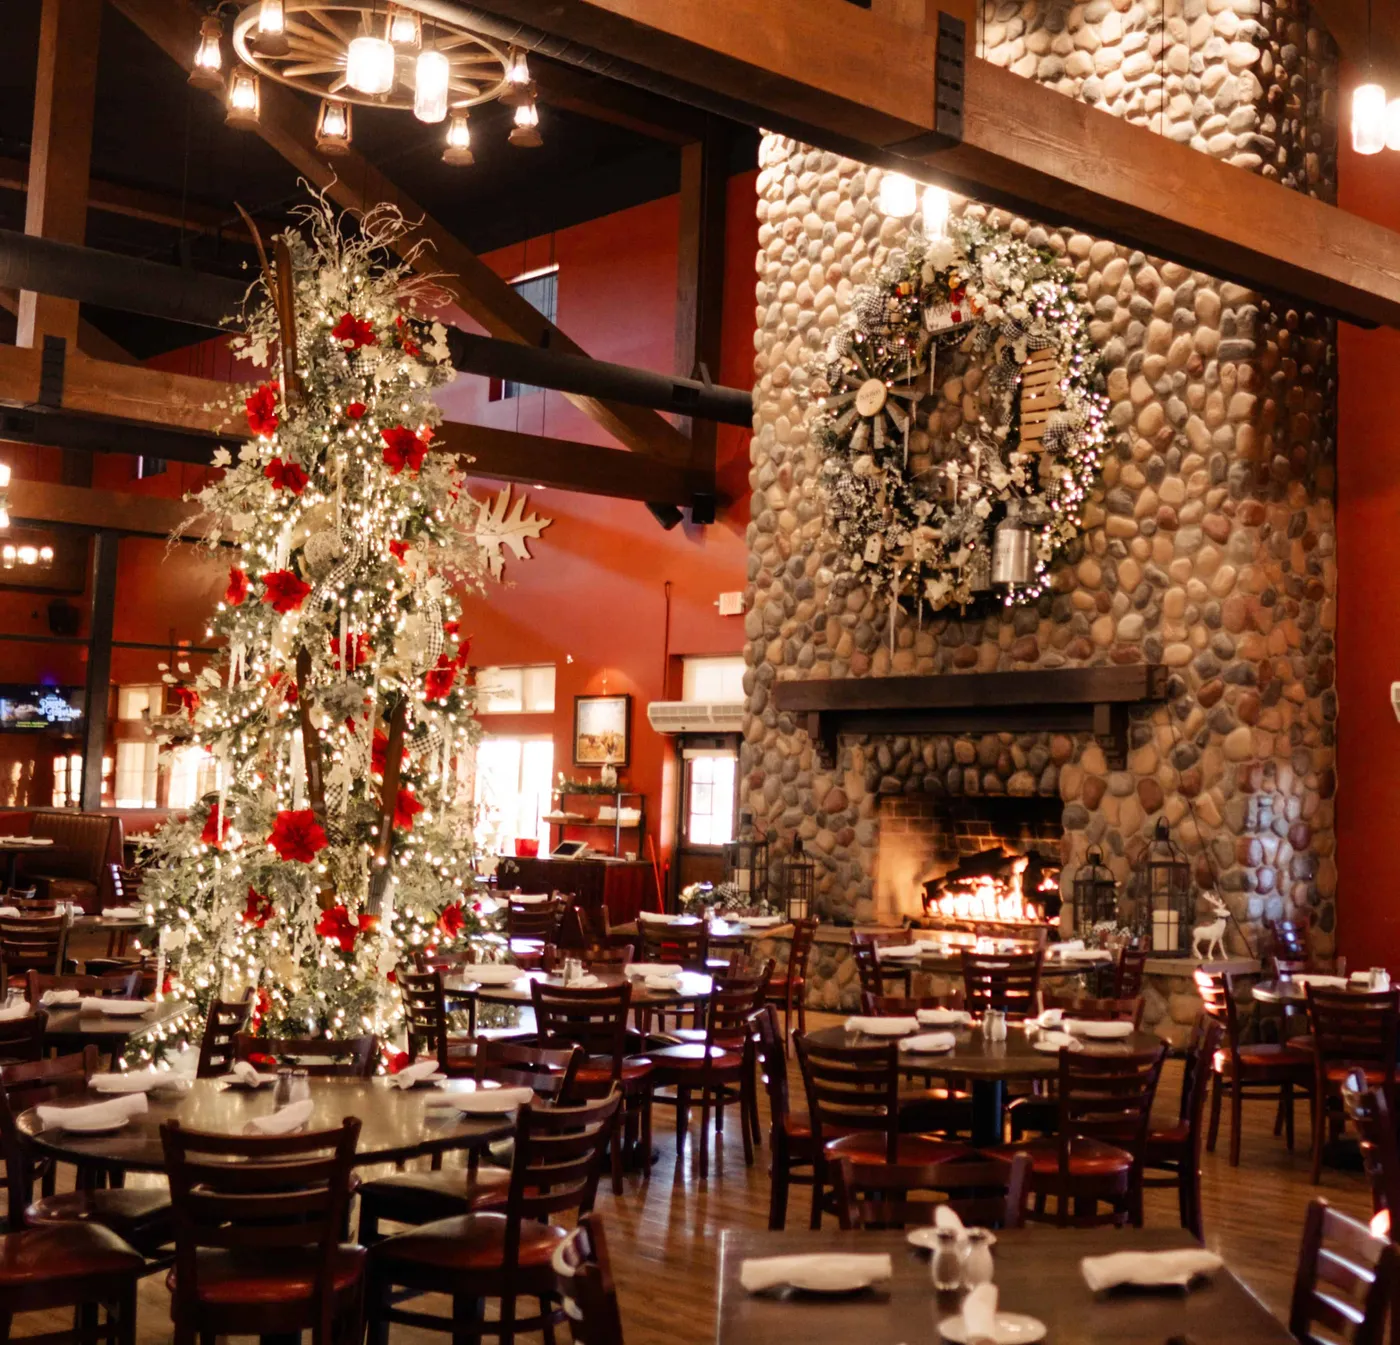
Bold red walls in a dining room are a commitment, and next to a big stone fireplace they can start arguing rather than harmonizing. If you love the warmth but not the permanence, paint one wall — the one behind the tree — and keep the rest a warm plaster white. Worth knowing too: a tree that size needs a stand rated for its height, and it will drop needles for six weeks no matter how faithfully you water it.
15. Retro Yellow Cabinets Against Red Patterned Wallpaper
Vintage kitchens are having a real moment. Blame the grandmillennial wave, blame two years of grey fatigue, but patterned wallpaper in a kitchen went from risky to aspirational fast. The yellow-and-red pairing works here because the pattern lives on the walls while the cabinets stay completely flat. One busy surface, one calm one — that’s the entire rule. This trend has legs; it reads as personality rather than a passing color story.
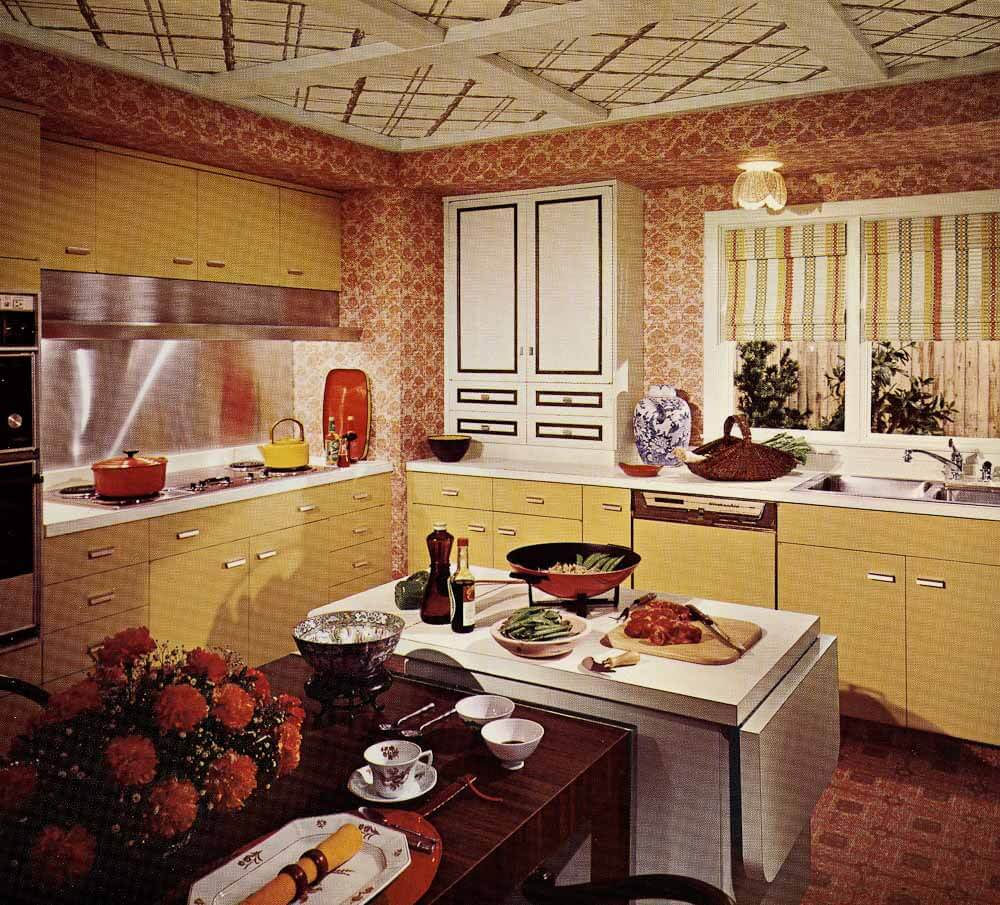
- Paint for flat-panel cabinets: $180–$450 in materials
- Peel-and-stick patterned wallpaper: $40–$90 per roll, 4–8 rolls
- Patterned ceiling treatment: $150–$400
- Drop-leaf island: $400–$1,200 vintage, $200–$500 refurbished
- Striped window shades: $70–$180 each
Total: roughly $1,100–$3,700 for the full retro treatment.
16. Checkerboard Floors and a Glossy Red Retro Fridge
Run the numbers: 45% white cabinetry and tile, 25% black from the hex backsplash and the floor, 25% glossy red, and about 5% teal you barely register. That tiny teal is what keeps the room from looking like a graphic design exercise — a couple of diner chairs or one small ceramic is plenty. Soften the red toward brick and the whole look relaxes; push it to true primary red and it gets louder, more playful, and much harder to change your mind about later.
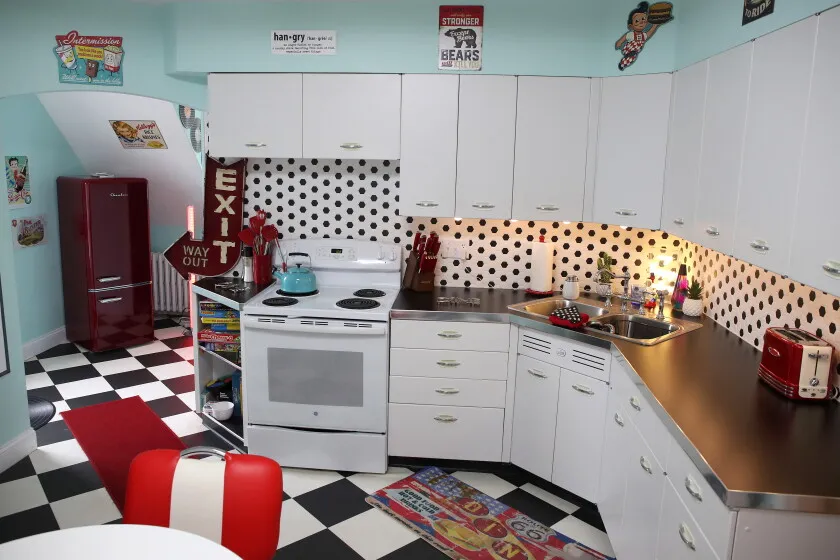
A glossy red refrigerator is the most committed appliance choice in this entire article, and it costs more than a standard finish. It shows every fingerprint, and the stainless-look covers never fit retro models. Check the footprint before you fall in love — many retro fridges run deeper than standard counter depth and will stick out past your cabinets. The checkerboard floor, meanwhile, is merciless about crumbs.
17. A Red-on-Black Warning to Edit Before You Add
Look at how little there is: a flat black field, one deep red circle, a single red exclamation point. Two colors, one shape, no texture — and it still stops you cold. That’s the entire lesson for a Christmas kitchen. Your eye doesn’t need more, it needs one thing it can’t ignore. Pick the single red accent in the room and let everything around it go quiet. Then resist the urge to add a second red thing, because the second red thing is what turns a moment into a mess.
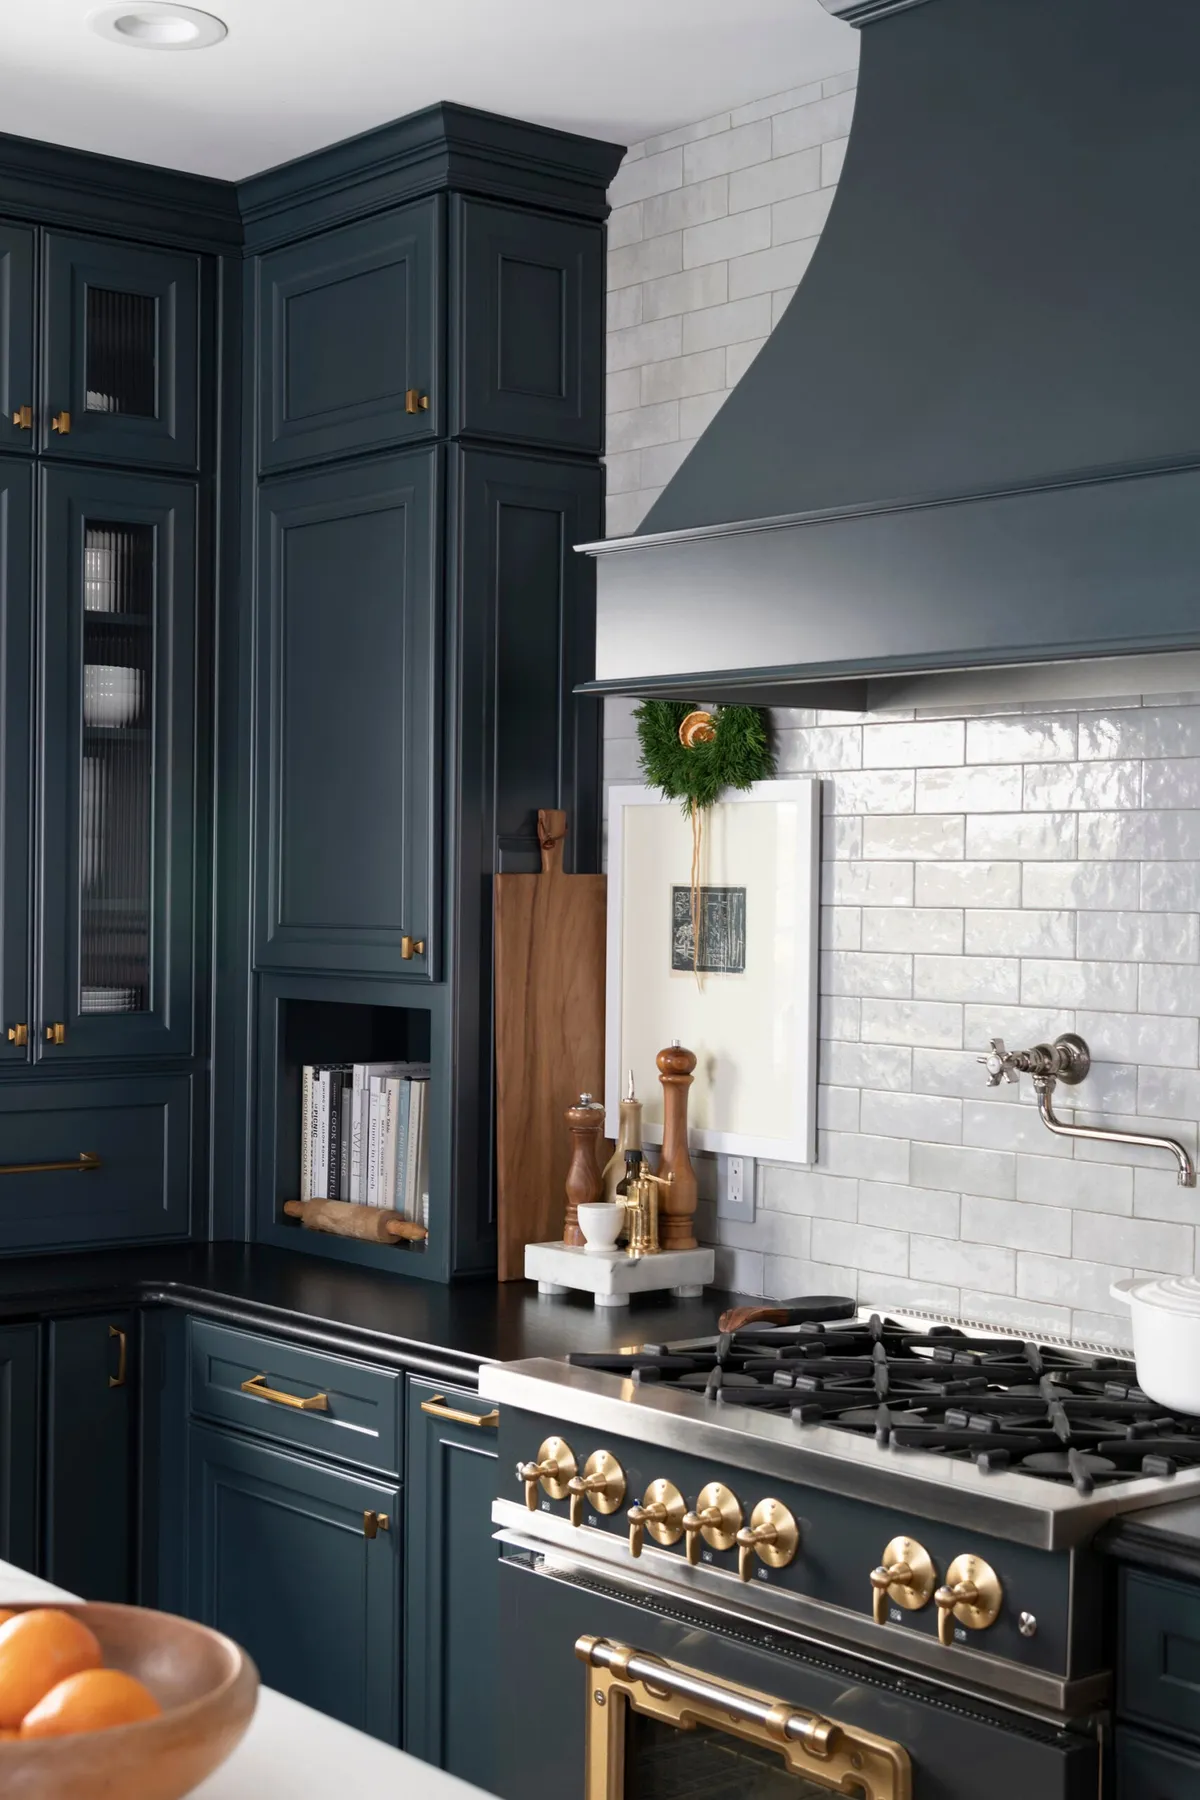
Here’s the number to decorate by: three objects per three feet of countertop, and no more than one of them red. If you can’t see at least four inches of bare counter between groupings, you’ve crossed from styled into stored. Before you buy anything else this season, walk the kitchen with a laundry basket and pull one item out of each grouping — then put back only what you genuinely missed.
18. Red Velvet Roses and Gold Ornaments in a Pine Wreath
- Start with a 20-inch faux pine wreath and fluff every branch outward rather than flat.
- Wire three frosted pinecones at the 4, 8, and 12 o’clock positions for a triangle of texture.
- Add five red roses in an uneven ring, keeping the largest near the bottom.
- Tuck glossy red berries into the gaps between roses and pinecones.
- Finish with three gold ornaments, clustered on one side only.

About an hour of work, and roughly $45 the first year if you buy the base and reuse it every December after that.
Fresh roses in a wreath last two to three days before they dry in place and lose their shape — lovely for a dinner party, disappointing by Sunday. Faux velvet roses hold color for years and dust off with a hair dryer on the cool setting. Store the wreath in a box rather than a bag, or the pinecones will crush. Metallic gold ornaments dull if they sit in a hot garage all summer.
19. Grid-Paned Windows and a Black Metal Ring Chandelier
The chandelier here is an open ring, and that’s not a style choice — it’s a strategy. A solid fixture would block the view; an open one frames it. The timber does the same work vertically, pulling your eye up without adding visual weight. Notice the mix:
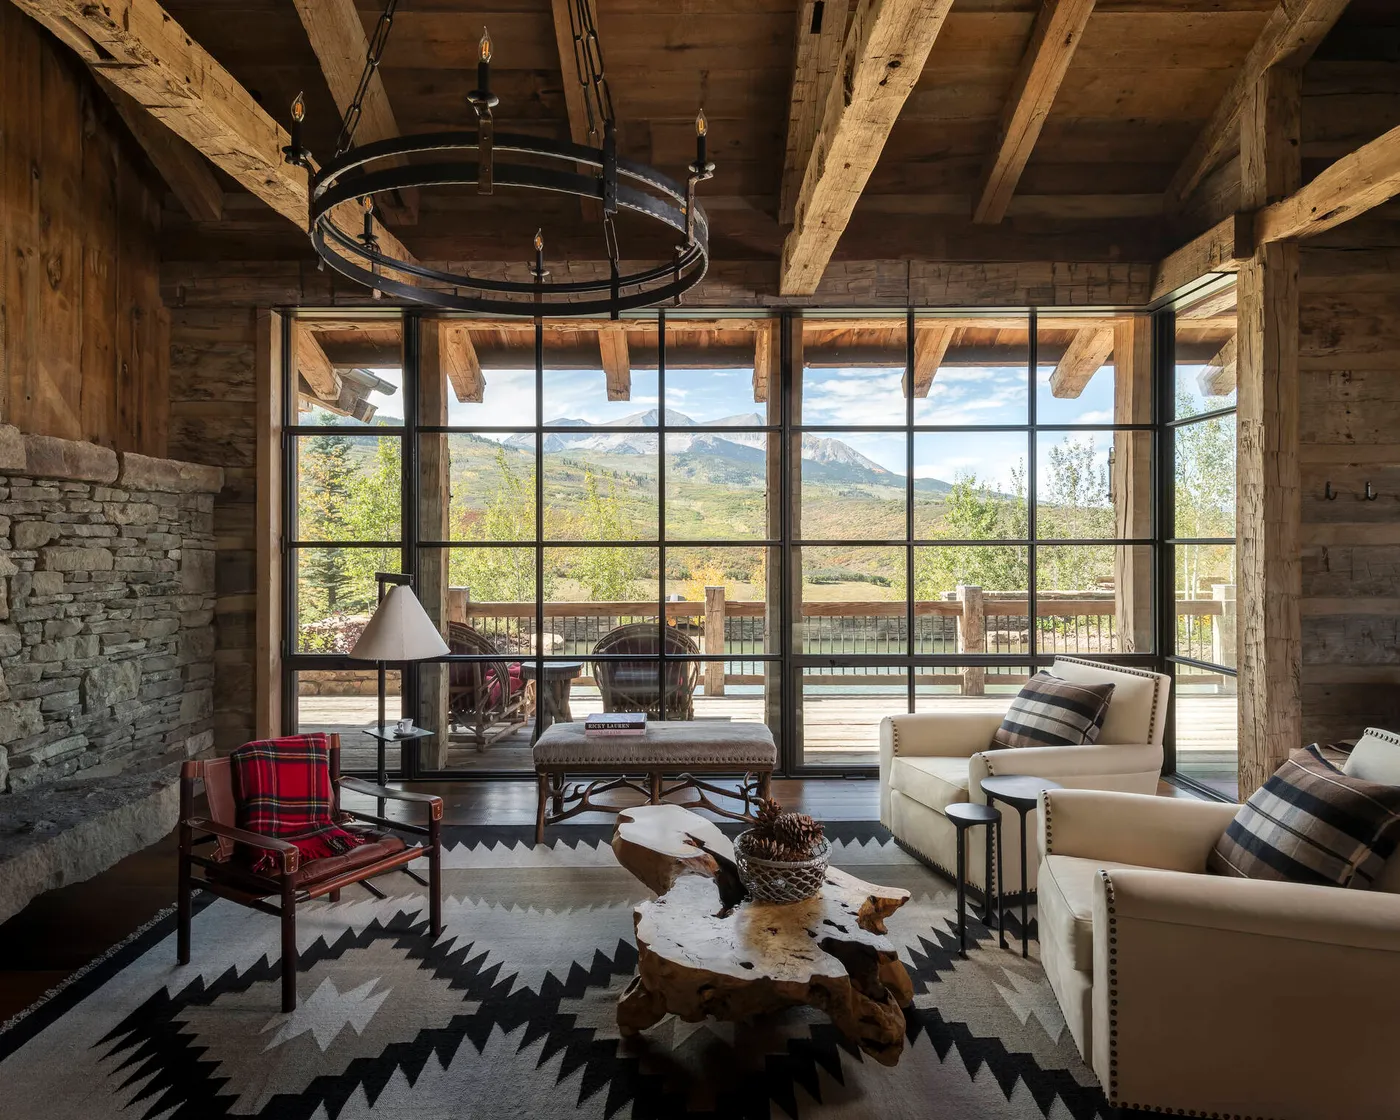
- Rough timber against smooth glass
- Black metal next to warm leather
- A patterned flat-weave rug grounding an otherwise neutral seating group
A great room like this only works at scale — think 400 square feet and 14-foot ceilings, with windows spanning at least eight feet. In a smaller kitchen-adjacent space, keep the spirit with one timber-look beam and a two-foot ring chandelier instead of the four-foot version. If your kitchen is closer to 150 square feet, the ribbon-tied wreaths in Idea #6 will serve you better.
20. Deep Teal Scalloped Cabinet Doors With Brass Knobs
- Custom scalloped cabinet fronts: $180–$400 per door
- Refacing flat doors with applied scallop trim: $12–$20 per door, plus paint
- Deep teal cabinet paint in satin: $60–$120 for a small kitchen
- Small round brass knobs: $4–$11 each
- White hexagonal mosaic backsplash: $8–$16 per square foot
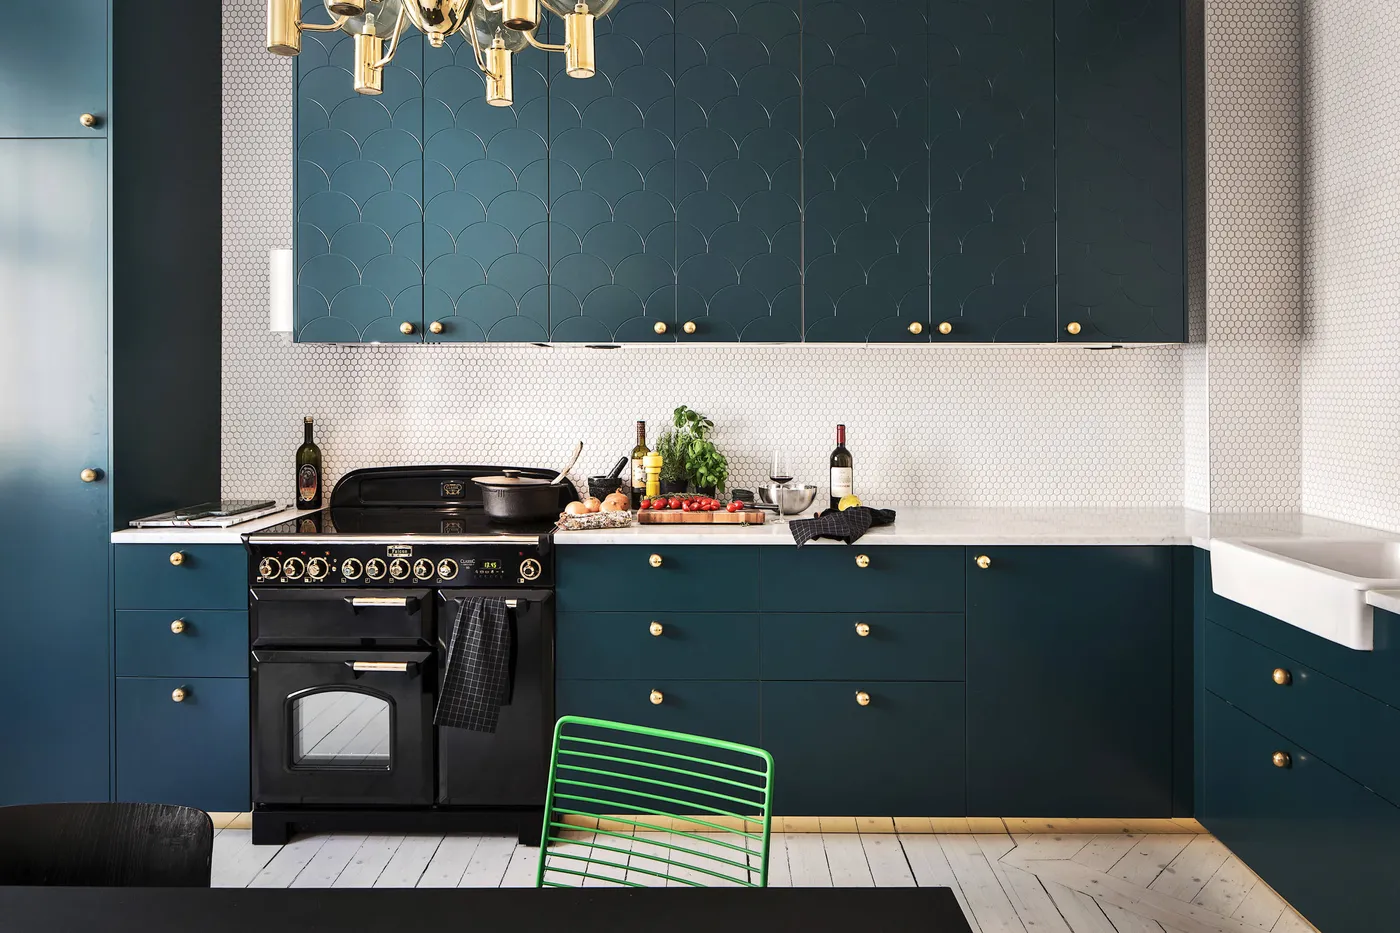
Total: roughly $900–$2,600 using applied trim, or $4,000 and up with custom fronts.
Scallops live or die by proportion. Keep each scallop 2.5 to 3 inches tall and repeat it across the full door width — any larger and it reads like bunting. Paint deep teal in satin, never flat: flat finishes show every fingerprint and chalky patch around the knobs. Order a sample door, live with it for a week, and check it in daylight before you commit to the whole kitchen.
21. Red Alert: Where All Those Ornaments Sleep in January
The part nobody posts about is storage. A 9-foot garland, four wreaths, a tree’s worth of ornaments, and a box of ribbon will eat two full bins — and that’s assuming everything fits. Anything you can’t store flat gets crushed and comes out looking tired next December. Before you buy, walk to where the bins actually go. If there’s no shelf space, that’s your real budget limit, not the price tag at the register.
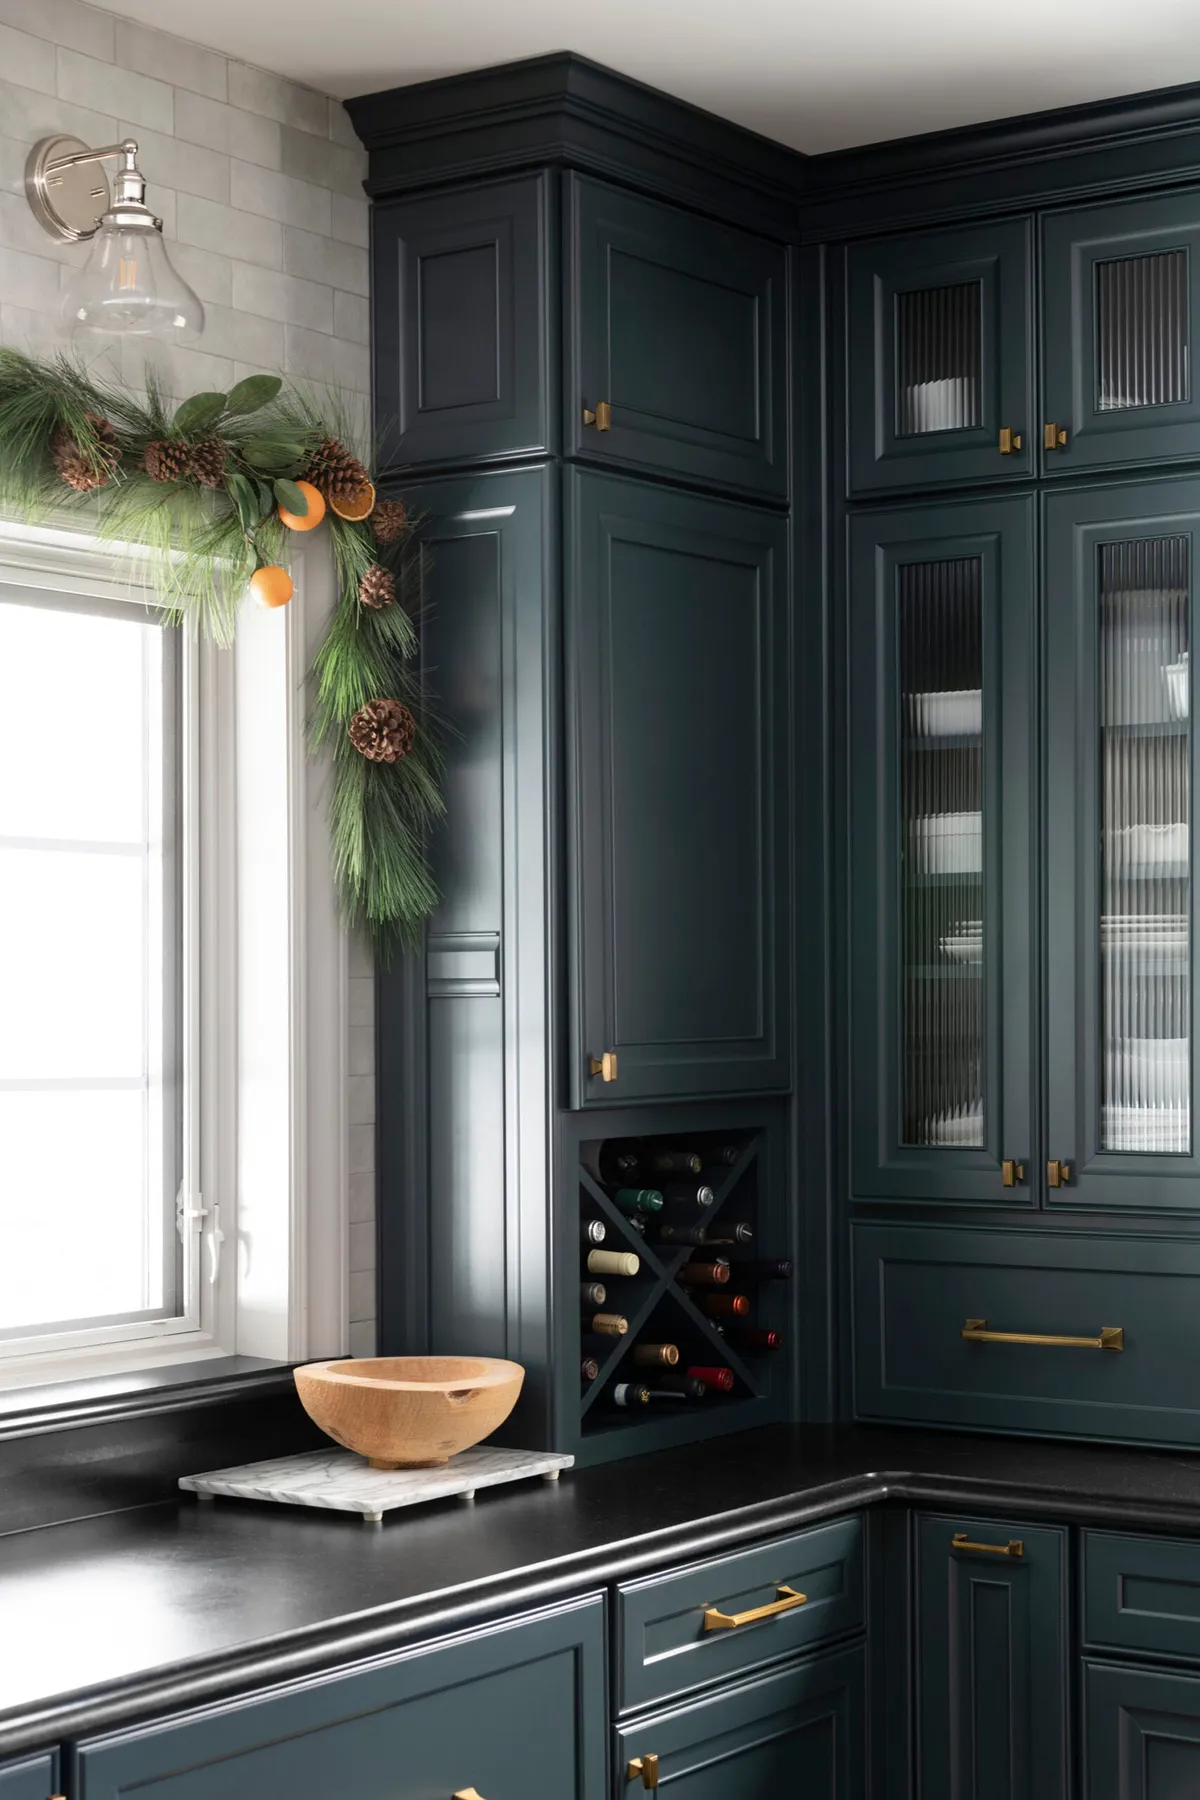
You can decorate an entire farmhouse kitchen for under $100 if you buy greenery and lights and improvise the rest. Real numbers: $25 for a faux cedar garland, $12 for warm-white fairy lights, $8 for a spool of ribbon, $14 for two grapevine wreaths you dress with clippings, and $20 at a thrift store for brass candlesticks and a bowl. Buy everything in one color story, and cheap pieces still look deliberate together.
22. Red-Ribbon Wreaths and a Tiered Wire Mug Stand
- Choose wreaths about one-third the width of your cabinet door — usually 10 to 12 inches.
- Thread a 1.5-inch red ribbon through the wreath frame and tie a bow at the top.
- Loop the ribbon over the top of the door and tape it on the inside face.
- Add a small square of felt behind the wreath so it doesn’t scuff the finish.
- Repeat on two or three doors only, spaced well apart.
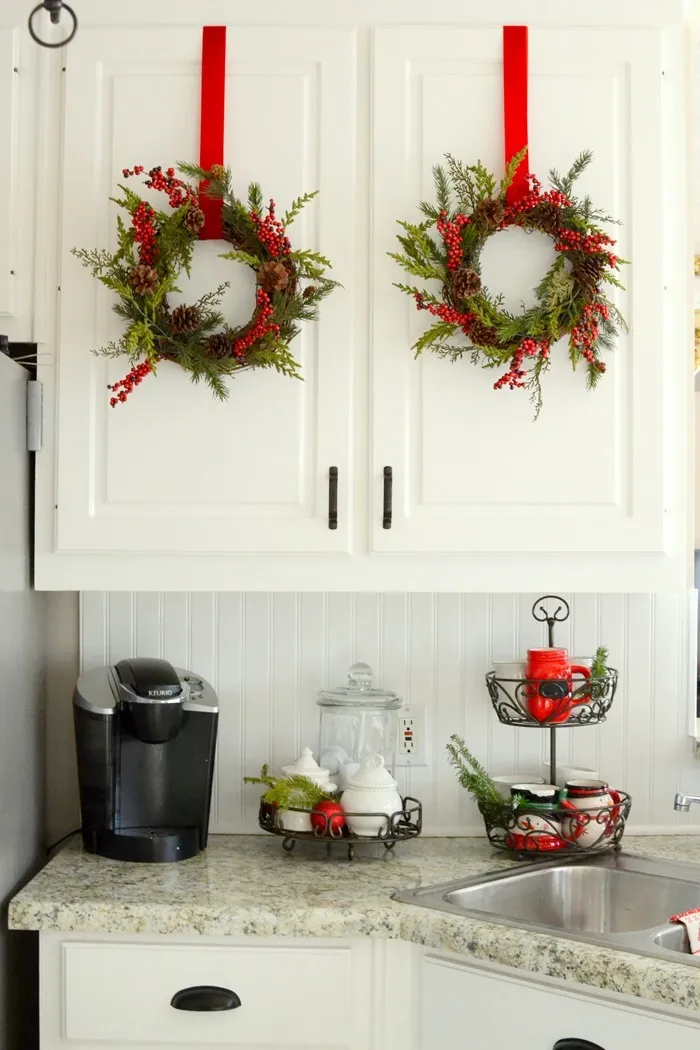
Fifteen minutes and about $30 for three wreaths if you build them on dollar-store grapevine bases.
Ribbon width is the detail people get wrong. On a 10- to 12-inch wreath, a 1.5- to 2-inch ribbon looks proportional; wider swallows the greens, narrower vanishes from across the room. Match the ribbon to the berries or the wreath, never both, and use the same ribbon on every door — mismatched ribbon is the fastest way to make identical wreaths look like a mistake.
23. Stone Walls, Timber Beams, and Brass Over the Island
Four materials, all rough in different ways: stone, timber, warm wood, and matte black metal. Nothing here is smooth except the glassware on the open shelves, and that contrast is what keeps the room from tipping into cabin cliché. The brass pendant matters more than it looks — it’s the only polished surface in the space, so it catches light and gives your eye somewhere to rest in an otherwise completely matte room.
- Measure island clearance — 42 inches on the working side, 36 inches minimum elsewhere
- Confirm beam height; anything below 8 feet will feel heavy over an island
- Decide what the open shelves hold year-round, not just in December
- Check where the pendant falls in relation to the cook’s sightline across the island
- Choose greenery that tolerates a warm, dry room — cedar over pine
Start With One Shelf, Not the Whole Kitchen
You don’t need to redo a single cabinet. You need one warm light source, one real garland, and one thing that’s red — then let the rest of the room catch up next December. Pick a single idea above, do it this weekend, and see how much cozier the kitchen feels with a third of the stuff you thought you needed.
📌 Save this to Pinterest and tag us when you try one — we really do want to see which idea you picked.