Still scrolling through Christmas DIY decoration photos at 11 p.m. with seventeen tabs open and nothing actually decided? You’re not alone — holiday boards get more saves in November than the rest of the year combined.
We spent serious time browsing Dollar Tree, Michaels, Hobby Lobby, and Etsy to bring you only what’s worth your attention this year, and every single idea lands somewhere between $1 and $180.
Inside you’ll find 30 curated ideas covering rustic woodland, traditional red-and-green, cozy cream neutrals, and a playful pastel pink moment that’s bigger than ever. Budget and luxury versions are compared side by side, so you can pick your lane and stay in it. In 2026 the real shift is toward handmade natural materials — dried citrus, jute, clay, and real pine — over plastic everything. It photographs beautifully and it costs less. And stay until the end — we break down the most common mistakes that can ruin these looks.
This post contains affiliate links — if you buy through them, we may earn a small commission at no extra cost to you. 📌 Save this to Pinterest for later — you’ll want to revisit these ideas.
1. Birch Tags Etched With Christmas 2026
Those light birch tags read as effortless, but drill before you letter. A 1/8-inch bit placed about half an inch below the top edge keeps the wood from splitting and gives your twine a clean channel instead of a chewed-up notch. Etch or wood-burn the date first, then add the greenery: one small sprig of fir with three or four red berries, wrapped in natural twine with two tight loops and a single knot. Anything more and it stops reading as a tag and starts reading as a craft fair.
The real charm is contrast of scale — a tiny, quiet object doing a lot of work. Pale wood keeps the red berries from shouting, and that green sprig adds just enough life to make a manufactured tag feel found in the woods. Repeat the same tag across every gift under the tree and one small craft becomes a system. That repetition is what makes it look intentional. Skip the berries and you have a plain wooden tag; add them and you have a finished vignette.
2. A Snow-Dusted Porch With Red Plaid and a Top-Hat Snowman
Here’s the honest part: anything on an open porch lives at the mercy of weather. Flocked trees shed their fake snow in the wind, kraft paper swells and sags in damp air, and open metal lanterns with real candles won’t survive a gust. Switch to LED pillars if the porch isn’t covered, and check your HOA rules before you hang anything from a railing. The look is wonderful — it just wants a covered corner and a two-minute sweep at night.
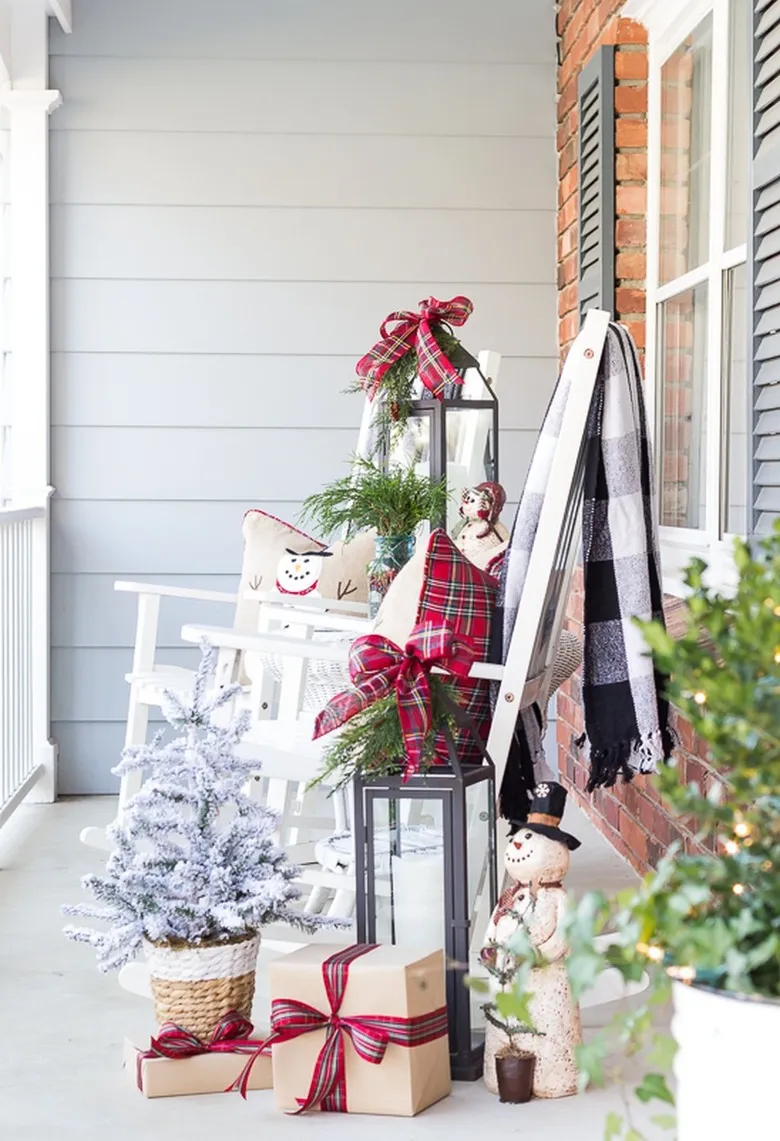
Run the math and this porch is about 70 percent white and light grey architecture, 20 percent red plaid, and 10 percent green and brown naturals. That ratio is why it reads traditional instead of chaotic. Want it softer? Swap the red plaid for charcoal buffalo check and change nothing else. Want it bolder? Paint the rockers black and let the red carry twice the weight. The percentages stay; the personality changes completely.
3. Stone Fireplace, Dark Wood Mantel, and a Red Sleigh Full of Ornaments
What makes this mantel is the small red sleigh. Take it away and you still have a nice garland and two fluffy stockings — pleasant, anonymous, forgettable. The sleigh does three jobs at once: it introduces the red that ties the stockings together, it adds a low horizontal shape against a very vertical stacked-stone wall, and it gives loose ornaments somewhere to live besides scattered across the hearth.
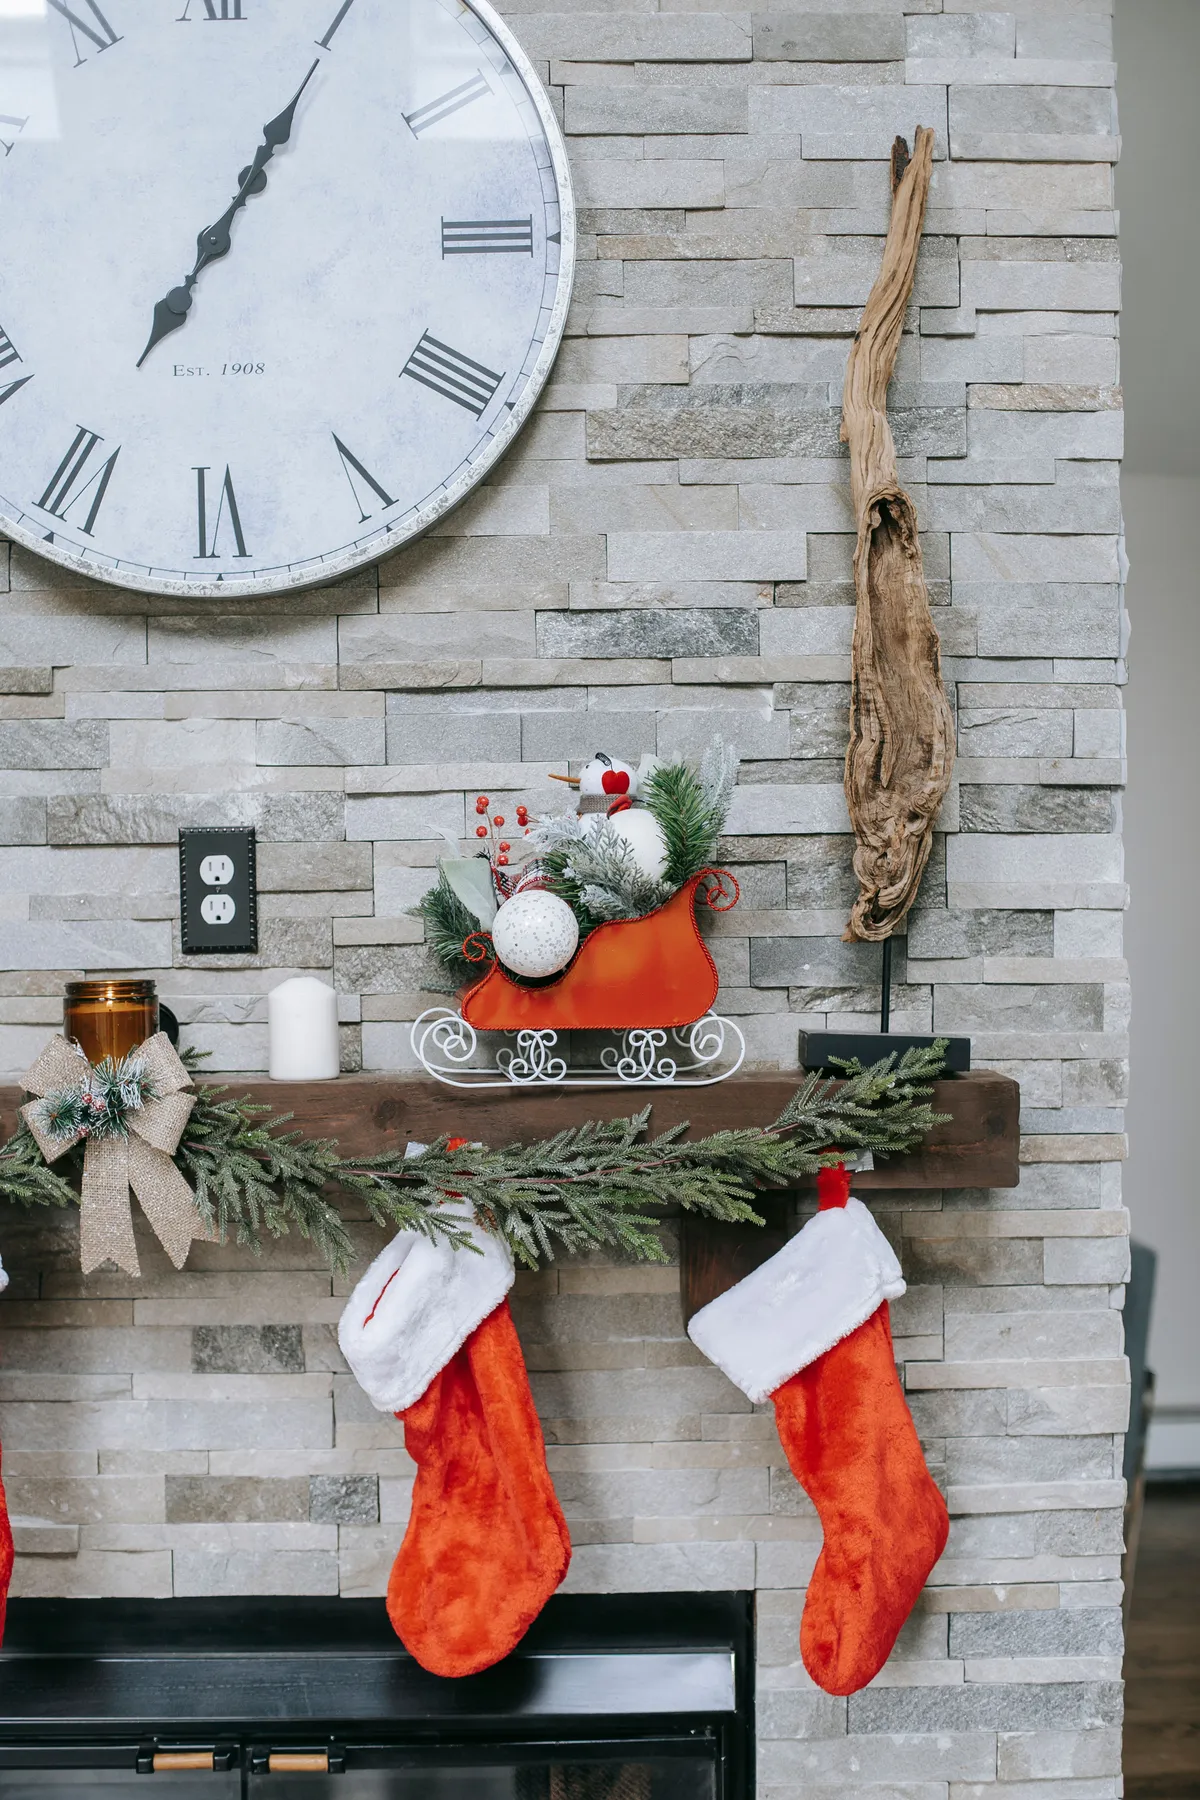
- Faux evergreen garland, 9 ft pre-lit: $25–$60
- Two stockings plus a wooden sleigh: $18–$45
- Ornaments to fill the sleigh (12–15): $15–$30
- Round wall clock, 20–24 in.: $35–$90
- Driftwood or tall branch accent: $0–$25, often found
Total: $93–$250. Budget alternative: double up Dollar Tree garland, spray-paint a thrifted sleigh red, and refill it with last year’s clearance ornaments — roughly $40 all in.
4. Mini Trees Clustered on the Mantel in Warm Bokeh Light
Small-tree clusters have quietly taken over the mantel this year. Part of it is practical: people decorating apartments and rentals where a full-size tree won’t fit, and a row of 12-to-18-inch trees fills the same real estate without eating any floor. Part of it is the photograph — clustered trees with warm string lights behind them melt into floating bokeh, which is exactly what Pinterest rewards. It’s a trend with legs because it solves a real space problem, not just a look.
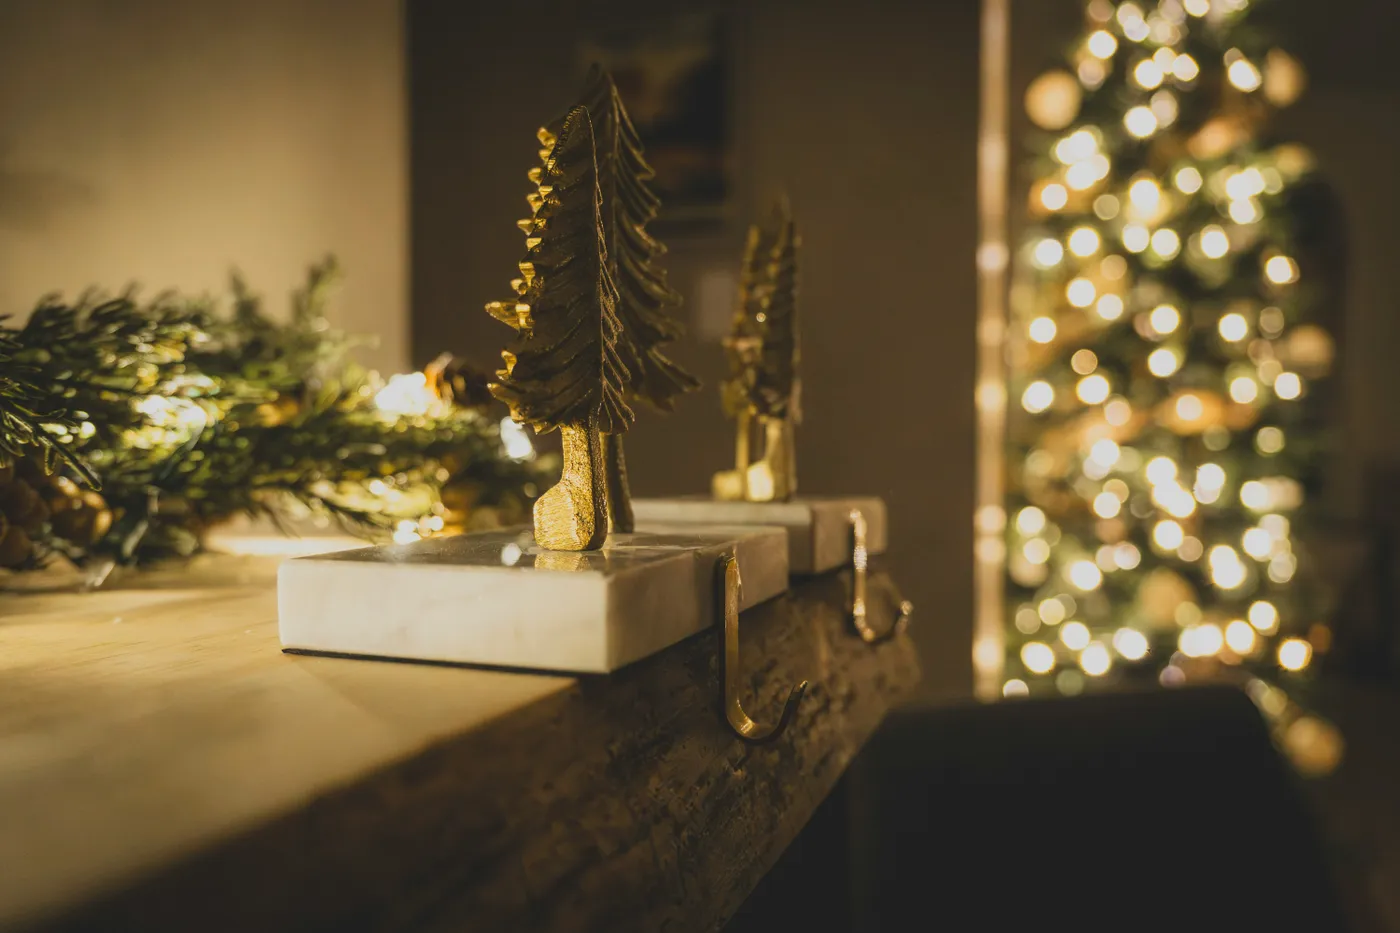
Cluster in odd numbers and stagger heights by at least four inches. Three trees at 12, 16, and 18 inches reads like a composition; four trees at the same height reads like a store shelf. Set the tallest one slightly off-center rather than dead middle. Run one continuous strand of warm-white lights behind the whole group instead of winding each tree separately, so the glow pools into a single soft wash. Compare with Idea #3 — same mantel, completely different energy.
5. White Mantel Symmetry: Garland, Gold Bells, Brass Candlesticks
- Measure the mantel and buy garland about 1.5 times its length so it can loop.
- Zip-tie the garland to itself in three places instead of nailing — no holes in the wood.
- Weave in red berries and gold bells last, spacing them roughly 8 inches apart.
- Cluster candles on each side in odd numbers, varying height by 2 to 3 inches.
- Light it all, step back 10 feet, and remove anything you can’t see from there.
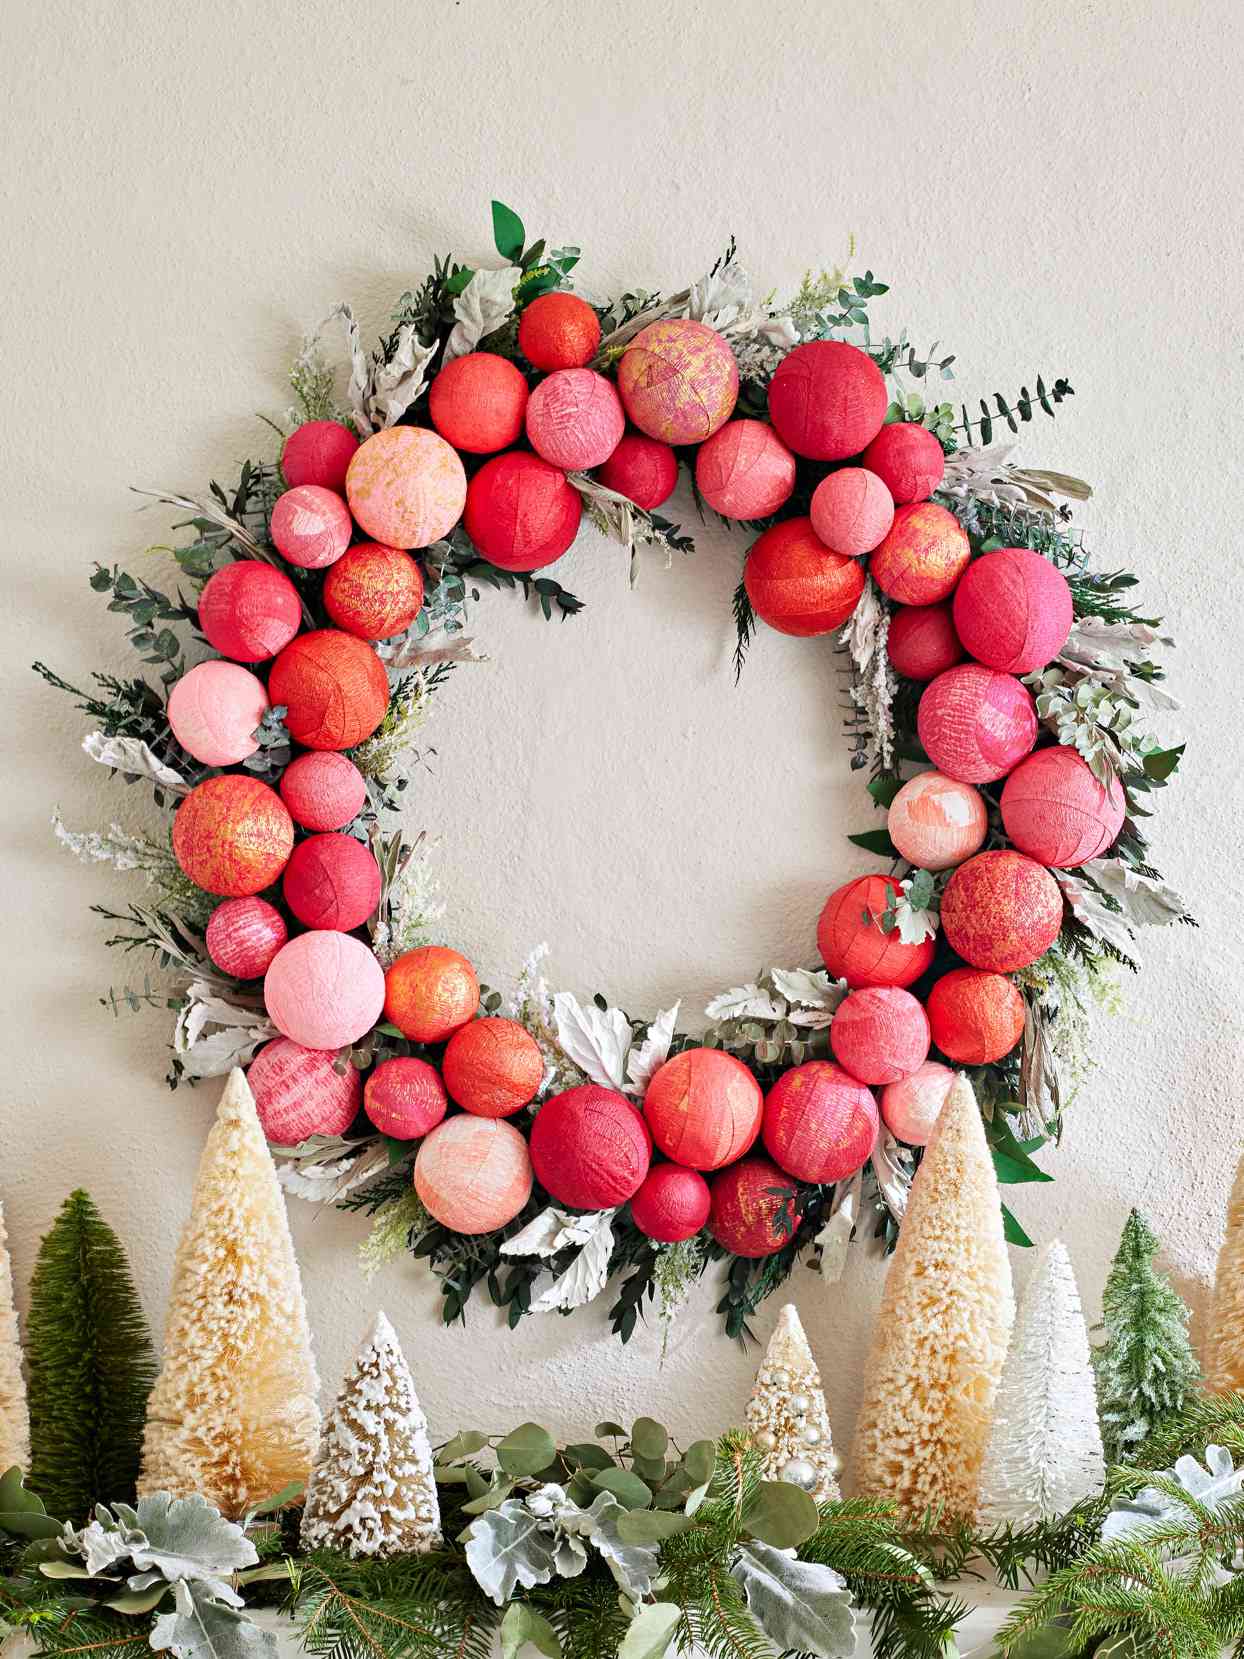
Roughly 45 minutes of work and $60–$110 if you already own the candlesticks.
Symmetry does the heavy lifting. Two brass candlesticks flank the center, the garland swags evenly on both sides, and the dark-framed mirror above gives the eye a hard rectangle to rest on after all that soft greenery. Without the mirror, the whole arrangement floats. The gold bells matter more than they look, too — they’re the only warm metal in a scene of white and green, and they keep the mantel from reading cold and snowman-adjacent.
6. A Weathered Barrel Planter Holding a Lit Taper, Pine, and Holly
Remove the barrel and you have a nice bundle of greens with a candle in it — pretty, but basically what everyone does. The small light-toned wooden barrel with dark metal bands gives the arrangement a container with weight and a little history, which makes the natural materials feel gathered rather than purchased. It also solves a practical problem: it holds water, hides the floral foam, and gives the taper candle a level, stable base. Wood beats glass here because it doesn’t compete with the pine.
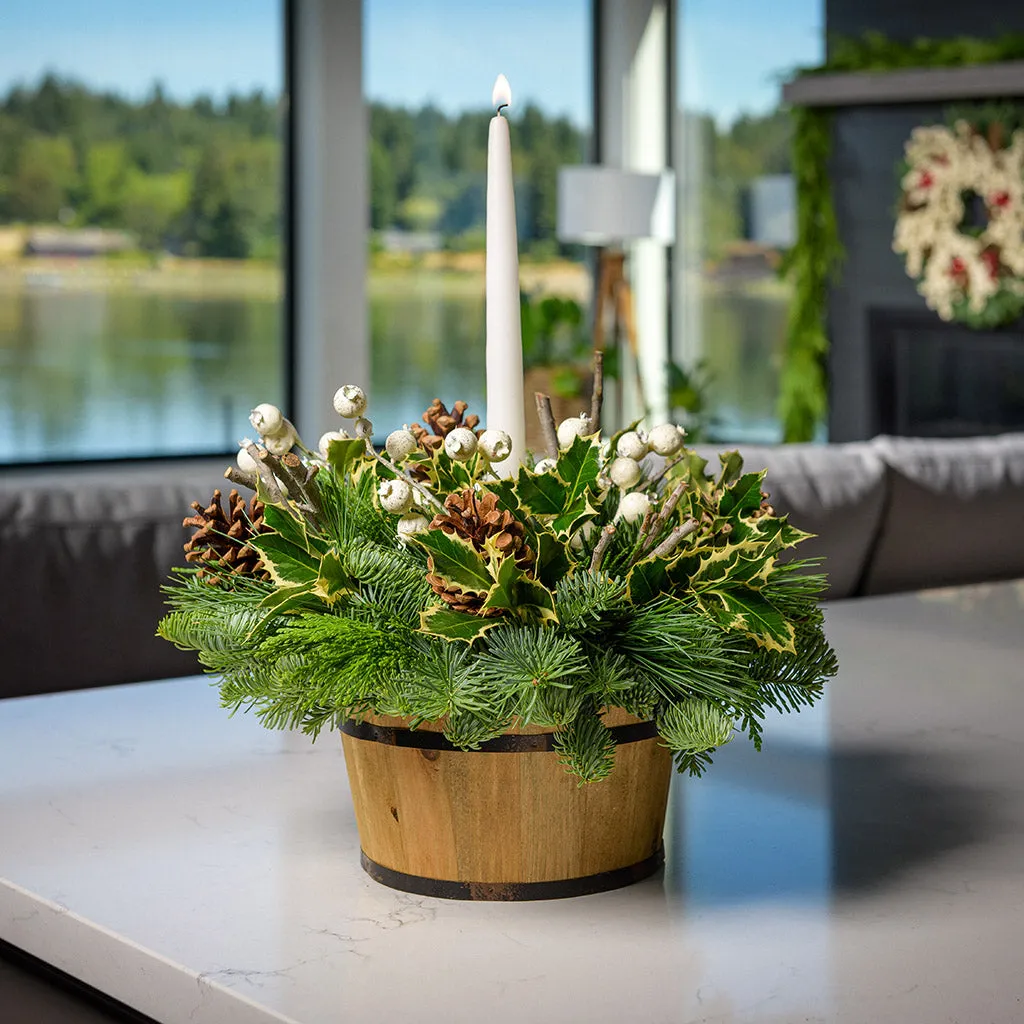
a lit taper in dried greenery is a fire waiting for a draft. Never leave the room, trim the wick to a quarter inch, and keep the flame at least three inches above the nearest branch. Holly berries are toxic to cats and dogs, so swap in white frosted faux berries if you have either. And fresh pine drops needles fast in dry indoor heat — mist every other day and expect about two good weeks.
7. Cedar, Pine, and Pinecones With One Off-White Pillar Candle
Think of this centerpiece as 80 percent green, 15 percent brown, 5 percent off-white. The greens vary — pine, cedar, bay leaves — but they’re all green, so the eye reads them as one mass. Pinecones and the pale tablecloth carry the brown. The single off-white pillar candle is the only light value on the table, which is why your eye lands in the middle without anything actually shouting for attention. Switch the candle to dark burgundy and you have a moodier evening version using the identical formula.
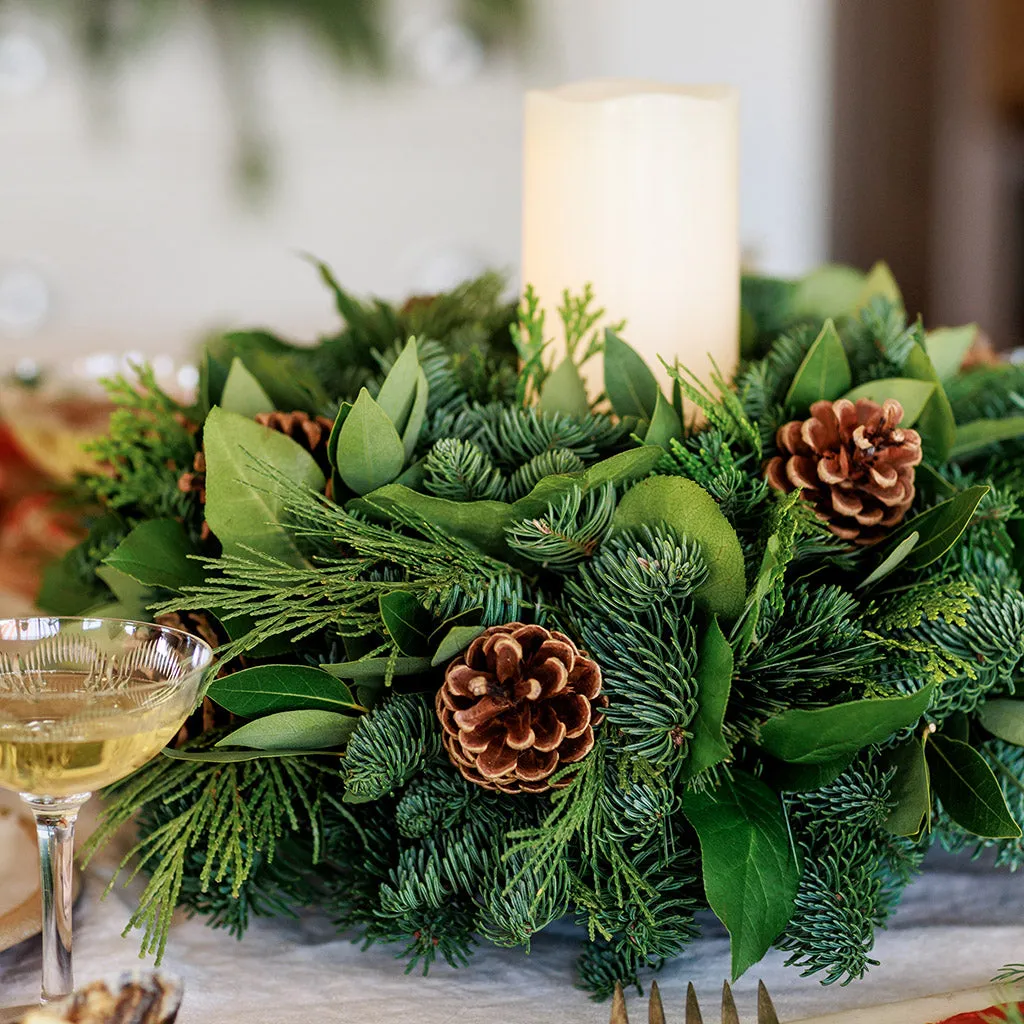
Keep any dining centerpiece under 12 inches tall if people sit across from each other. A piece that blocks sightlines gets moved to the sideboard by night two — guaranteed. Measure from tabletop to the top of the candle: 10 to 12 inches is the sweet spot for a dining table, 14 to 16 for a buffet or console. If you’re using fresh greens, soak the foam, then let it drain upside down before setting it down, or you’ll be sanding a watermark ring out of the wood in January.
8. Glossy Red Ornaments Stacked Like a Modern Bouquet
The single-color ornament pile is having a moment, and it’s the rare holiday trend that costs almost nothing. What makes it feel current instead of 1998 is the finish mixing — matte, glossy, and metallic reds stacked together so light does something different at every angle — plus a dark, moody backdrop that lets the red glow rather than compete. It reads as sculpture, not storage. Compare with Idea #26, which uses the same red in a much warmer, more traditional way.
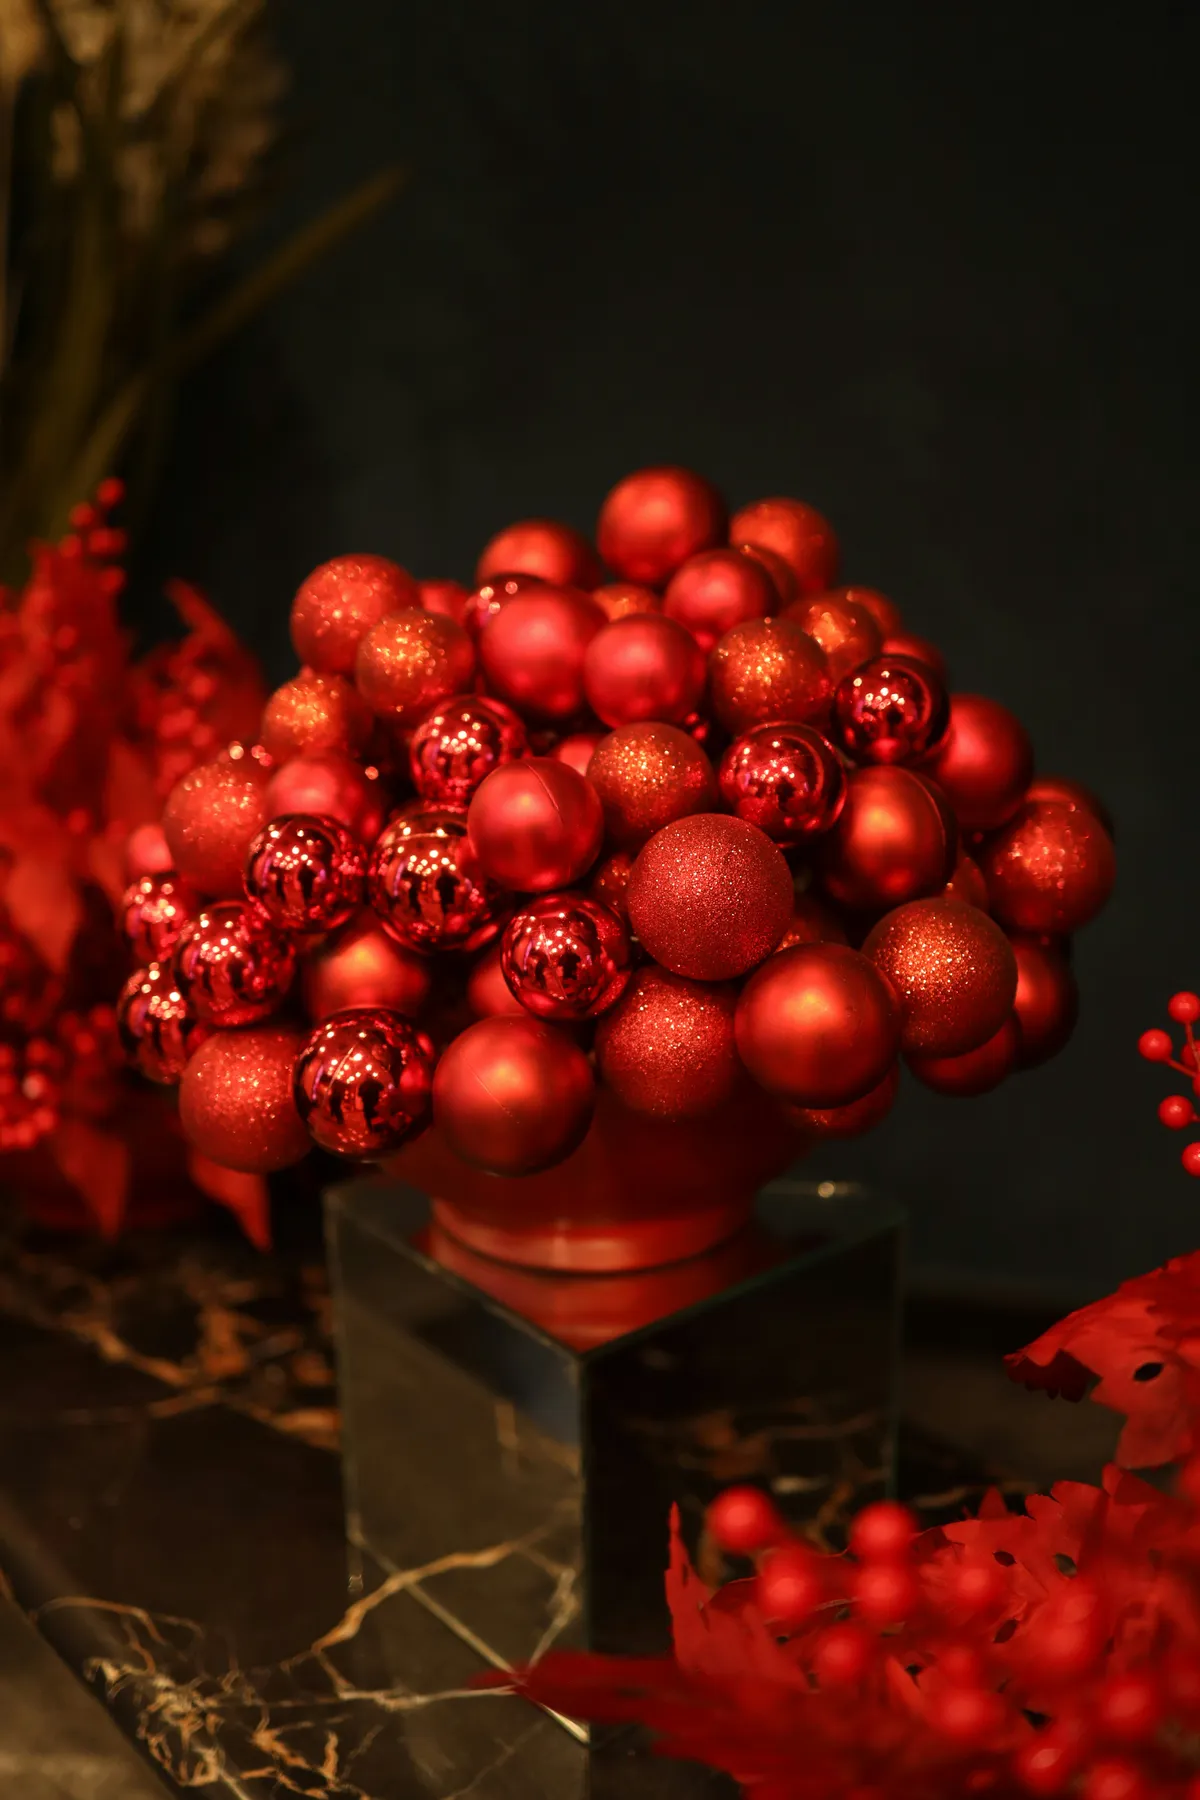
Red ornaments are the cheapest thing in the store after December 26th. Dollar Tree sells six-packs for $1.25, and a thrifted footed vase or even a cardboard box wrapped in kraft paper makes a fine base. Sort by size, then stack largest to smallest so the pile tapers. Total spend lands between $12 and $20. If you want to splurge, one $8 metallic ornament tucked at the very top catches the light and makes the whole pile look expensive.
9. Dried Orange Slices and Cinnamon Sticks, Tied With Twine
- Slice oranges 1/8 inch thick and blot them dry with a paper towel.
- Bake at 200°F for 2.5 to 3 hours, flipping once, until leathery — not brittle.
- Bundle two orange slices with two cinnamon sticks and a sprig of dark green foliage.
- Tie with twine in a double knot, leaving a 4-inch loop for hanging.
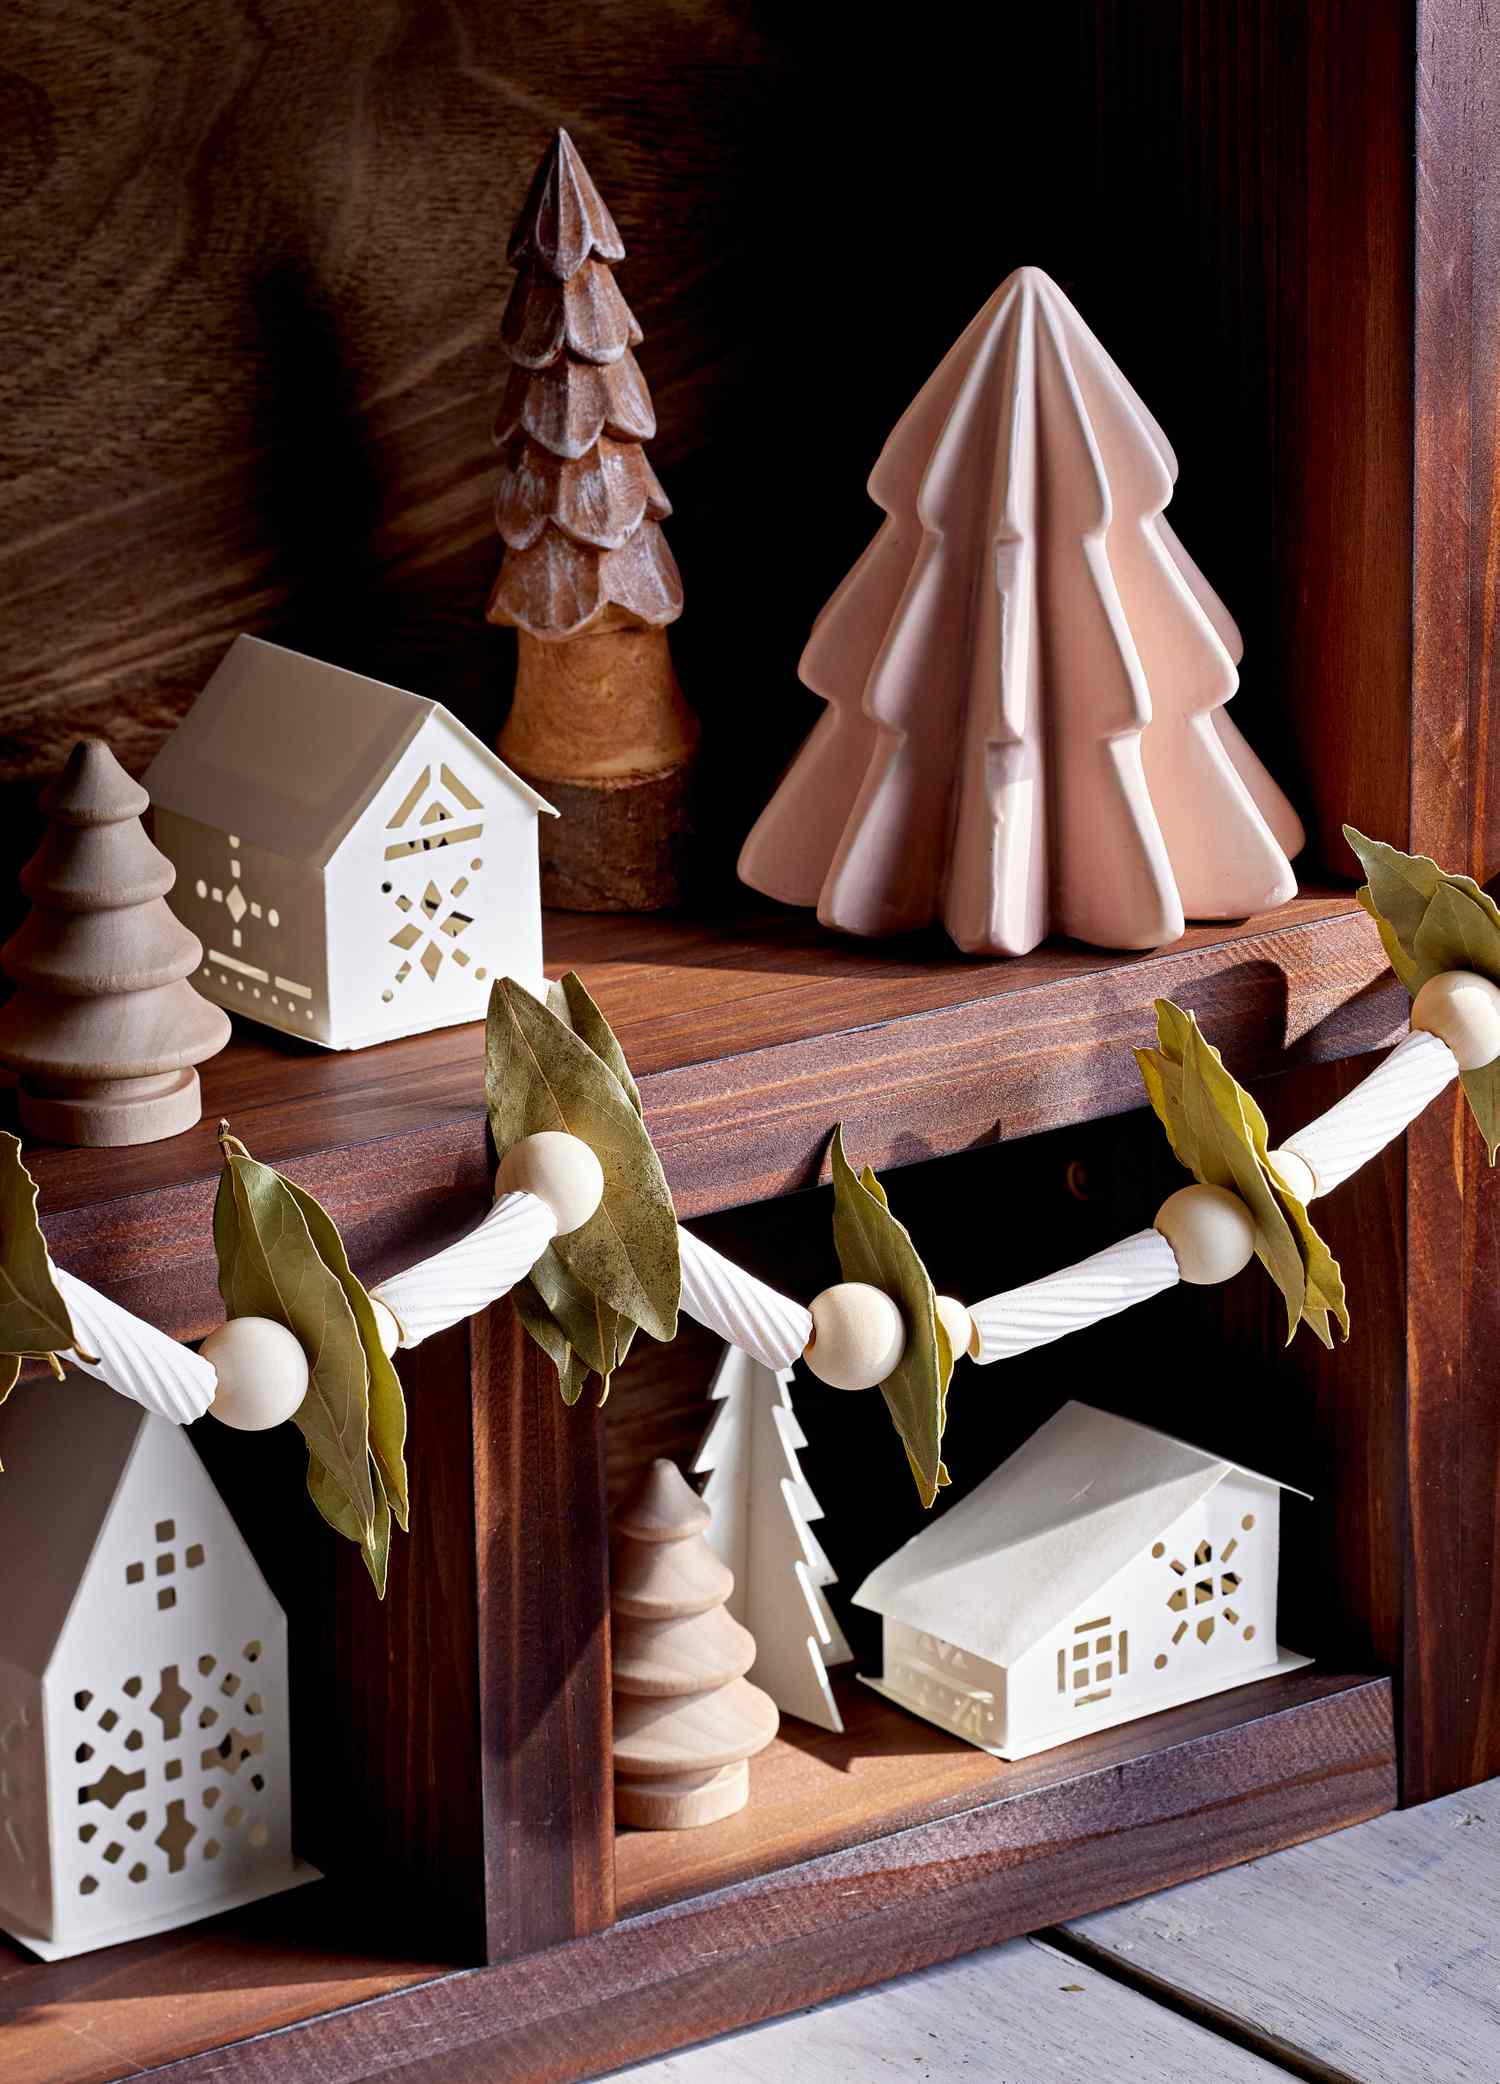
About 3.5 hours including oven time, and roughly $8 for a dozen.
Dried citrus holds for one season, maybe two if you store it in an airtight bin with a silica packet. Humid rooms kill it — the slices go soft, then dark. Cinnamon sticks keep their scent for about six weeks before they fade into pure decoration; a drop of cinnamon oil on the back refreshes them instantly. If you’d rather skip all of that, faux dried orange slices look about 90 percent as good and last indefinitely.
10. Twenty-Four Fabric Pouches Clipped to Red and Green Ribbon
- 24 muslin drawstring pouches, 3×4 in.: $14–$28
- Felt sheets in red, green, cream, and yellow: $6–$12
- Grosgrain ribbon, two rolls: $8–$16
- Mini wooden clothespins, 50-pack: $4–$8
- Number stickers or a fine black marker: $3–$6
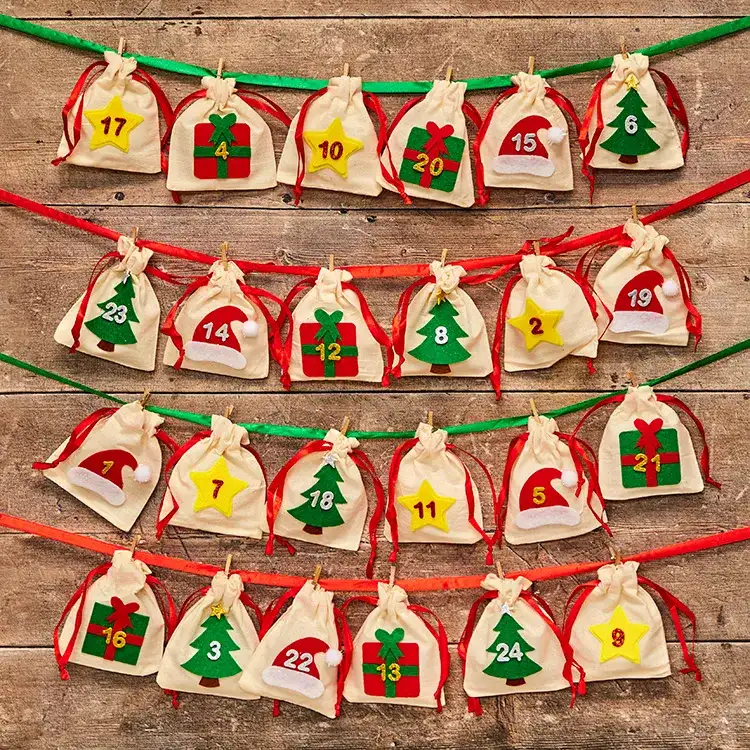
Total: $35–$70. Budget alternative: buy pouches in bulk, cut your own felt shapes from a single 9×12 sheet, and hand-number with a Sharpie — it costs nothing and looks more personal than stickers.
Hang both ribbons first and space them before you clip a single pouch. Fourteen to sixteen inches apart is right for four rows of six. Clip everything on, then slide each pouch left or right to even the gaps; it’s far faster than eyeballing one at a time. And resist putting the big gift in pouch 24 on day one — kids find it, and the whole calendar peaks too early.
11. Blanket Ladder Beside a Garlanded Mantel and Round Mirror
The blanket ladder is doing something subtle. It’s a tall vertical element balancing a wide horizontal mantel, so the wall doesn’t read as one heavy band across the middle. It also brings textile into a scene that’s otherwise all wood, stone, and evergreen, and that mix of hard and soft is exactly why this corner feels lived in rather than styled. The round mirror repeats the shape of the wreaths and ornaments without adding another rectangle to a wall that already has enough of them.

Fresh garland over a working fireplace dries out fast — within a week you’ll be sweeping needles off the hearth. Keep it at least six inches above the firebox opening, and never let it hang in front of a working flue. Ladder styling has its own trap: three or four folded throws is the ceiling. More than that and it stops being a ladder and becomes a pile. If you have toddlers, anchor it to the wall, because they will climb it.
12. Paper Snowflakes Cut by Hand in Red, Green, and Peach
- Start with a square, fold it in half diagonally, then in half twice more.
- Cut the open edges into curves — straight cuts give you square, boxy snowflakes.
- Snip notches along both folded sides, never through the closed point.
- Unfold slowly and press flat under a heavy book for ten minutes.

About five minutes per snowflake, and nearly free if you already own paper and scissors.
Hand-cut snowflakes are back for a reason that has nothing to do with nostalgia: people want a craft a seven-year-old and an eleven-year-old can do at the same table without anyone crying. The color shift matters too — mixing peach and warm red in with the traditional greens keeps the whole thing from looking like a classroom in 1994. Tape them to a window and the light does the rest. This is the one project on the list you can finish with zero shopping.
13. Wood Block Snowmen Wearing Knitted Hats and Plaid Scarves
Scrap 2×4 offcuts from a garage or a hardware store bin are free, and one can of white acrylic covers a whole family of these. Knitted baby hats run about $1 to $3 at Dollar Tree in December; if you can’t find them, cut the cuff off an old sweater sleeve. Plaid fabric scraps from a thrifted shirt make the scarves. Six snowmen for under $15. The one thing worth buying new is a fine-tip paint pen for the faces, because a shaky Sharpie smile ruins an otherwise charming figure. Compare with Idea #9 for another natural-material ornament at about the same cost.
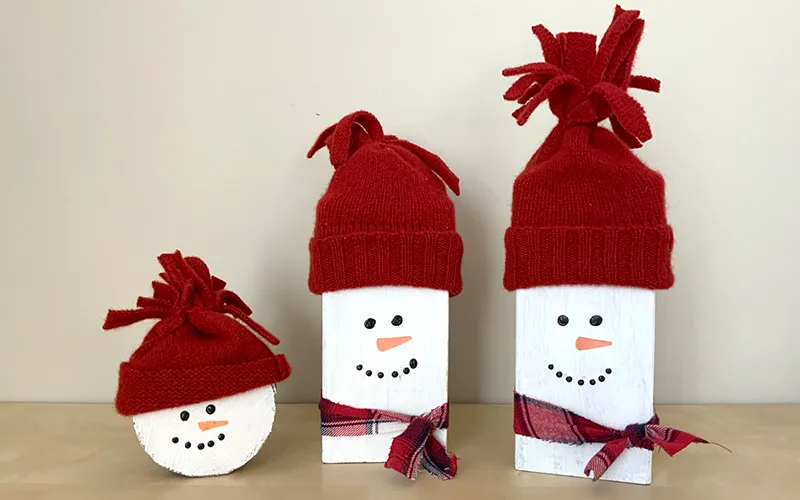
Sand the cut edges to 220 grit before painting — end grain on a 2×4 drinks paint and looks fuzzy otherwise. Two thin coats beat one thick one, and let each dry completely. For the faces, less is more: two dots and a small curved smile. Big cartoon eyes and a carrot nose push these straight into lawn-decoration territory, and there’s no coming back from that.
14. A Slow Afternoon of Handmade Holiday Crafting
that matters in a handmade holiday is that your hands are actually in it. Not a kit, not a printable — cutting, gluing, tying. That sounds sentimental until you notice the difference in the finished object: slightly uneven edges, imperfect spacing, no two alike. That irregularity is the entire aesthetic. You can absolutely buy the look instead, but you can’t fake it convincingly, and everyone who walks in will know which one you did.
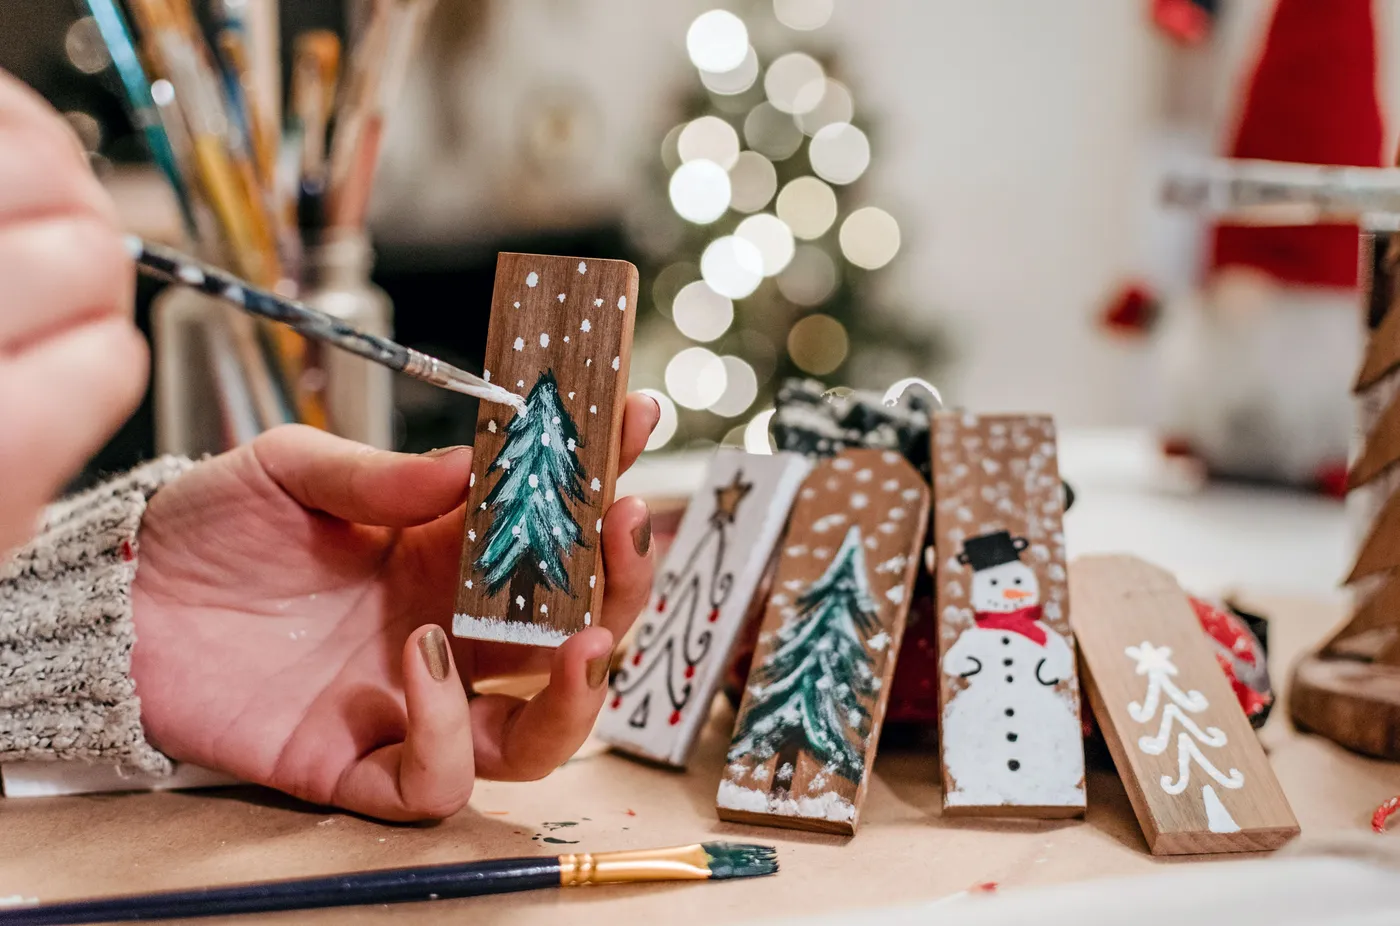
A good craft table is about 50 percent materials, 30 percent tools, 20 percent mess. Lay paper, felt, twine, and pinecones on one side. Put scissors, glue, and a cutting mat on the other. Leave the middle empty — that’s where the actual work happens, and if you fill it you’ll be clearing space with your elbow every two minutes. Cover the table with kraft paper and you can fold the whole mess away in a single sheet when you’re done.
15. Pinecones, Ceramic Stars, and Glass Baubles by Candlelight
Pinecones from the yard bring friends. Bake them at 200°F for 30 to 40 minutes to kill anything living inside and force out the sap — do this before you craft, not after, or you’ll have sticky ornaments by New Year’s. Fresh greenery in the same arrangement will drop needles within two weeks indoors. Ceramic stars and glass baubles, on the other hand, will outlive you. Store them wrapped in tissue rather than a plastic bag, and they’ll still look new in 2035.
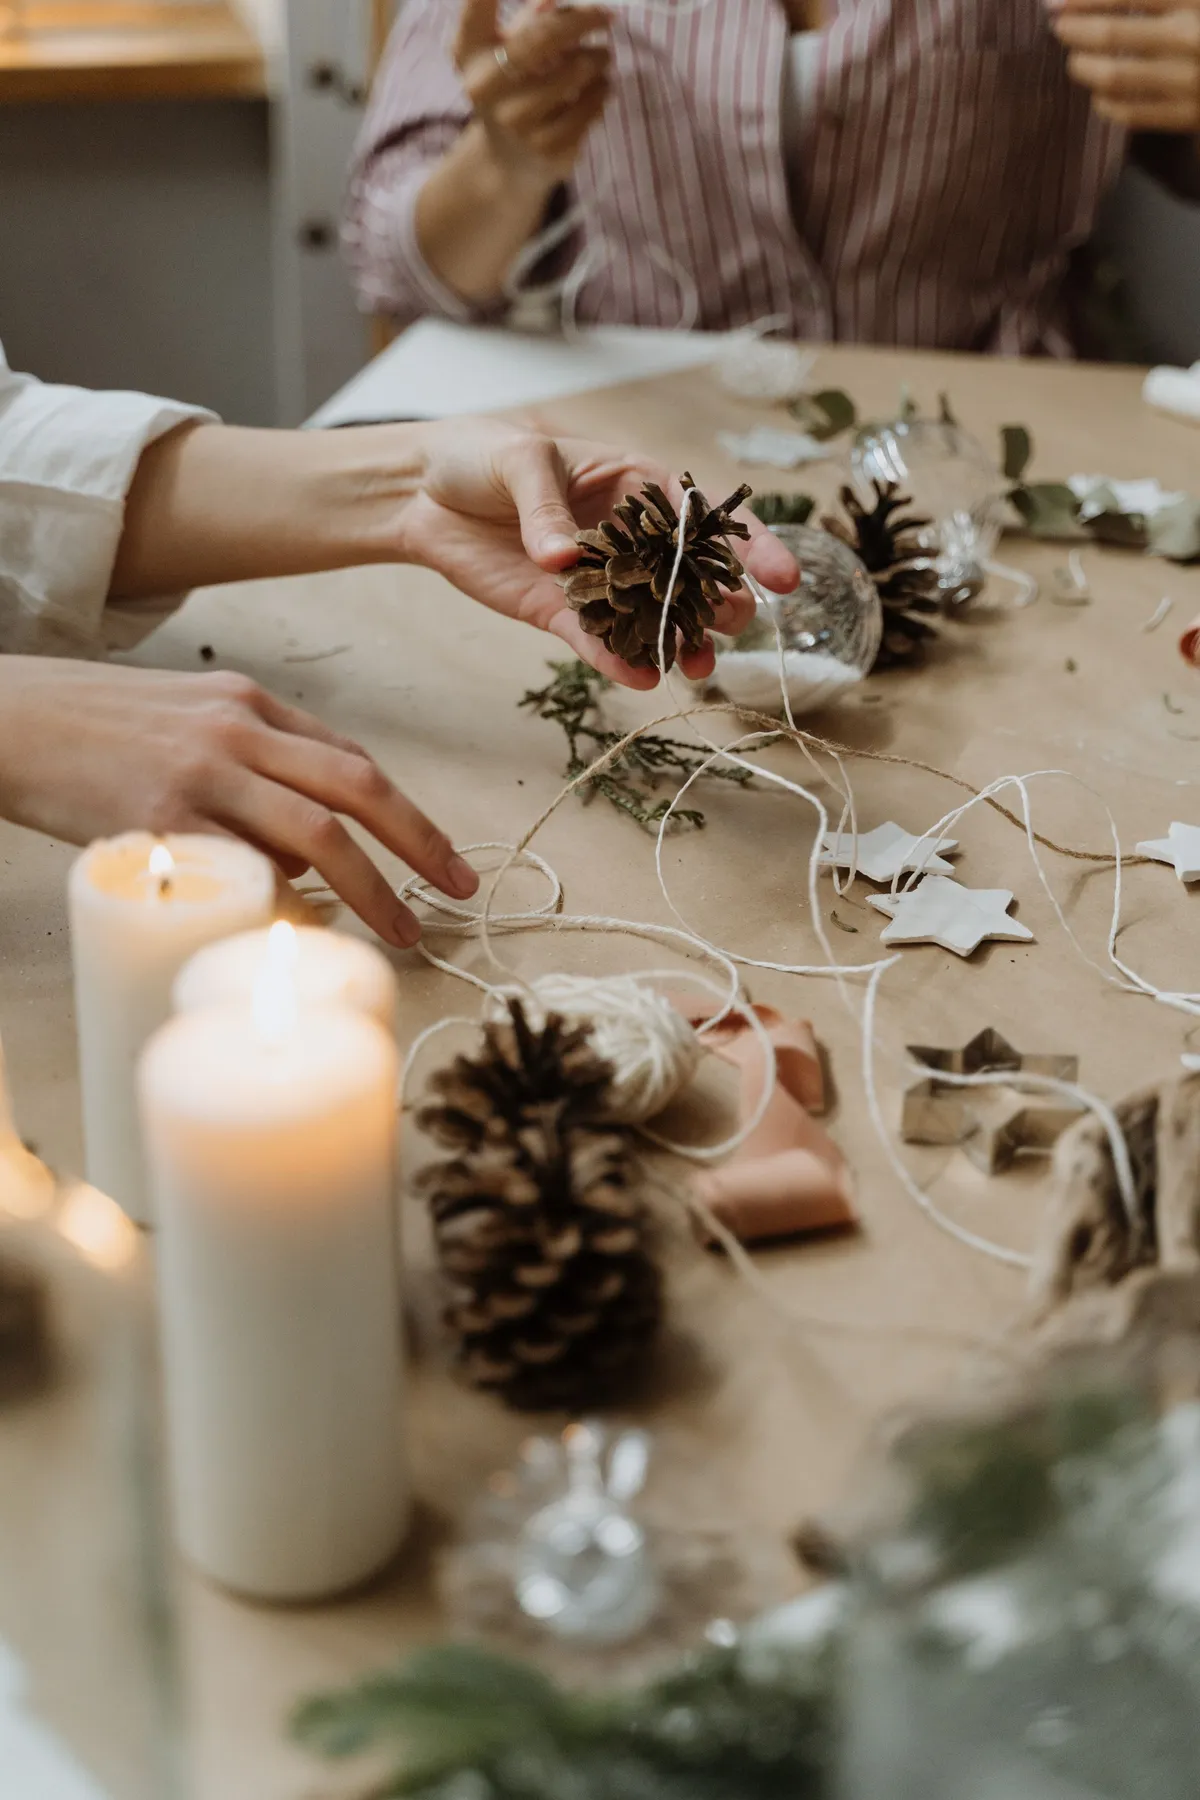
Notice how the materials disagree with each other on purpose. Matte pinecone, glossy white ceramic, clear glass, rough twine, soft candlelight — five textures in one small cluster. That’s what keeps a natural arrangement from reading as a bowl of yard waste. The lit pillar candles behind the objects matter too: they backlight the star ornaments and make the pinecones look sculptural instead of just dark. Swap in plain overhead lighting and most of that richness vanishes.
16. Wrapping Clear Ornaments in Jute Twine, One Glue Line at a Time
- Dab a line of hot glue about an inch long onto the ornament.
- Press the jute into the glue and hold for five seconds — it sets fast.
- Work in small arcs, rotating as you go, until the sphere is fully wrapped.
- Tuck a small pine sprig into a gap and secure it with one final dot of glue.
- Trim loose fibers with sharp scissors and hang it right away.
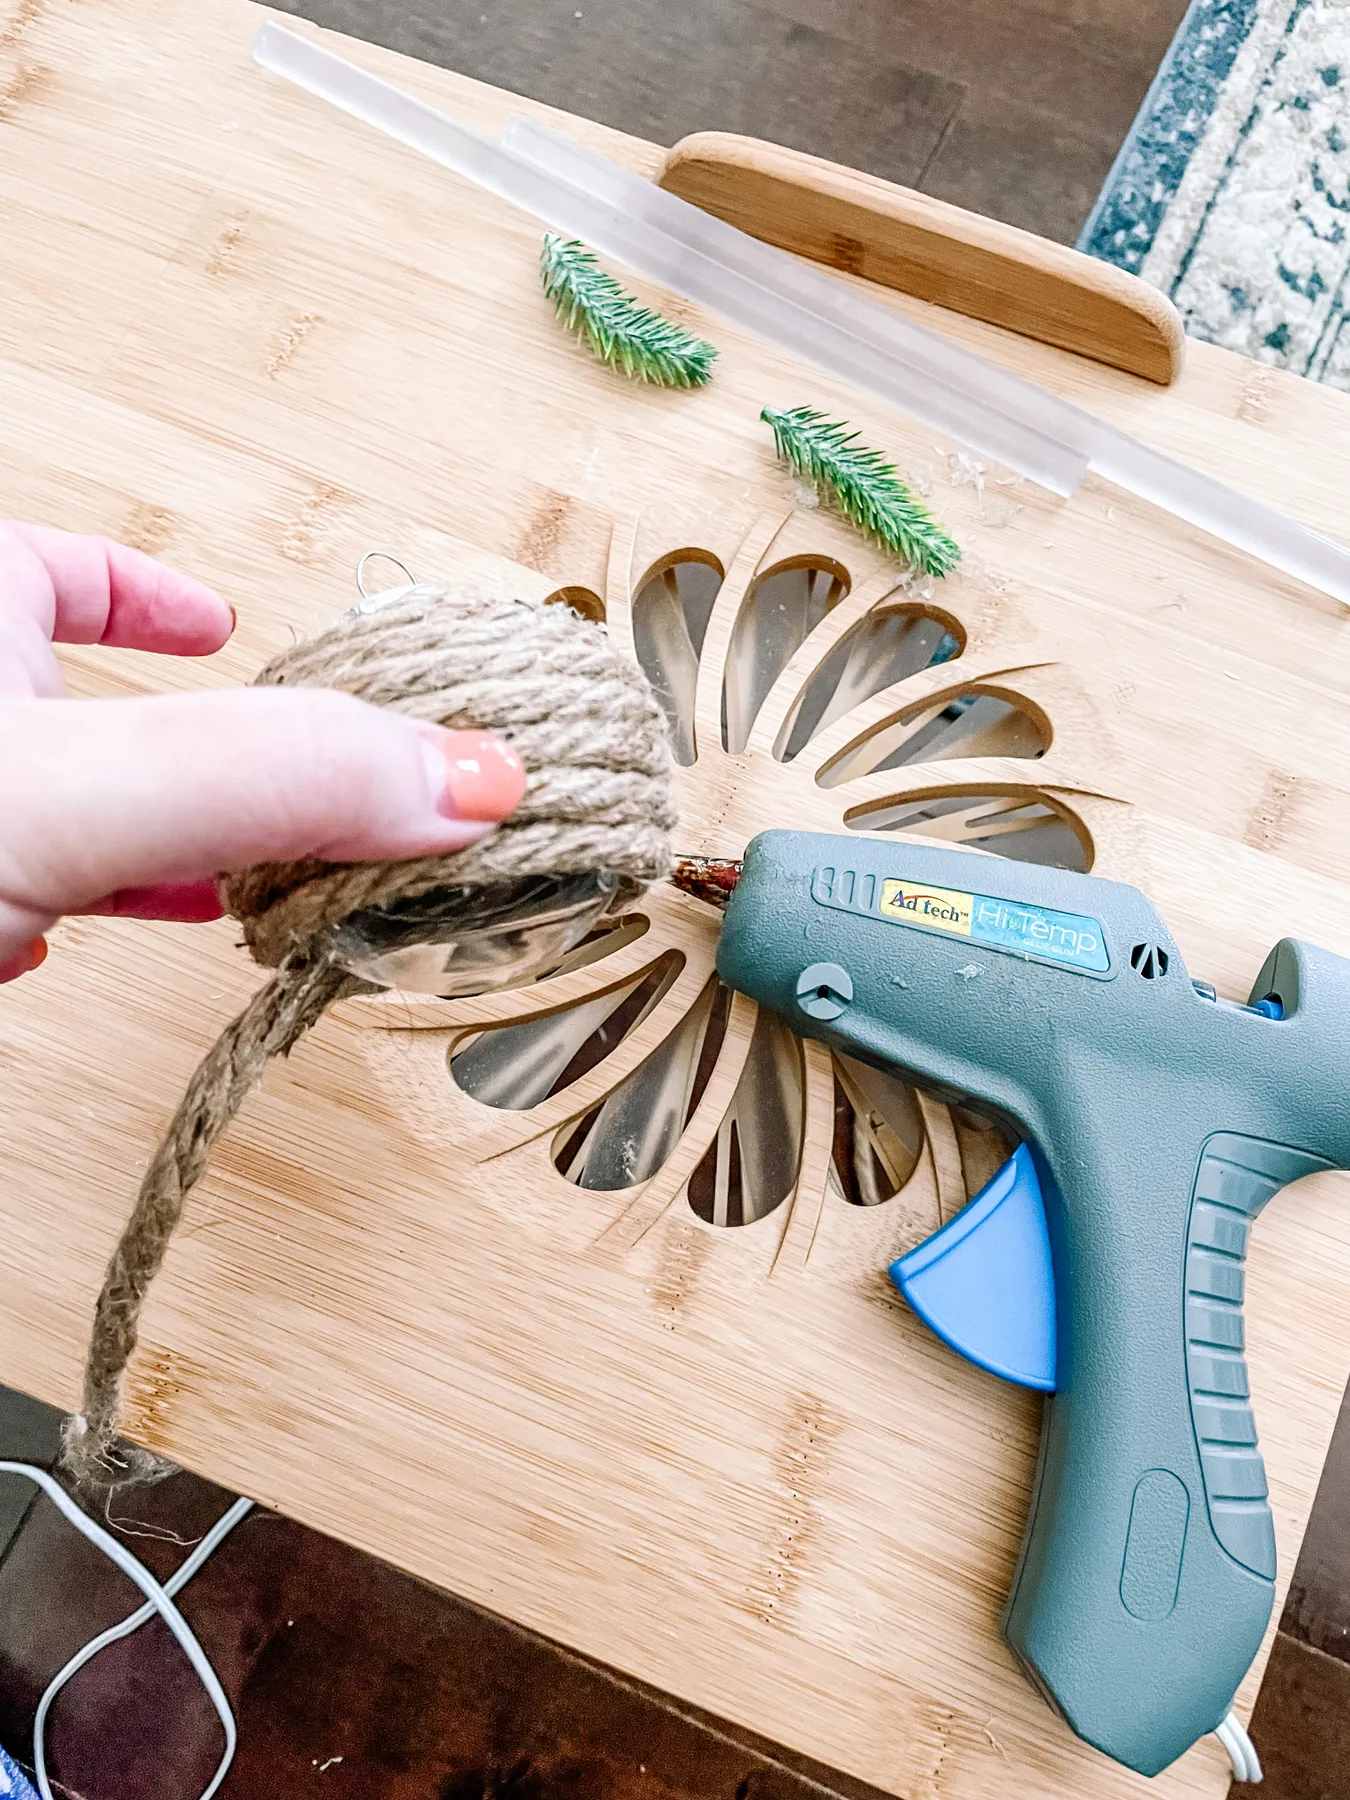
Twelve to fifteen minutes per ornament, and about $6 for a ball of jute that covers eight.
Jute reads as texture rather than color, so a few go a long way. Eight to twelve is plenty on a small tree, and more than that turns into visual static. On a nine-foot tree they’ll disappear from across the room, so use them as deep filler and keep your scale-dominant ornaments out on the tips. They’re also heavier than they look — thin, spindly branches will droop, so hang them toward the interior where the wood is thicker.
17. Three Rolls of Pre-Lit Garland, Still in the Box
Buying garland in a box is a trap if you don’t read the length. Fifteen feet often means fifteen feet fully stretched, tip to tip — fluffed and swagged across a mantel, it covers maybe eight. Measure your mantel or stair rail and multiply by two. Check whether the lights are one continuous strand or end-to-end connectors, too; mixing brands means one plug and a dead section you can’t diagnose. Pre-lit bulbs are rarely replaceable, so buy an extra box while it’s in stock.
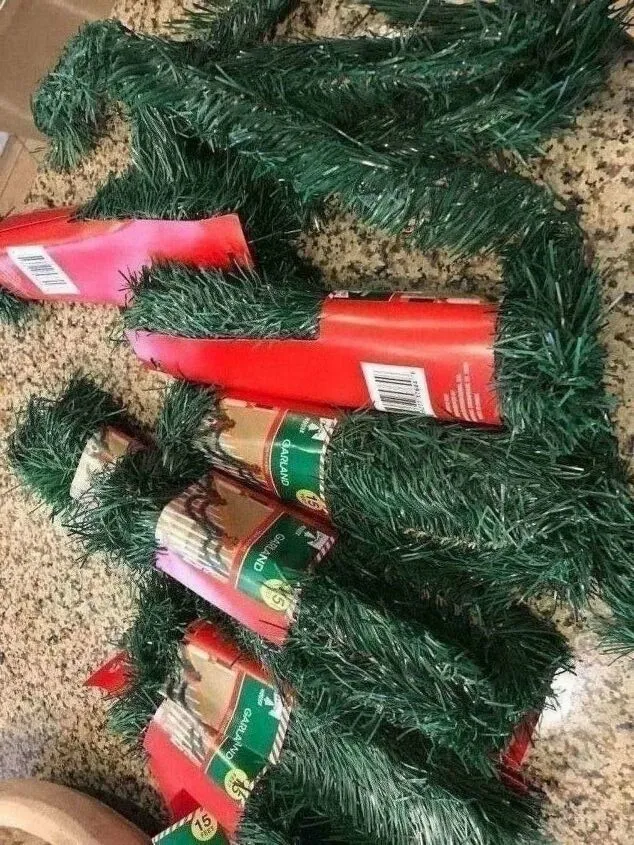
The single biggest upgrade you can make to boxed garland is bending every branch outward before it goes up. Ten minutes per roll, and it roughly doubles the visual volume. After that, layer a second real-touch garland over the top for depth and you’ll land that Idea #11 mantel look without paying for custom greens. Zip ties, not nails. And never plug more than three strands end to end, no matter what the box claims.
18. Three Flocked Mini Trees in Galvanized Buckets on Striped Linen
This little vignette runs on roughly 60 percent white and soft grey, 25 percent black and white stripe, and 15 percent bright red. The stripes are the wildcard — they’re what makes three ordinary mini trees look designed. Keep the buckets plain galvanized metal so the stripe stays the loudest pattern in the scene; add a second pattern and the whole thing collapses. Swap the red ornaments for copper and it turns modern farmhouse. Swap the stripe for solid cream and you’re back to something anyone could have styled.
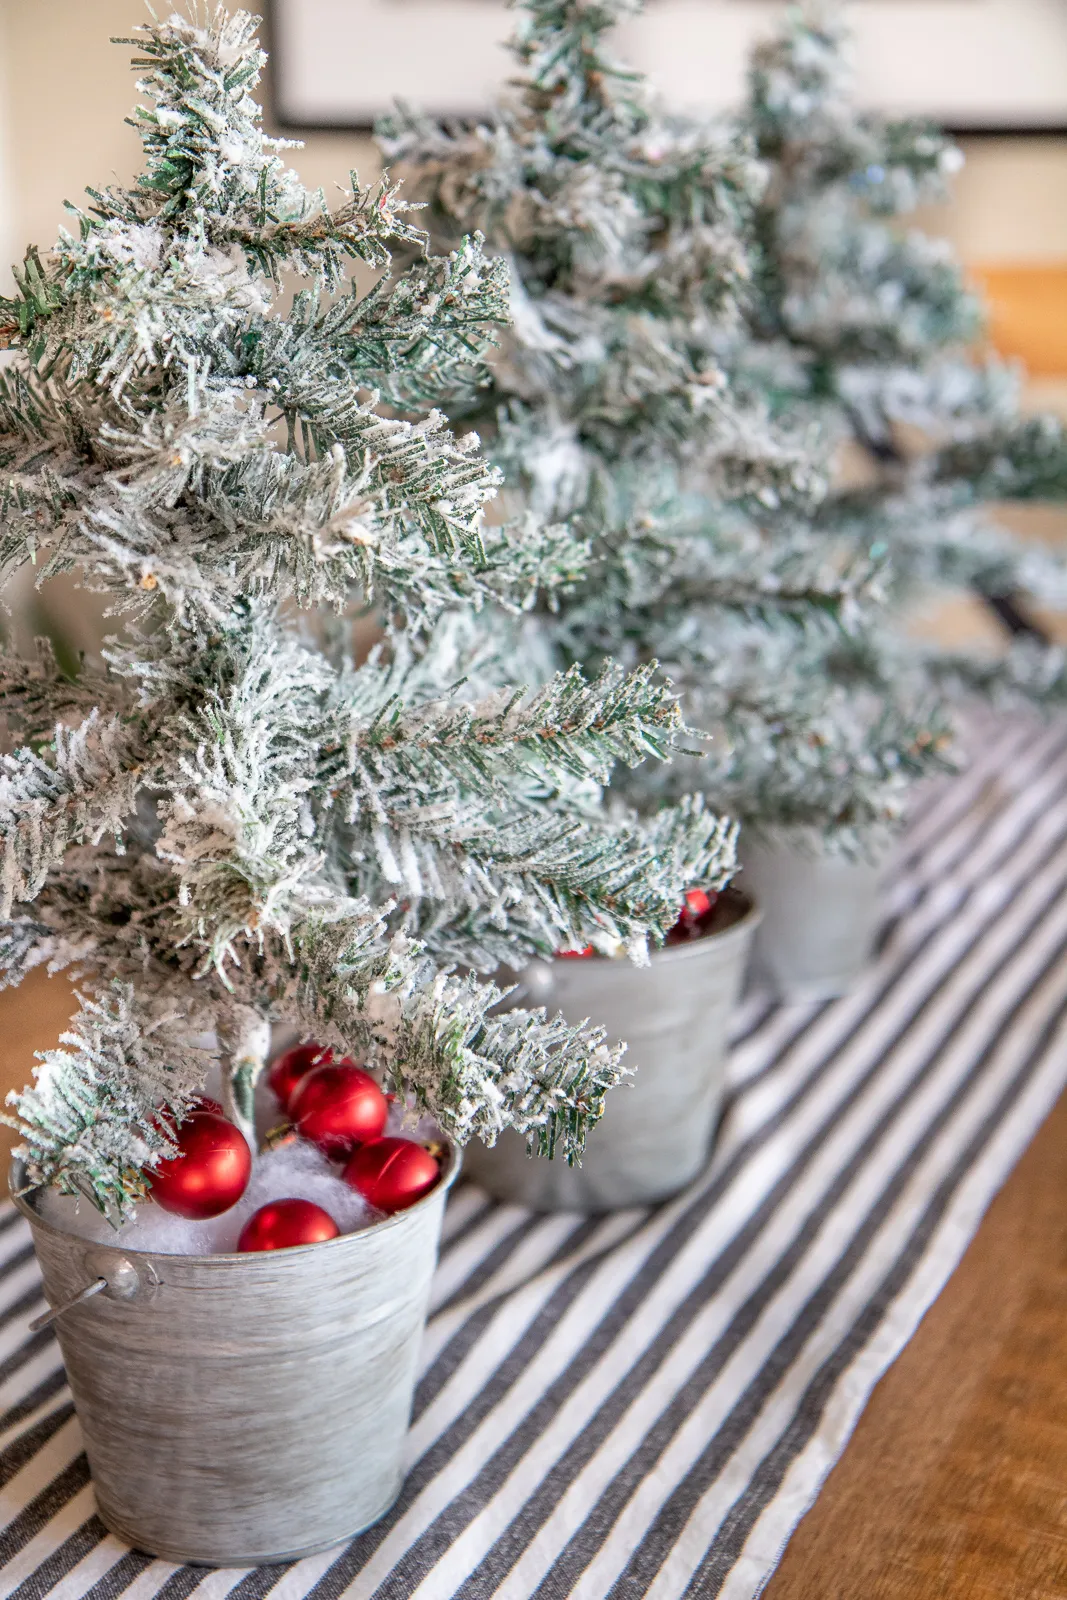
Dollar Tree sells flocked mini trees for around $5 in early November and galvanized buckets for $1.25, so three trees and three buckets lands under $25. The striped runner is the only piece worth spending on — a $12 cotton runner from Target or a yard of remnant fabric both work. Fill the buckets with pillow stuffing instead of faux snow; it’s cheaper, it doesn’t blow around, and from three feet away nobody can tell the difference.
19. Chunky Cable-Knit Stockings and a Sunlit White Mantel
The stockings are the whole point. A green garland with warm lights on a white mantel is one of the most common holiday setups there is — you’ve seen it a hundred times. What stops you here is two chunky cable-knit stockings in forest green and cream, hung with personalized gift tags and tiny red bells. They add the one thing garland can’t: softness. Swap them for thin felt stockings with printed snowmen and the scene is still perfectly pleasant, and completely forgettable.
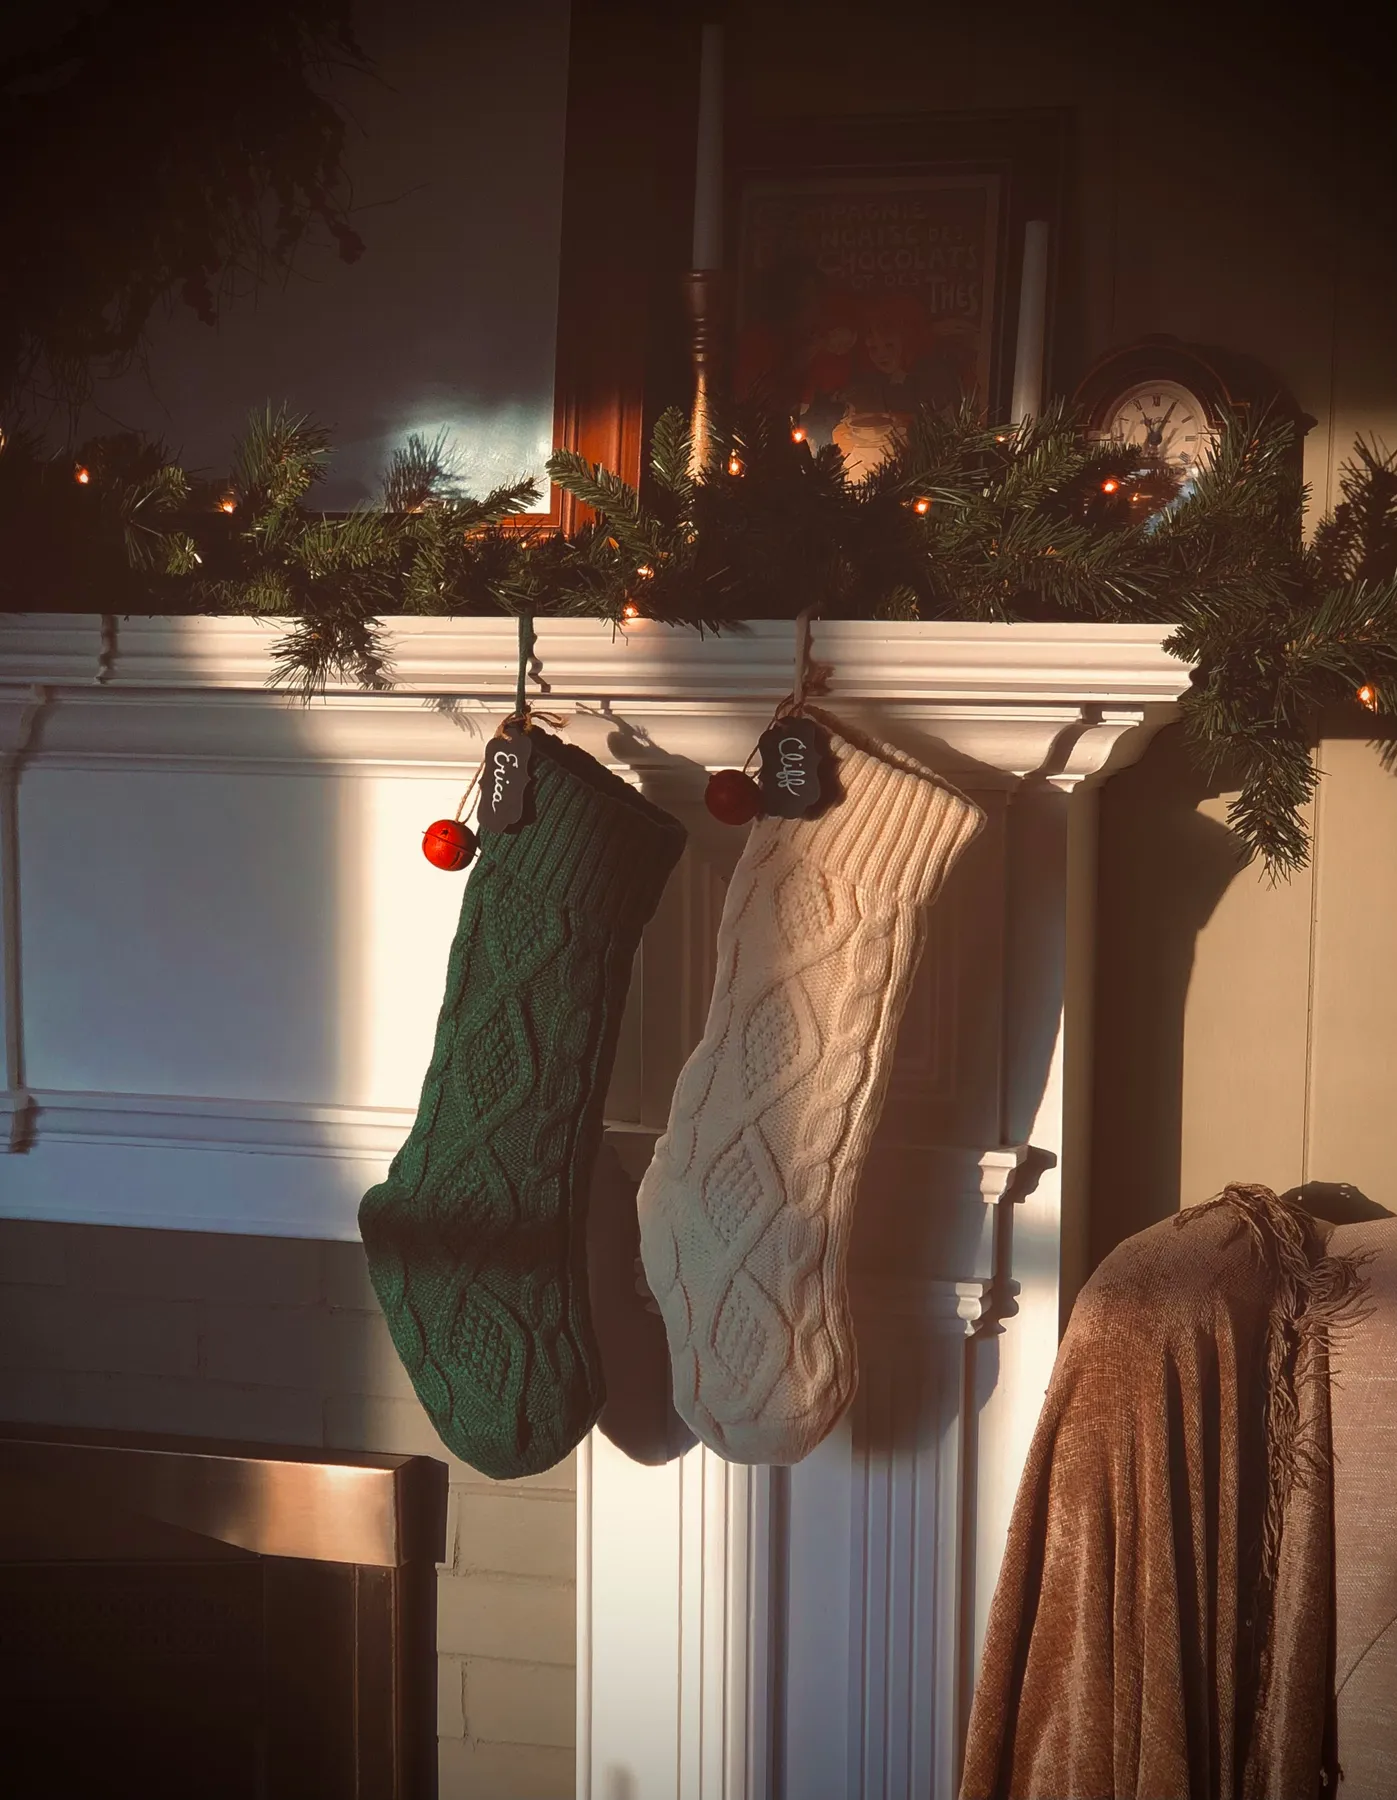
Texture is doing more work than color. The mantel is smooth and white, the garland is spiky, the stockings are nubby and soft, the frames above are flat and dark. Four textures stacked vertically, which is why a two-color scheme doesn’t feel boring. Natural sunlight matters enormously here — it rakes across the knit and exaggerates every stitch. Face this wall north instead and you’d get about half the effect, and you’d want a warm lamp on the side table to make up the difference.
20. A Big Fir Wreath and Three Red Cone Trees on the Hearth
- 24–30 inch faux fir wreath: $22–$55
- Three textured red cone trees, 8–14 in.: $18–$45
- White pitcher plus faux red berry branches: $12–$30
- Red knitted garland for the doorway: $10–$22
- Removable hooks and ribbon: $6–$12
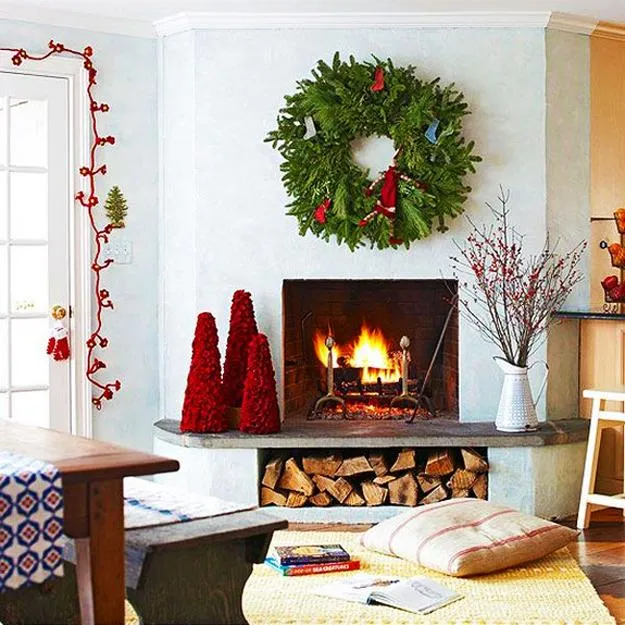
Total: $68–$164. Budget alternative: Dollar Tree sells plain foam cone forms — three painted red lands around $9. A thrifted white pitcher is about $4, and last year’s clearance berry stems work fine.
Hanging a wreath on a pale blue painted wall means one thing: that hook hole is permanent unless you’re careful. Use a removable adhesive hook rated for twice the wreath’s weight, and wipe the wall with rubbing alcohol first — that’s the step everyone skips and then blames the hook for. Keep the wreath at least four inches above the mantel shelf so it doesn’t visually merge with the garland, and check it every few weeks, because fir wreaths lose volume as they dry.
21. Terracotta Gingerbread Men With Painted White Hearts
- Roll air-dry clay to about 1/4 inch thick on parchment paper.
- Cut with a gingerbread cutter and smooth the edges with a damp fingertip.
- Poke the hole for your twine while the clay is still soft — not after it dries.
- Air dry 24 to 48 hours, flipping once at the halfway mark.
- Paint the white outlines and hearts, then thread twine with a single wooden bead.

Thirty minutes of actual work, two days of drying, about $10 for a dozen.
It’s the wooden bead. A two-cent craft supply, and it’s the difference between I made this and I made this well. The bead sits exactly where the twine meets the ornament, hiding the knot, giving the hanging loop a finished weight, and picking up the terracotta tone of the clay. Without it the loop looks improvised. With it, the whole piece reads as a small designed object — which is precisely the effect you want when you’re handing them out as gifts.
22. A Pastel Console With Bottle-Brush Trees and a Star Twig Wreath
Pink Christmas stopped being a novelty a few years ago and has quietly become its own category. What’s changed is the palette around it: the pink now shows up with teal and soft gold instead of hot pink and glitter, which makes it read as designed rather than themed. Most of that interest comes from people styling rentals and small apartments, where a full-size pastel tree simply doesn’t fit. Compare with Idea #28, where pink and teal show up on a full-size flocked tree.
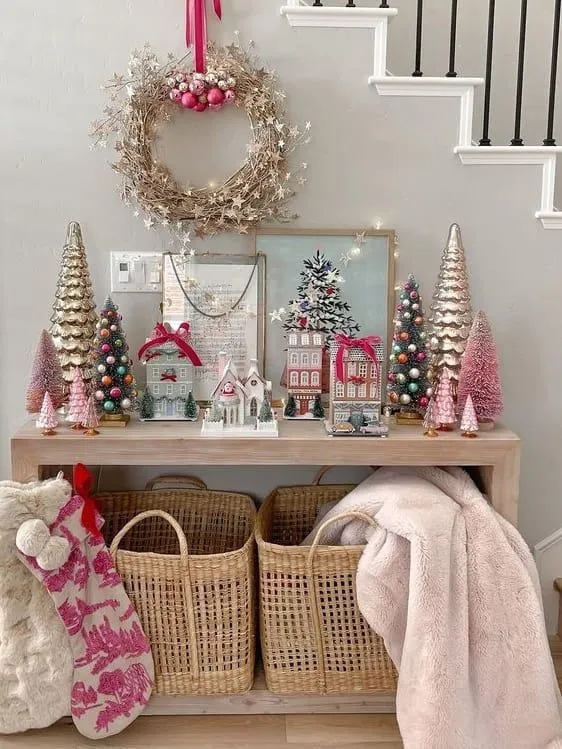
The formula is roughly 55 percent light wood and cream, 25 percent pastel pink, 12 percent teal, and 8 percent metallic. That metallic slice is what keeps the pinks from turning saccharine — silver stars on the twig wreath, gold and silver ribbed cone trees on the table. Push the metallic to 15 percent and hold pink at 25 and the vignette reads cooler and more grown-up. Push pink to 40 percent and you’re decorating a kid’s room. Small increments, big change.
23. White Brick Fireplace, Wood Mantel, Row of Taper Candles
When you line candles across a mantel, measure the spacing. Seven tapers at seven inches apart on center reads as orderly; the same seven, eyeballed, will have drifted noticeably by the time you reach the end. Use a tape measure and a pencil tick, or a laser level if you own one. And match candle height to the mirror above: tapers that end just below the frame’s bottom edge make the arrangement feel deliberate instead of stacked.
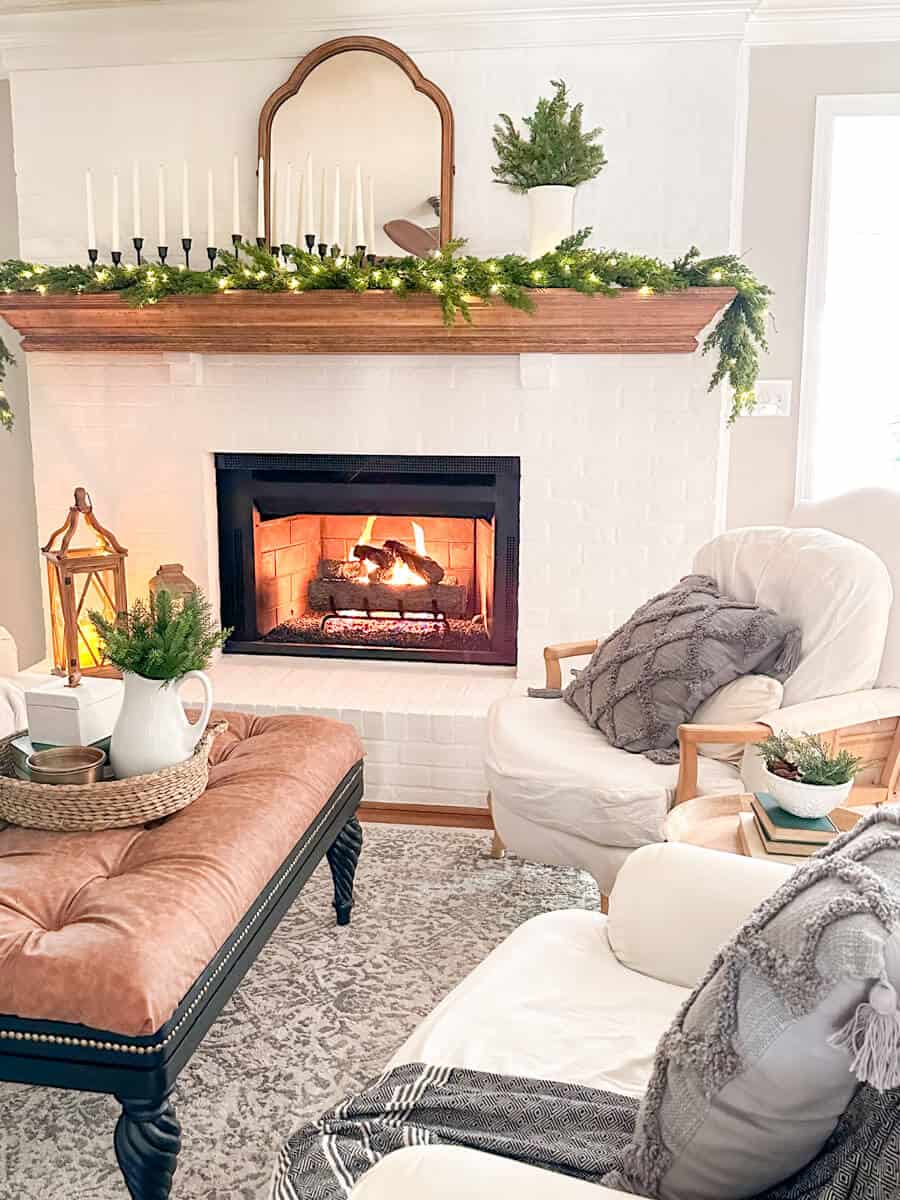
The candles are where you save. Bulk packs of ten tapers run about $12 online, and plain black holders are a dollar or two each at Dollar Tree — a full mantel row for under $25. The arched mirror is both the expensive piece and the one worth thrifting; estate sales and Facebook Marketplace turn up wood-framed arches for $30 to $60 fairly regularly. The pine garland can be boxed, as long as you fluff it twice as much as you think you need to.
24. Cedar, White Blooms, and One Slender Cream Taper
This arrangement is built for a table seating six to eight — roughly 60 to 72 inches long. Any longer and you’d need two, which starts to look like a matched set. Ceiling height matters less than you’d expect, but the taper should top out around 14 inches from the table so nobody has to lean around it. On a smaller four-seat table, scale the whole thing down by a third and drop to a single bloom. On a round table under 48 inches, skip the taper entirely and use two short pillars.
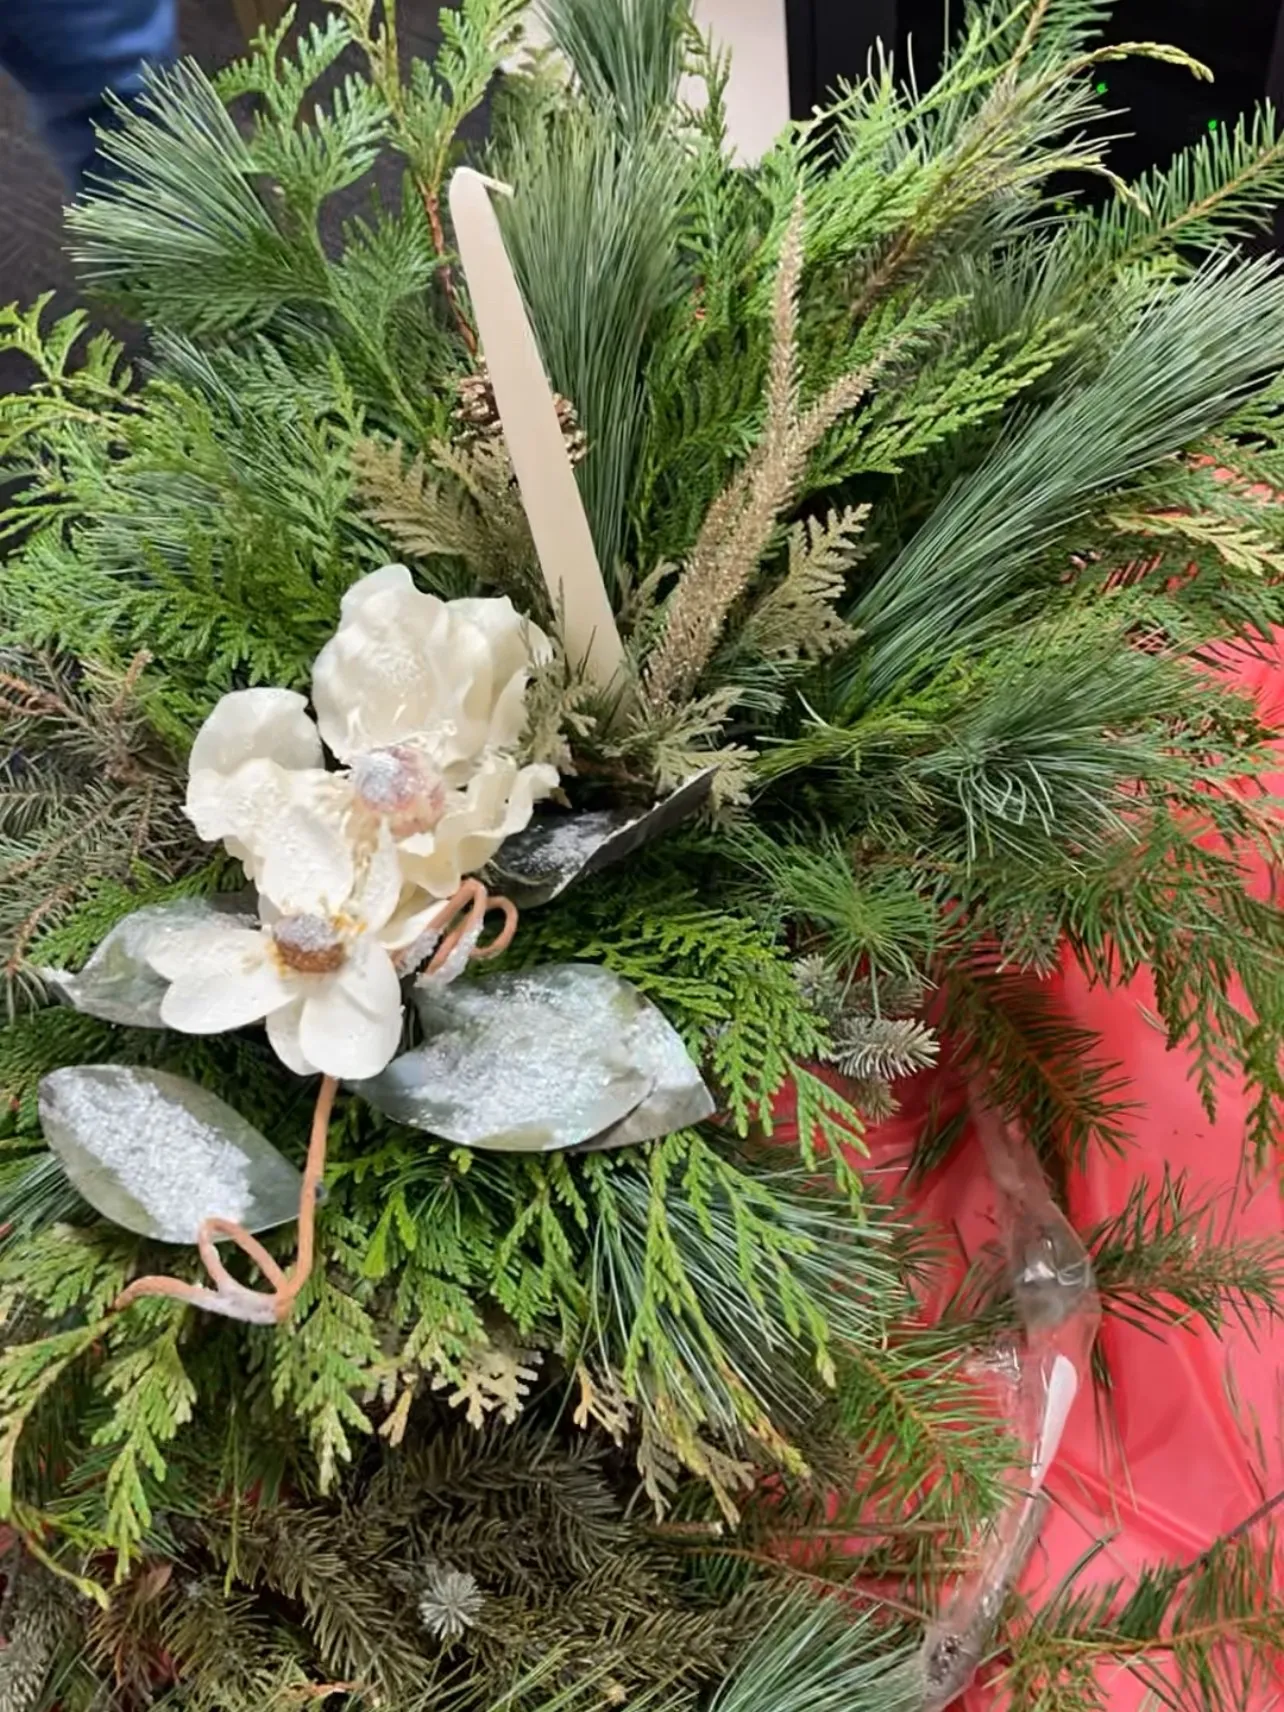
Two white blooms do an enormous amount of work in an all-green composition. They’re the only bright value in the arrangement, they sit slightly off-center so your eye travels rather than parking, and their frosted silver leaves catch candle glow at an angle fresh greenery can’t. The slender cream taper matters too — tall and thin against a wide, low mass is a classic proportion trick. Swap the blooms for red berries and this becomes an entirely different, more traditional centerpiece.
25. Twin Red Tapers Rising Out of Evergreen and Pinecones
The dark wood plank wall behind it. Take this arrangement off that wall, put it on a white tablecloth, and you lose half the drama — the deep reds and greens suddenly have nothing to push against. A dark backdrop makes the candle flames read as genuine light sources rather than decoration, and it pulls the blue-green undertones out of the foliage. If you can’t change your wall, hang a dark panel or a section of weathered fence board behind a console for the same effect.
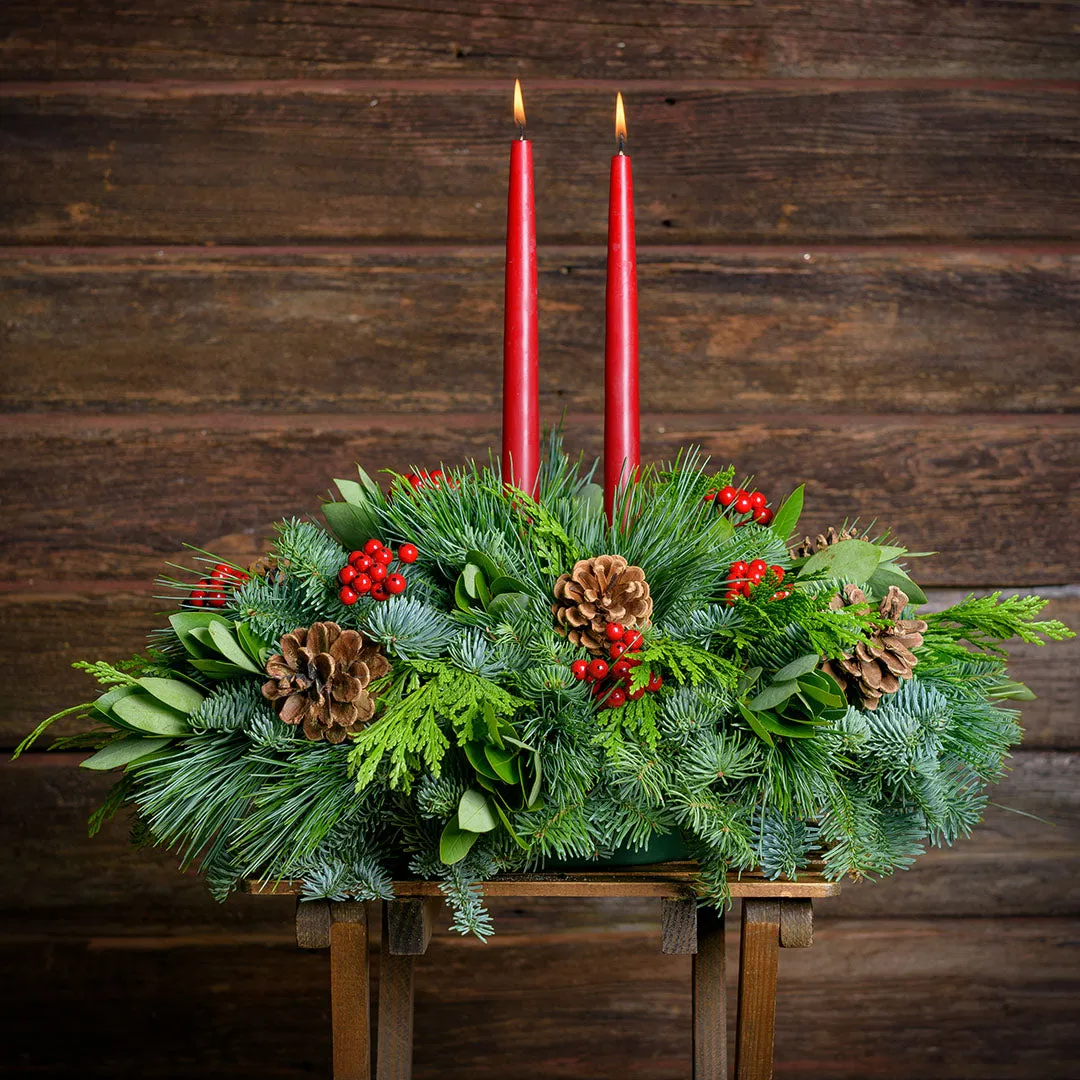
Fresh evergreen centerpieces want water every day and a misting every other. Expect a solid two weeks, then a slow decline — cut stems seal over and stop drinking. Red taper candles drip, so use holders with a drip tray or you’ll be scraping wax off wood with a credit card at midnight. Real berries stain fabric permanently; faux berry clusters solve that in about ten seconds and nobody will ever know.
26. Carved Wood Mantel With Red Beaded Garland and Brass Candlesticks
The red beaded garland is the signature move, and you can string your own from Dollar Tree wooden beads and red craft paint for about $8 — roughly a third of what a pre-strung version costs. Brass candlesticks turn up at thrift stores constantly for $3 to $6 each, and a quick rub with brass polish makes them look like heirlooms. The mottled red glass vase is the hardest piece to fake, but honestly any red vessel holding bare twigs reads the same from across the room.
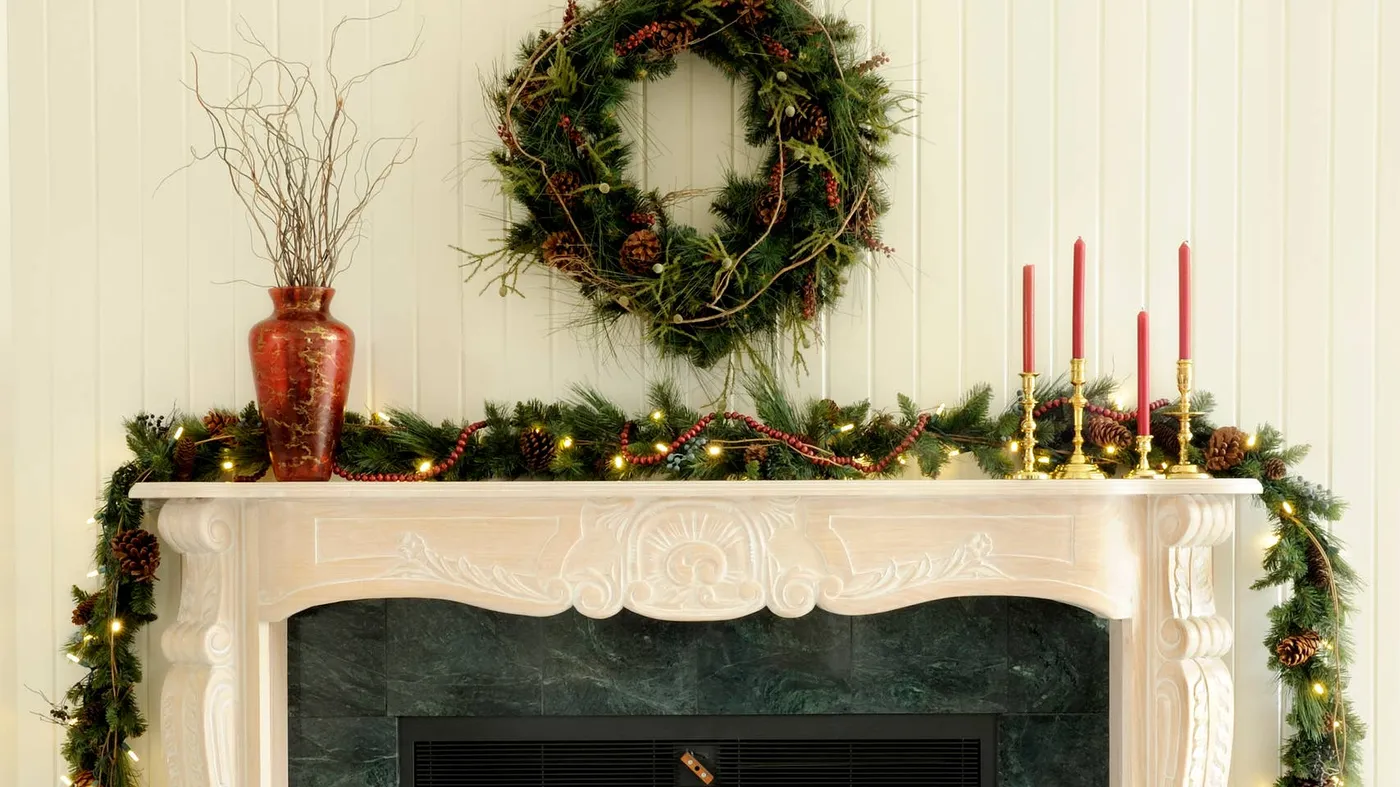
Layer three garlands instead of one: thick base greens, a wispy pine over the top, and the red beaded strand woven through last. Working back to front in that order is what creates depth — string the beads under the greens and you’ll never see them. Use small zip ties in green or brown and clip the tails flush. Then drape the whole thing asymmetrically, about a foot heavier on one side. Perfectly even swags look like a store display, and not in a good way.
27. Stacked Vintage Glass Dishes Glowing From Inside
These towers are the one idea on this list that actually wants to be outside — a porch corner, a covered entry, a balcony. Build them at least 24 inches tall so they register from the sidewalk, and no more than 48, or they’ll wobble in the wind. Indoors they work on a wide console or a stair landing with 18 inches of clear height above. Pair them with the warm interior glow of Idea #23 and keep everything on the same warm-white bulb temperature — mixing warm and cool is the fastest way to make DIY decor look cheap.
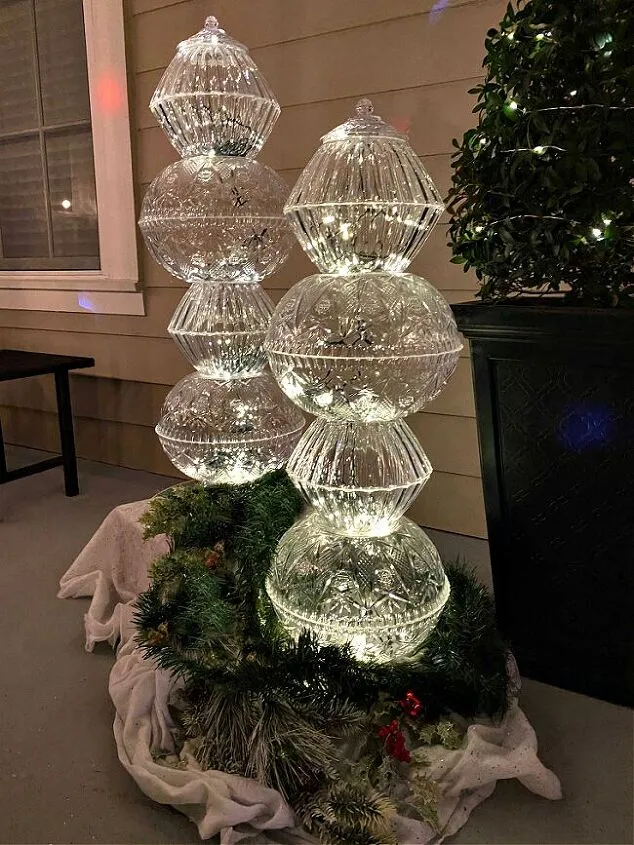
- Start with the widest, heaviest dish or platter as your base.
- Run a short strand of warm fairy lights into each piece before stacking it.
- Secure every layer with a ring of clear museum putty.
- Hide the battery pack behind the bottom dish under fabric or greens.
- Wobble-test the whole tower before you fill it with anything.
Thirty to forty minutes of work, and $15 to $30 if you thrift the glassware.
28. A Flocked Tree Full of Letters to Santa and Striped Ribbon
Two things to know before you commit. First, flocking sheds — vacuum under the tree weekly, and never vacuum the branches themselves or you’ll strip them bald. Second, if you have pets, that fake snow is not edible and cats find flocked branches unusually appealing. On the letter props: paper ornaments hold up fine in a dry house, but don’t hang them near a heat vent or they’ll curl by mid-December. Print on heavier cardstock and skip the laminating.
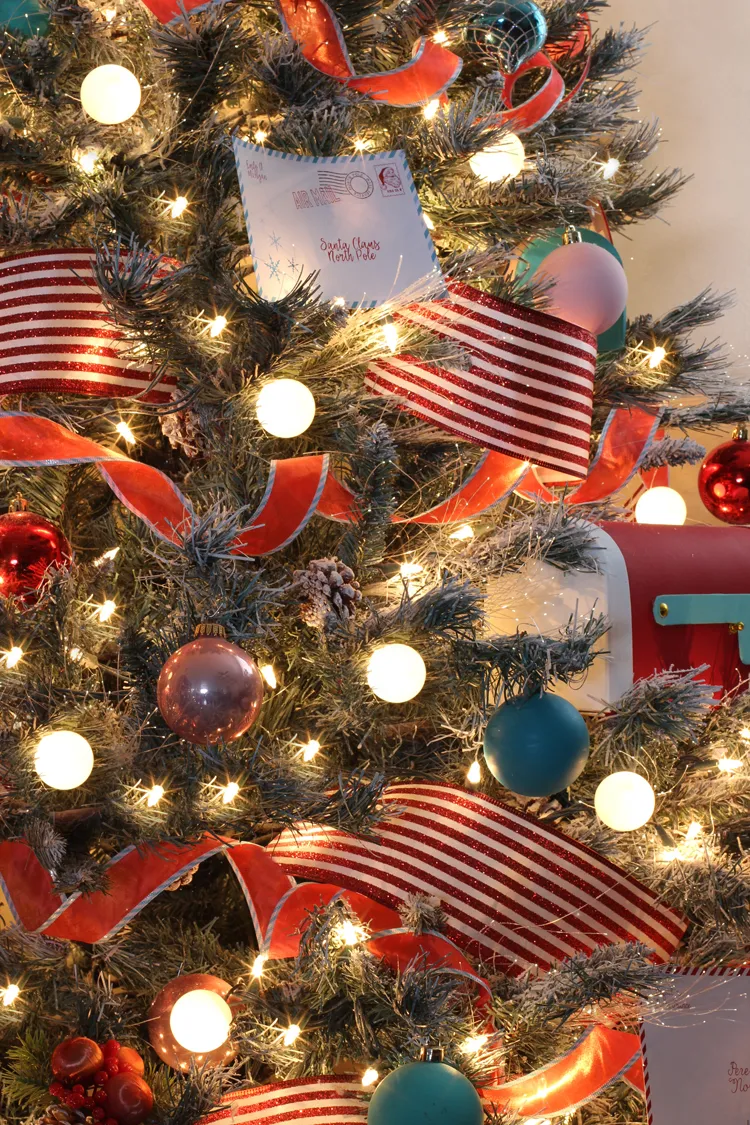
Strip the tree down and the formula is roughly 45 percent white flocking, 25 percent pink, 20 percent teal, and 10 percent red-and-white stripe. The flock is the neutral here — without it, pink and teal would fight each other all season. The striped ribbon is the only pattern in the room and it appears just three or four times, which is why the tree reads whimsical instead of cluttered. Want it less sweet? Push teal to 35 percent and pink down to 10. Same tree, entirely different personality.
29. A Tabletop Tree Full of Fresh Red Roses and Silver Baubles
Fresh flowers on a tree is a lovely idea with a short shelf life — roses go over in about four days in a warm room. A convincing alternative: buy one large grocery-store bouquet of red roses for $12 to $18, pull the blooms, and wire them into water picks so they last a full week. Carnations are cheaper and hold twice as long if you’re not precious about the flower. Silver baubles are a Dollar Tree staple, and a thrifted silver bowl polished up costs about $5.
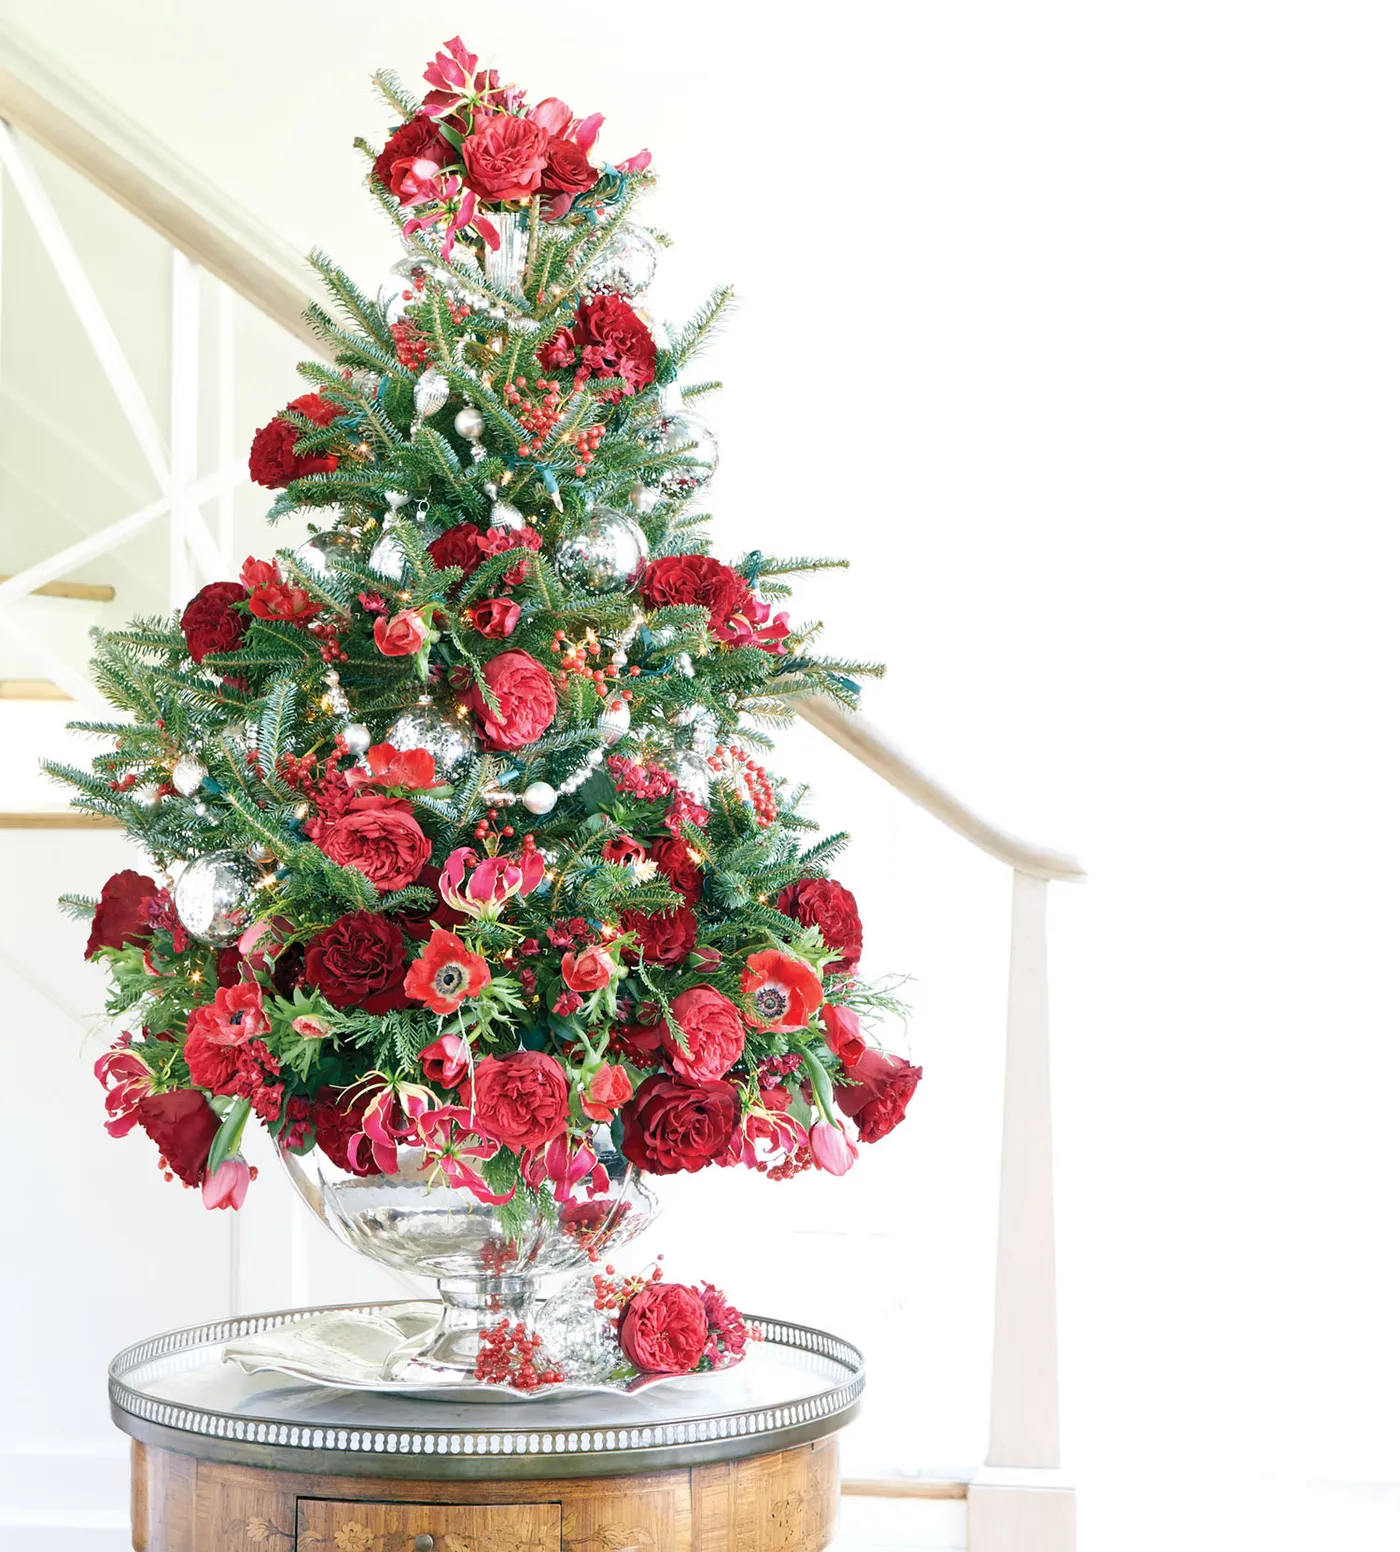
A tree this size — around three feet in a pedestal bowl — fits a round side table 20 to 24 inches across and needs 18 inches of clear height above it. That’s the right scale for a hallway console, a bathroom vanity, or a bedside table in a small apartment. Working with a bigger room? Group three of them at staggered heights rather than buying one enormous tree, because a single oversized version just reads like a regular Christmas tree that ran out of ornaments.
30. Red Fabric Stockings With Reindeer Print and Plush Cuffs
Red printed cotton is one of the more forgiving holiday fabrics — machine washable cold, tumble low, and it doesn’t shed the way felt or knit does. The plush cuff is the fragile part. It pills after a few seasons and picks up every stray bit of tinsel in the house. Wash stockings inside a pillowcase to protect the cuffs and button details, and hand-sew any loose button the moment you notice it. A missing button on a handmade stocking is far more obvious than on a store-bought pair.
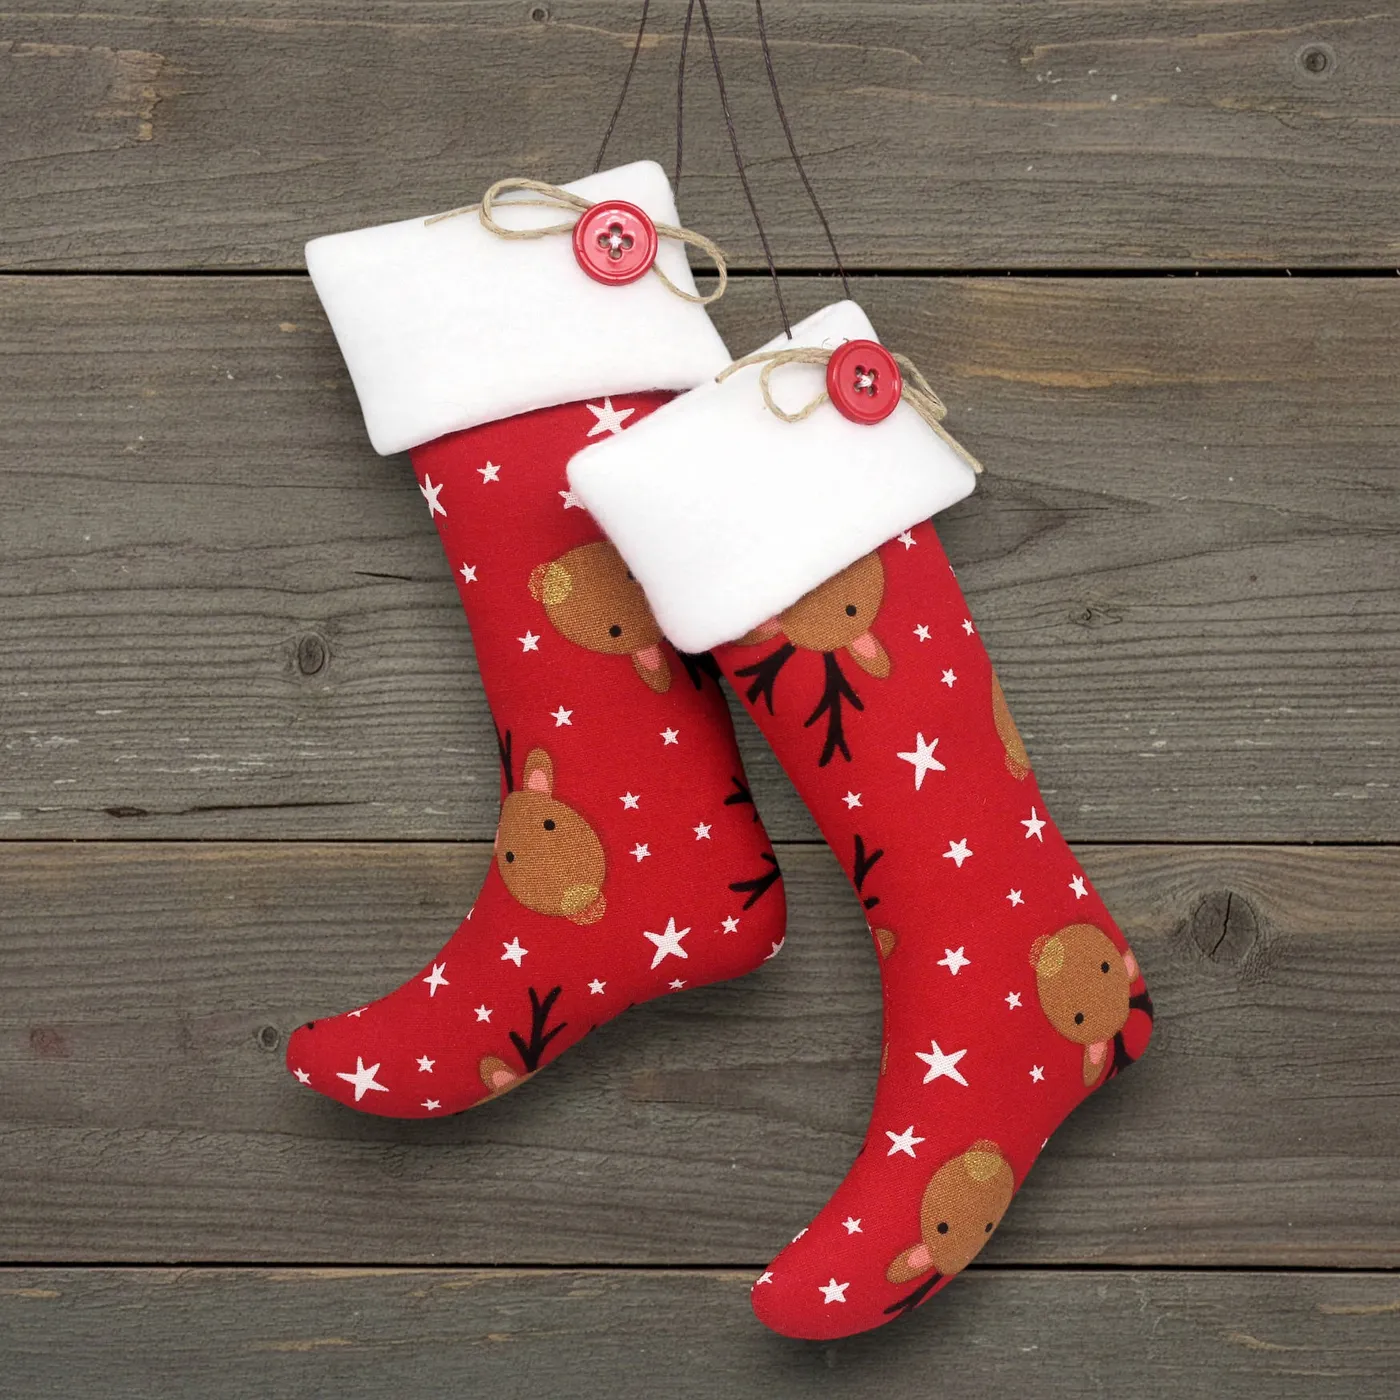
The button. One red button tied on with twine, sitting right where the cuff meets the body of the stocking. It costs about fifteen cents and does the job of a designer label: it tells your eye that a person made this, not a four-pack. That’s also why the printed reindeer and star pattern matters — it looks like fabric someone chose, not a graphic someone downloaded. Two small details, and the whole thing reads handmade in the best possible way.
Pick Three Ideas, Not Thirty
Start with the project that takes twenty minutes, not the one that eats a weekend — momentum matters more than ambition when the calendar is already full. Shop your house first, buy only what you genuinely can’t fake, and let the rest of the room breathe. 📌 Save this to Pinterest so next December you’re not starting from zero.