You know that feeling when you spot a tiny green felt tree on a wooden tray and suddenly the whole holiday season feels manageable? That’s the quiet magic of felt Christmas trees in 2026 — they’re soft, they survive toddlers, and they forgive a less-than-perfect mantel.
We dug through hundreds of listings and handmade photos across Etsy, Target, and Walmart to narrow this down to 31 ideas that actually earn their shelf space, from about $6 for a single ornament to $85 for a full display set. Inside you’ll find cream-and-gold scallop trees, teal layered cones, embroidered sheep, one extremely confident felt alligator, and a felt ball tree that looks like it cost three times what it did. And stay until the end — we break down the most common mistakes that can ruin these looks. 📌 Save this to Pinterest for later — you’ll want to revisit these ideas.
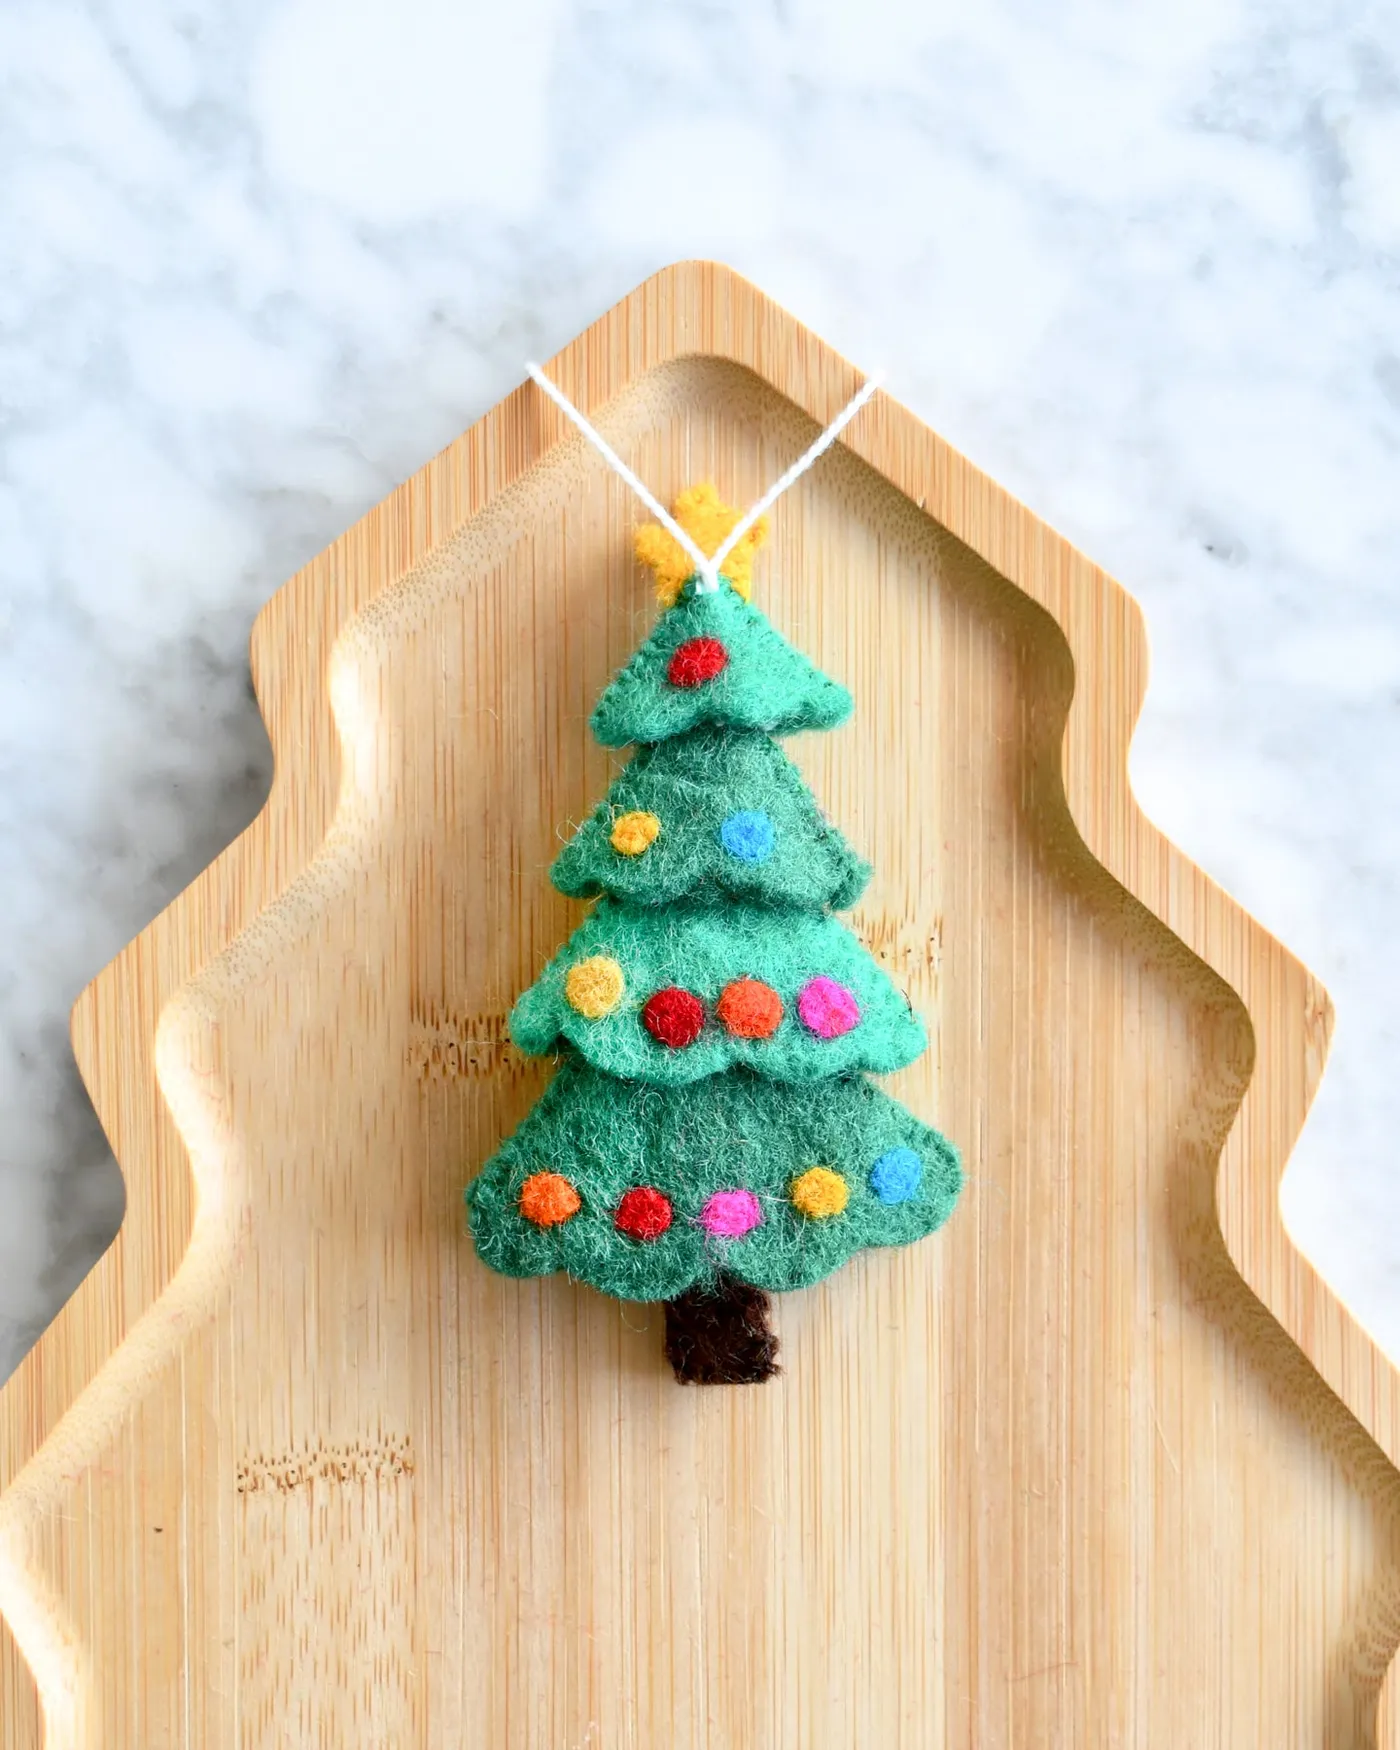
1. One Felt Tree Ornament, One Wooden Tray, Zero Clutter
Take away the little tree-shaped wooden tray and you’re left with a green felt ornament sitting on marble — charming for about four seconds. The tray is the whole trick. Its light brown grain warms up the forest green, its silhouette echoes the ornament so the eye reads one shape instead of two, and it quietly corrals the composition so nothing drifts. Lay the ornament slightly off-center, let the yellow star sit just above the tray’s notch, and you’ve got a five-minute styling moment that looks genuinely considered.
Here’s the measurement trick: leave at least a third of the tray empty. On a tray this size — roughly eight inches across — the ornament owns one side and negative space owns the rest. Scale up to a console and the math holds: a 24-inch tray gets a cluster of three, never five. Bare wood is doing the same job as the felt. Shoot it straight down from about 18 inches and the white-and-grey marble hands you a free, bright backdrop.
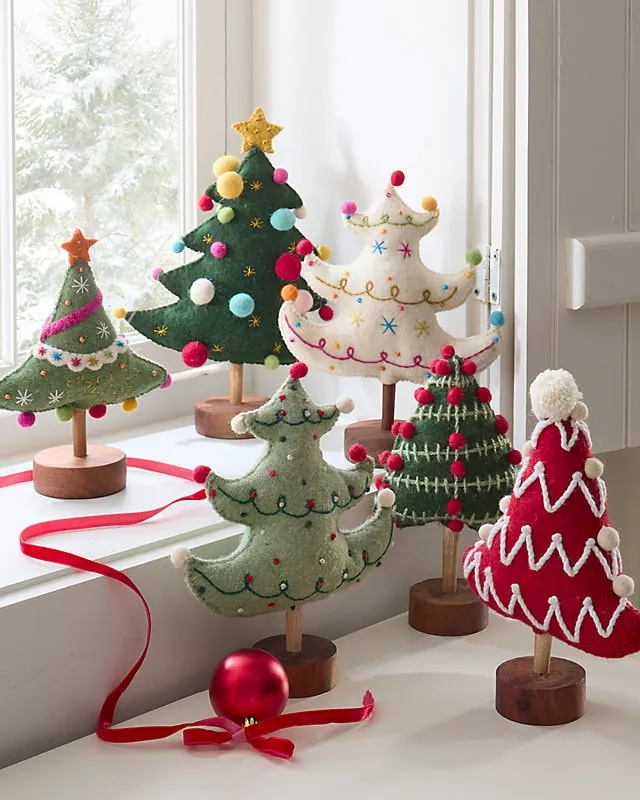
2. Six Pom-Pom Felt Trees Lined Up on a Windowsill
Six handcrafted trees, six round wooden bases, one white windowsill. Here’s roughly what it takes to build the whole lineup yourself:
- Felt trees in mixed sizes (6): $30–$72
- Round wood bases or slices: $8–$18
- Pom-poms, embroidery floss, star toppers: $10–$20
- Red satin ribbon and matte red ornament: $6–$14
- Stuffing, thread, fabric glue: $5–$10
Total: $59–$134 as a full handmade set, or about $24 if you buy plain felt trees and skip the wooden bases entirely.
Windowsills are gorgeous and also brutal. That pale green felt will fade unevenly on whichever side faces the glass, and winter condensation does quiet damage to wool blends. Rotate each tree a quarter turn every six to eight weeks and keep them three inches back from the pane. If the sill gets direct afternoon sun, move your favorites to a shelf by February and let the cheap ones take the hit.
3. Cream Scallop-Layer Felt Trees with Gold Bead Details
The formula here is 70% cream felt + 20% warm neutral (that light textured fabric and the off-white wall) + 10% gold. That last 10% is doing all the heavy lifting: a few beads on the larger tree, embroidered gold stars on the smaller one, and four shiny spheres scattered at the bases so the metallic repeats at floor level. Swap the gold for matte copper and the whole thing relaxes into rustic. Swap it for black beads and you get something almost modern.
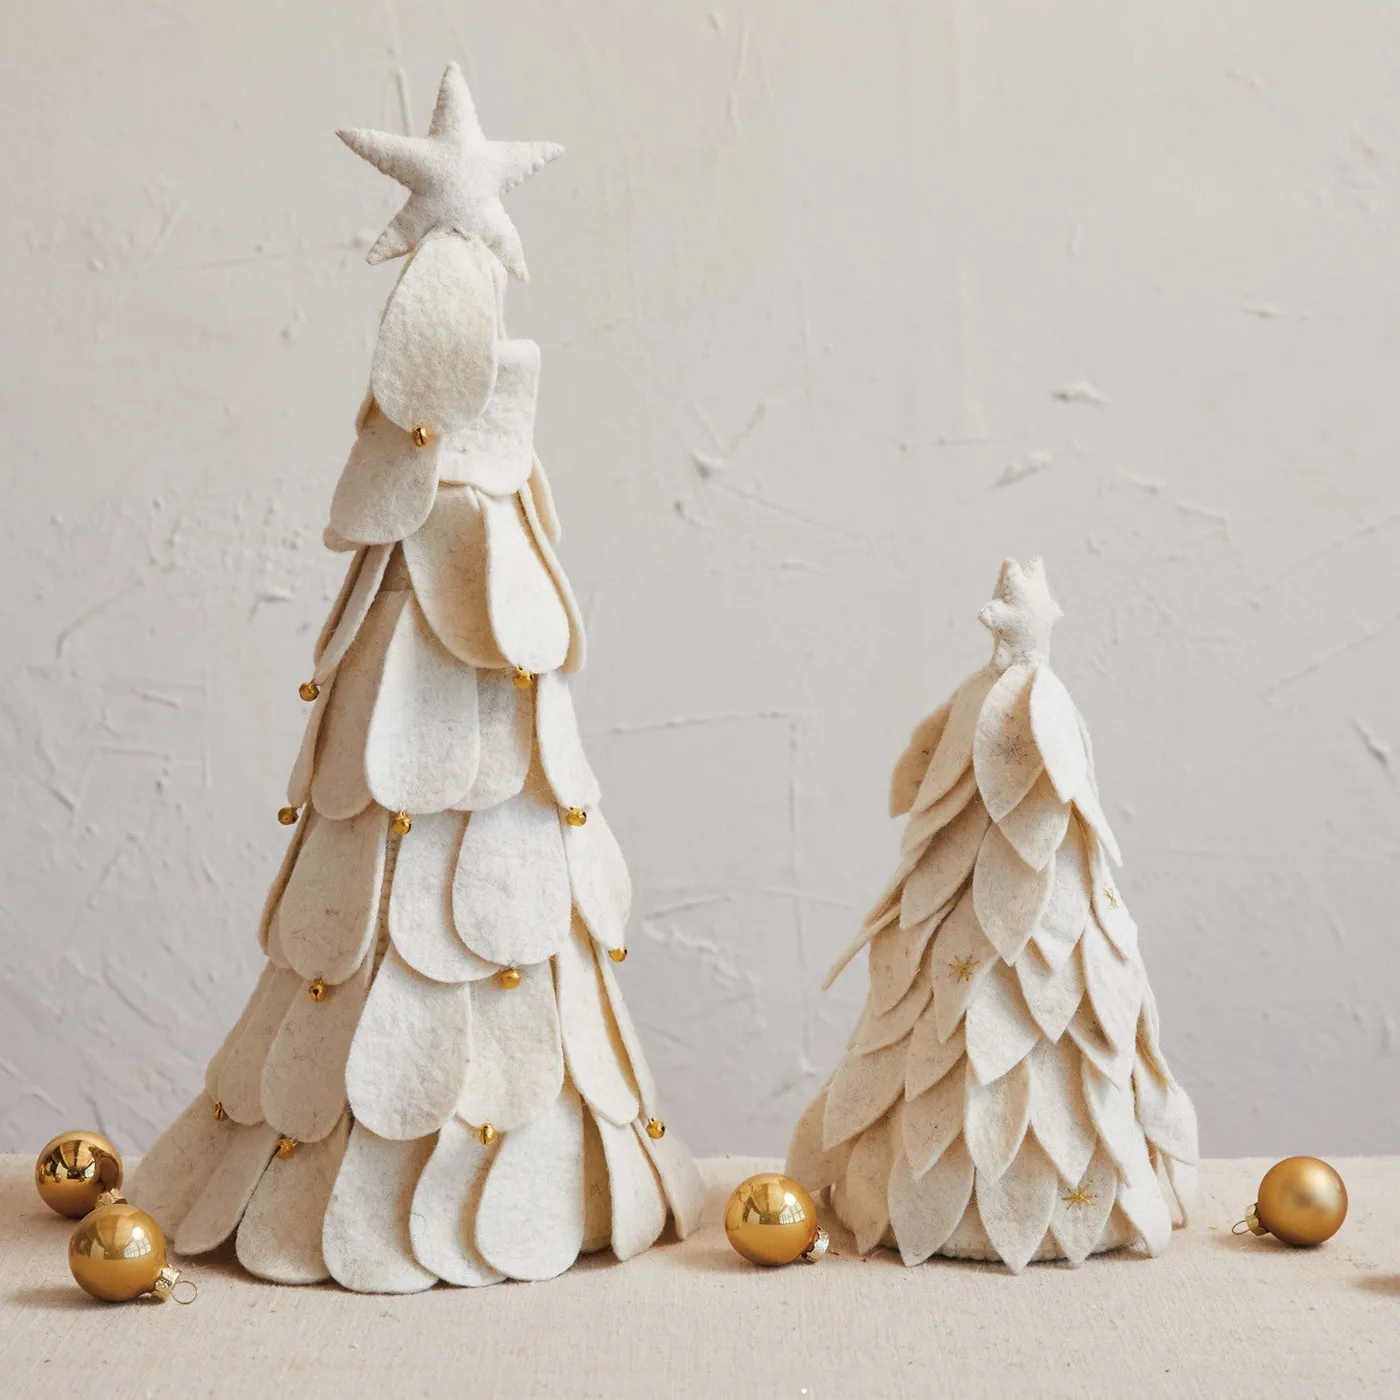
This pair wants a narrow stage. It reads best on a console or sill at least 30 inches wide with about 10 inches of headroom above the taller tree, and the two sizes should relate at roughly a 1:1.5 height ratio — 9 inches next to 13 or 14. Anything closer to equal looks like a matching set, which is not the point. On a deep mantel you can add a third, but only if it drops the height again. Compare with Idea #6, which runs the exact same layering logic in a much bolder palette.
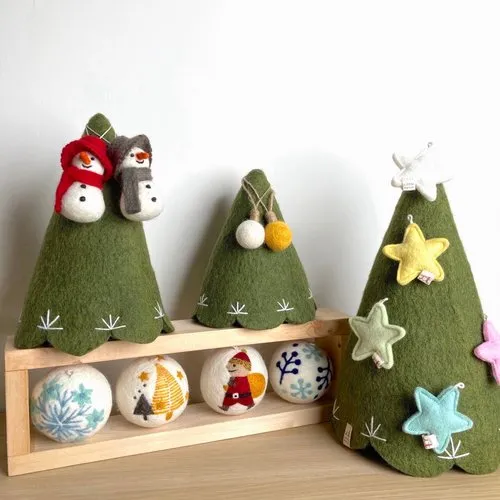
4. Dark Green Cone Trees with Stitched Snowman Friends
The detail that makes these three cones look store-bought is the white stitched scalloped base ring. You can fake it in about 25 minutes for under $5 in materials:
- Cut a felt strip 1.5 inches wide and long enough to circle your cone’s base, plus half an inch of overlap.
- Fold it in half lengthwise and press the crease with your fingers.
- Snip half-inch half-circles along the folded edge to create the scallop.
- Blanket stitch along the scallop edge in white floss — big, loose stitches, roughly four per scallop.
- Wrap the strip around the base and hot-glue the overlap at the back.
- Finish with a tiny felt star or snowman tucked just above the ring.
There are three separate reasons this display works, and they’re worth stealing individually. First, repetition: three identical cone shapes read as a collection, not clutter. Second, contrast of finish — matte dark green felt against crisp white stitching gives the eye something to hold onto. Third, the light wood display rack underneath carries four white felted sphere ornaments with embroidered holiday designs, which pulls the whole arrangement up off the table so it doesn’t look like three objects dropped on a surface.
5. The Felt Wall Tree That Lives Above a Toy Basket
a felt wall tree with felt ornaments and a strand of warm white fairy lights is the single most kid-friendly holiday decoration you can hang — and the most tempting to install badly. Skip the damage-free strips for anything heavier than the tree itself; they fail in cold rooms and take paint with them. Anchoring into a stud or using proper wall anchors takes ten extra minutes and saves you a repair in January. Also check that your fairy lights are battery-powered with the pack mounted off the floor, because a curious two-year-old will find a dangling cord.
You do not need a boutique version. Here’s the honest shopping list:
- Felt wall tree with hook-and-loop ornaments: $25–$45 (Amazon, Walmart)
- Battery fairy lights, warm white: $8–$12 (Target)
- Cube storage or low shelf underneath: $35–$60 (IKEA Kallax)
- Toy basket with fabric liner: $12–$20
That’s a complete, functional holiday corner for under $100 — and the basket hides the mess that the tree inevitably inspires. If you want the ornament-only version instead, see Idea #18.
6. Teal and White Layered Trees with Red-and-Blue Felt Balls
If you’re building the scalloped layers yourself, cut each tier about 20% narrower than the one below it and stagger the scallop patterns so they don’t line up. Misaligned scallops read as handmade; perfectly stacked ones read as manufactured. Pin each layer to the cone form with two straight pins before you glue, and work top to bottom so you can still reach in.
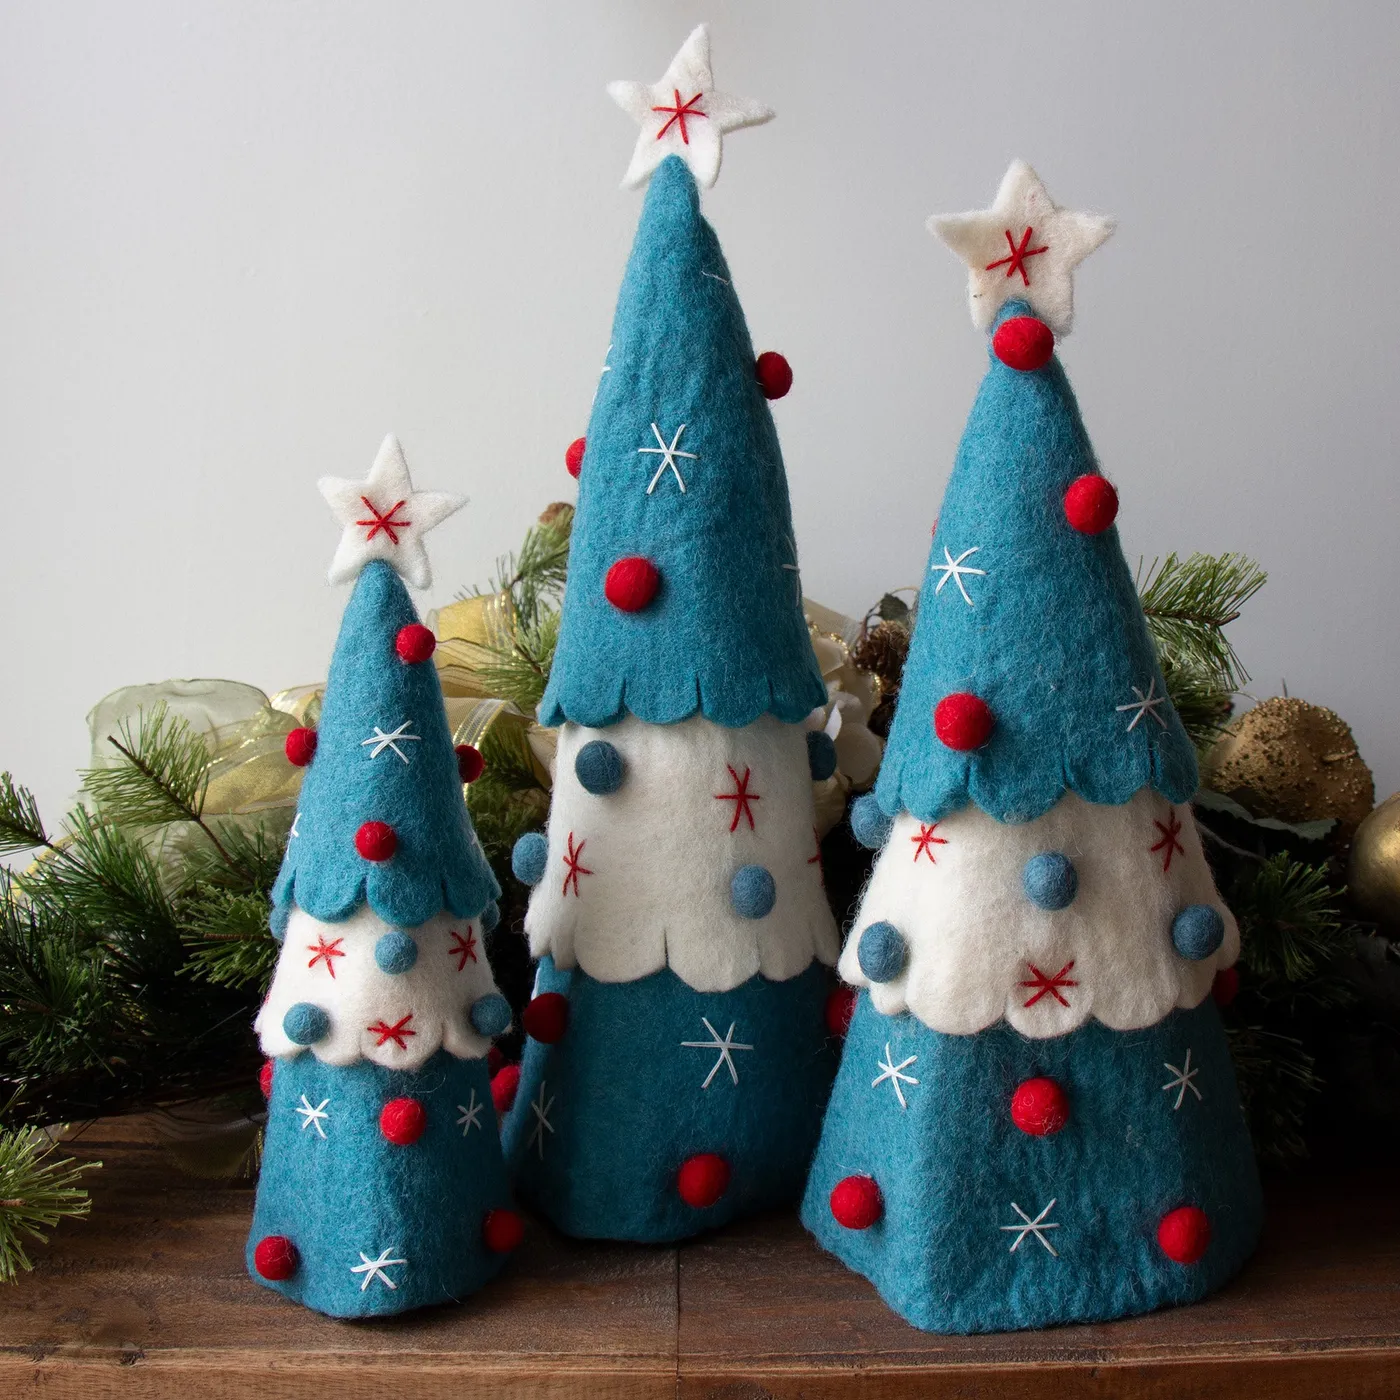
The color math underneath this trio is 50% teal, 25% white, 15% red and blue accents, 10% gold from the garland. That teal-and-white base is doing something specific: it’s a cool palette, which is why the warm gold ornaments in the garland behind them feel like a relief rather than a clash. Change the ratio and the mood shifts hard — 70% teal with just a whisper of white goes moody and coastal, while a 50/50 split reads candy-shop bright. The embroidered white and red stars are the tiebreaker; they repeat the cream of the felt without adding a fourth color.
7. Dark Green and Grey Felt Trees with a Glitter Star Finish
Two trees, one dark green and one light grey, both sitting on plain natural wood bases — and the grey one wins. That fuzzy light grey insert tucked into the darker silhouette gives the pair a tonal shift without introducing another color, which is why it photographs so well against warm string lights and a pinecone-and-berry garland. The glitter star toppers are the only sparkle in the frame, so they land with real weight. Remove them and you have two nice felt cones. Keep them and the composition has a top.
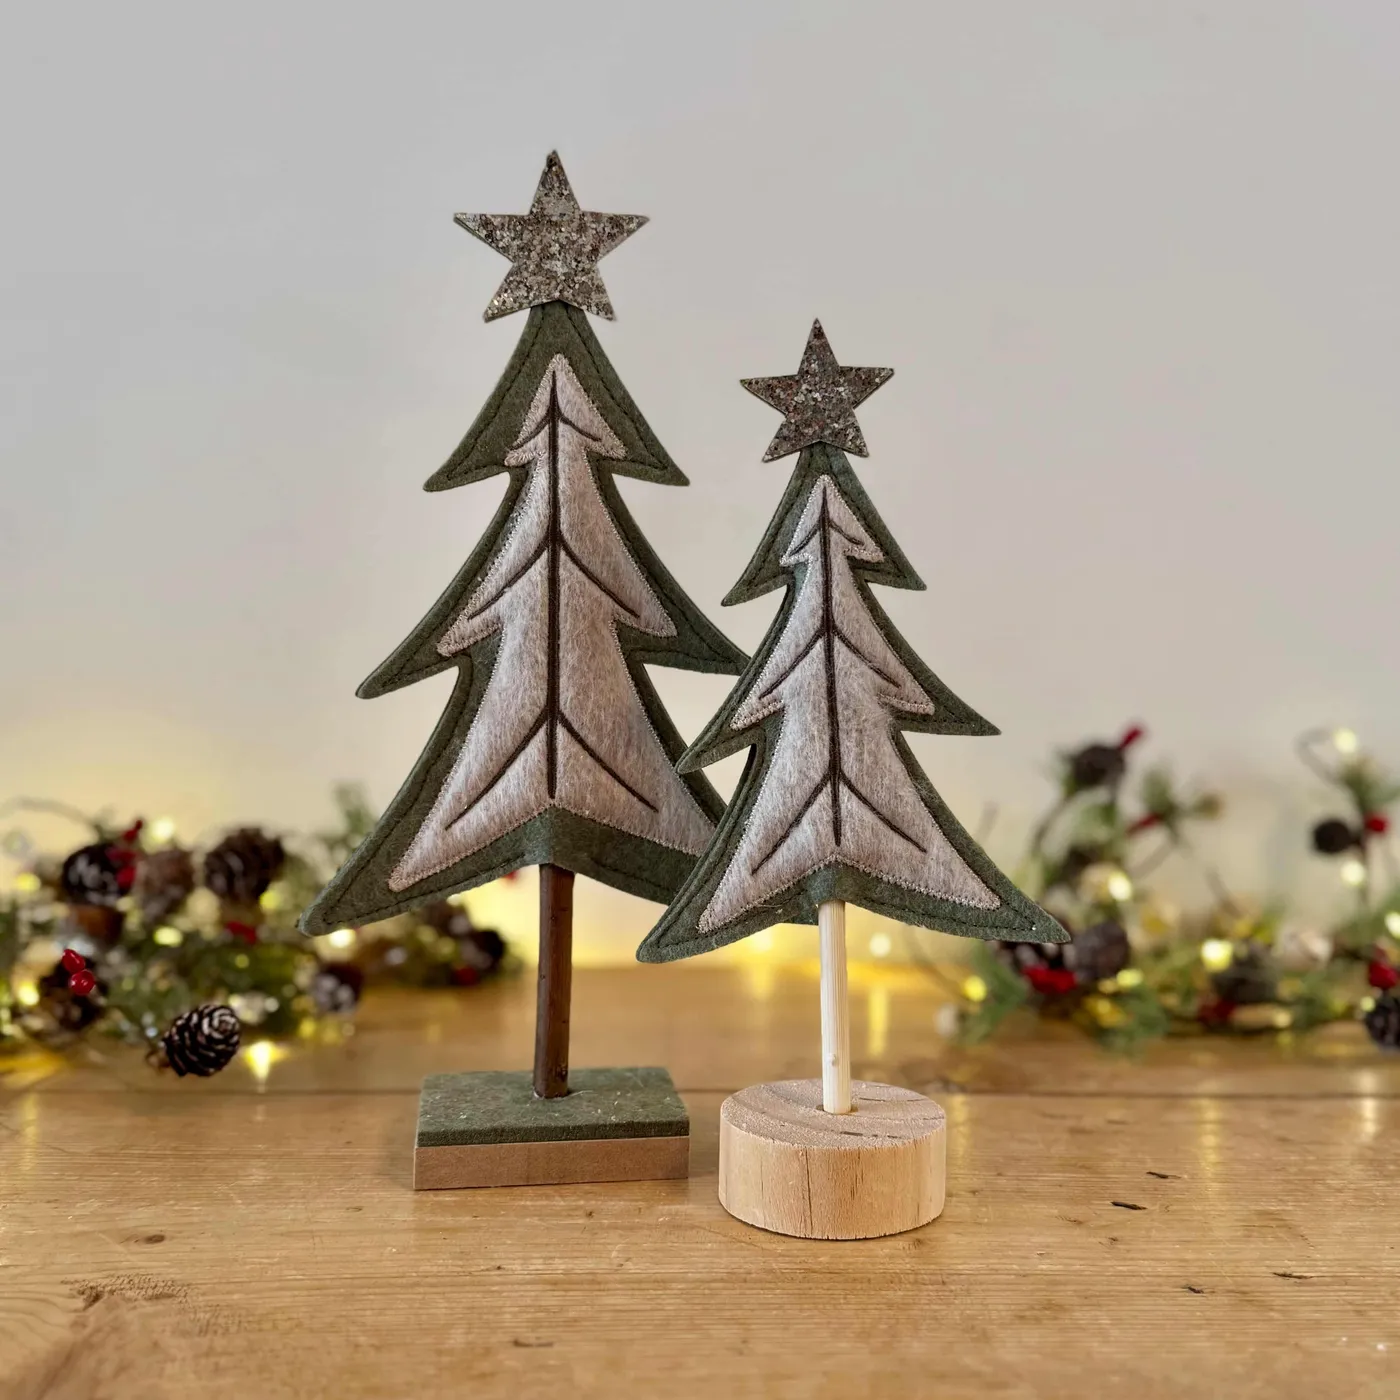
This is a forgiving setup for small spaces. It works on anything from a 24-inch entry console to a deep windowsill, and it needs only about 12 inches of vertical clearance above the taller tree once the star is on. Ceiling height doesn’t matter here at all — this is tabletop scale. If your space runs larger, repeat the pair at both ends of a sideboard rather than sizing up the trees; oversized felt cones start looking like craft-fair inventory. For a similar two-tree balance in a lighter palette, look at Idea #3.
8. The Candy-Cane Piped Felt Flower Ornament
Those red-and-white striped petals aren’t painted — they’re a piping technique, and you can replicate it with a single length of striped ribbon or a rolled strip of striped cotton. Fold the strip in half lengthwise, sew or glue it along the petal edge with the raw edges hidden inside, then turn it right side out. It gives you a crisp candy-cane border on green felt without a single embroidery stitch, and it holds up better than painted edges on a decoration that gets handled every December.
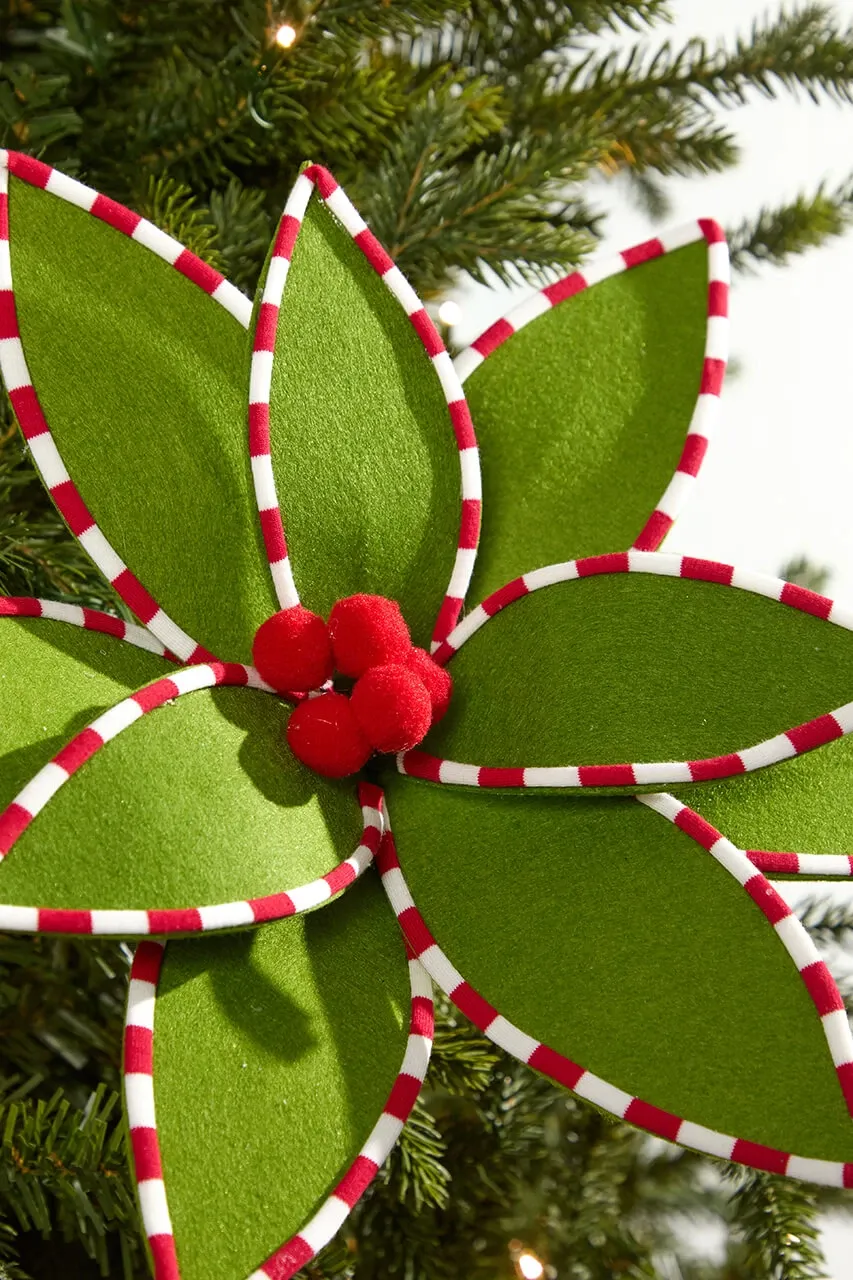
that makes this ornament memorable is the cluster of small red pom-poms in its center. Not the stripes, not the flower shape — the pom-poms. They give the piece a focal point and a bit of physical depth, so it doesn’t flatten into a green blob when it’s hanging against green needles. Without them, the striped piping reads as a border. With them, the whole ornament reads as a face. Keep the cluster tight, five or six of them at most, and push them slightly proud of the felt surface.
9. A Bright Pink Ruched Tree on a Simple White Base
This is a small piece with a very low cost ceiling, which is exactly why it works as a test run before you commit to a full shelf:
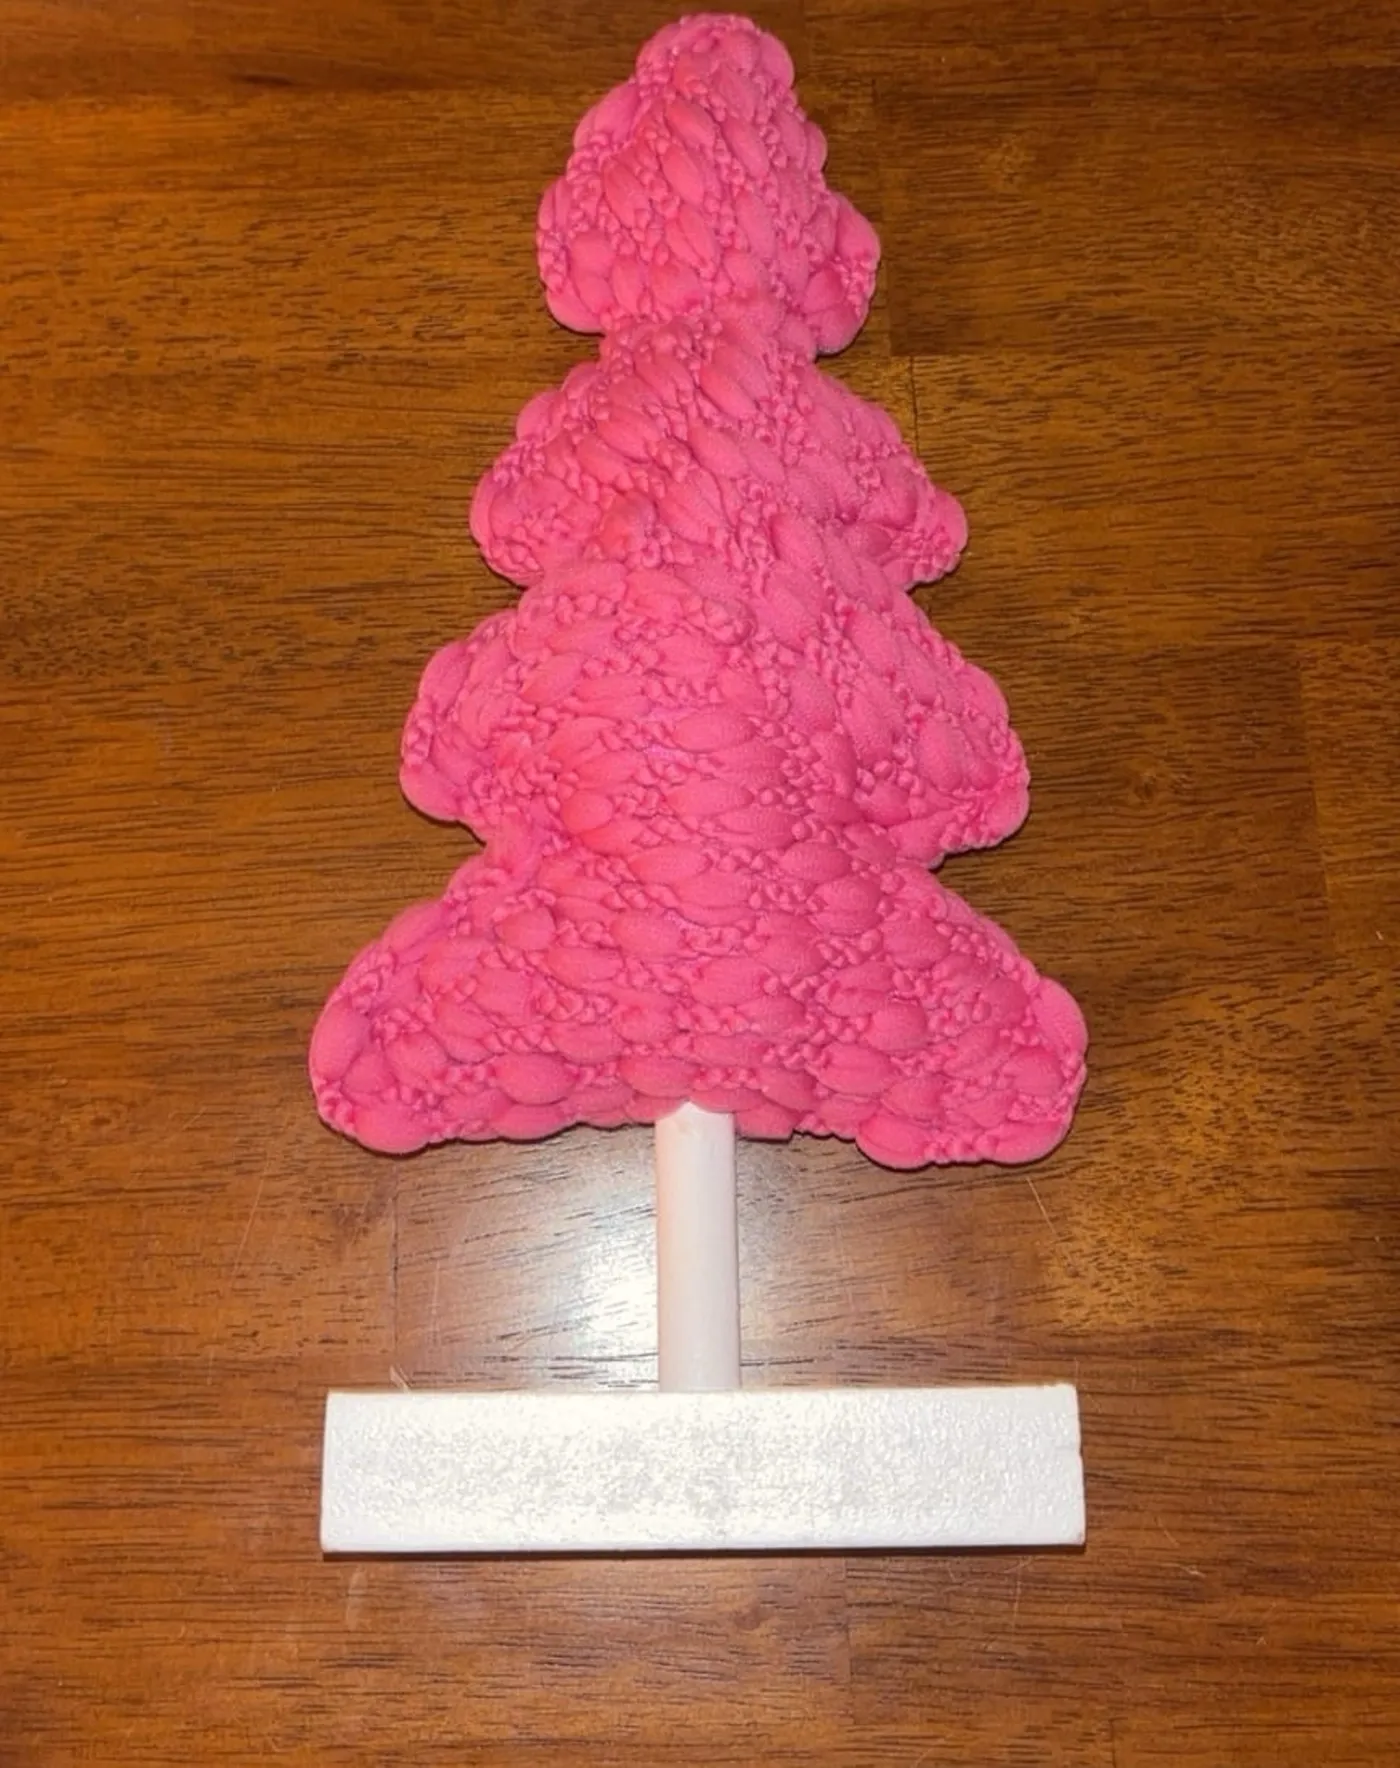
- Textured ruched tree form: $12–$28
- Wooden dowel or light cylindrical stem: $2–$5
- White rectangular base or wood block: $3–$8
- Paint for the base: $5–$9
Total: $22–$50, or under $15 if you build the tree from gathered felt on a foam cone — about 40 minutes of work and a hot glue gun.
Saturated single-color decor has been climbing on Pinterest for a couple of years now, and pink specifically has moved from novelty to mainstream in holiday styling. What makes it stick is how well it plays against wood tones — that warm grain underneath the bright pink softens what could otherwise read as a party supply. My honest read: this trend has another three or four seasons in it, and it photographs beautifully, so it’s a low-risk place to be a little loud.
10. Horse, Nutcracker, Bird: Embroidered Ornaments on a Branch
Hanging ornaments from a bare evergreen branch instead of a tree is a cheap, high-impact styling move — and it takes about 20 minutes to do properly:
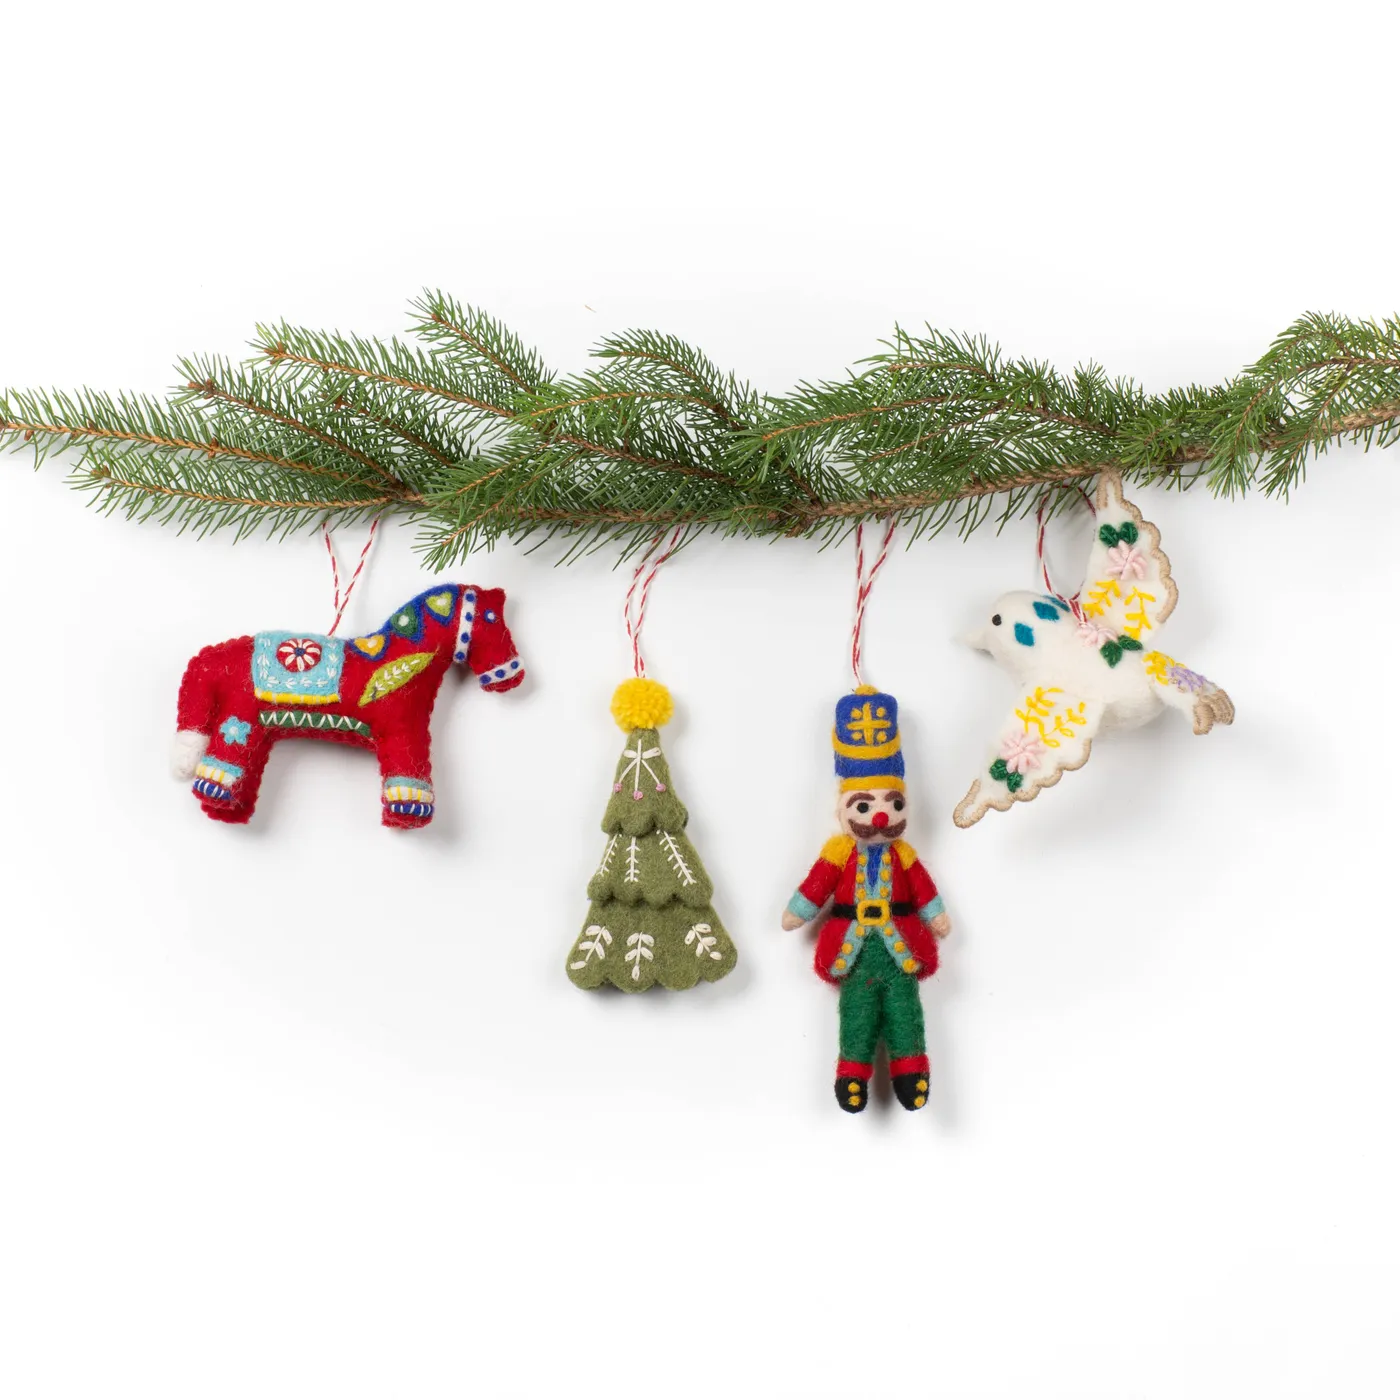
- Choose a branch with a natural fork so it can lean against a wall without rolling.
- Trim the back half of the needles so it sits flat against the surface.
- Set the branch on two small adhesive hooks or a simple wooden bracket.
- Hang ornaments at staggered heights, keeping at least two inches between them.
- Use narrow red-and-white striped string so the hangers themselves become part of the design.
Two warnings, both learned the hard way. Fresh branches drop needles for a week, so either seal them with a matte spray or accept the mess. And a top-heavy branch with four ornaments will tip — put the heaviest piece closest to the fork. If you’re hanging these near a heat vent, expect the felt to soften slightly; move the display before anything sags.
11. The Felt Alligator in a Santa Hat Nobody Expects
Novelty ornaments need a ratio, and the ratio is one weird one per eight to ten classic pieces. This olive green alligator in a miniature red Santa hat — complete with tiny green bead eyes and a white pom-pom trim — is the correct amount of strange when it’s surrounded by plain baubles and gold spheres. Put three novelty ornaments next to each other and the joke collapses. Also give it breathing room: a novelty piece on a bright white reflective surface with just a blurred red ribbon and a gold ornament nearby reads as a deliberate visual gag rather than clutter.
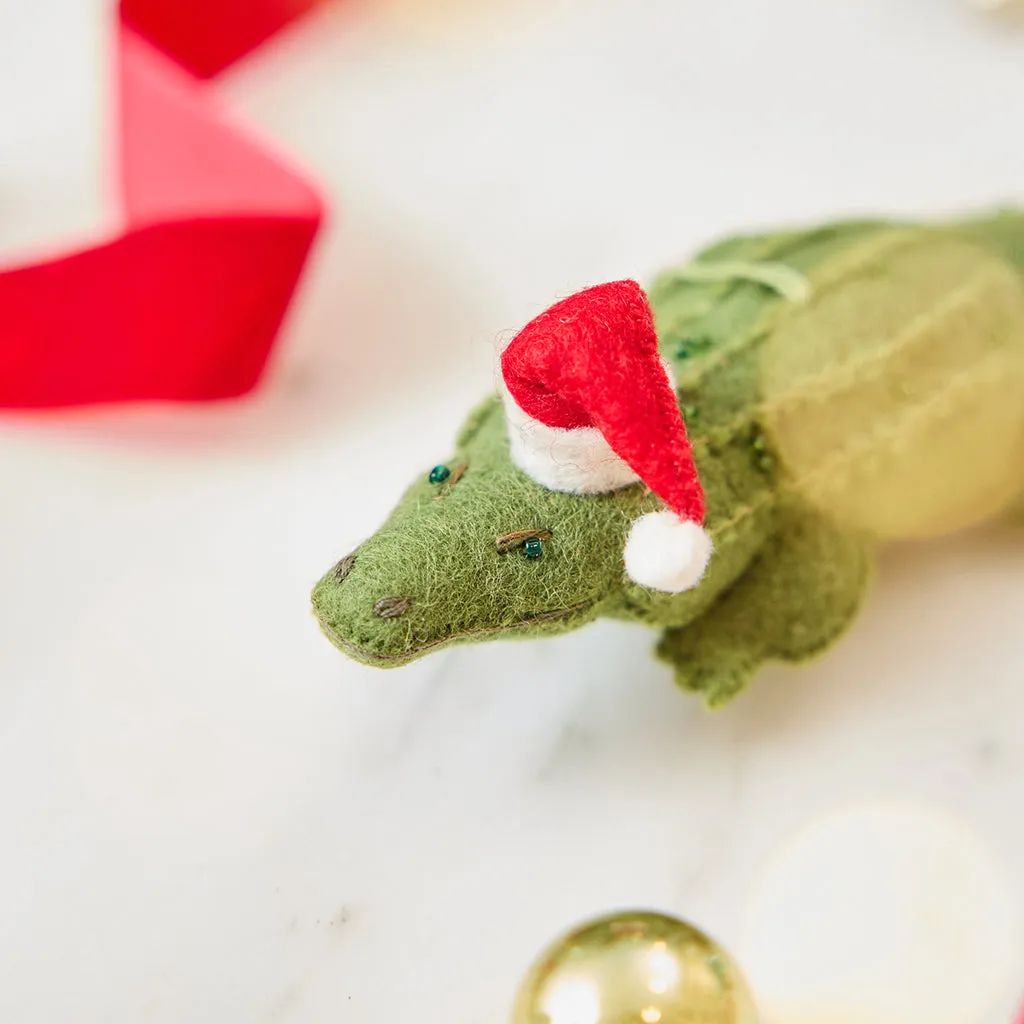
Making this yourself is genuinely cheap. Two 9×12 felt sheets in olive and red run about $2, white fluff for the hat trim is another $2, and a bag of small beads for the eyes is $4 and will last you years. Total materials: under $10, versus $18–$30 for a comparable handmade piece on Etsy. The trade-off is time — roughly 90 minutes if you’re comfortable with a blanket stitch, closer to three hours if you’re not. Start with a simple silhouette and let the hat do the personality work.
12. Red Felt Ornaments with White Snowflake Stitching
Three shapes — heart, star, circle — in deep red felt, each with white hand-stitched snowflakes and a blanket-stitched border. The design principle at play is restraint: one color, one thread, three silhouettes. Because the shapes vary so much, the eye never gets bored, and because the palette never changes, the set looks like it came from one maker’s hand. Lay them on dark green evergreen branches and the red does all the popping without any help. It’s the same discipline as the ornaments in Idea #10, just quieter.
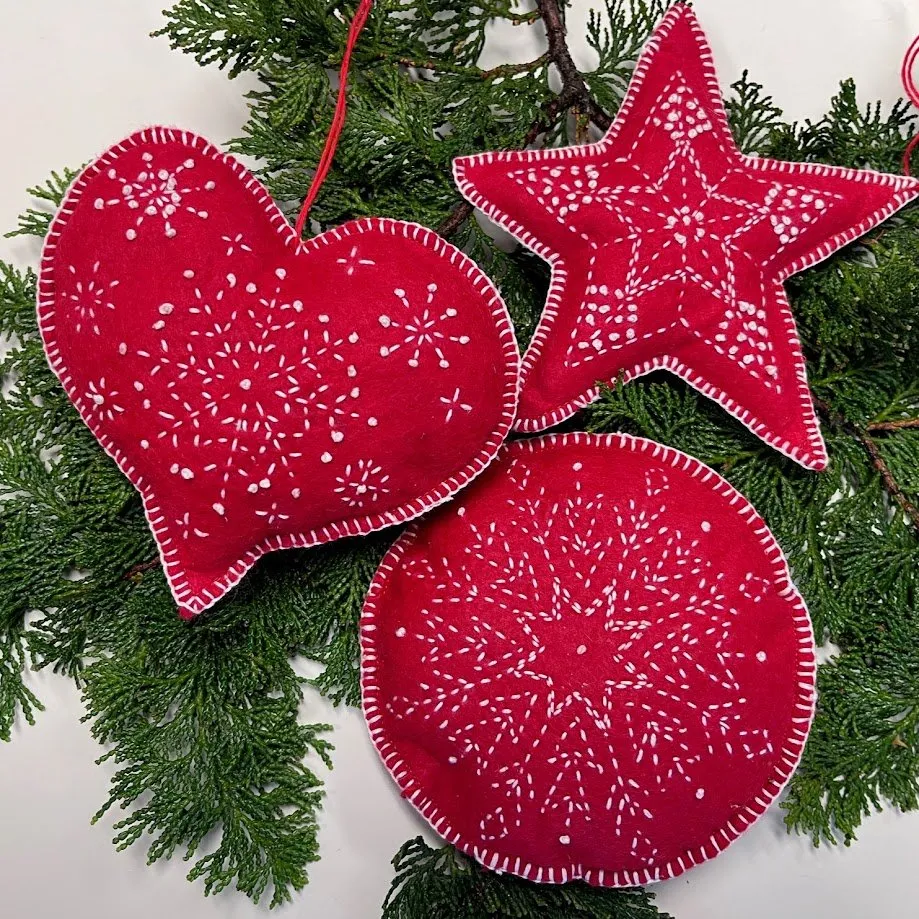
Red felt is one of the more forgiving materials you can own, but white stitching is not. Cotton floss yellows over time and picks up dust in the fibers, so plan on a gentle hand-wash in cool water with a drop of mild soap every couple of seasons, then blot and air-dry flat. Store them loosely wrapped in tissue, not compressed in a bin — creases in felt are permanent. And keep them off surfaces that transfer dye; a red felt heart pressed against a cream table runner in July is a stain waiting to happen.
13. A Tree Built Entirely from Dark Green Felt Balls
The color formula on this one is 60% dark green felt balls as the structure, 30% brights (red, pink, blue, orange) as ornaments, and 10% shine from the tiny beads and sequins stitched onto a handful of the ornaments. That last 10% is what stops a ball-covered tree from reading as texture soup. If you’re building your own, buy the dark green in bulk and the brights in small mixed packs — the brights are accents, and you need far fewer than you think.
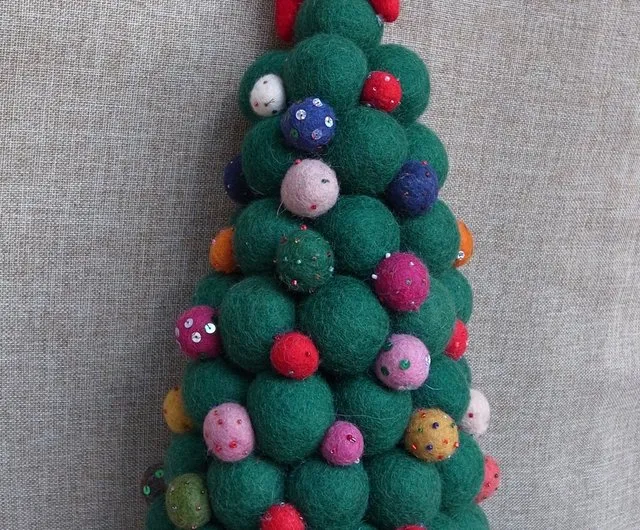
Size variation is the secret. Use 2.5cm balls for the tree body and 1cm balls for the ornaments, and keep the miniature ornaments no more than two balls apart so the eye travels evenly. Cluster three small ornaments near the base and one near the tip; that asymmetry is what makes the thing look styled rather than speckled. A coarse woven fabric backdrop — like the one in this setup — absorbs the light so the felt reads soft instead of shiny.
14. The Stacked Rainbow Felt Tree That Hangs
The single element that makes this ornament work is the gradient. Eight stacked felt layers moving through yellow, orange, red, pink, purple, blue, green, and teal, each one slightly smaller than the last — remove any layer and the whole thing gets a little less joyful. The solid yellow star on top and the small brown felt trunk at the bottom are the punctuation. Without the star it’s a stack of felt. With it, it’s unmistakably a tree.
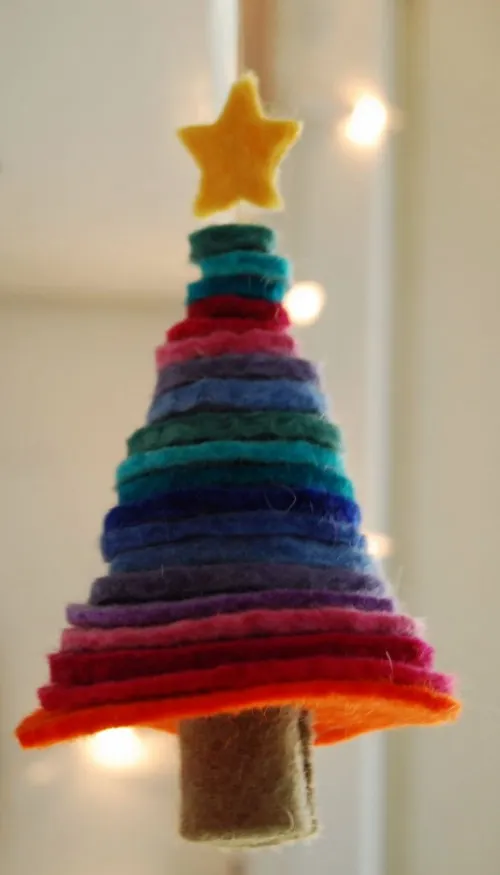
Here’s how to build one in about an hour:
- Felt sheets in eight colors, 9×12: $8–$12
- Embroidery floss and a needle: $3
- Poly-fill stuffing: $4
- Small brown felt scrap for the trunk: $1
- Cut eight circles, decreasing by half an inch each, from 4 inches down to 0.5 inches.
- Stack them largest to smallest and pin through the center.
- Sew a running stitch straight down the middle, catching every layer.
- Stuff lightly between layers as you go so each tier puffs.
- Add the brown trunk and yellow star, then attach a loop at the top.
15. Mini Felt Stockings with Gingham Bows and Red Scallops
These little white stockings are the kind of thing that looks expensive in a bowl by the door and costs almost nothing to assemble:
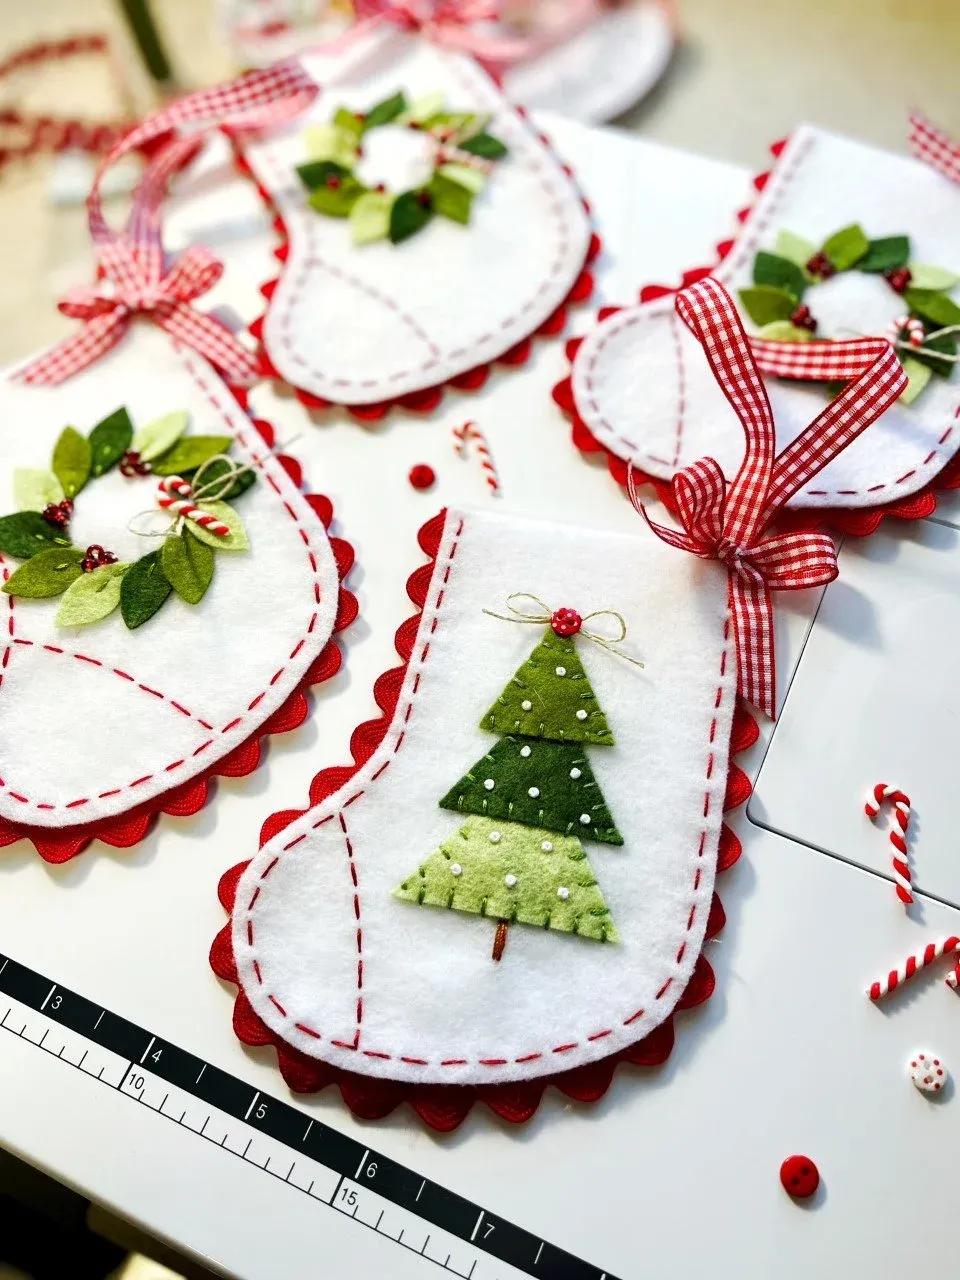
- White felt mini stockings (set of 6): $12–$22
- Red and lime green felt scraps for trees and wreaths: $5–$9
- White bead accents and red embroidery floss: $5–$10
- Red-and-white gingham ribbon: $4–$8
Total: $26–$49 for six, and a budget version using pre-made plain stockings and a single pack of gingham ribbon comes in closer to $18.
Scale matters more than people expect with small ornaments. These are roughly three inches tall, which means they work in a cluster of five to seven in a shallow bowl, on a small tabletop tree under four feet, or as gift toppers. They disappear on a full-size tree — too small to register from across the room. If your tree is over seven feet, either hang them in a tight group of three near eye level or save them for a wreath. For a larger-format version of the same charm, see Idea #27.
16. The Personalised Felt Lamb with an Embroidered Letter
If you’re commissioning or making a personalized ornament, embroider the initial on a separate small block and attach it afterward rather than stitching directly into the figure. It gives you a do-over if the letter goes crooked, it adds a dimensional layer that reads as intentional, and it means one design can serve a whole family — just swap the block. A satin stitch in a contrasting green over a brown felt square takes about fifteen minutes and looks genuinely professional.
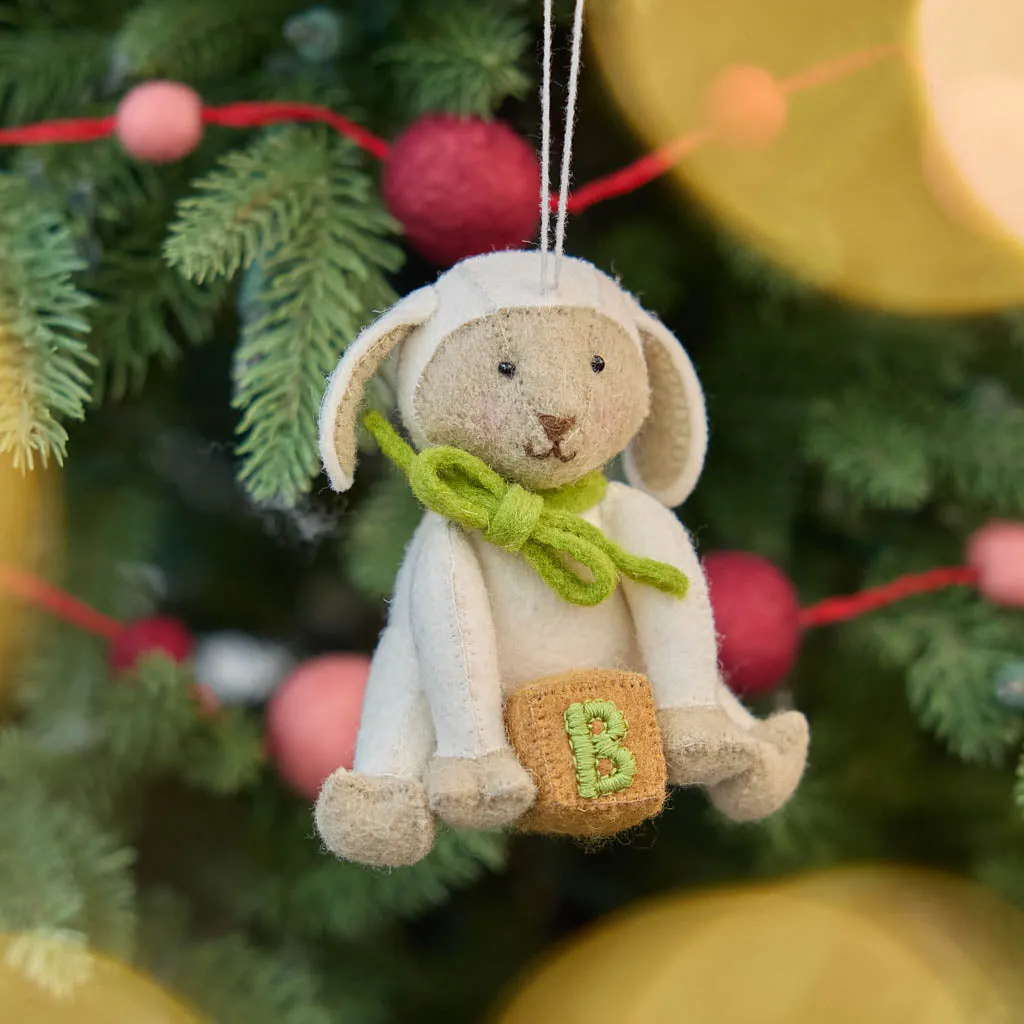
The honest caveat with small handmade pieces like this lamb in its white hood and green scarf: they are not toddler-proof. Loose felt balls on a garland nearby are a choking hazard, thin hanging strings break, and glued-on accessories come off. If small kids are in the house, hang this one at the top of the tree or on a wall display and keep the felt ball garlands well above reach. It’s a keepsake, not a toy — treat it accordingly and it’ll outlast the tree.
17. A Gray-Brown Felt Sheep with Hand-Stitched Eyes
This little sheep gets its charm from three deliberate choices. The body is a textured gray-brown felt that mimics fleece, while the face and ears are smooth white — that material contrast does the work of a whole color palette. The stitched black eyes and mouth curve slightly upward, which is the entire difference between cute and unsettling. And the legs are short and wide-set, giving it a stable, slightly chunky silhouette that reads well at a distance on a busy tree.
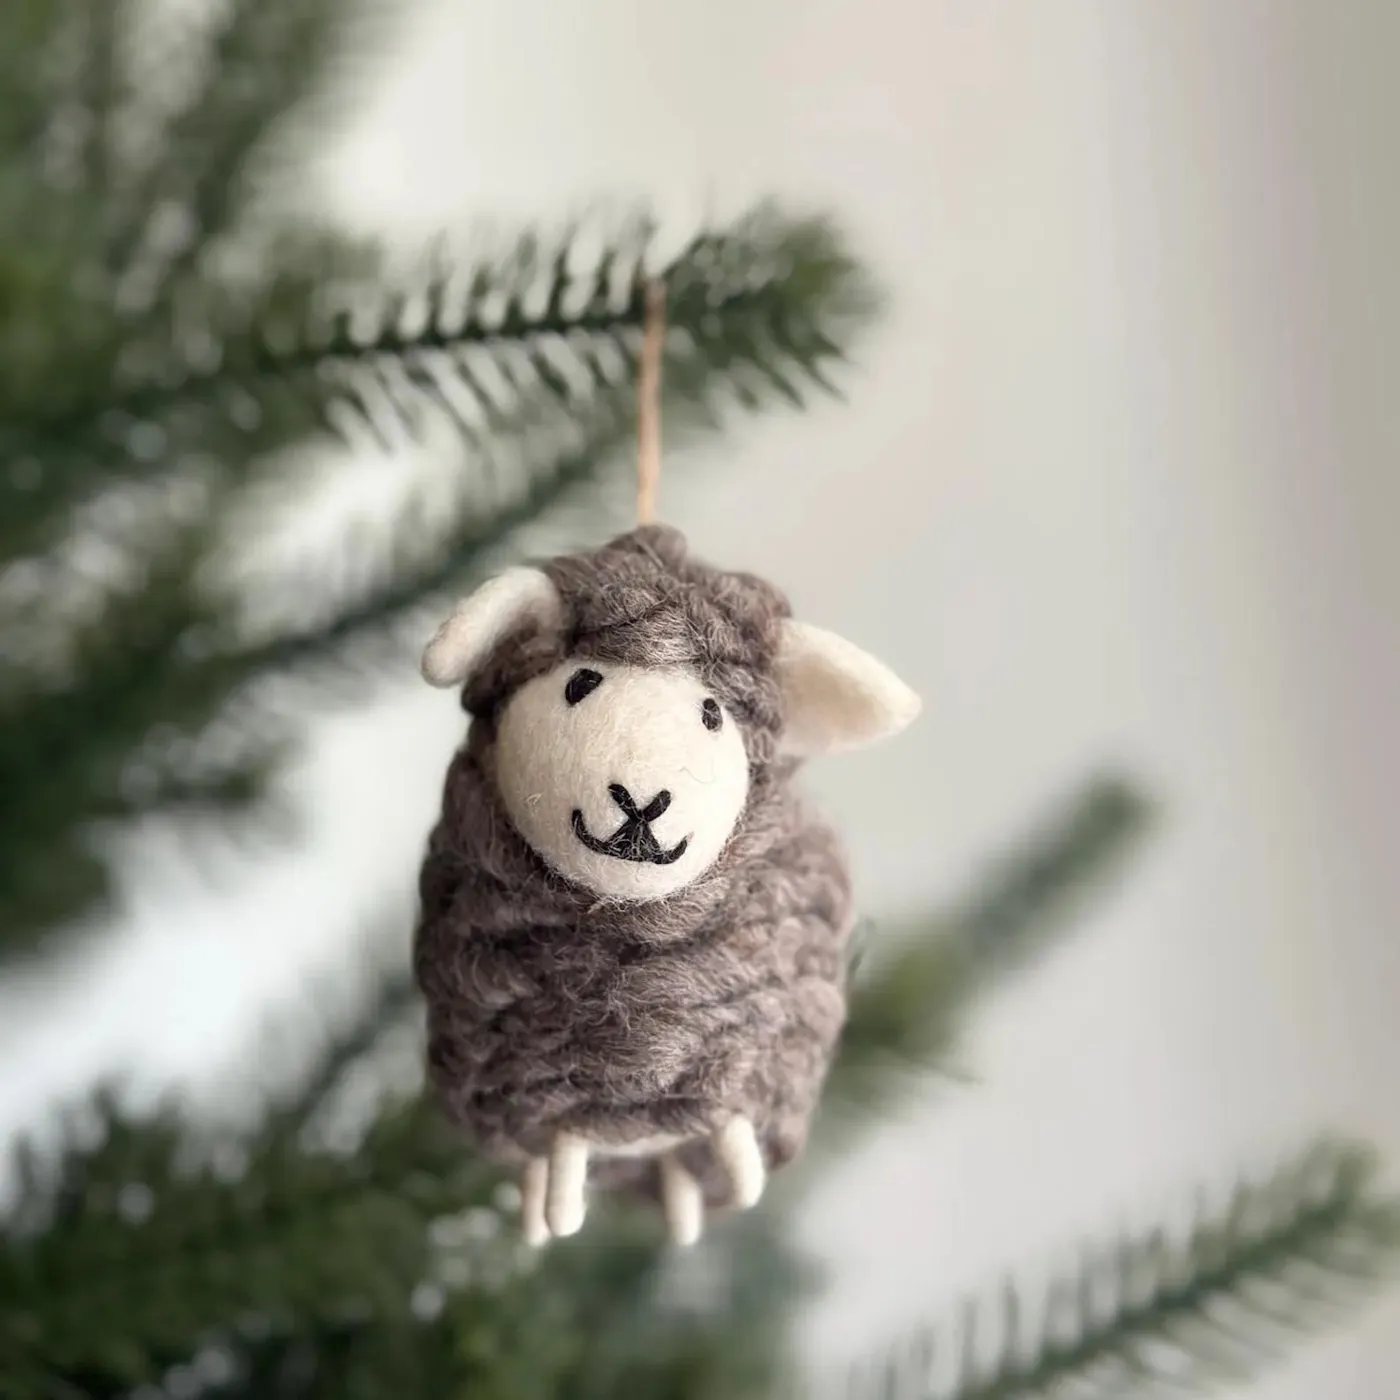
Maintenance is minimal but not zero. Textured wool-blend felt pills where it rubs against branches, so hang it on an outer branch rather than deep inside the tree. Brush the body gently with a soft toothbrush once a season to lift dust out of the fibers, and never machine wash — cold hand wash only, and only if something actually spills on it. Store flat in a tissue-lined box. Expect a well-kept felt ornament like this to look good for a decade or more, which is a lot of Decembers for about $15.
18. Button-Trimmed Felt Trees on Pastel Backgrounds
This is the project for anyone who has a button jar and no patience. Two green felt trees, brown felt trunks, a glitter star on each, and a handful of plastic buttons in orange, pink, and cream standing in for ornaments. Walmart and any craft store sell mixed button bags for $4–$6, felt sheets run about 35 cents each, and glitter foam stars are $3 for a pack of twenty. Add a hot glue gun you probably already own and you’re at roughly $12 for the pair — versus $30–$45 for similar handmade sets online.
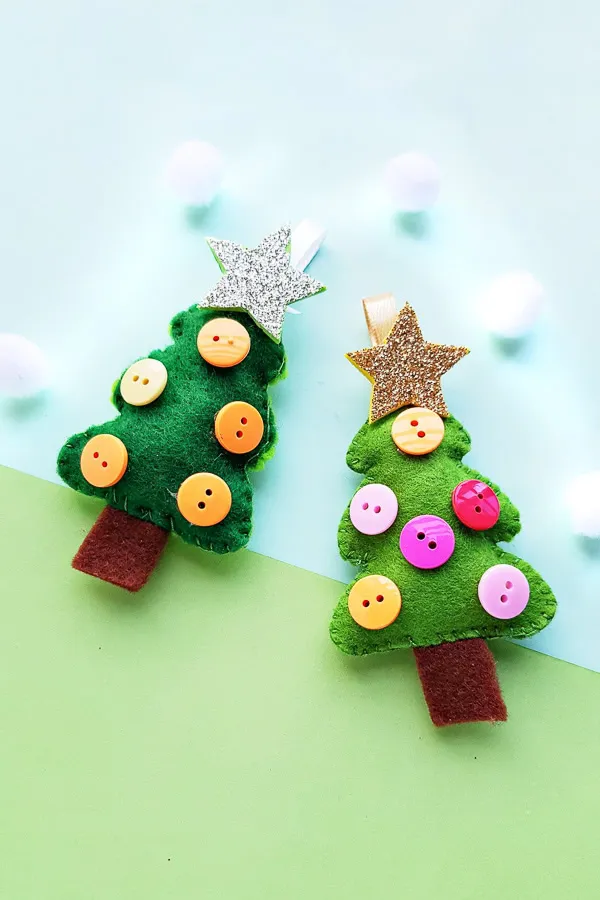
Assembly is genuinely a twenty-minute job:
- Cut two tree silhouettes from green felt, about 4 and 5 inches tall.
- Cut matching back pieces and set them aside.
- Glue buttons in a loose triangle pattern, leaving the bottom third emptier.
- Add the brown trunk and glitter star with a small dot of glue.
- Stitch or glue the front and back together, leaving a small gap for stuffing.
- Stuff lightly, close the gap, and add a hanging loop.
19. A Needle-Felted Penguin in a Blue Scarf
Black and white with orange accents is one of the most reliable color formulas in all of holiday decor, and this penguin runs it perfectly: 70% white, 25% black, 5% orange for the beak and feet. The blue hat and scarf are the wildcard that pushes it from generic to specific. Swap the blue for red and you get a classic Christmas penguin; swap it for mustard and the whole thing turns Scandinavian. The formula survives either swap because the base ratio never changes.
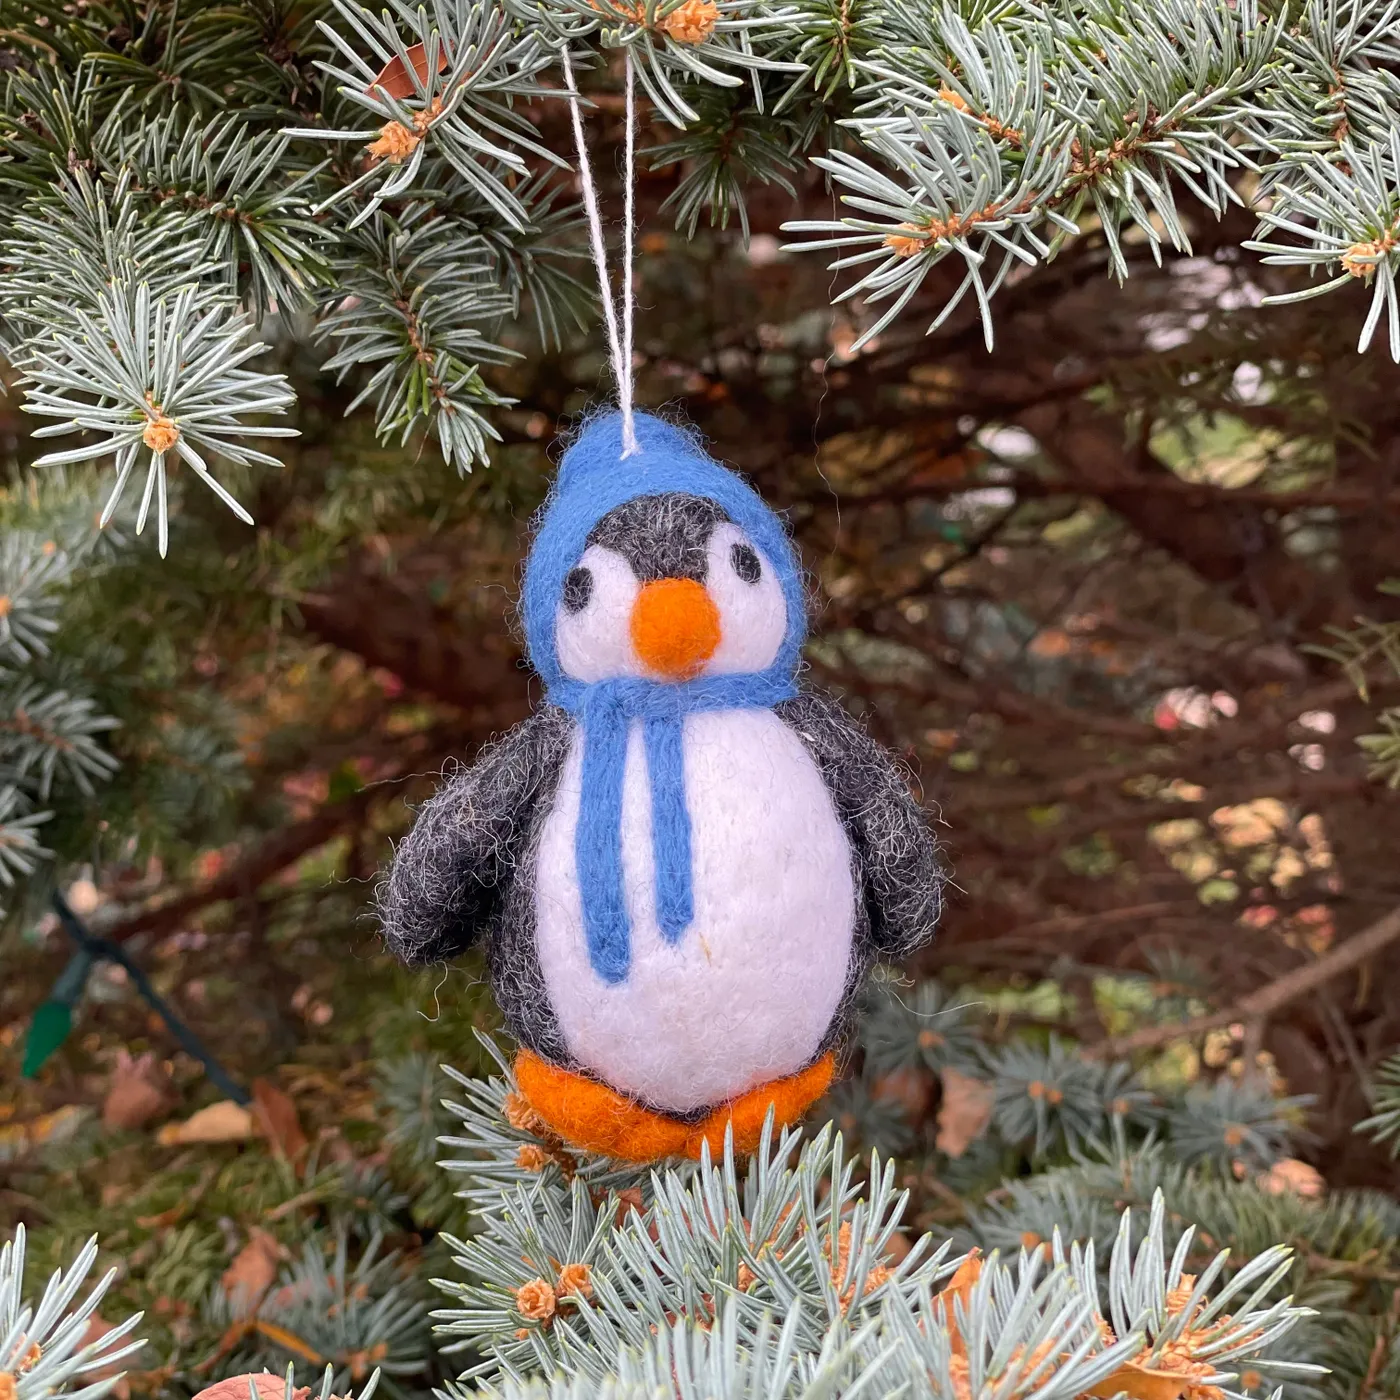
you’d miss if it vanished is the scarf. Not the hat — the scarf. It wraps the neck and creates a horizontal break in a figure that’s otherwise one continuous black-and-white column, which is exactly what stops a needle-felted bird from looking like an egg with a beak. It also covers the join between head and body, which is the hardest part of needle felting to get smooth. If you’re making one, build the scarf last and size it generously — a skimpy scarf won’t hide anything.
20. Green-and-Red Felt Tree Ornaments Against a Fireplace Glow
Felt photographs flat under overhead light and gorgeous under low, warm light. If you’re styling a shelf or mantel with these, put the light source low and to one side — a string of warm white bulbs behind the display, or a lamp at mantel height — so the stitched patterns cast tiny shadows. That side-lighting is what makes stitched stars and snowflakes visible from three feet away. Front-lit felt just looks like colored fabric.
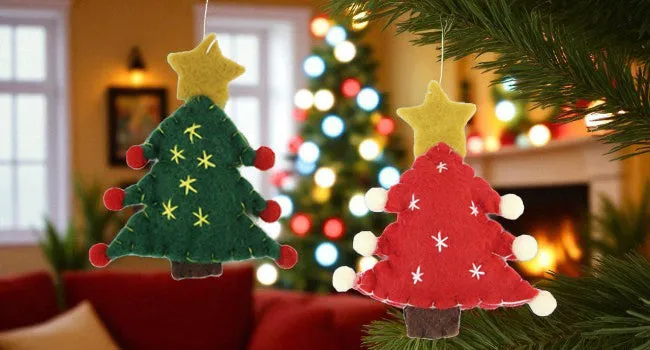
The reason this traditional red-and-green look keeps resurging is that it’s the antidote to a very specific fatigue: years of neutral, beige-everything holiday decor. Pinterest searches for saturated, nostalgic Christmas styling have been climbing steadily, and handmade-looking pieces are the entry point because they’re affordable and personal. My honest prediction is that this one isn’t a trend at all — it’s a permanent option that cycled back into view. The stitched snowflake patterns and pom-pom accents here are timeless enough that you won’t be rethinking them in three years.
21. The Kangaroo-and-Joey Ornament with a Tiny Backpack
Two details do all the work on this one. The joey peeking out of the pouch creates a built-in second focal point, so the eye keeps moving — that’s a small piece of storytelling most ornaments don’t bother with. And the orange-and-green backpack on a light brown felt kangaroo wearing a blue shirt is a wildly confident color mix that somehow doesn’t fight, because the light brown base neutralizes both. Remove the backpack and it’s a souvenir-shop kangaroo. Keep it and it’s a character.
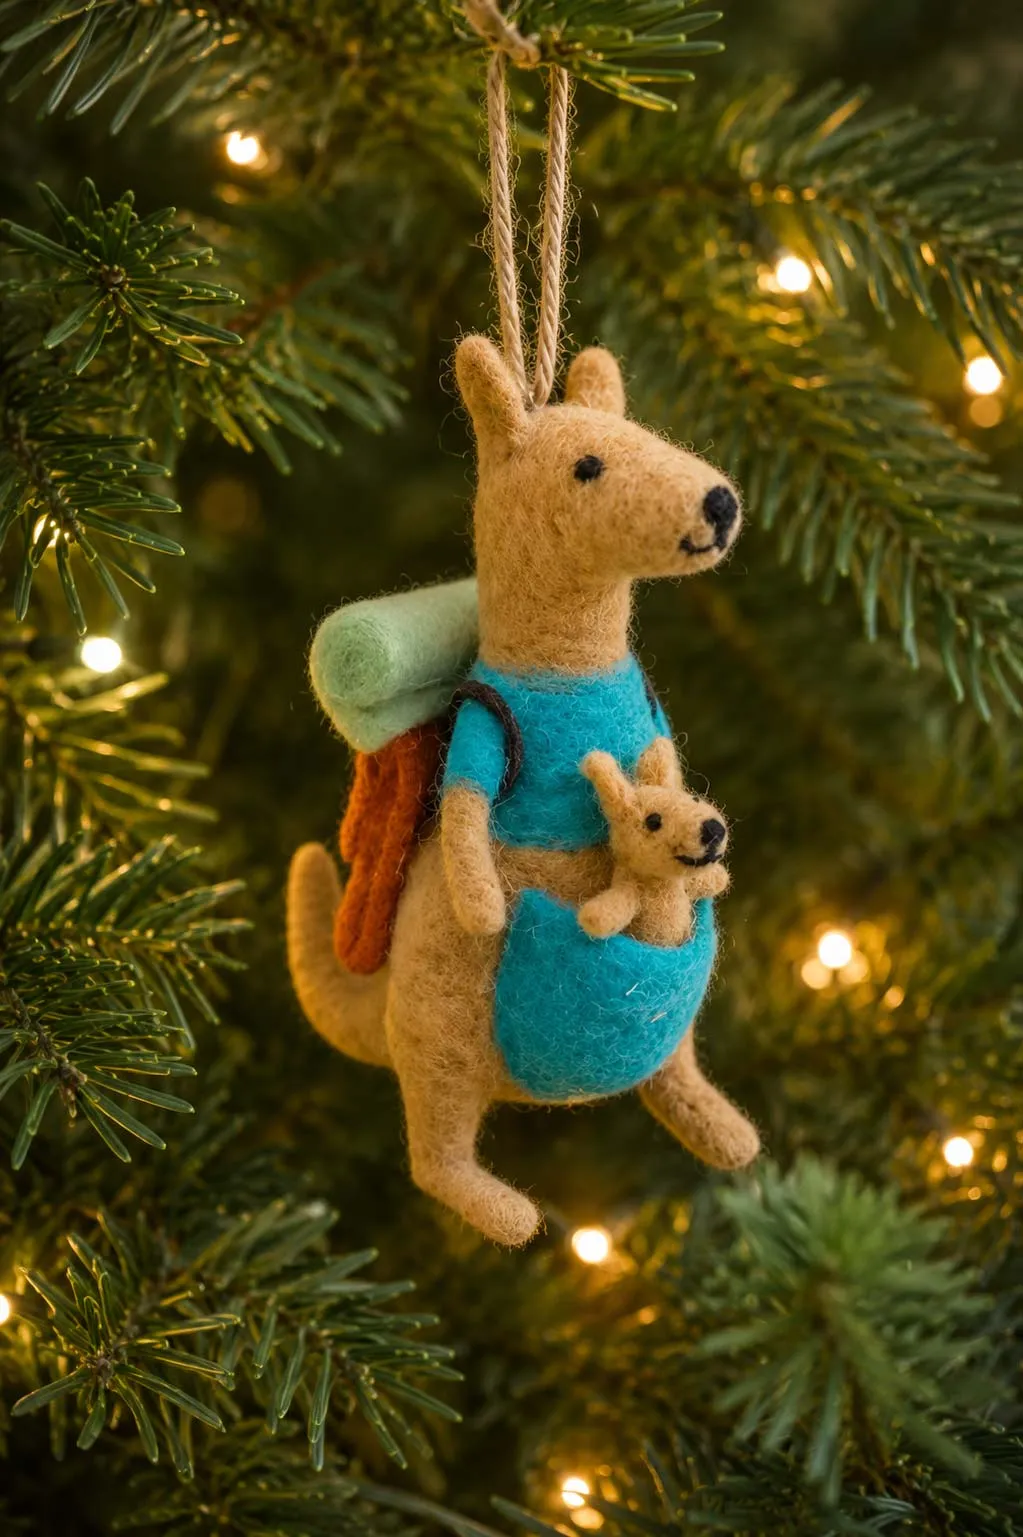
Animal ornaments are where DIY gets genuinely competitive with retail. A single 9×12 sheet of light brown felt runs about $1, and you can pull blue, orange, and green from a $6 multi-pack. Total material cost: under $10, against $20–$35 for a comparable handmade piece. If you’d rather buy than sew, look at Facebook Marketplace and thrift stores in early November — handmade ornament collections turn up constantly, often in bundles of ten for the price of one. Start collecting in October and you’ll have a full tree by December.
22. A Felt Mouse in a Pink Fluffy Skirt
Fluffy trim is beautiful and high-maintenance. That pink skirt will collect lint, pet hair, and stray pine needles faster than anything else on your tree, and it doesn’t wash well — the fluff mats down and never quite recovers. Keep a lint roller nearby during the season, and store this piece in its own small bag rather than loose in a bin where the fluff will press against everything else. Expect the pink to soften slightly over several years, which honestly looks fine on a mouse.
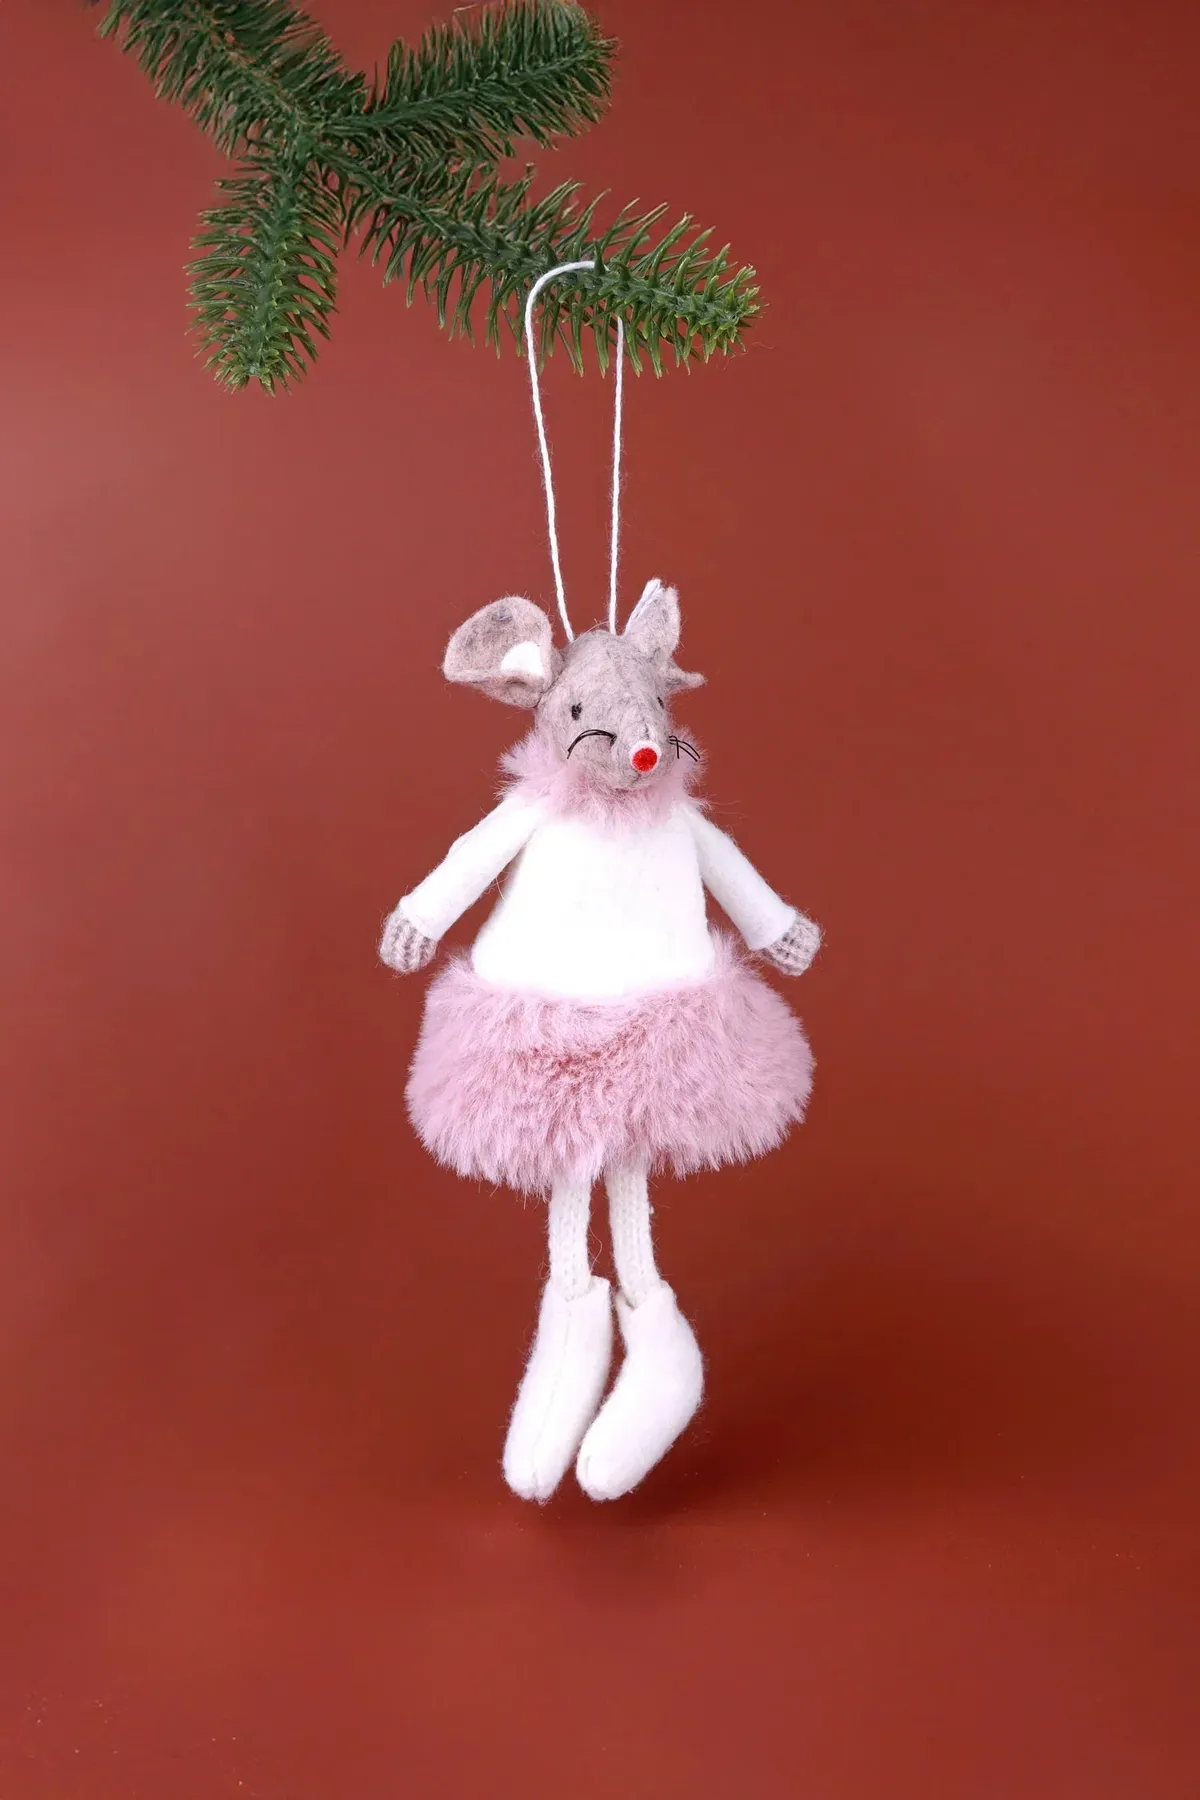
The palette is worth copying: 55% grey, 25% white, 15% pink, 5% red for the nose. Grey as the dominant color is the sophisticated move here — it means the pink reads as a deliberate accent rather than a cutesy overload, and the whole thing sits comfortably against a reddish-brown background instead of disappearing into it. Swap grey for taupe and you get a warmer, more vintage version. Swap the pink for burgundy and it becomes a much more grown-up ornament without losing any personality.
23. The Felted Wool Goat on a Striped String
Felted wool figures like this brown-and-white goat are dense and relatively heavy — noticeably heavier than flat felt ornaments of the same size. That matters when you’re placing them. On a full-size tree, hang them on an inner branch near the trunk where the structure can carry the weight, and use a proper ribbon or doubled string rather than a single thin thread. On a small tabletop tree under four feet, they’re better placed low, where they add visual weight to the base.
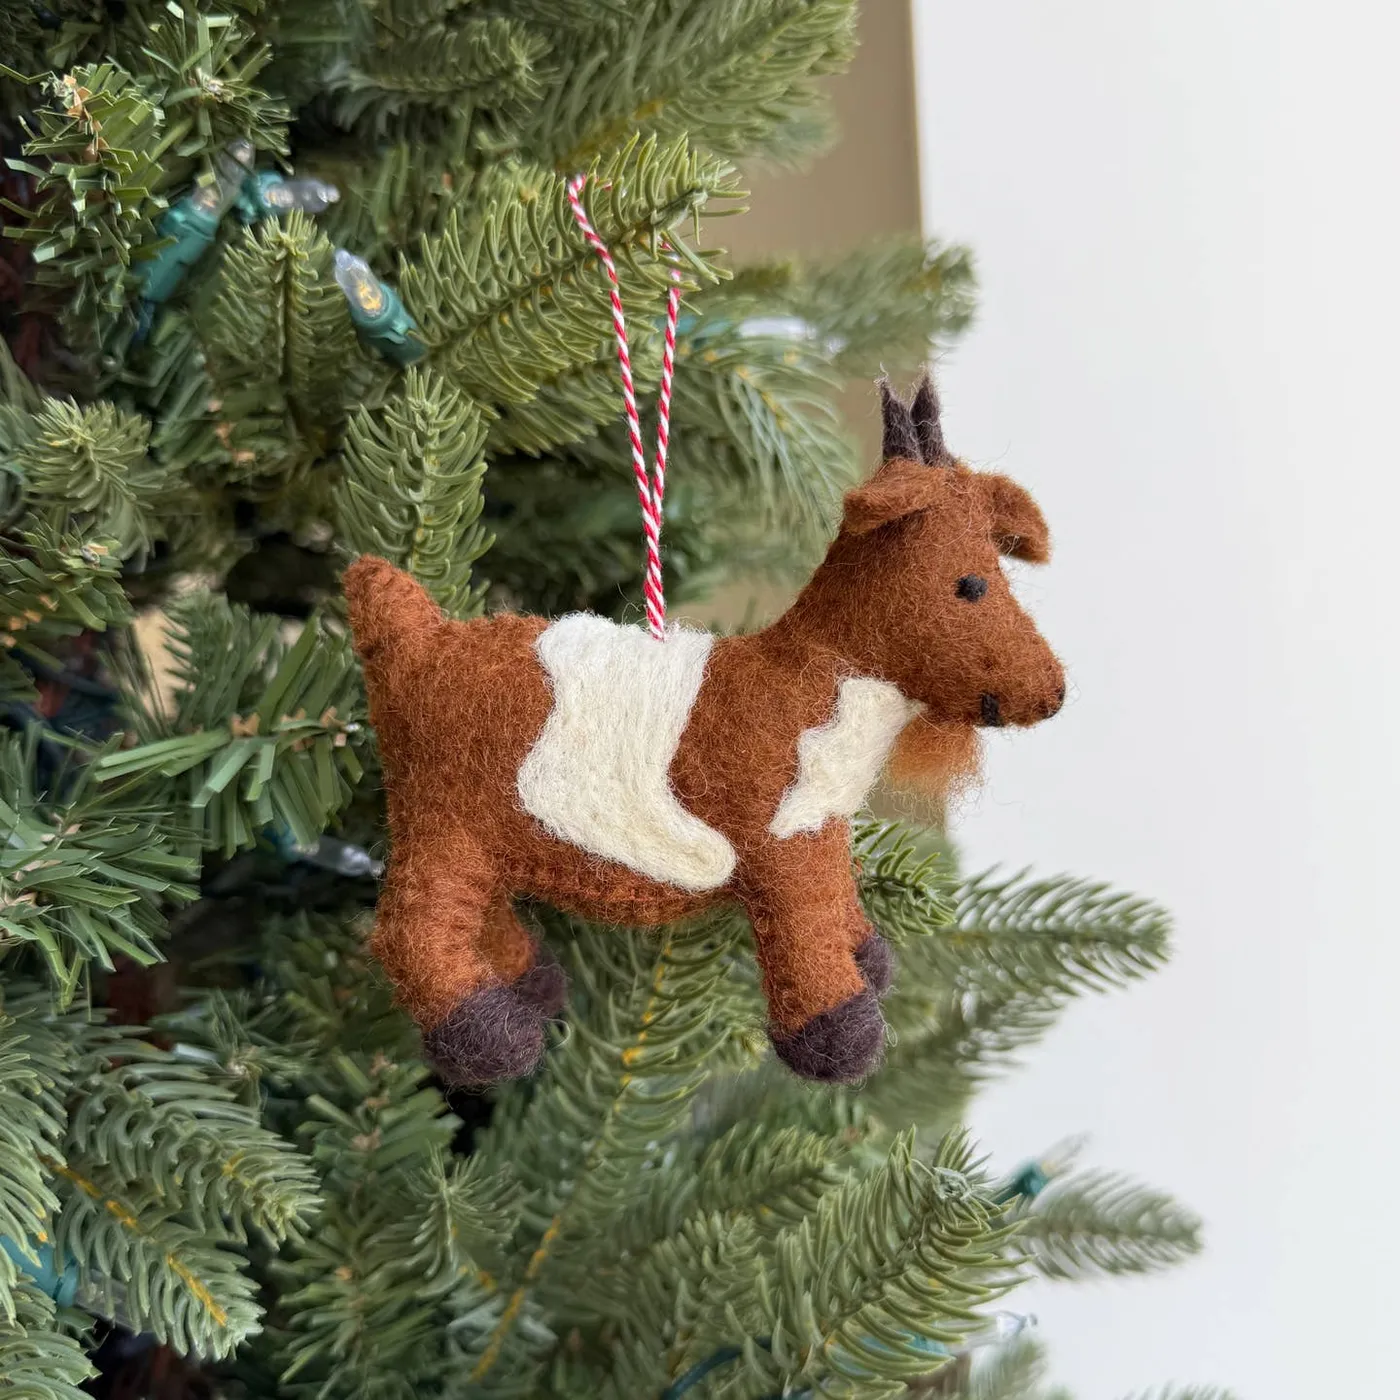
One caution about the red-and-white striped string and the deep green branches it’s photographed against: red dye on cord can transfer to light-colored felt in humid conditions. If your ornaments live in a damp basement through the off-season, separate the strings from the figures before storage. And keep felted wool away from direct heat — above a fireplace mantel sounds romantic, but dry heat makes wool fibers brittle over a season or two. A shelf across the room gives you the same cozy effect with none of the damage.
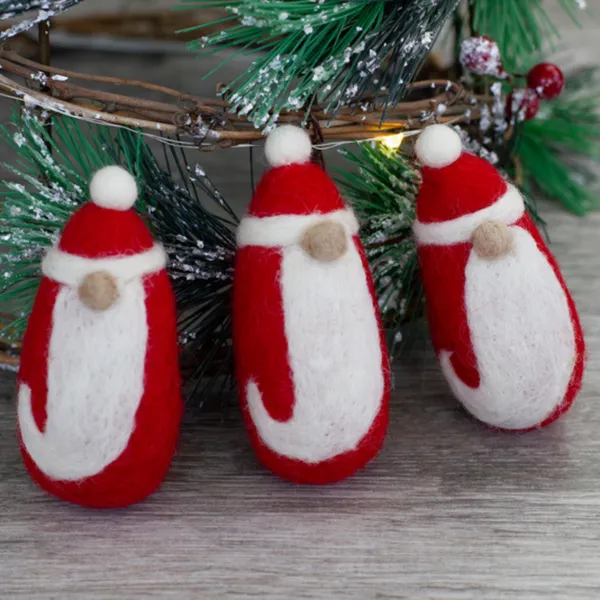
24. Three Felt Gnomes Tucked Into a Frosted Wreath
This is one of the cheapest full vignettes in this whole list, because the wreath does the heavy lifting and the gnomes are small:
- Faux frosted pine wreath, 12–16 inch: $14–$28
- Three felt gnome ornaments: $9–$18
- Battery fairy lights, warm white: $8–$12
- Light wood tray or board: $10–$20
Total: $41–$78, or about $25 if you skip the tray and lay the wreath directly on a table.
What makes this arrangement work is that the wreath acts as a frame, not a background. The three gnomes — red conical hats, white pom-poms, white beards, tiny beige noses — sit in the foreground while the wreath’s frosted needles create depth behind them, and the fairy lights sit between the two layers. That’s a three-plane composition in a fourteen-inch circle, which is why it reads as a designed moment rather than three ornaments on a table. Keep the gnomes clustered, not evenly spaced.
25. Pink, Red, and Blue Textured Trees on White Pegs
Before you commit to a set like this, check four things:
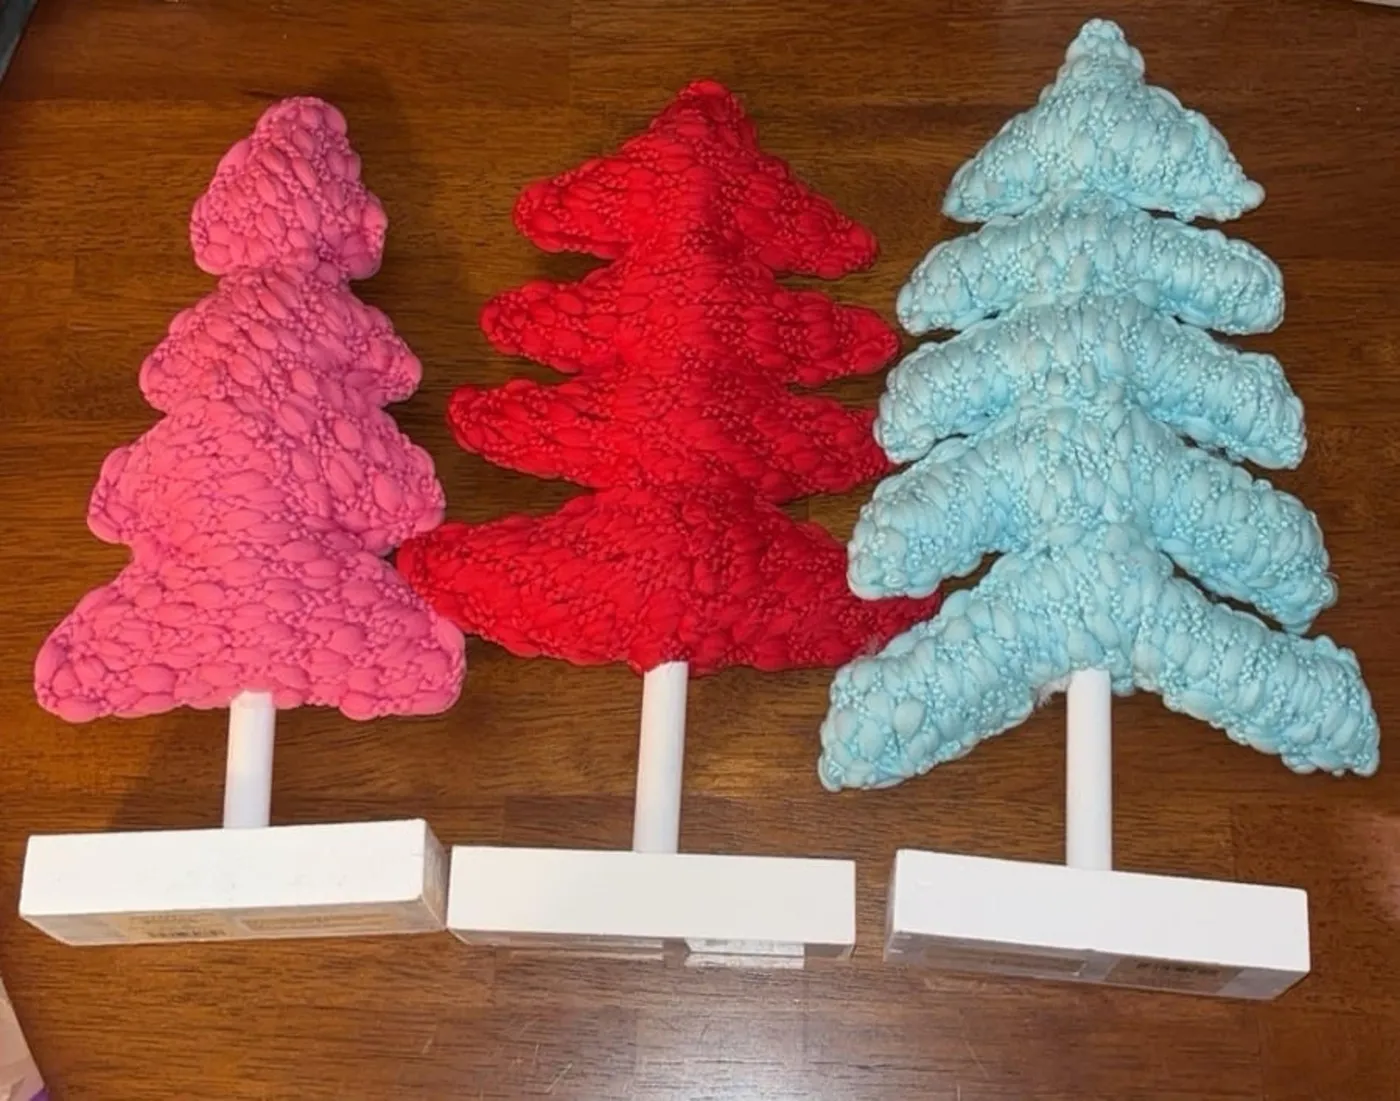
- Measure the surface — three trees at 6–8 inches wide each need at least 24 inches of clear run.
- Confirm the base color — white bases vanish on a white shelf and pop on wood, so decide which you want first.
- Check the light — bright pink shifts noticeably under warm bulbs versus daylight.
- Count your colors — three saturated trees is a statement; five becomes chaos.
The color formula here is bolder than most: three near-equal blocks of bright pink, vibrant red, and light blue, with white stems and bases acting as the only neutral. It shouldn’t work, and it does, because all three colors sit at similar saturation and the bumpy texture unifies them. If you want to tone it down, replace the red with a deeper berry tone or the blue with sage — either swap calms the group without breaking the rhythm.
26. The Felt Bacon Strip with Googly Eyes
A rusty orange strip of felt, wavy white fat lines, two googly eyes, and an embroidered smile. That’s the whole thing, and it takes about thirty minutes:
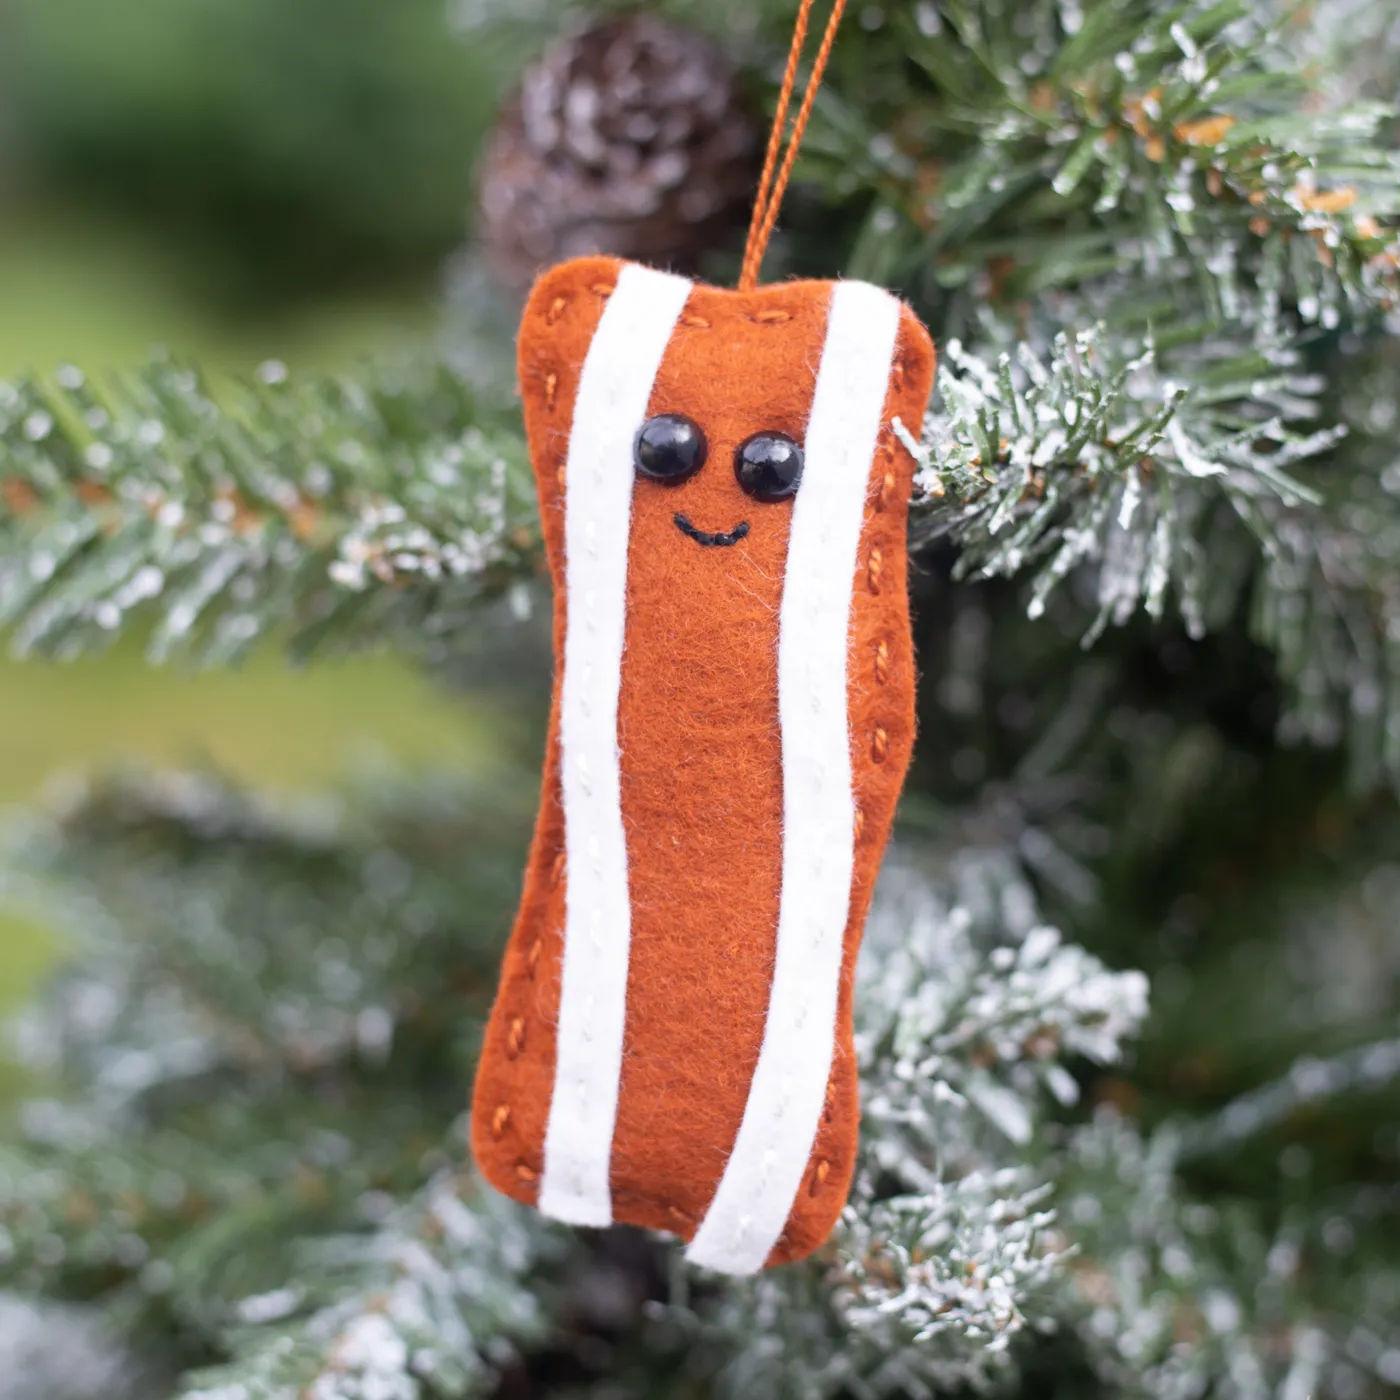
- Cut two wavy strips of rusty orange felt, about 1.5 by 5 inches.
- Glue narrow white felt strips along the edges to mimic fat.
- Blanket stitch the two orange layers together, leaving a small opening.
- Stuff very lightly — flat is funnier than puffy here.
- Glue on googly eyes and embroider a simple curved smile in black.
- Attach an orange string loop at the top.
Total materials: about $6, and half of that is a bag of googly eyes you’ll use again. Comparable novelty ornaments go for $15–$25 online, which is a lot for a joke you could make in a single evening. If the sense of humor runs in your house, check Idea #11 — same principle, same price point, different punchline.
27. Mini Felt Sweaters with Beaded Gingerbread and Polar Bear
holding this trio together is the red-and-white striped yarn loop. Three sweater-shaped ornaments — cream with a gingerbread man, red with a polar bear in a green scarf, forest green with a snowman face — could easily look like three unrelated crafts. That single repeated hanger turns them into a set. It’s a two-dollar detail that does the job of a whole design system, and it’s the first thing I’d copy if you’re making your own.
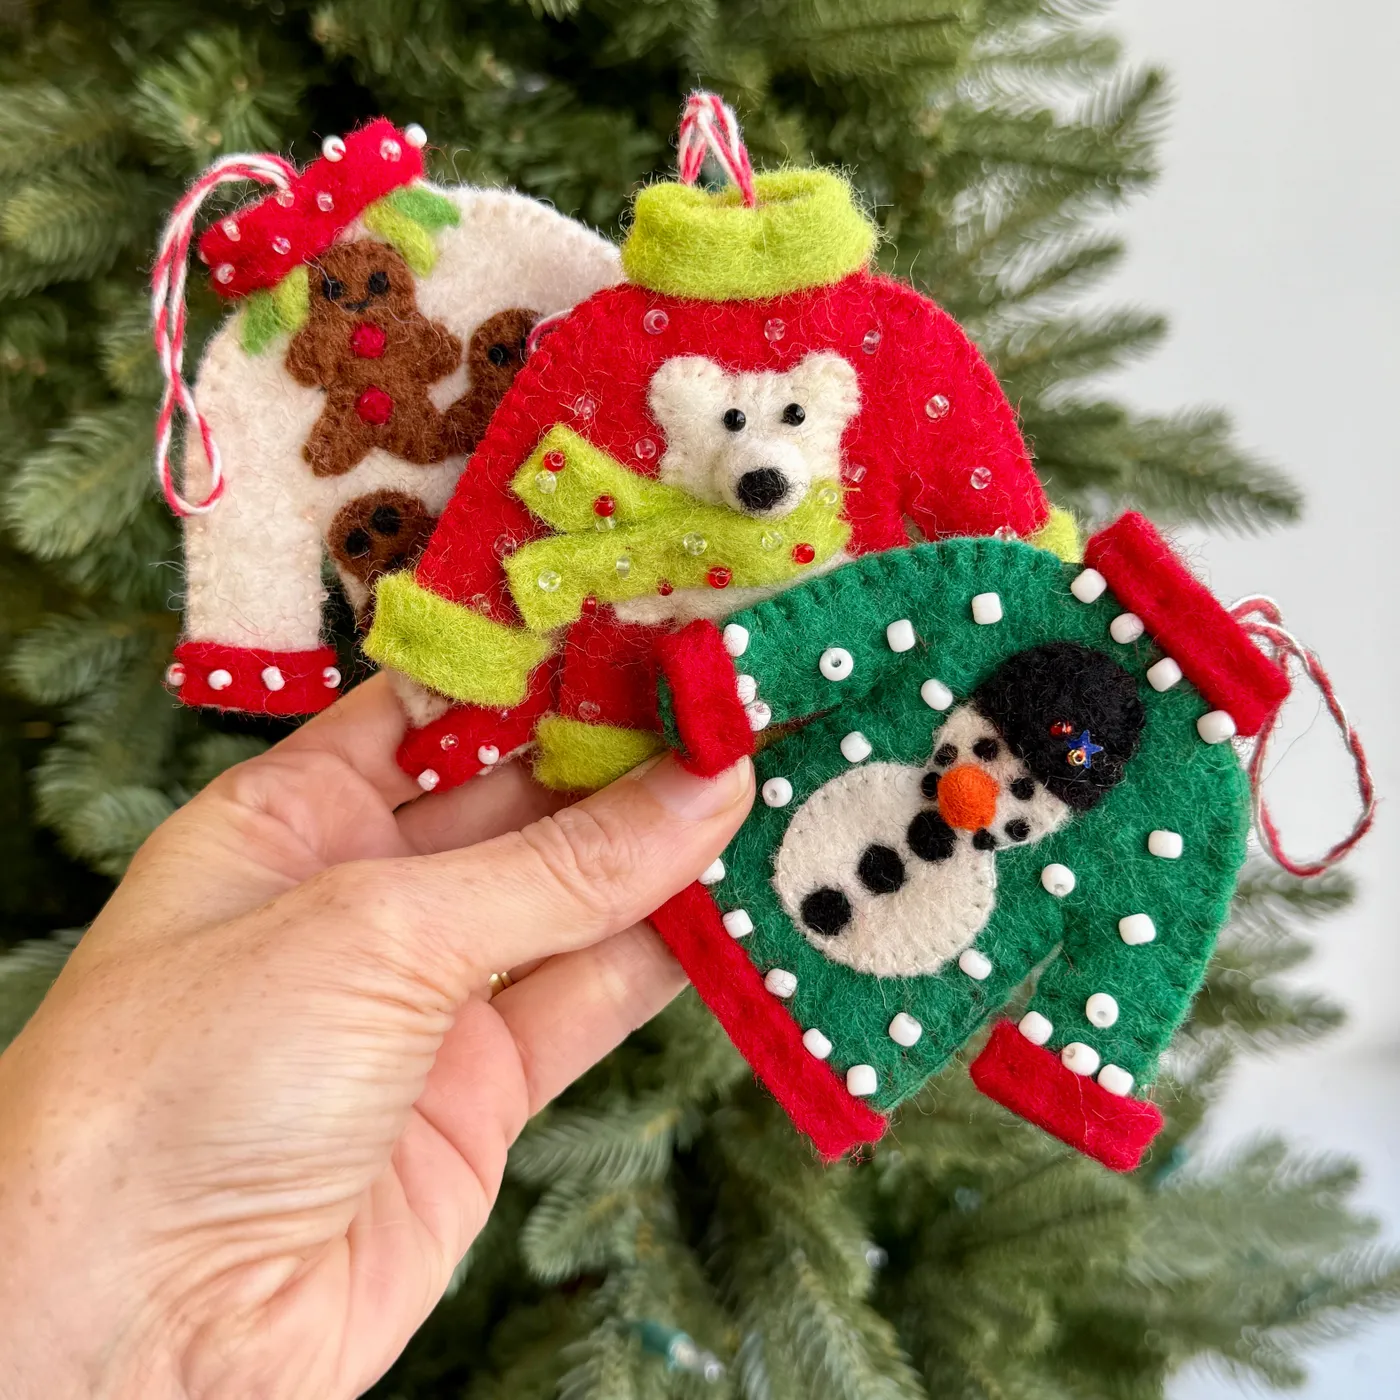
stitching, verify a few practical things:
- Bead size — anything under 3mm is a choking hazard in a house with toddlers.
- Appliqué placement — center the gingerbread man, but push the polar bear slightly off-center for movement.
- Thread match — bring a felt scrap to the store; cream felt reads yellow under warm light.
- Hanger strength — striped yarn stretches, so knot it at the top rather than relying on glue.
28. A Felt Circle Garland Above a Framed Floral Print
Garlands sag. It’s the one thing nobody mentions. Felt circles are heavier than paper, so a six-foot run of them will bow in the middle unless you anchor it every 18 to 24 inches. Use small clear adhesive hooks at those intervals and thread the garland over them rather than hanging it from the two ends — the line stays straight and the felt still looks soft. Also iron each circle flat before stringing; felt arrives with a factory fold and it will absolutely show in photos.
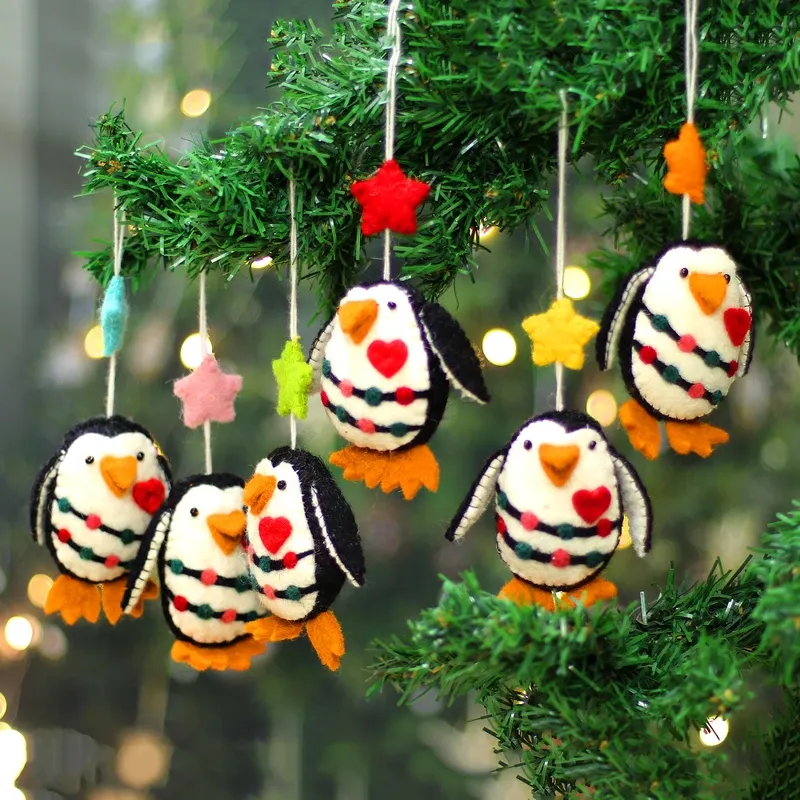
Length is where people go wrong. A garland should span about 80% of the wall or shelf it’s dressing — full-width looks stretched, half-width looks like an accident. On a light wall it can run the entire width above a framed print, as it does here, with the white mat and dark frame providing contrast. It’s a low-ceiling-friendly idea too: a garland at 60 inches works fine in a room with eight-foot ceilings, and it needs no vertical clearance at all. For another wall-friendly approach, see Idea #5.
29. The White Felt Bird with a Red Blanket-Stitch Border
Traditional handwork is having a real moment. The blanket stitch, the tiny embroidered blue eye, the green felt leaves with red berries and brown embroidered stem — this is the kind of piece that used to live in a grandmother’s ornament box and is now the most-saved thing on a lot of holiday boards. What’s driving it is a broader shift away from mass-produced plastic decor, helped along by how good hand-stitched texture looks in natural light on a phone camera. It has staying power because it’s not a look so much as a technique.
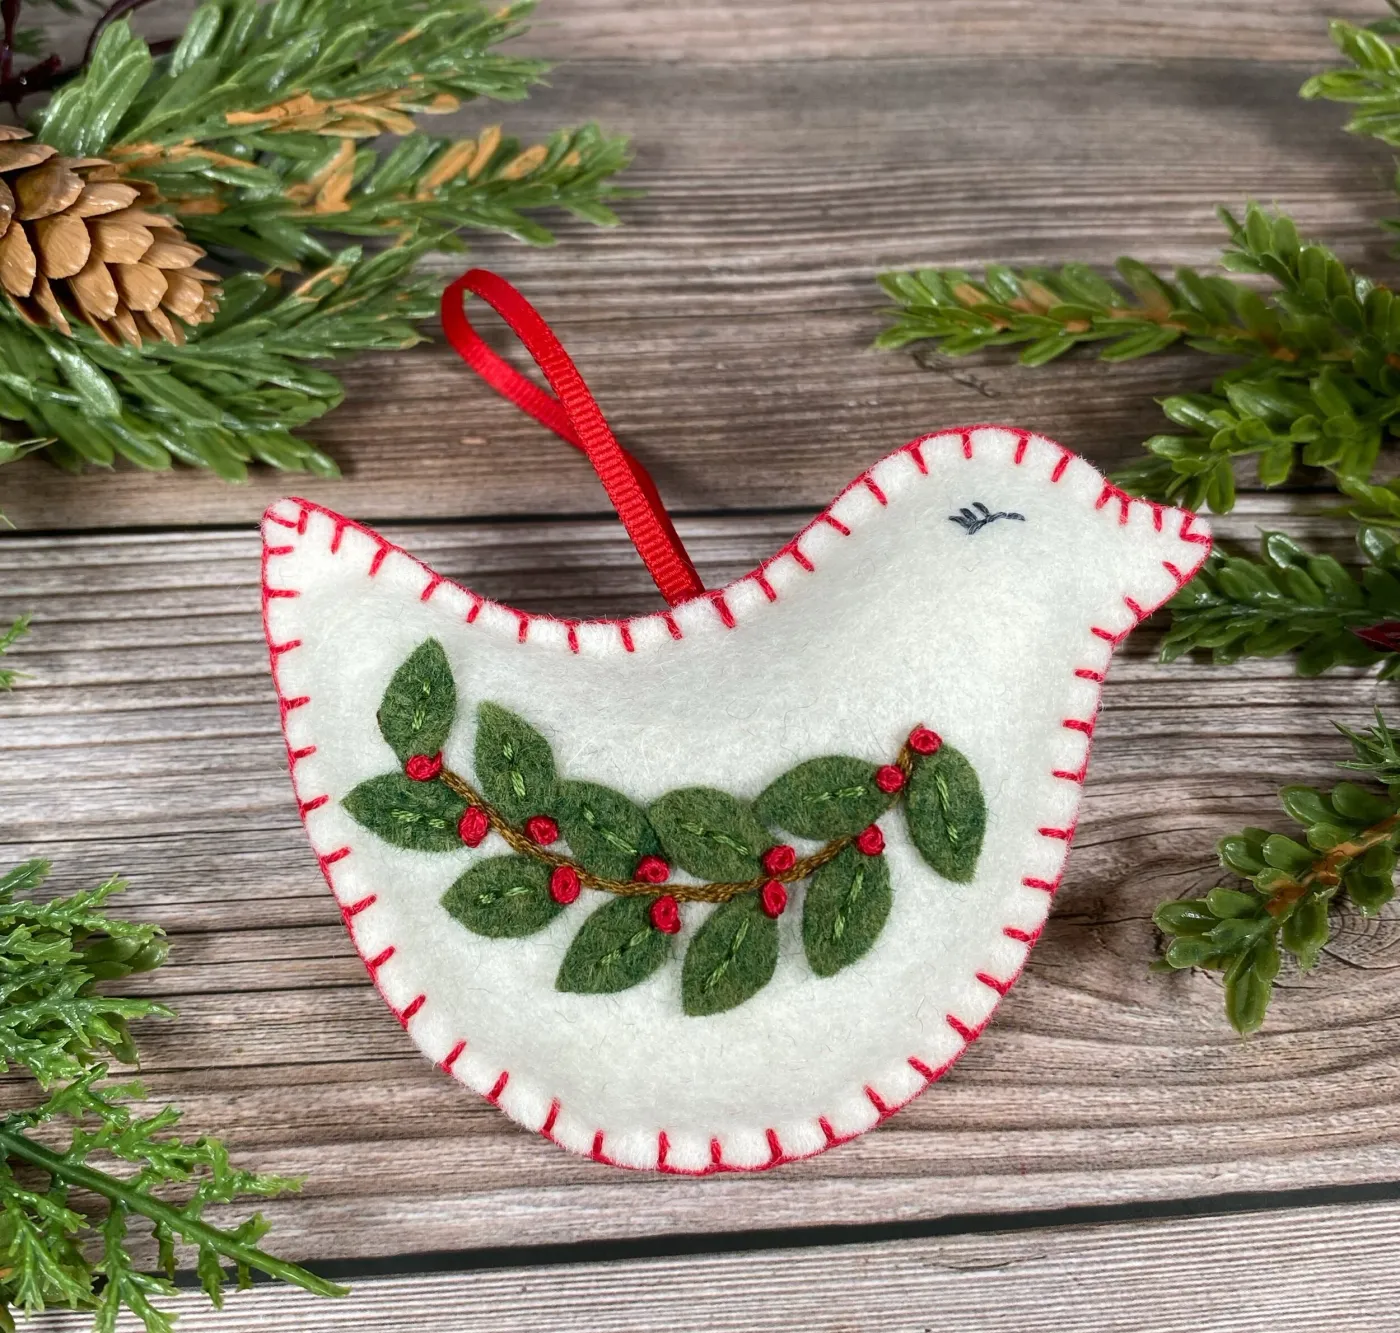
- White felt, two sheets: $2
- Red embroidery floss and a needle: $3
- Green felt scraps and red beads: $4
- Red ribbon for the hanging loop: $2
Total: about $11 in materials and roughly two hours of stitching.
30. A Three-Tier Green Felt Tree with Clean Stitched Edges
Simple pieces are the least forgiving. Two slightly uneven tiers or a wobbly stitch line on a three-tier felt tree in solid deep green, and there’s nowhere for the eye to go — no embellishment to distract from the flaw. If you’re making this one, cut all three tiers with a template and a rotary cutter rather than scissors, pin generously, and accept that the stitched edge needs to be consistent. It’s the same discipline that makes the ornament in Idea #31 work.
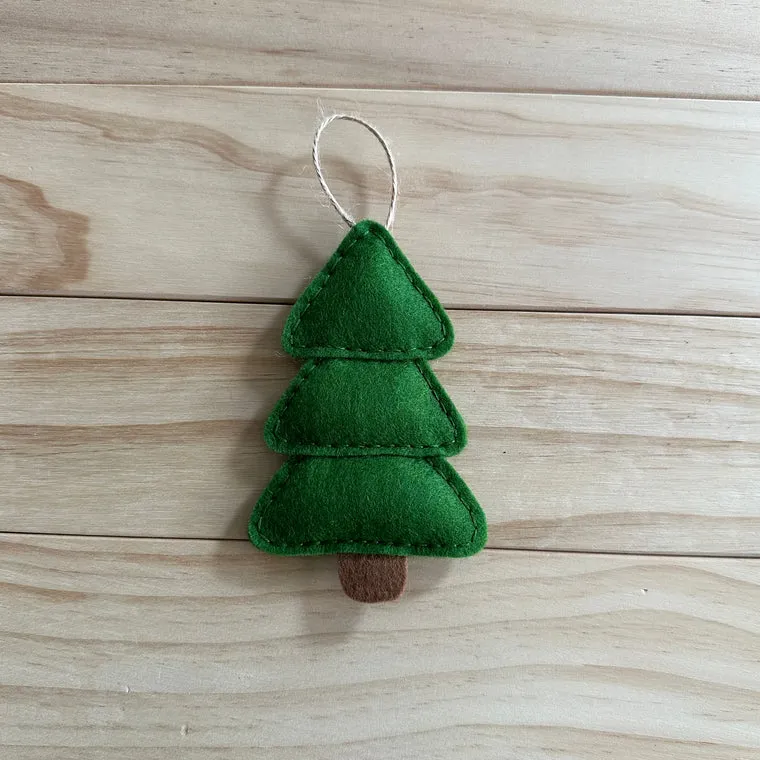
here is proportion. Three tiers stacked with the middle one at roughly 65% of the base width, and a tiny brown felt trunk at the bottom that’s no wider than the smallest tier. Get that ratio right and a plain green felt tree looks like something from a design shop. Get it wrong — middle tier too wide, trunk too chunky — and it looks like a craft project. Off-white string, not red, keeps the whole thing restrained.
31. The Ombre White-to-Charcoal Felt Star
Before you hang something this graphic on a natural tree, run through this:
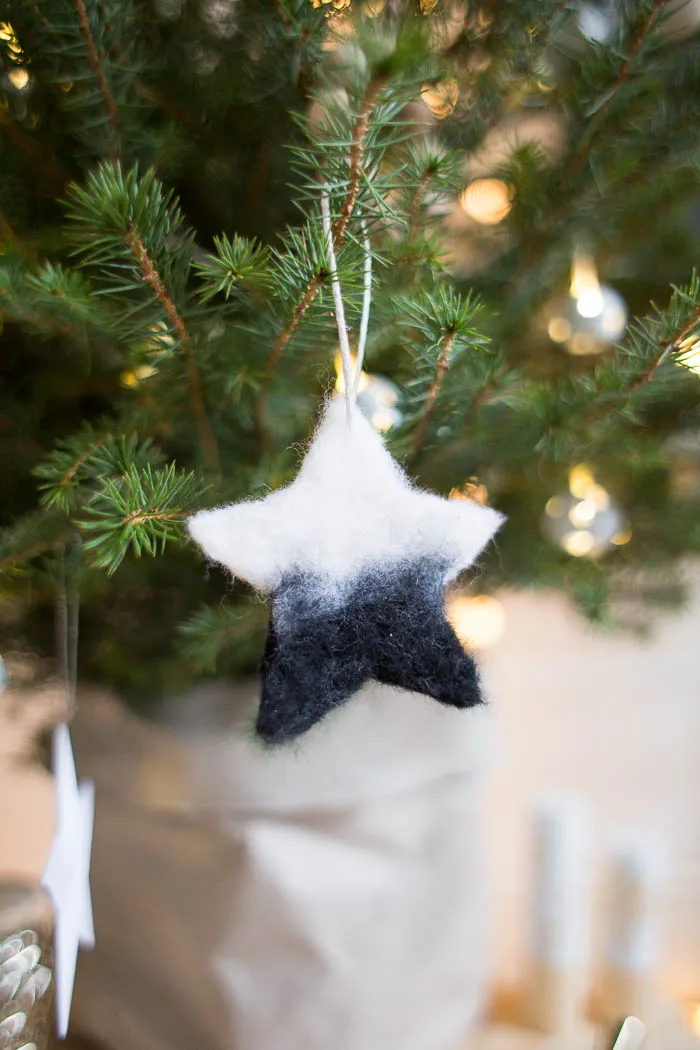
- Check the gradient direction — white at the top reads lighter against dark needles; charcoal at the top reads heavier and moodier.
- Confirm the white string disappears against your tree or deliberately contrasts with it.
- Plan for at least two stars, because one ombre piece alone on a tree looks like a mistake.
- Test the placement in daylight and again at night with the lights on.
Ombre felt is a maintenance commitment, though. The charcoal end will transfer onto light surfaces if it gets damp, so keep it away from windows and never store it pressed against cream fabric. Sunlight fades the white end toward yellow long before the dark end changes, which eventually breaks the gradient. Keep it on an interior-facing branch, store it flat, and plan to replace it in four or five years if it lives somewhere bright.
Start With One Felt Tree and Let the Shelf Fill Itself
You don’t need thirty-one ideas — you need one that makes you smile when you walk past it in February, and then the rest tends to follow. Pick a starting point, buy the $6 version first, and upgrade once you know what your space actually wants.
📌 Pin your favorites now so you can find them when the craft store sales hit.