You know that feeling when the tree is up, the lights are warm, and something still looks suspiciously store-bought? That’s usually the moment people start searching for homemade Christmas ornaments — and then get buried under a thousand glitter-and-popsicle-stick tutorials that all look the same.
We spent weeks combing Etsy, Michaels, Amazon, and our local thrift stores to bring you only the 31 handmade ornament ideas worth your glue-gun hours this year, from $5 wax-and-spice hexagons to $45 gilded filigree cones.
Inside you’ll find rustic wood-and-twine pieces, vintage glass revivals, needle-felted critters, and quiet neutral palettes built on cream and beige — plus budget and luxury versions of the same look, compared side by side.
In 2026, “made it myself” is the flex: crafters are leaning into slow, tactile, slightly imperfect pieces instead of another matched boxed set, and the trees look better for it.
And stay until the end — we break down the most common mistakes that can ruin these looks.
📌 Save this to Pinterest for later — you’ll want to revisit these ideas.
1. Hand-Painted Ceramic Tree Ornaments on a Rustic Branch
Painting your own ceramic trees? Lay in the outline and the scalloped base edge first, then flood the interior — you get crisp lines without a strip of painter’s tape. Build color in three thin coats instead of one heavy pass; thick underglaze crazes in the kiln and shows hairline cracks by January. Two light passes of matte acrylic sealer, held about 8 inches from the surface, keeps those bright florals and spirals from dulling.
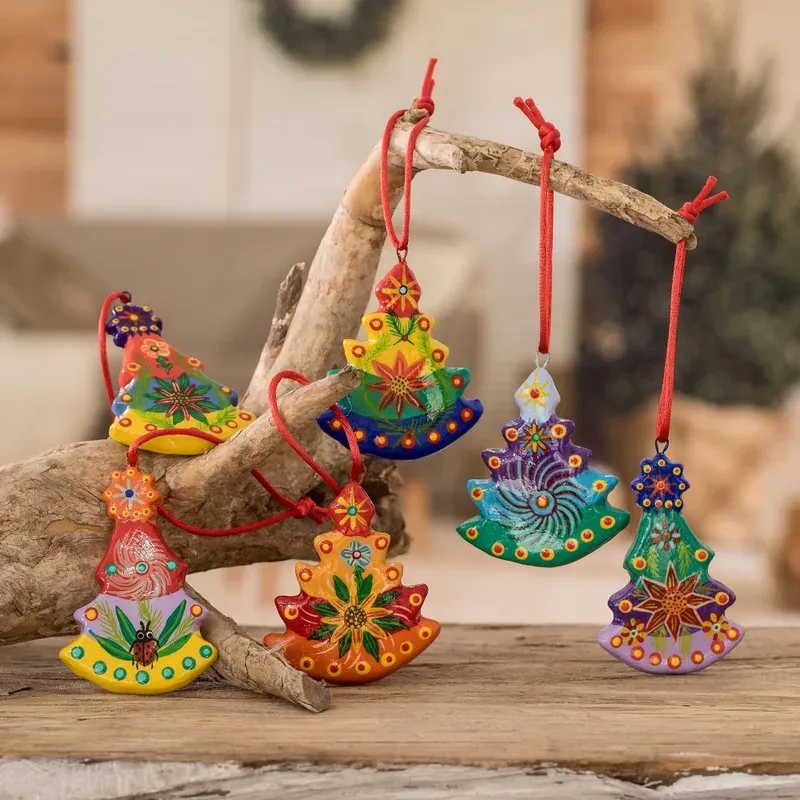
What makes this collection work is repetition with variation. Six trees share one silhouette, one scalloped base, one red cord — but every painted pattern is different, so the eye keeps moving. Displaying them on a bare, unfinished branch instead of a stained shelf lets all that saturated color do the talking.
2. Silver-and-White Candle Tray with Pinecones and Baubles
- White wooden tray: $18–$45
- Three glass candle holders: $12–$30
- Silver and white baubles, 12-pack: $10–$22
- Glitter snowflake picks: $8–$16
- Bag of pinecones: $6–$14
- Pillar candles: $9–$24
- Fresh pine sprigs: $5–$12
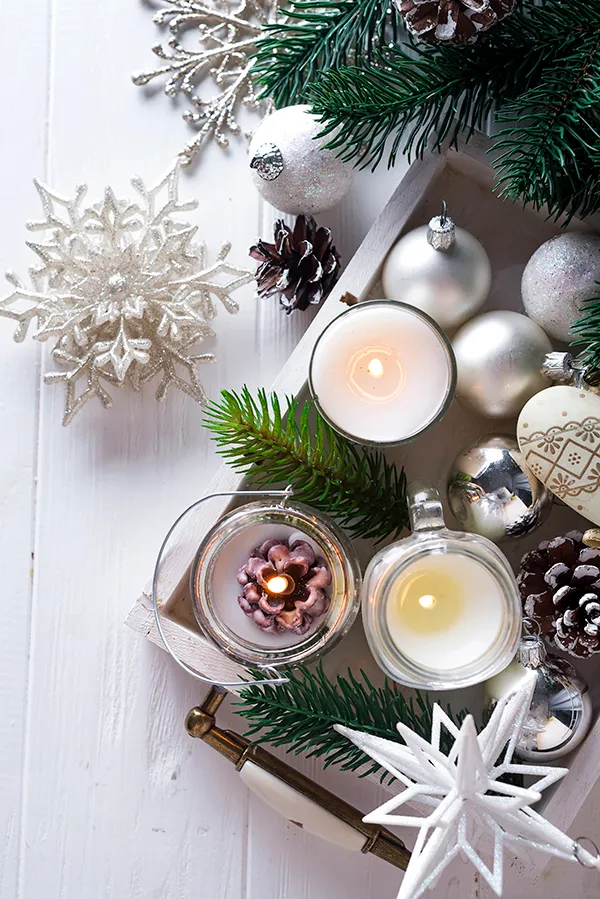
Budget alternative: a thrifted silver platter instead of the tray, pinecones you gathered on a walk, and post-holiday baubles at 70% off lands you around $30–$45.
Three lit candles at staggered heights are the whole engine of this arrangement. Take them out and you’re left with a pleasant but flat tray of silver balls. The flames do two jobs: they throw warm light onto the metallic finishes so the silver reads champagne instead of gray, and they pull your eye up and down the tray in a slow zigzag. Group odd numbers, keep the tallest candle off-center, and don’t light more than three.
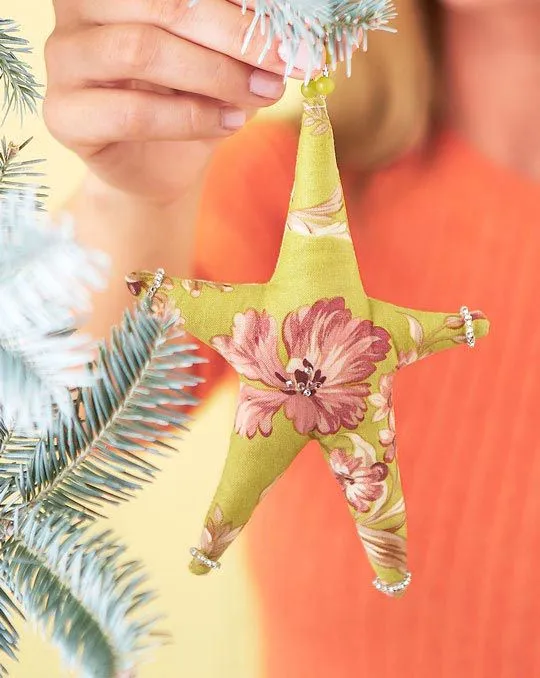
3. Hand-Stitched Fabric Stars and Wood Bead Garland
- Cut two matching star shapes from cotton, 4 inches across.
- Pin them right sides together, then tuck a 4-inch twine loop into the top point.
- Blanket stitch around the perimeter, stopping an inch short of the last point.
- Turn the star, stuff it lightly with polyester fill, and close the gap.
- Embroider a simple X or running stitch across the center for interest.
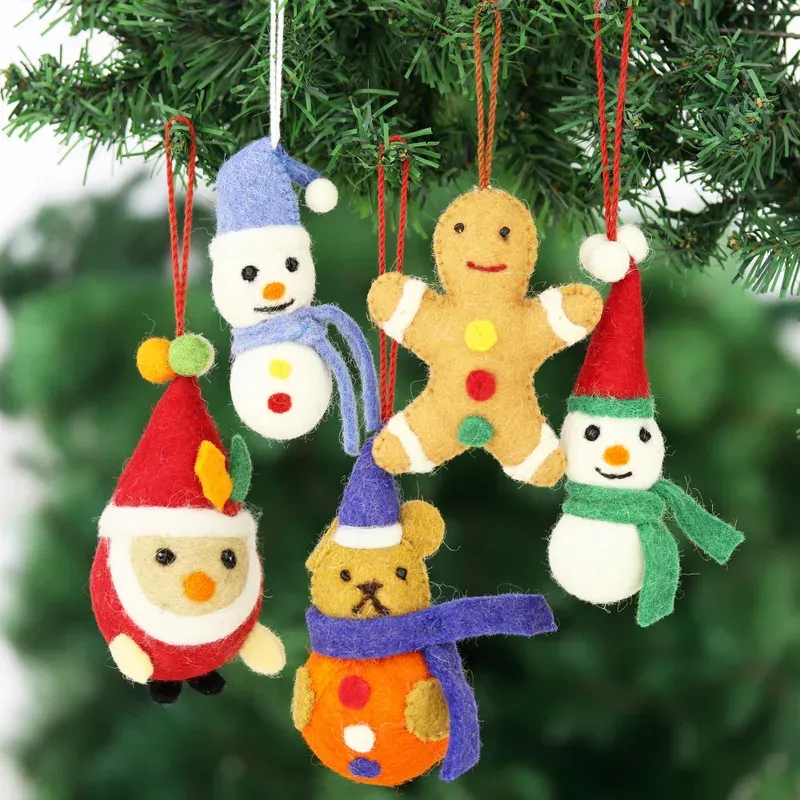
About 40 minutes per star once you stop re-reading the tutorial. Fabric and fill run under $10 for a set of six.
The formula is 70% soft neutral fabric + 20% red stitching and ribbon + 10% natural wood. That ratio is why this reads traditional instead of country-cute — the red stays small enough to feel like an accent, never a theme. Swap the red for sage green and the same star turns quiet and modern; swap the cotton for wool felt and it goes cabin. Compare with Idea #20 — same stitched spirit, tighter palette.
4. Glass Vase Ornament Tree Built on Silver Wire
The vase-and-wire display is the 2026 answer to a real shift: people are collecting fewer ornaments and actually want to see them. Instead of one more bin in the attic, the pieces become an object on the sideboard. It also mirrors the jewelry-like styling turning up in holiday tablescapes — thin wire, clear glass, and pink glass instead of tinsel. This one has staying power because it’s storage and decor in the same breath.
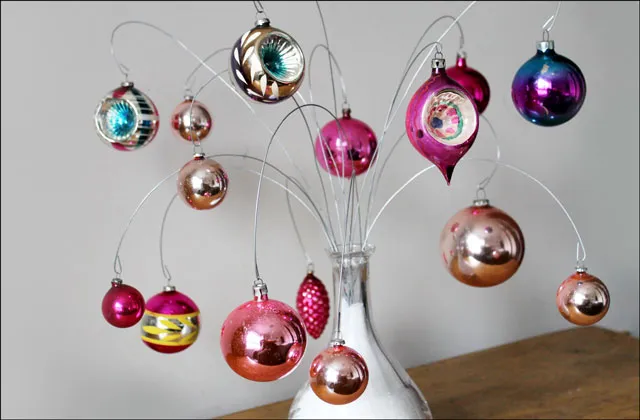
It thrives in small spaces. A 10-inch vase with 18-inch wires fills a 24-inch console beautifully; anything shorter than 14-inch wires and the ornaments tangle against the rim. It needs about one square foot of surface and zero clearance above, so it suits apartments, entry consoles, and bathroom counters. Working a full-size tree instead? See Idea #17 for how big ornaments should read up close.
5. Folded Paper Star Ornaments in Warm Beige
These stars read calm against the deep green because the contrast is in value, not hue. Light beige against dark needles, no competing color anywhere. The faceted fold catches light in dozens of tiny planes, so a single matte material still shimmers as the tree moves. And the small scale keeps them quiet — scale these up to 8 inches and that same geometry becomes a statement, losing all its restraint.
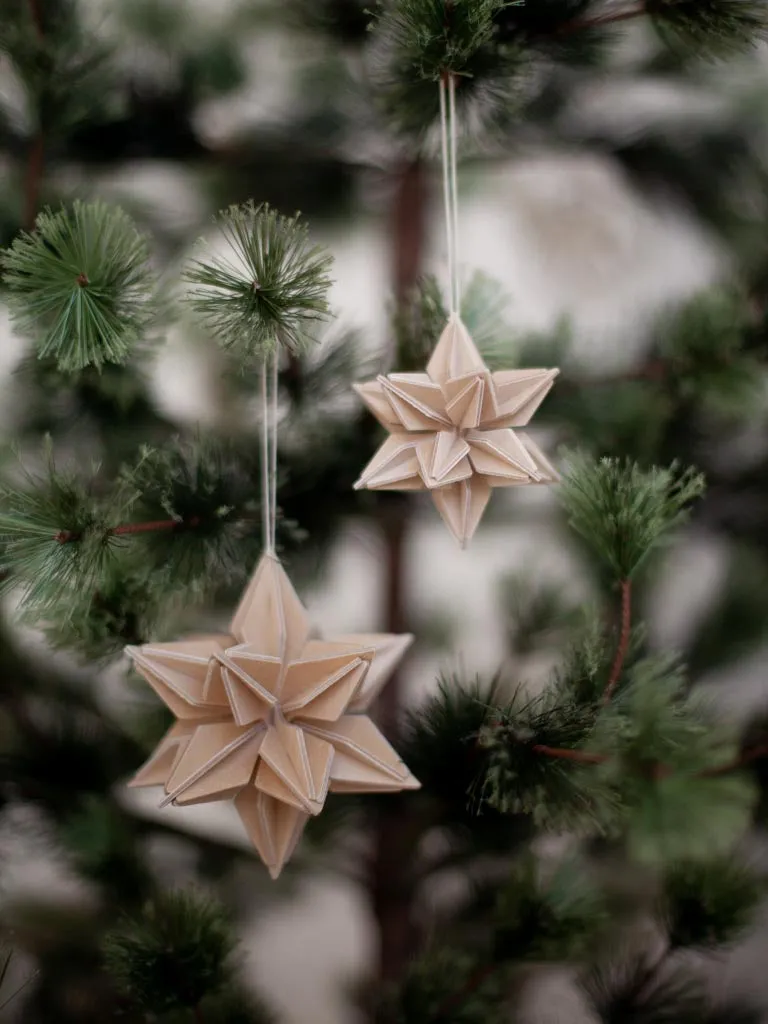
Paper is the one material that punishes a humid house. Near a kitchen, a radiator, or a bathroom door, heavy cardstock softens and creases within a season. Spray both sides with a matte fixative before folding, keep them off the lowest branches where pets and toddlers reach, and never hang them within 12 inches of a real candle. Store flat in a shoebox with tissue between layers.
6. Wicker Basket Filled with Floral and Speckled Baubles
Floral-painted spheres look boutique, but they’re a napkin and a sponge away at home. Buy plain matte baubles at a dollar store, cut paper napkins into motifs, and apply with decoupage medium — 12 ornaments for under $15. The speckled blue ones? Dip a dry brush in gold acrylic and flick it with your thumb. Thrift the wicker basket for about $4 and line it with a linen tea towel so the spheres stop rolling into each other.
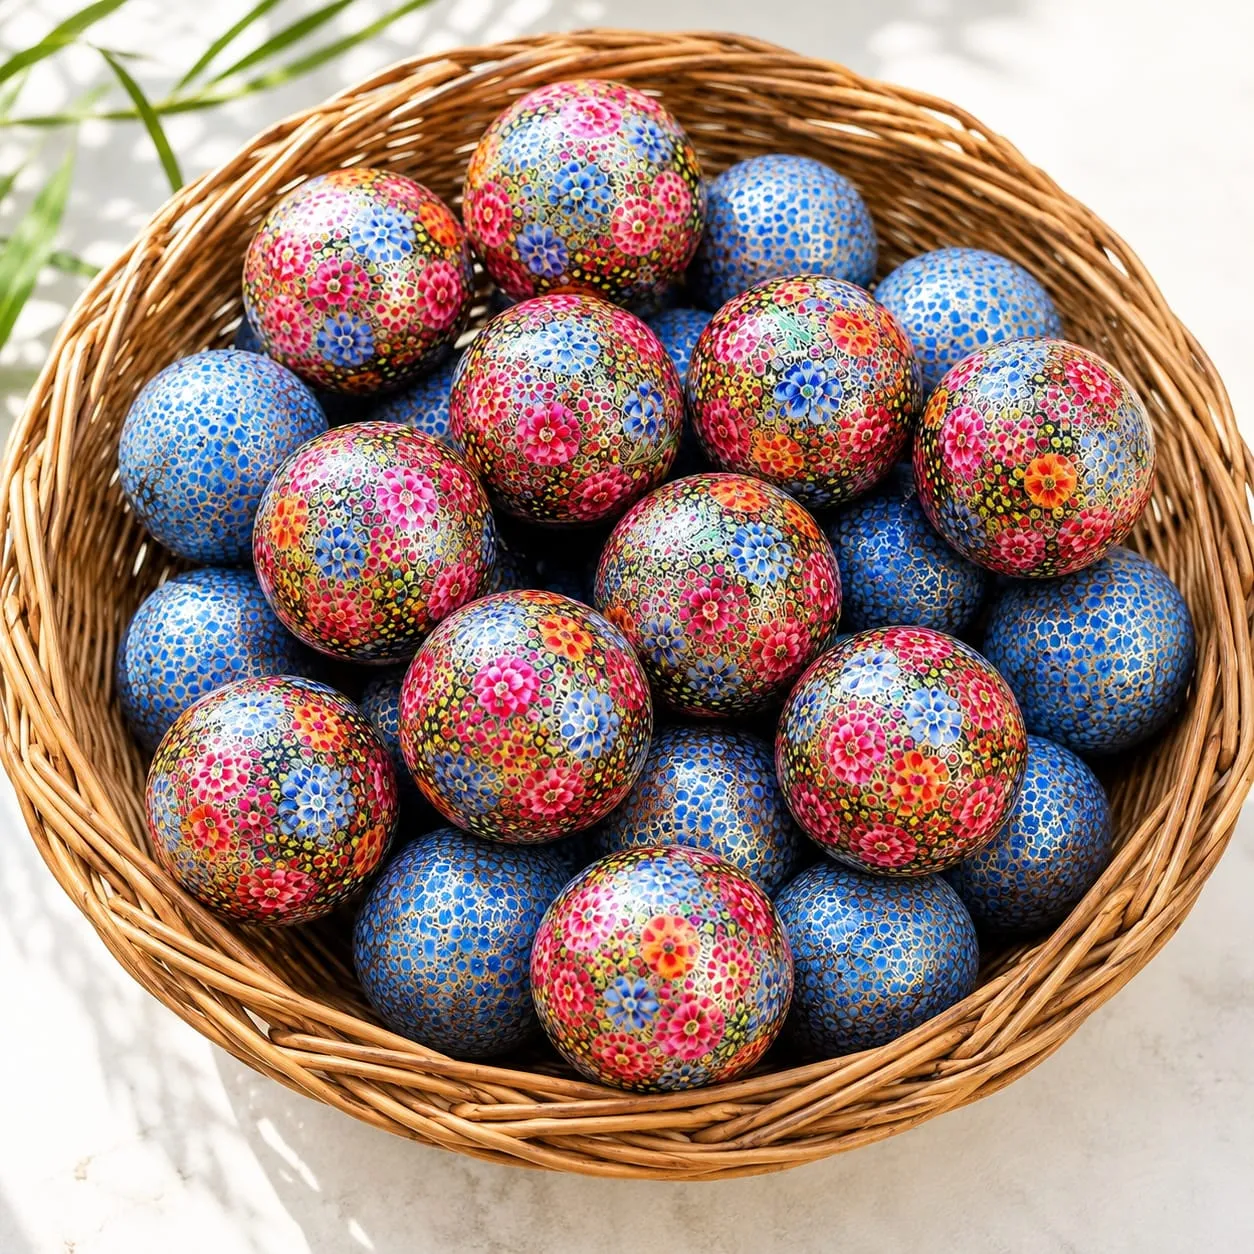
Fill the basket to roughly 85% and stop. Overfilled, the ornaments look poured in; underfilled, the basket looks empty. Set the largest spheres at the back and sides where they frame the arrangement, and tip two smaller ones forward so the stack looks casually placed rather than stacked. If the basket sits on a shelf, angle it 15 degrees and let one ornament rest outside the rim.
7. Millefiori Glass Tree Ornaments with Gold Ribbons
Count it out: 60% clear glass, 30% split between one red and one green body, 10% gold ribbon. The clear tree is the anchor — it lets the greenery show through, which is exactly why the set feels airy instead of heavy. Change the anchor to smoked gray glass and the trio turns moody; keep the ratio and swap the ribbon to ivory and it goes soft and Scandinavian. The light yellow glass bases act as the neutral holding it all together.
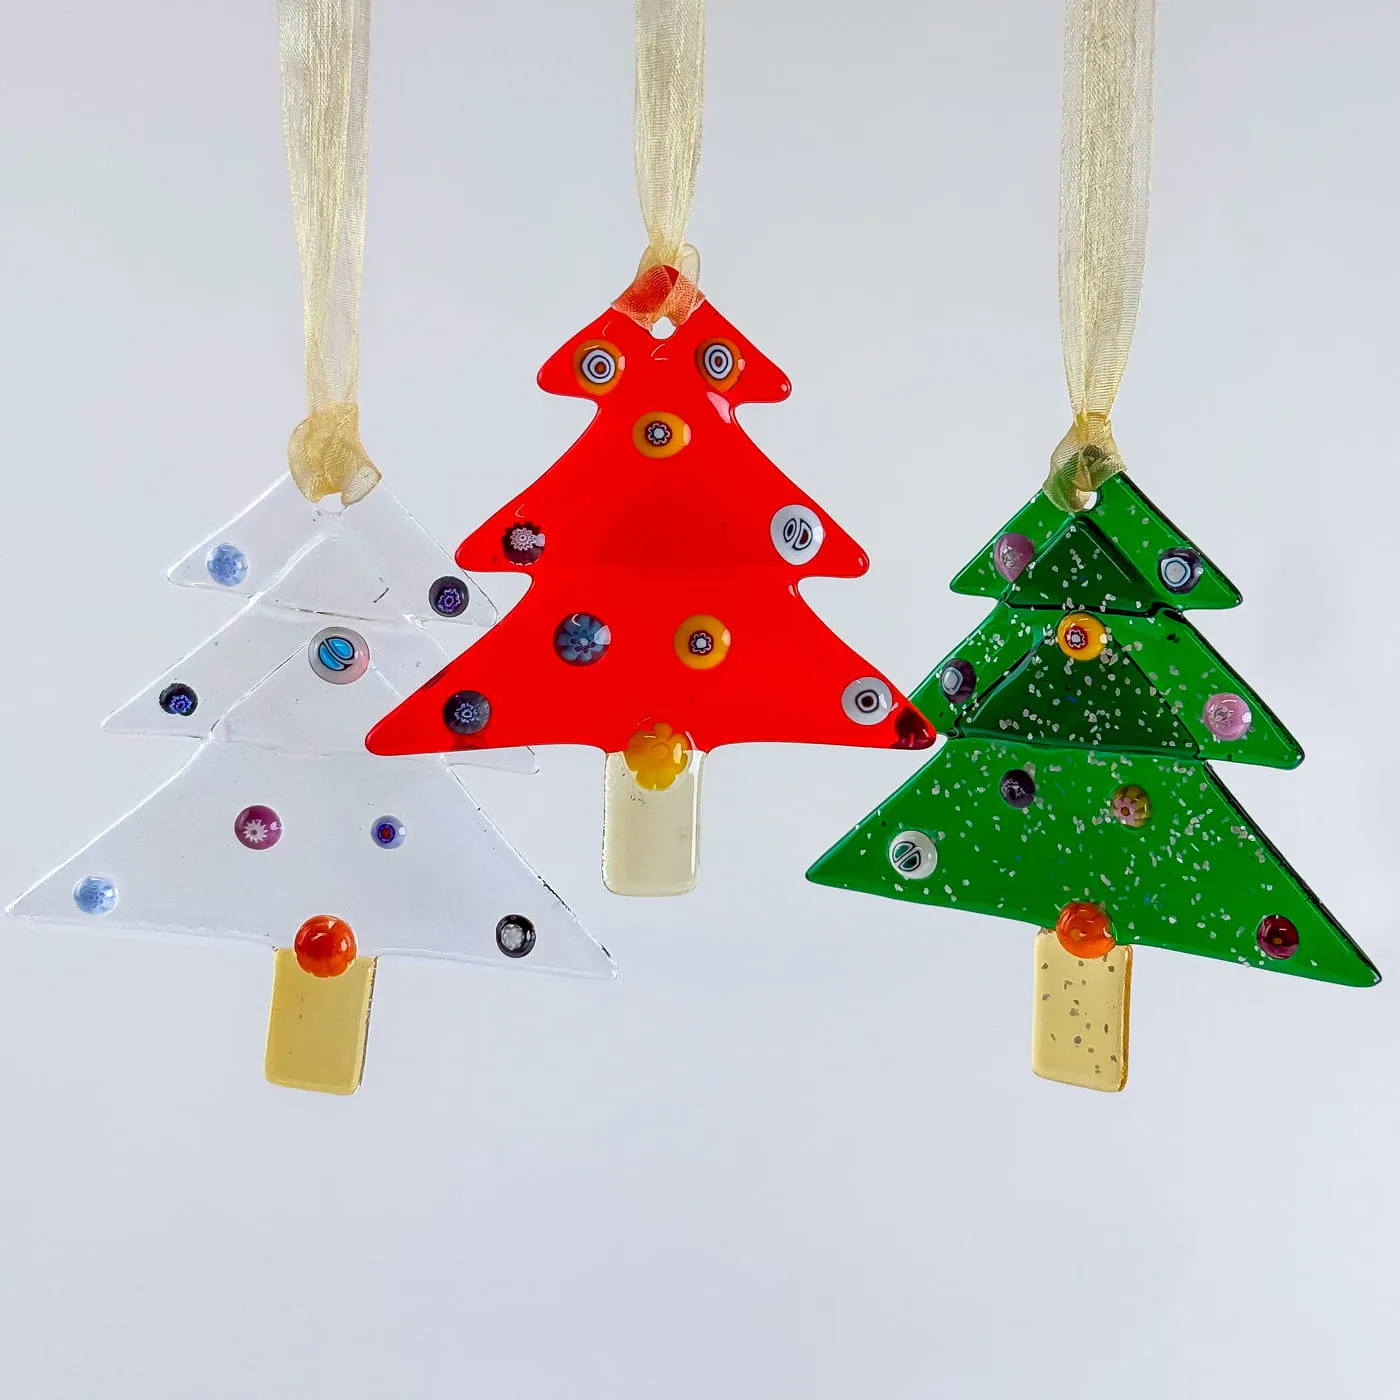
Glass with millefiori dots needs a soft brush, not a cloth — dust catches in the indented patterns and a rag pushes it deeper. Gold sheer ribbon frays at the cut end; seal it with a dot of clear nail polish. And check the wire loops every December. Glass is heavy, and a loop that survived last year can still be fatigued. Compare with Idea #21 for storage that actually protects glass.
8. Clear Baubles Filled with Natural Seed Caps
- Confirm your seed caps are fully dry — a full week on a screen, minimum, or they’ll mold inside the glass by New Year.
- Use a clear-drying craft glue; white school glue clouds permanently behind glass.
- Measure the ornament opening against your tweezers and a chopstick before you commit to a design.
- Decide whether your tree will be flocked — pale seed caps disappear against heavy frost.
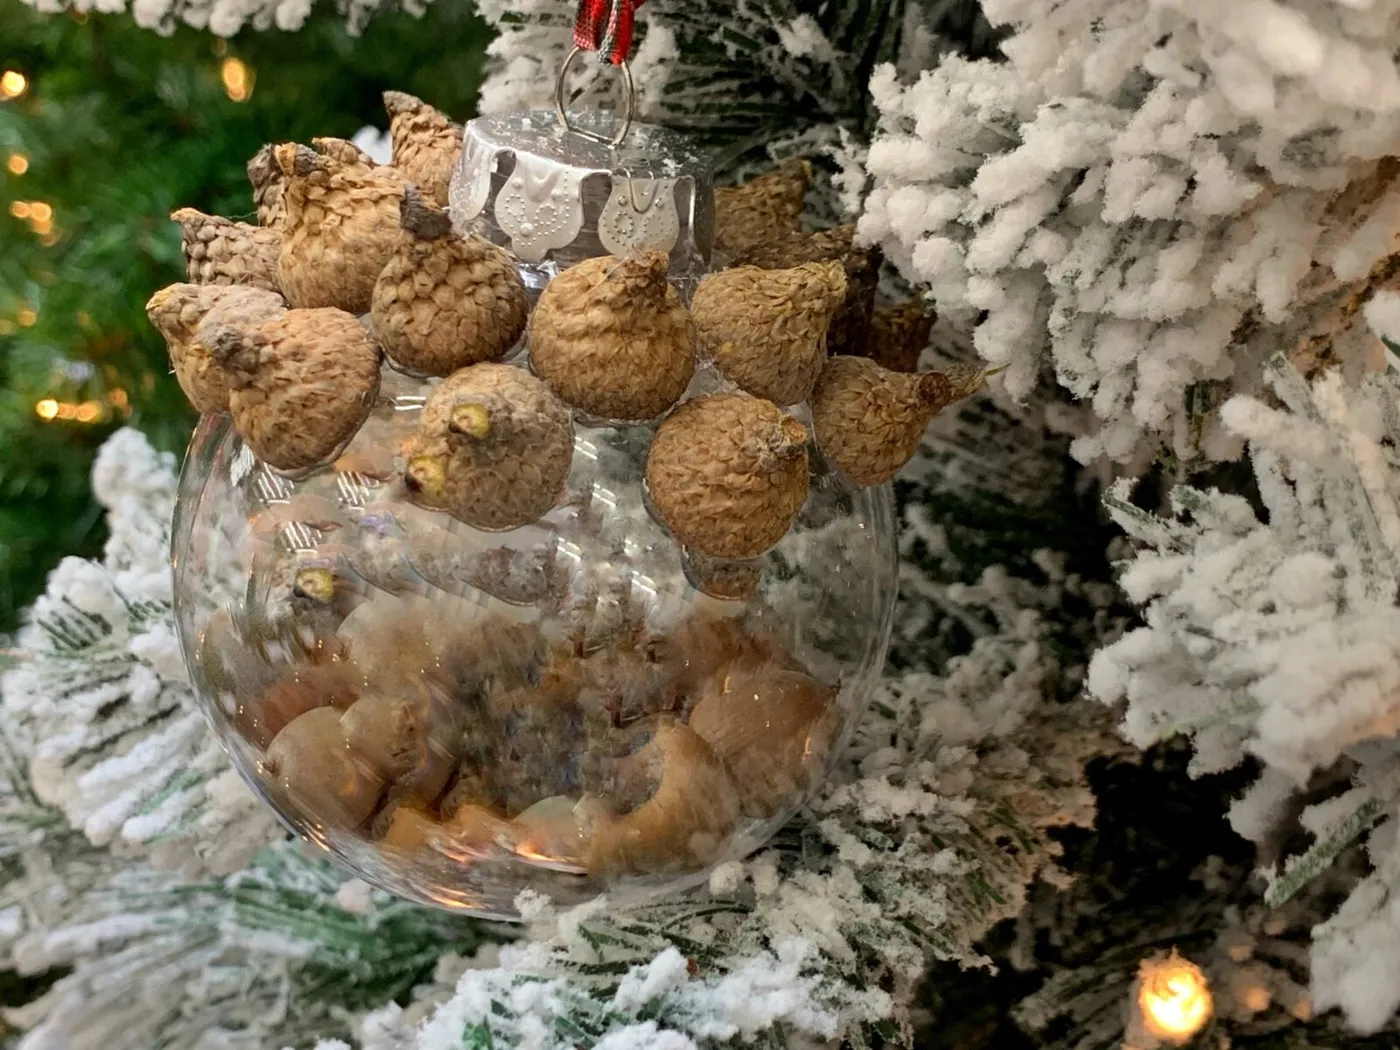
Filling the inside is what separates this from a craft-kit bauble. Anyone can glue pods to the outside; the ones suspended within catch light and shadow as the tree moves, so the ornament changes all evening. Leave roughly a third of the interior empty at the bottom — the negative space is what makes the drift look like it’s floating rather than stuffed.
9. Distressed Metal-Look Ornaments with Embossed Dots
- Air-dry clay, 2 lb: $12–$18
- Round cookie cutter or jar lid: $0–$6
- Rubber stamps with dot and line motifs: $10–$22
- Metallic rub-on wax in bronze: $9–$16
- Black acrylic for the crevices: $4–$8
- Twine or waxed string: $3–$6
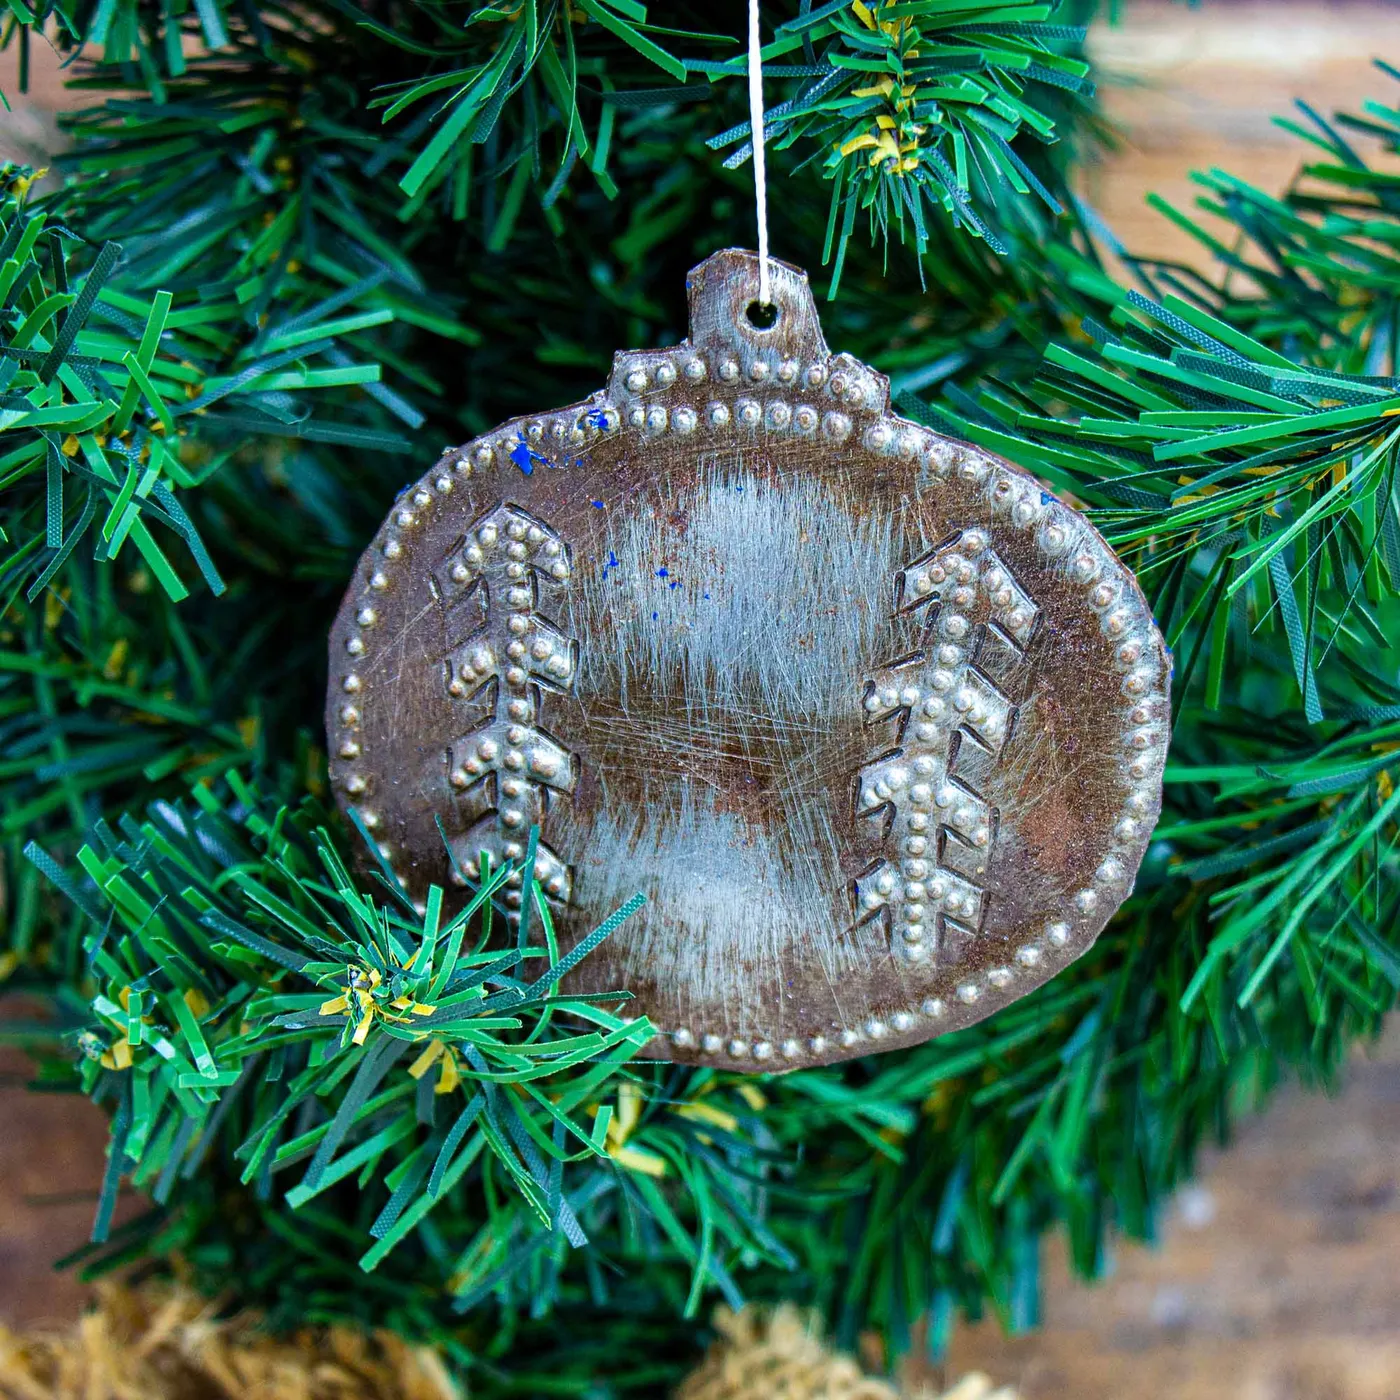
Budget alternative: skip the stamps entirely and press the tines of a fork and the tip of a pen cap into the clay. You get the same embossed rhythm for about $20.
Weight is the hidden problem with clay ornaments. Air-dry clay is roughly twice as heavy as wood, so six of these on one branch will bow it. Hang them one per branch and close to the trunk, never on the tips. And let them dry a full 48 hours before adding metallic wax — trapped moisture under the finish turns the whole surface cloudy, and no amount of buffing fixes it.
10. Carved Wooden Snowflake Stars with Red Ribbon
- Trace a five-point star onto 1/8-inch birch plywood, about 3 inches wide.
- Cut the outline with a scroll saw or a fine-tooth coping saw.
- Sand the edges to 220 grit, then sketch a snowflake in pencil at the center.
- Carve the lines with a 1mm V-gouge, always working with the grain.
- Wipe with a damp cloth to raise the grain, sand once more, and finish with tung oil.
Roughly 50 minutes per star. One $6 sheet of plywood makes eight of them.
The white space around the snowflake is doing the work. Carve that same design at full width and it turns busy; leaving a wide margin of plain wood makes the pattern read instantly from across the room. And the red ribbon covers only about 5% of the ornament’s surface — small enough to feel like a signature, not a color scheme. This is the one that looks best when the tree lights are warm, low, and slightly blurred.
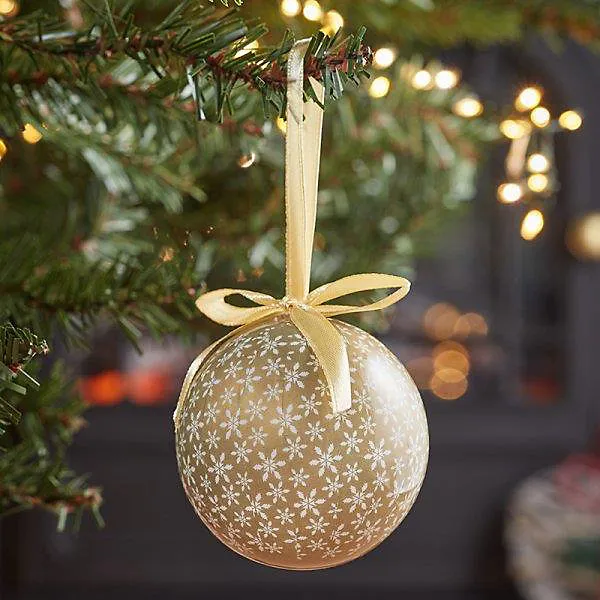
11. Gold Baubles Stamped with White Snowflakes
Stamping onto a curved bauble is easier than it looks if you use a makeup sponge instead of the stamp block. Load it lightly, pounce two thin coats rather than one wet one, and rotate the ornament a quarter turn between impressions so the pattern wraps naturally. Let each coat dry 20 minutes. Seal with a matte varnish — gloss makes white paint look gray under warm bulbs. A 3/8-inch satin ribbon ties a bow that reads from across the room.
These 3-inch gold spheres work best on a 7.5 to 9-foot tree, spaced about 5 inches apart so the repeating pattern isn’t crowded. On a small 4-foot tabletop tree, use only three as focal points and skip the space-fillers. If you’re working a wall of ornaments instead, see Idea #31 for how larger glass pieces hang without overwhelming a room.
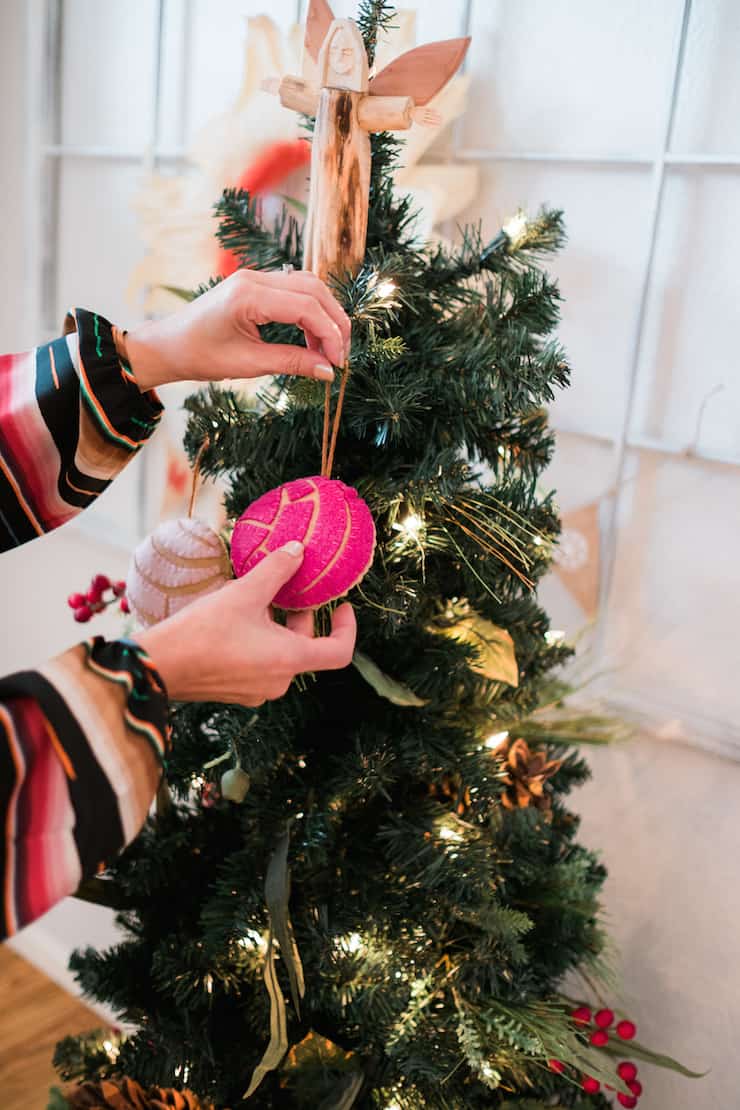
12. Concha Ornaments and a Carved Wooden Angel Topper
Pan dulce ornaments are the crossover moment of the 2025–2026 season — bakers and crafters realized the concha’s ridged shell shape is basically a ready-made ornament mold. A hot pink one next to a natural beige one makes a deliberately bicultural tree: tradition holding hands with a wink. It isn’t a flash trend either. Food-shaped ornaments have been climbing for three years, and this one carries real meaning for a lot of families.
Skip the specialty mold and shape air-dry clay over the back of a scalloped tart tin — same ridges, $8 of clay, makes ten. Let them dry 48 hours, sand the edges, and paint with craft acrylic in hot pink and pale beige. Hang with baker’s twine. A whole garland for under $20, and the slightly irregular shapes are the point. Pair with the tray styling in Idea #2 for a dessert-table moment.
13. Needle-Felted Husky Ornament in a Tiny Red Scarf
The scarf. It’s four inches of knitted ribbing on a three-inch dog, and without it he’s a cute wool blob. With it, he has a personality — you can almost hear the snow crunching. That’s the lesson for any needle-felted animal: give it one piece of clothing or one accessory, in a real material, at honest scale. A tiny scarf knitted on 2mm needles takes twenty minutes and does more than another hour of fur blending.
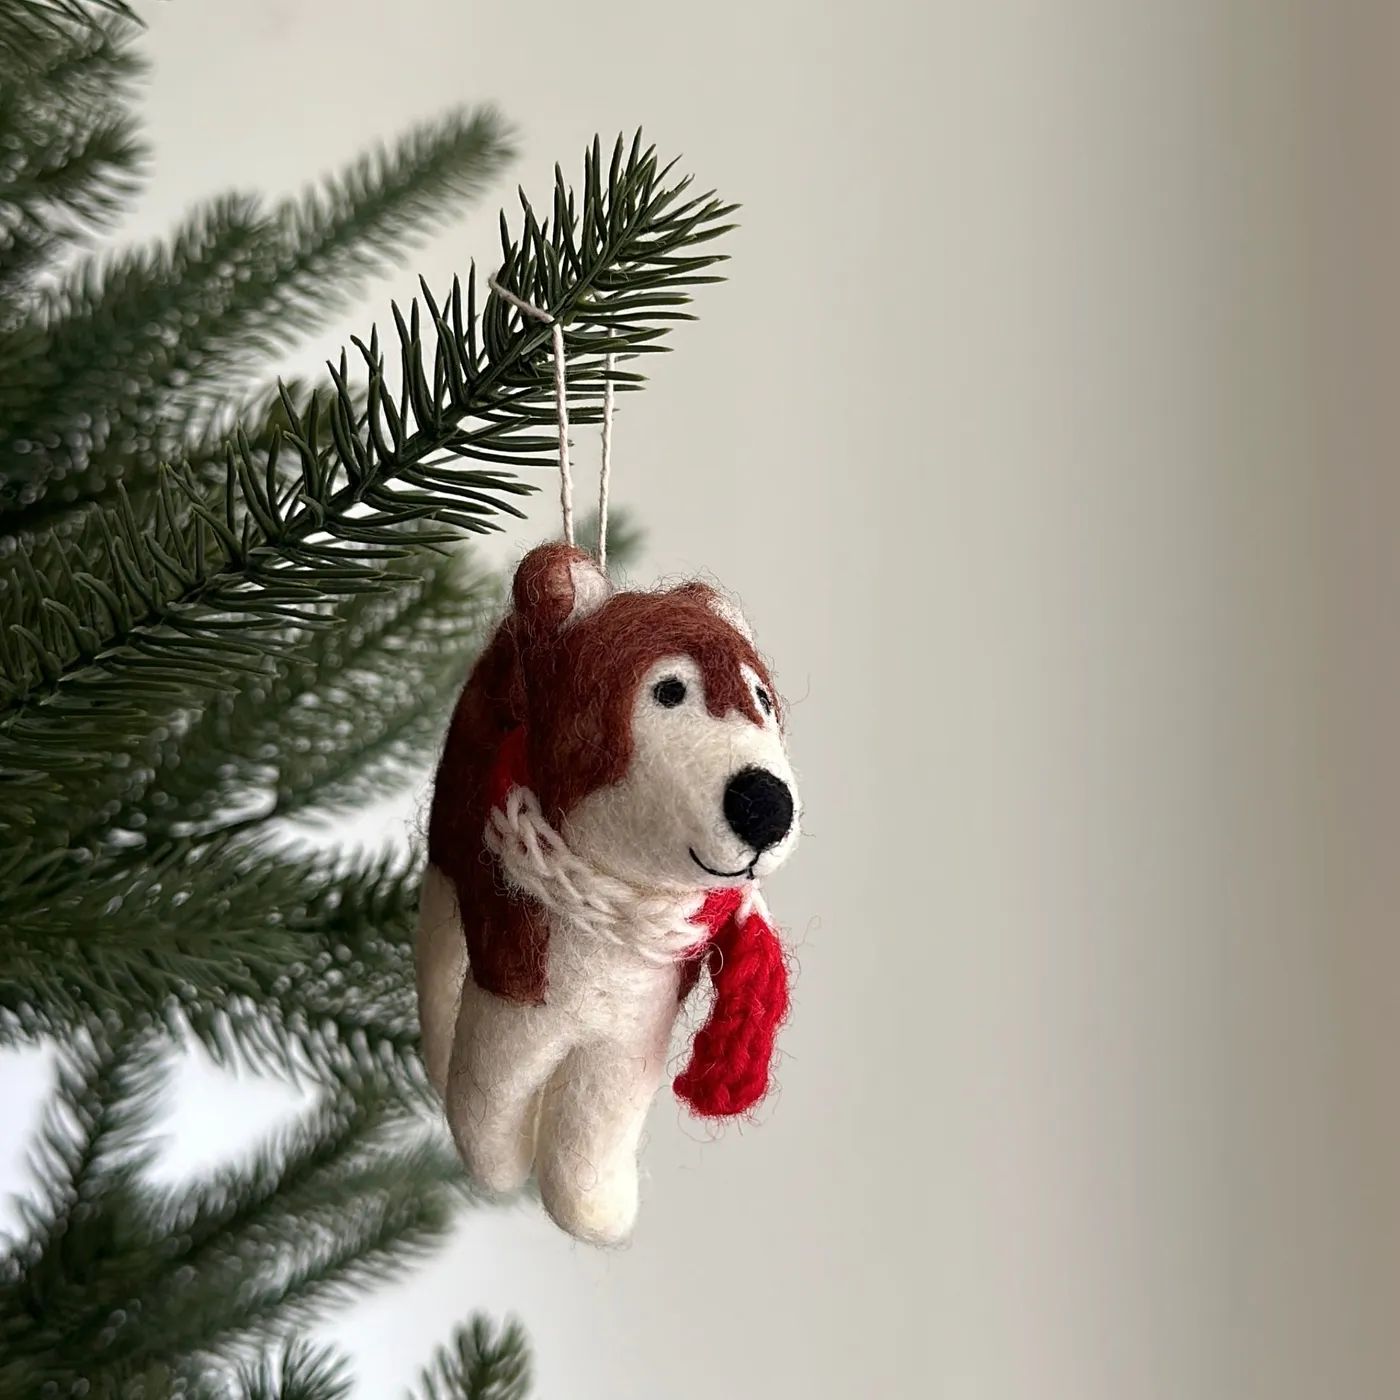
Needle felting is the least forgiving craft on this list for your fingers. The barbs are sharp and 38-gauge needles snap if you push sideways. Felt over a foam pad, keep your fingers behind the needle, and buy replacements in packs of ten. Finished pieces collect dust and pet hair, so store them in a closed bin rather than an open shoebox — and never wash them.
14. Felt Mouse Dressed as a Lit Christmas Tree
- Cut a cone from green felt, 4 inches tall, and whip-stitch the seam closed.
- Poke small holes in a spiral with an awl, spaced about 1/2 inch apart.
- Thread battery micro-LEDs through the holes, working from the bottom up.
- Tuck the battery pack behind the mouse’s base and secure it with a velcro dot.
- Cap the cone with a felt star dipped in gold glitter and glue it in place.
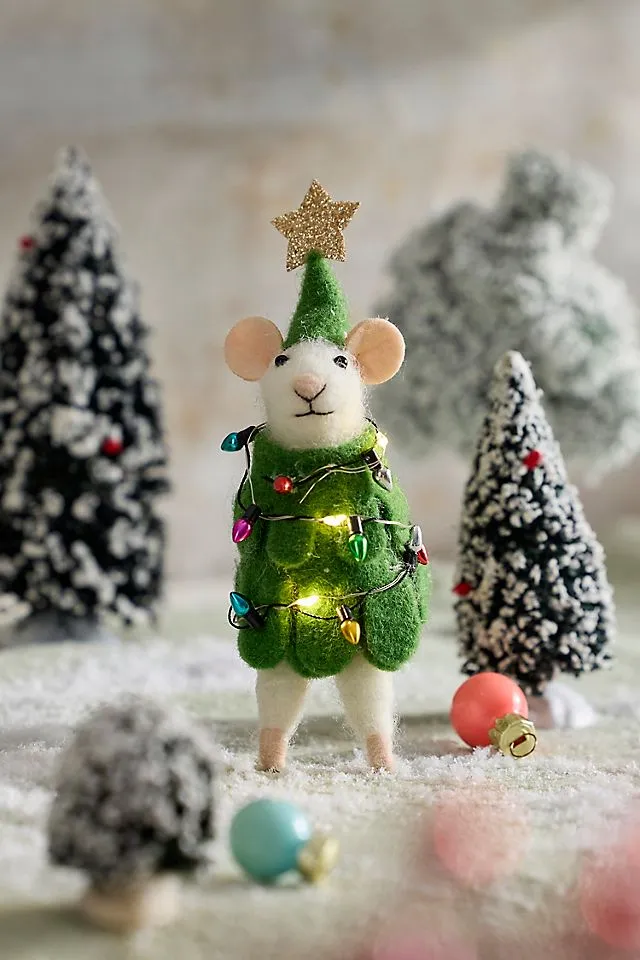
Roughly an hour of work. Felt, LEDs, and glitter run about $14 total.
Count the recipe: 80% white felt for the mouse and snow, 15% green for the tree costume, 5% gold glitter on the star hat. The white keeps a whimsical figure from tipping into kitschy, and the multicolored lights are the only place saturated color appears. Change the mouse to light gray and the palette goes cooler and more Scandinavian; swap the gold star for silver and it turns frosty.
15. Felt Cake Roll Ornaments with Dripping Icing
- Wool-blend felt sheets, 6 colors: $8–$14
- Embroidery floss: $4–$8
- Sequins, mixed pack: $3–$7
- Polyester fill, small bag: $4–$7
- Ribbon for hangers: $3–$6
- Assorted glass baubles for styling: $12–$30
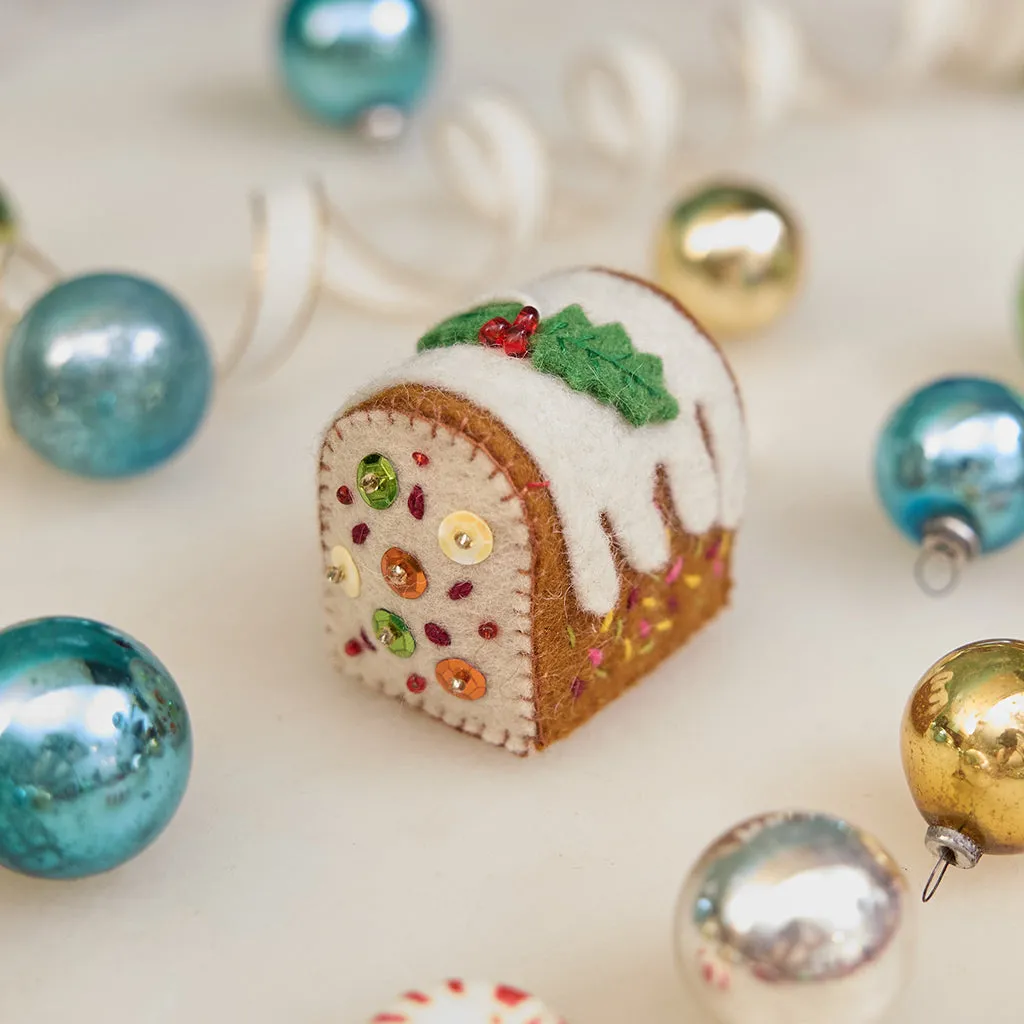
Budget alternative: acrylic craft felt at about 50 cents a sheet instead of wool blend, and skip the glass baubles — style the arrangement with ornaments you already own.
Sequins are the diva of this ornament. They shed, they snag on wool, and they catch on branches when you pull the piece out of storage. Back each cluster with a drop of fabric glue and the shedding mostly stops. Keep all felt ornaments out of direct window sun — three summers of UV and green felt turns sage. Store in a zip bag with a cedar block, and never machine wash felt, even on cold.
16. Laser-Cut Wooden Santa Faces on Pine
If you’re cutting these yourself, use 1/8-inch birch plywood and run two passes at 60% power rather than one at full — you get cleaner edges and far less char. Sand the burnt edge with 320 grit, then wipe with tung oil thinned 50/50 with citrus solvent. Etched details read best at 0.5mm line width or narrower; anything heavier closes up and the mustache turns into a blob. Local makerspaces rent laser time by the hour if you don’t own one.
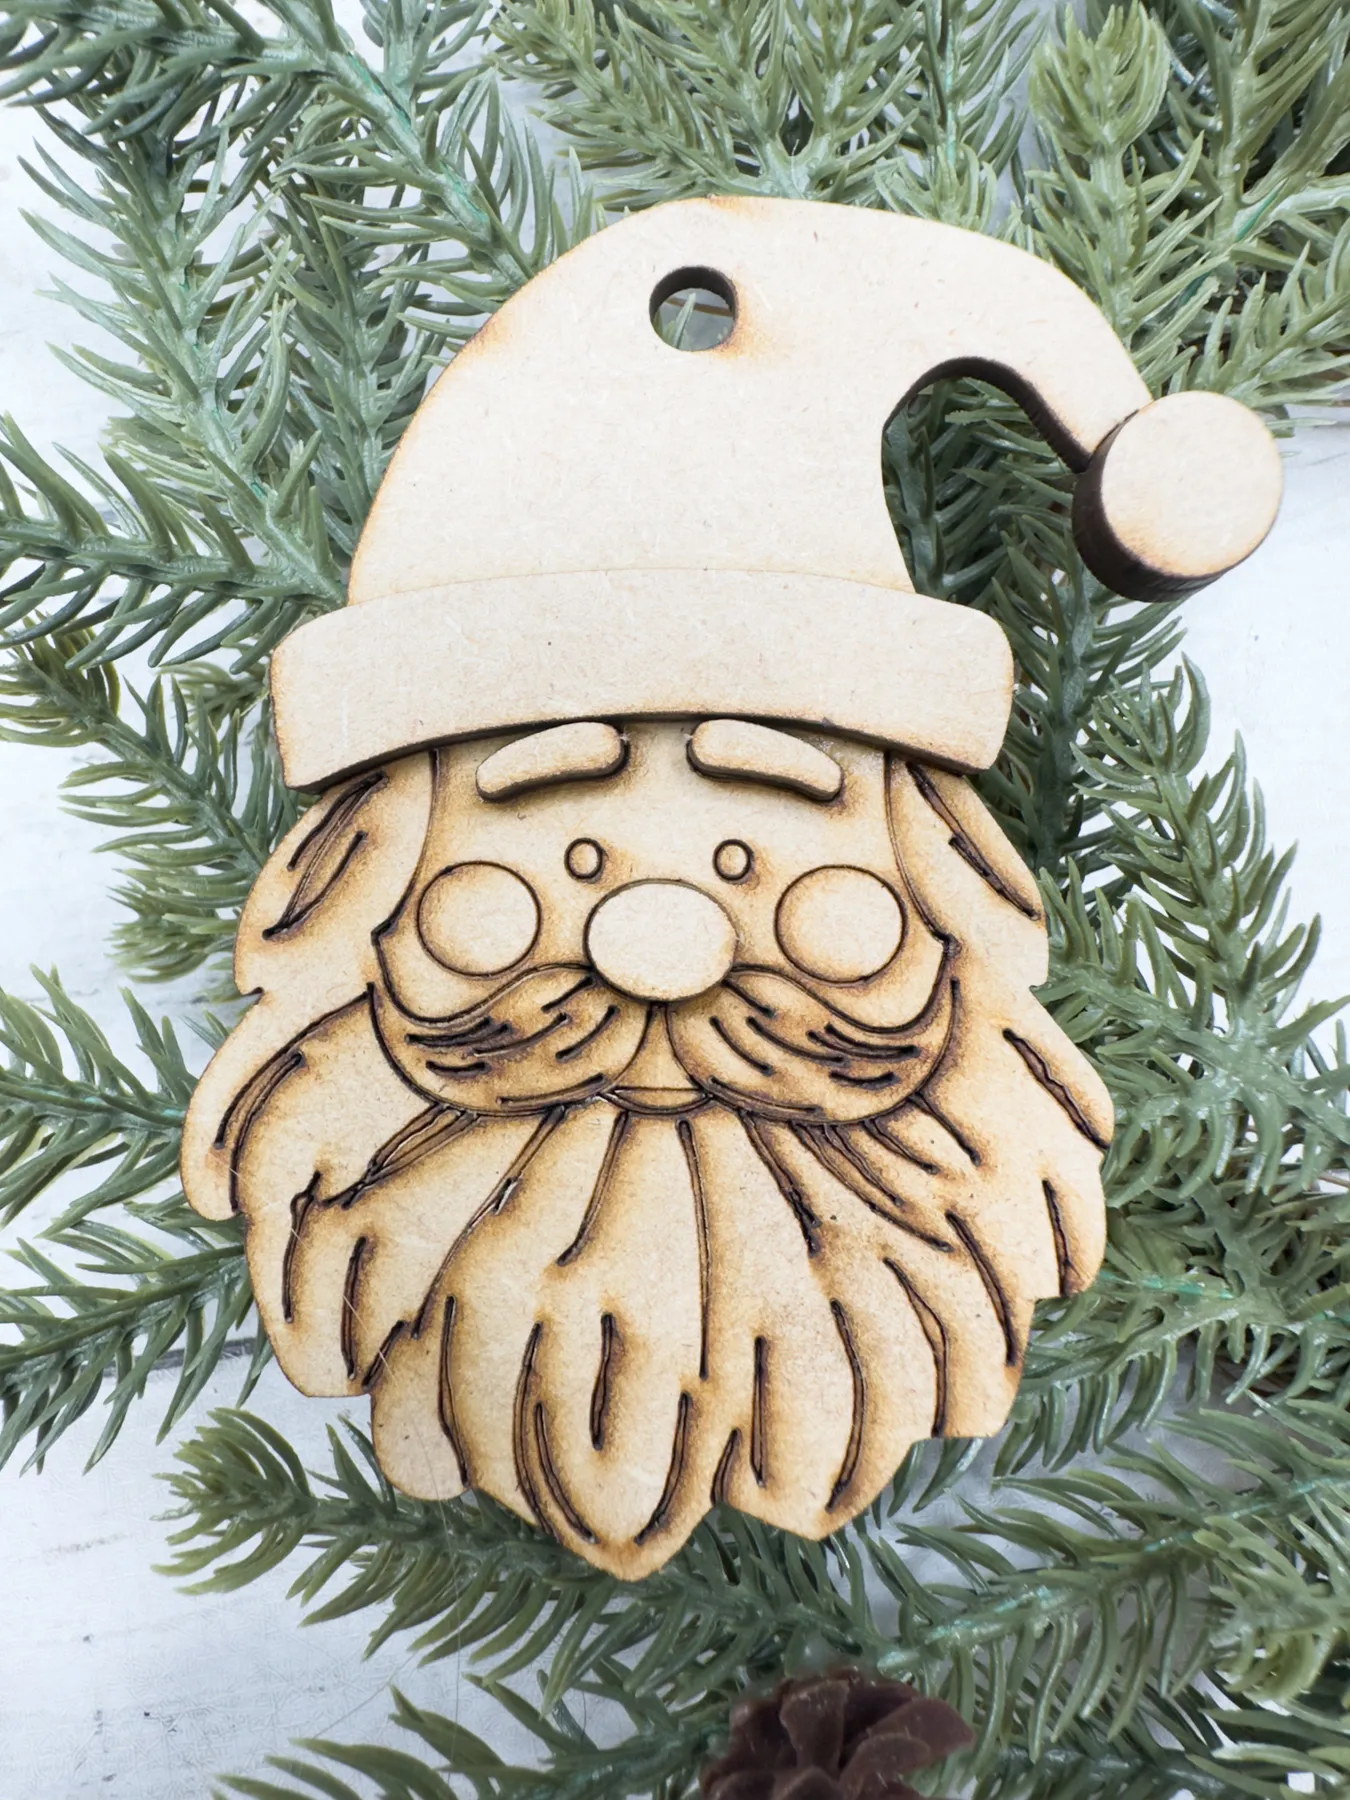
- Confirm your plywood is truly 1/8 inch — 5mm stock won’t fit standard ornament hangers.
- Test your cut file on a scrap square before committing a full sheet.
- Decide the finish first: raw wood, oiled, or whitewashed changes the whole look.
- Check the hanging hole diameter against your twine or ribbon.
17. Gilded Filigree Cones with Silhouetted Scenes
Filigree needs scale to read. On a 7.5 to 9-foot tree, a 5-inch cone holds its own; on a 4-foot tree it swallows everything around it. Give each one at least 8 inches of clear space so your eye can complete the silhouette — pack them in and the scenes turn to gold mush. If your ceiling is under 8 feet, hang these in the upper third of the tree, where light passes through the cut-outs most dramatically.
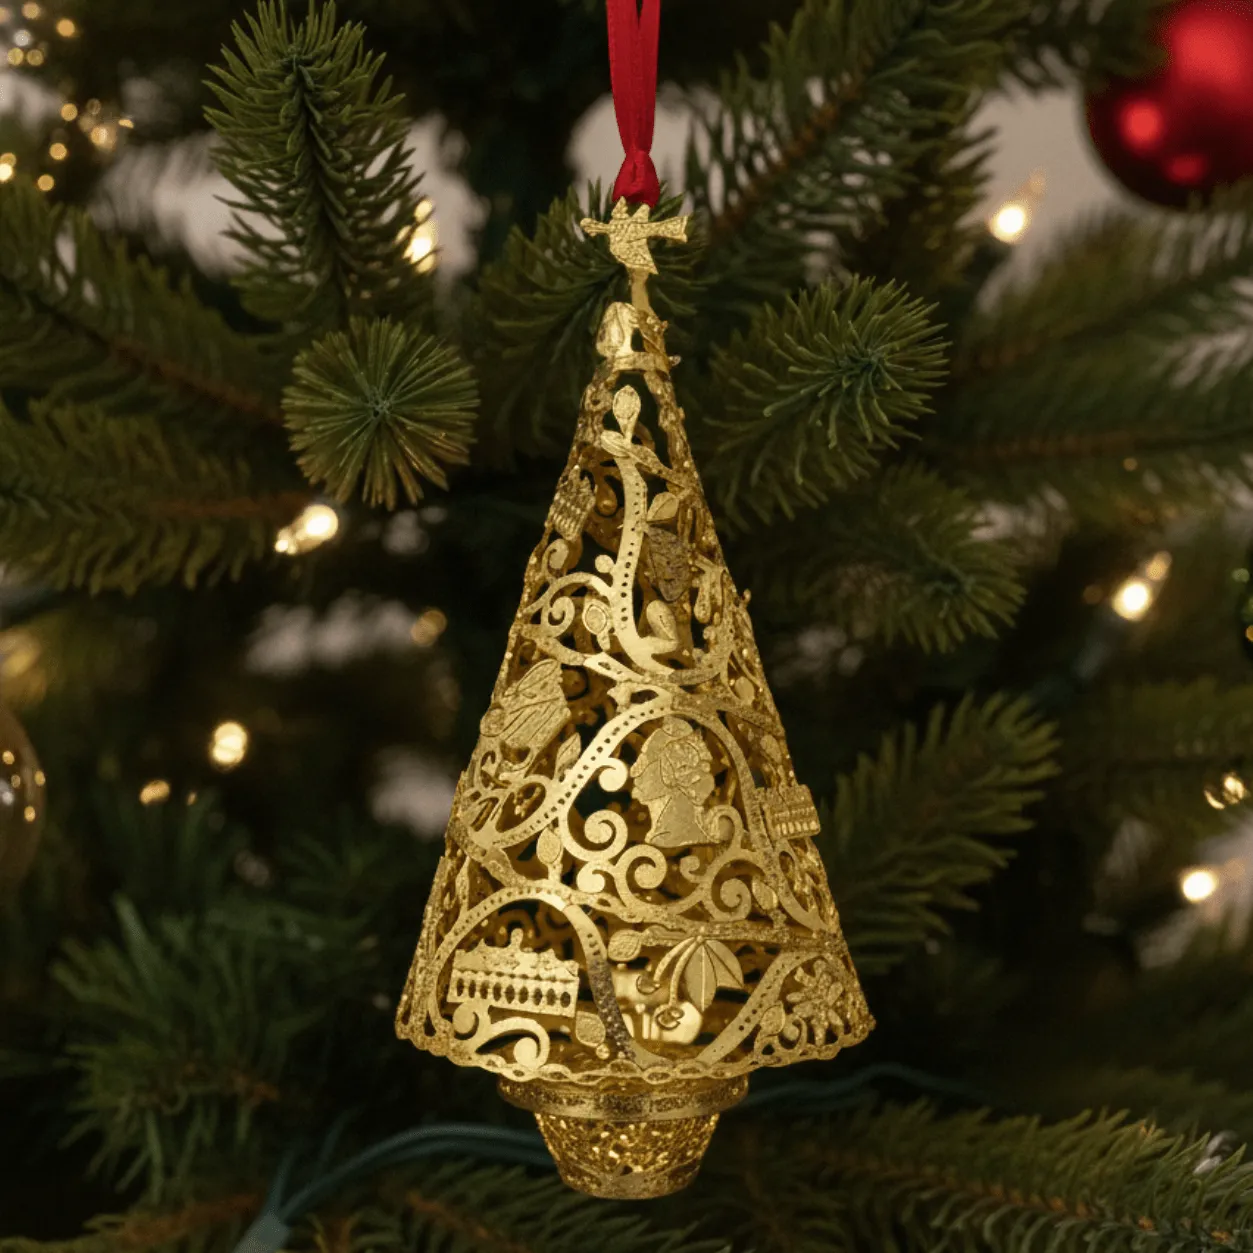
It’s negative space again, but here it’s literal. The filigree lets warm tree lights pass straight through, so the ornament doesn’t reflect light, it transmits it. That’s why gold pieces like this look richer than solid metallic spheres at the same price. The red ribbon and the tiny bird detail at the top keep it from feeling like an antique shop display case: one warm color and one moment of whimsy holding the whole thing together.
18. Decoupage Horse Ornaments in Santa Hats
Decoupage on a curved surface will wrinkle — plan for it. Work with small pieces no wider than a thumbnail, press from the center outward, and accept that two or three will need redoing. Mod Podge turns milky in cold rooms, so let each ornament dry somewhere above 65°F. And seal the finish, because unsealed decoupage on wood picks up fingerprint oils and goes dull within a month.
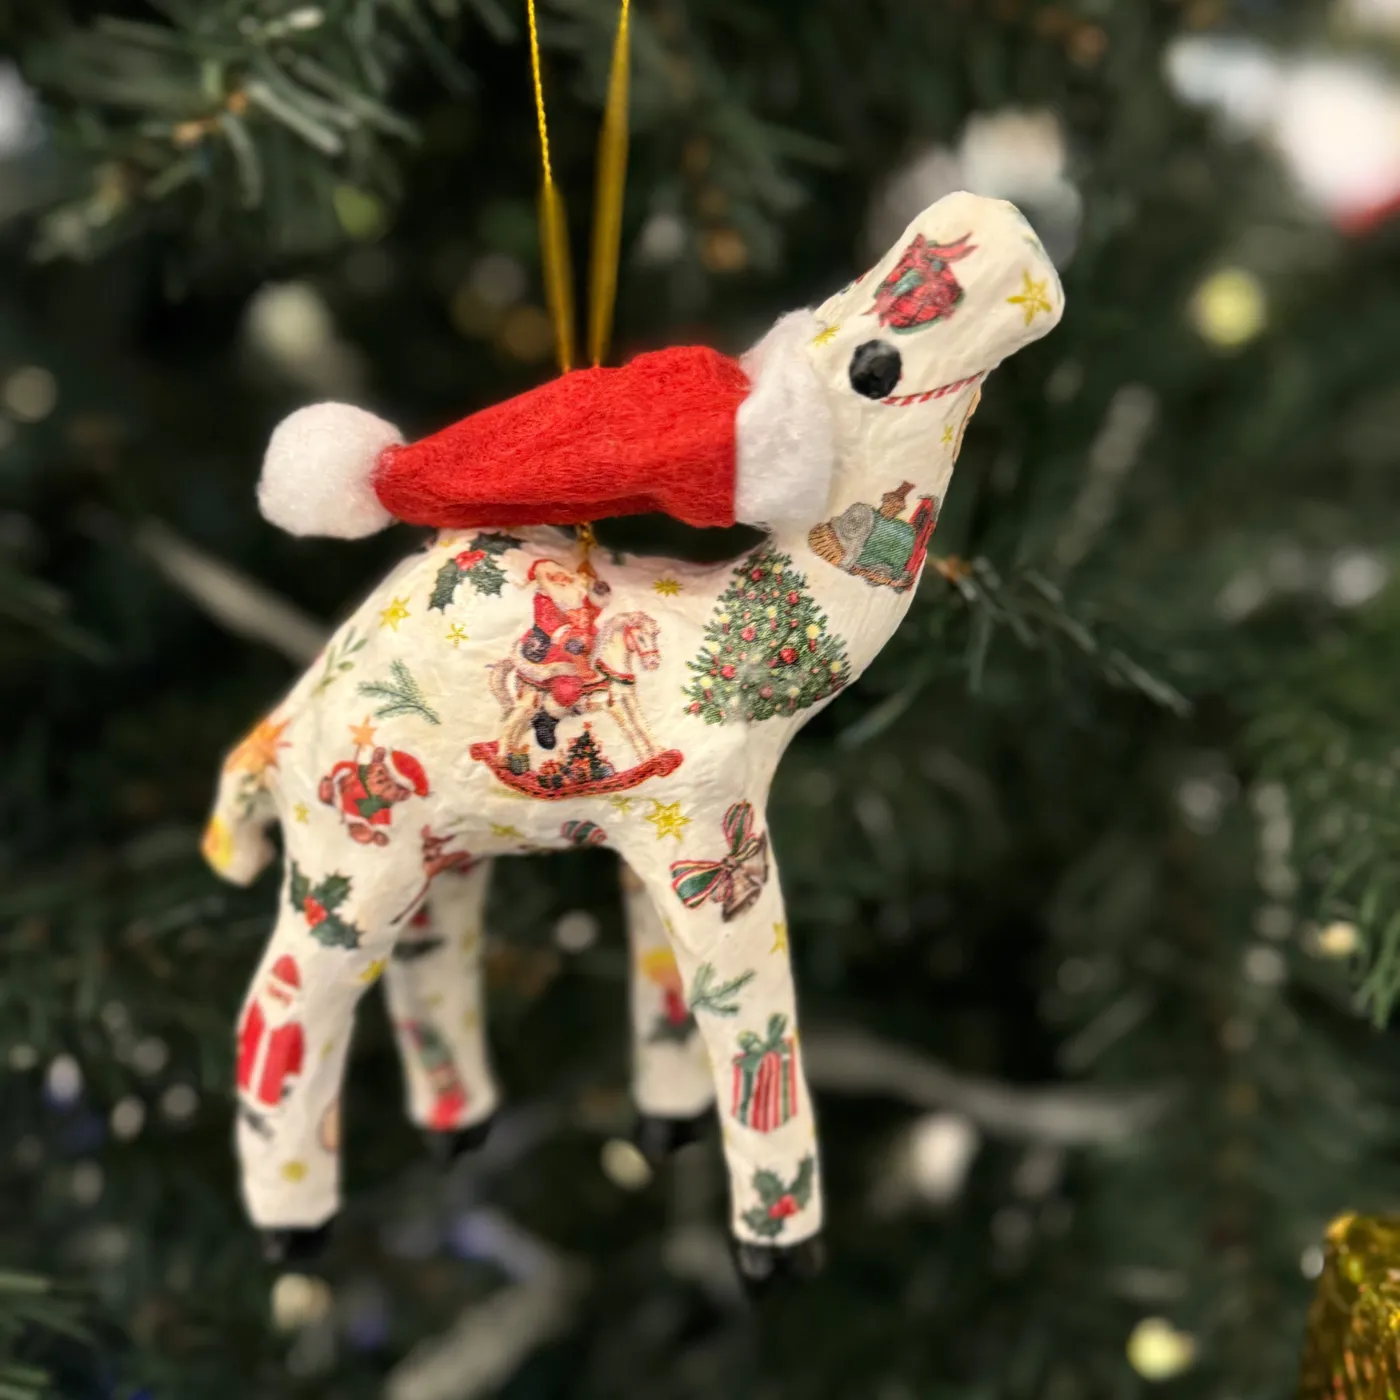
Thrift stores are full of unpainted wooden animal shapes for about $1 each — horses, ducks, cats, all of it. Pair those with paper napkins (bought, or saved from a party) instead of specialty decoupage paper and you’re at roughly $3 per ornament including the finish. Can’t find animals? Use flat wooden discs and decoupage a scene inside a circle. The silhouette matters less than the paper’s color story — see Idea #5 for how beige neutrals behave against deep green.
19. Felted Snowmen with Knitted Hats and Plaid Ribbon
Roughly 50% natural off-white felt, 25% red and plaid accents, 15% white, 10% that orange-glittered snowflake. The plaid is doing quiet work here — it reads as winter without introducing a new hue, so the whole vignette stays in the red-and-cream lane. Want it cooler? Trade the plaid ribbon for light blue gingham. Warmer? Swap the orange glitter for copper and the snowmen gain a moodier, evening feel.
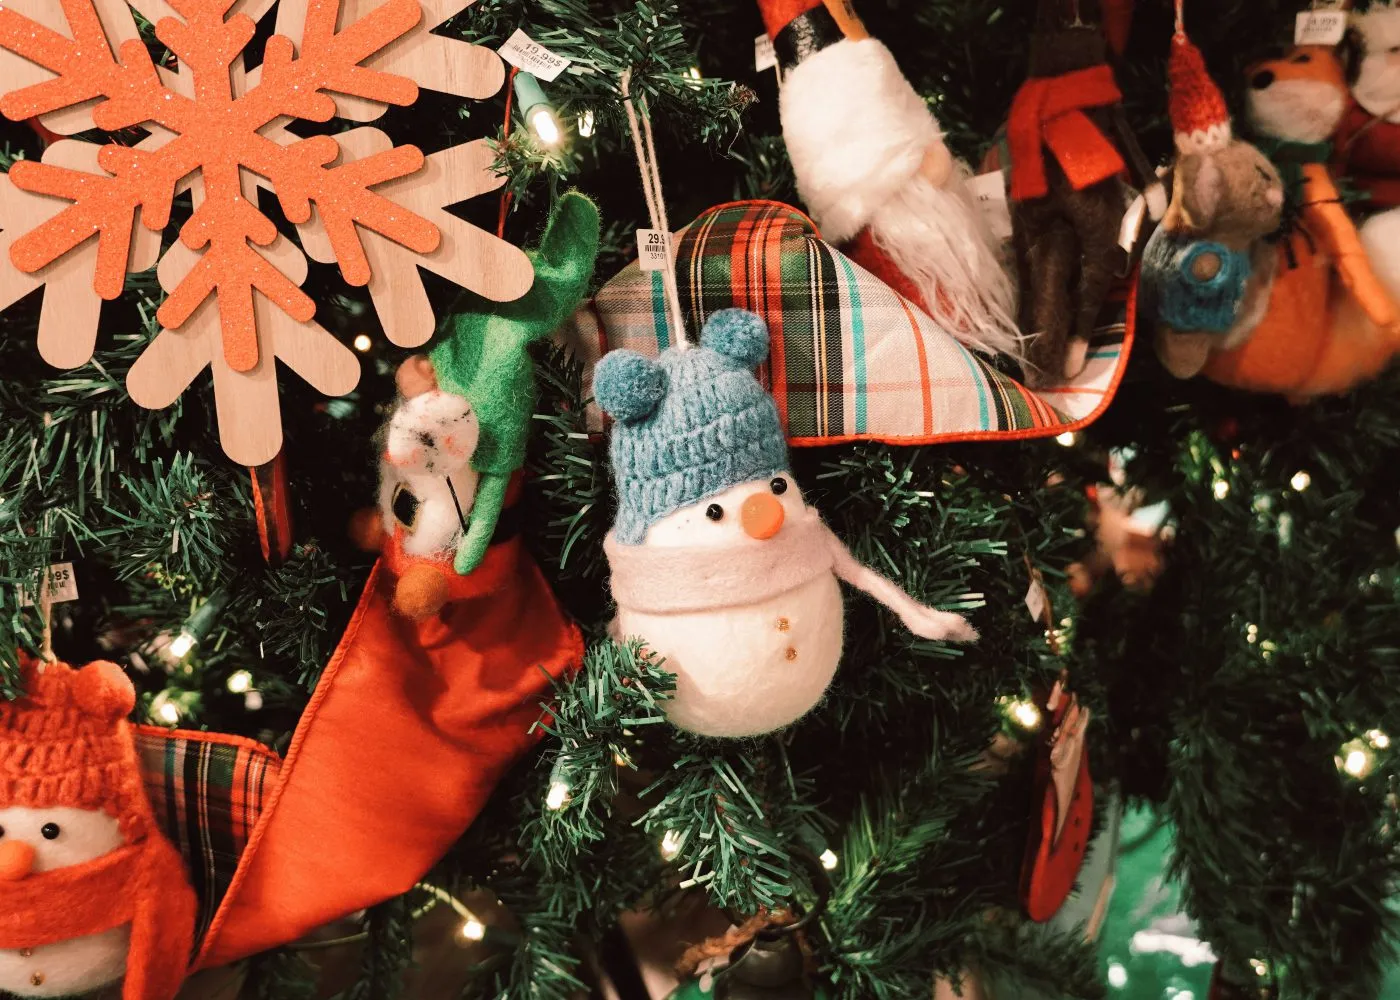
It’s the hats and scarves, and specifically their scale. A knitted hat covering a third of a two-inch snowman’s head looks right; one that covers half looks like a doll. Knit on size 2 needles with sock yarn, work in the round, and stop just past the crown. That single proportion choice is what makes handmade feel designed instead of improvised.
20. Blanket-Stitched Fabric Stars and Hearts
- Cut two star shapes, 4 inches point to point, from cotton or linen.
- Pin right sides together and mark a 3/8-inch seam allowance.
- Blanket stitch from the top point around, using 6 strands of embroidery floss.
- Stop 1 inch before closing, turn the piece, then stuff it lightly.
- Slip a twine loop into the opening and stitch it shut with the button on top.
About 35 minutes each once you’re warmed up. Six strands, a size 5 embroidery needle, and a $3 bundle of floss covers a dozen ornaments.
Blanket stitch is unforgiving about spacing. Aim for roughly 1/8 inch between stitches and keep the loop depth consistent — uneven loops make a star look hand-me-down instead of handcrafted. Practice on a scrap square for two minutes first. And back every fragile point with a small dot of fabric glue before you turn the piece; stars and hearts always fray at the tips, and the glue disappears after stuffing.
21. Ridged Amber Glass Baubles on Twine
Amber glass looks warm for the same reason it’s fussy: the translucency shows every fingerprint, and vertical ridges hold dust in a way smooth glass doesn’t. Clean with a barely damp microfiber cloth and dry immediately — standing water spots permanently on unsealed glass. Replace the twine loops every two years; they stiffen, crack at the knot, and give out without warning. The clear glass hanger caps can also loosen with temperature swings.
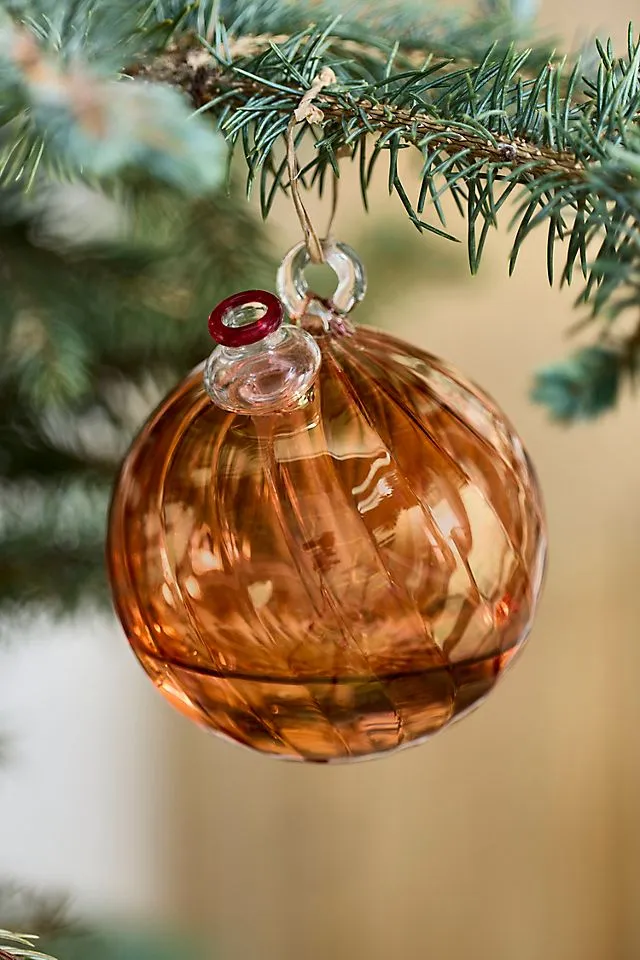
- Amber ridged glass ornaments, set of 6: $18–$36
- Clear glass hanger caps with rims: $8–$18
- Natural jute twine: $4–$8
- Amber glass spray paint for a DIY run: $9–$14
- Plain glass blanks, 6-pack: $8–$15
Budget alternative: spray plain glass blanks in light even coats and let them cure five days. The ridges are the only thing you lose.
22. Button-Covered Paper Trees with Distressed Edges
The buttons do triple duty: they’re color, they’re texture, and they’re a rhythm. Sizes vary randomly, which keeps the surface from looking like a grid — switch to uniform buttons and it flattens instantly. The distressed dark edge with visible stitching is the second trick: it gives a flat paper ornament depth it doesn’t actually have. And the red star topper is the only pure saturated color, so your eye lands there and then wanders down the trunk.
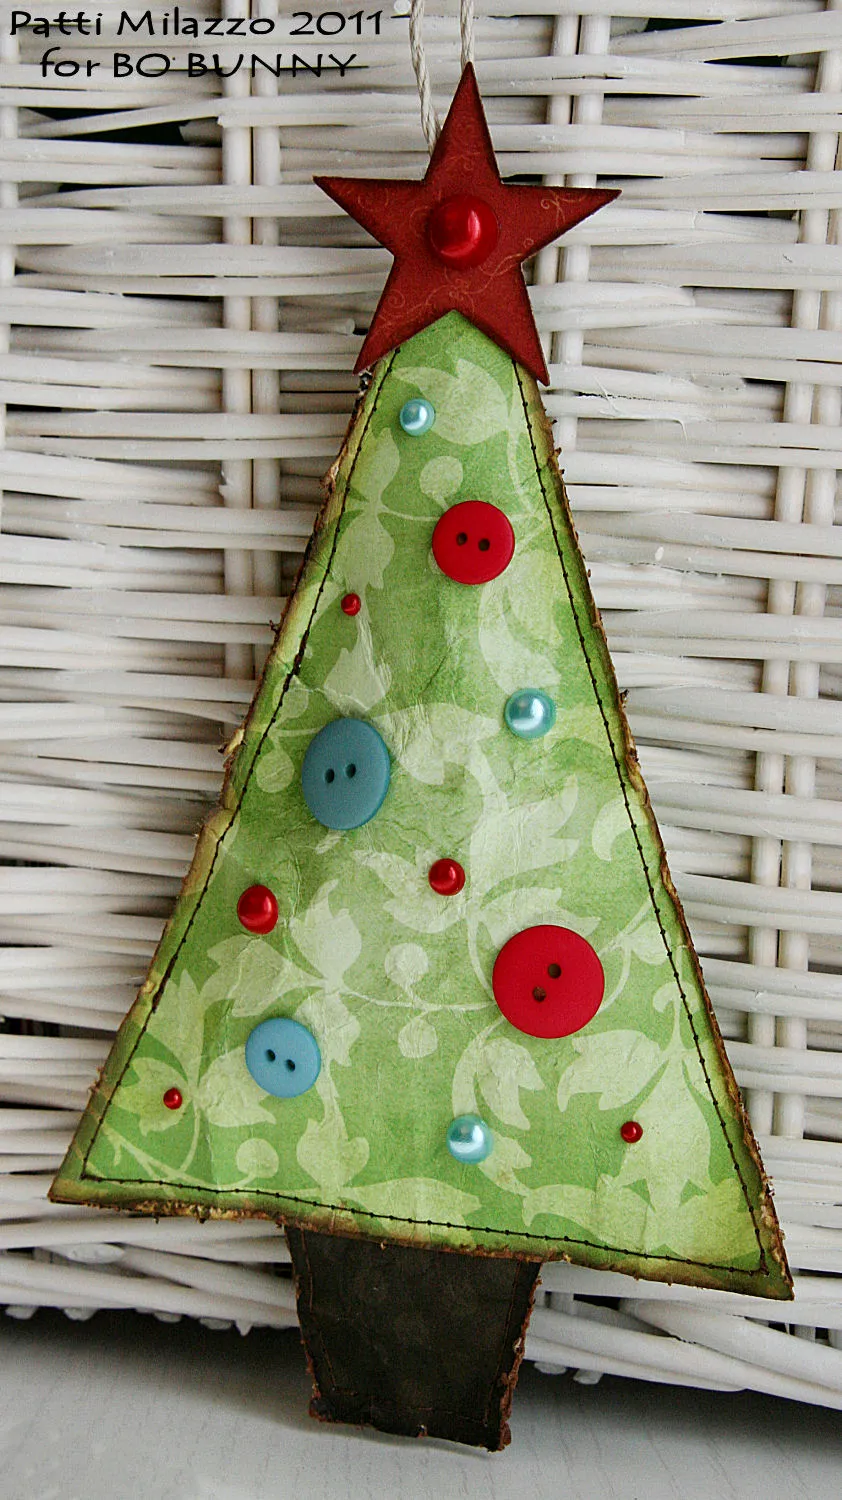
Flat ornaments need more air than round ones. On a standard 7.5-foot tree, space these at least 8 inches apart and keep them off branches directly behind other ornaments — layered flat pieces read as clutter from across the room. If your tree is under 5 feet, choose two of these as feature pieces and fill the rest with small spheres. A wider wall display like Idea #31 can carry more of them at once.
23. Beaded Wire Trees Displayed in a Wooden Cubby
Seed beads by the tube are cheap — about $2 to $4 for enough to make two trees — and 22-gauge craft wire is $4 a spool. The trick is shaping: string a hank at a time on a long wire, then twist down and back up, shortening each pass by two beads. A thrifted printer’s tray or a $20 unfinished cubby shelf becomes the display. That’s about $12 per tree plus the shelf, while Etsy sellers charge $40 for the very same thing.
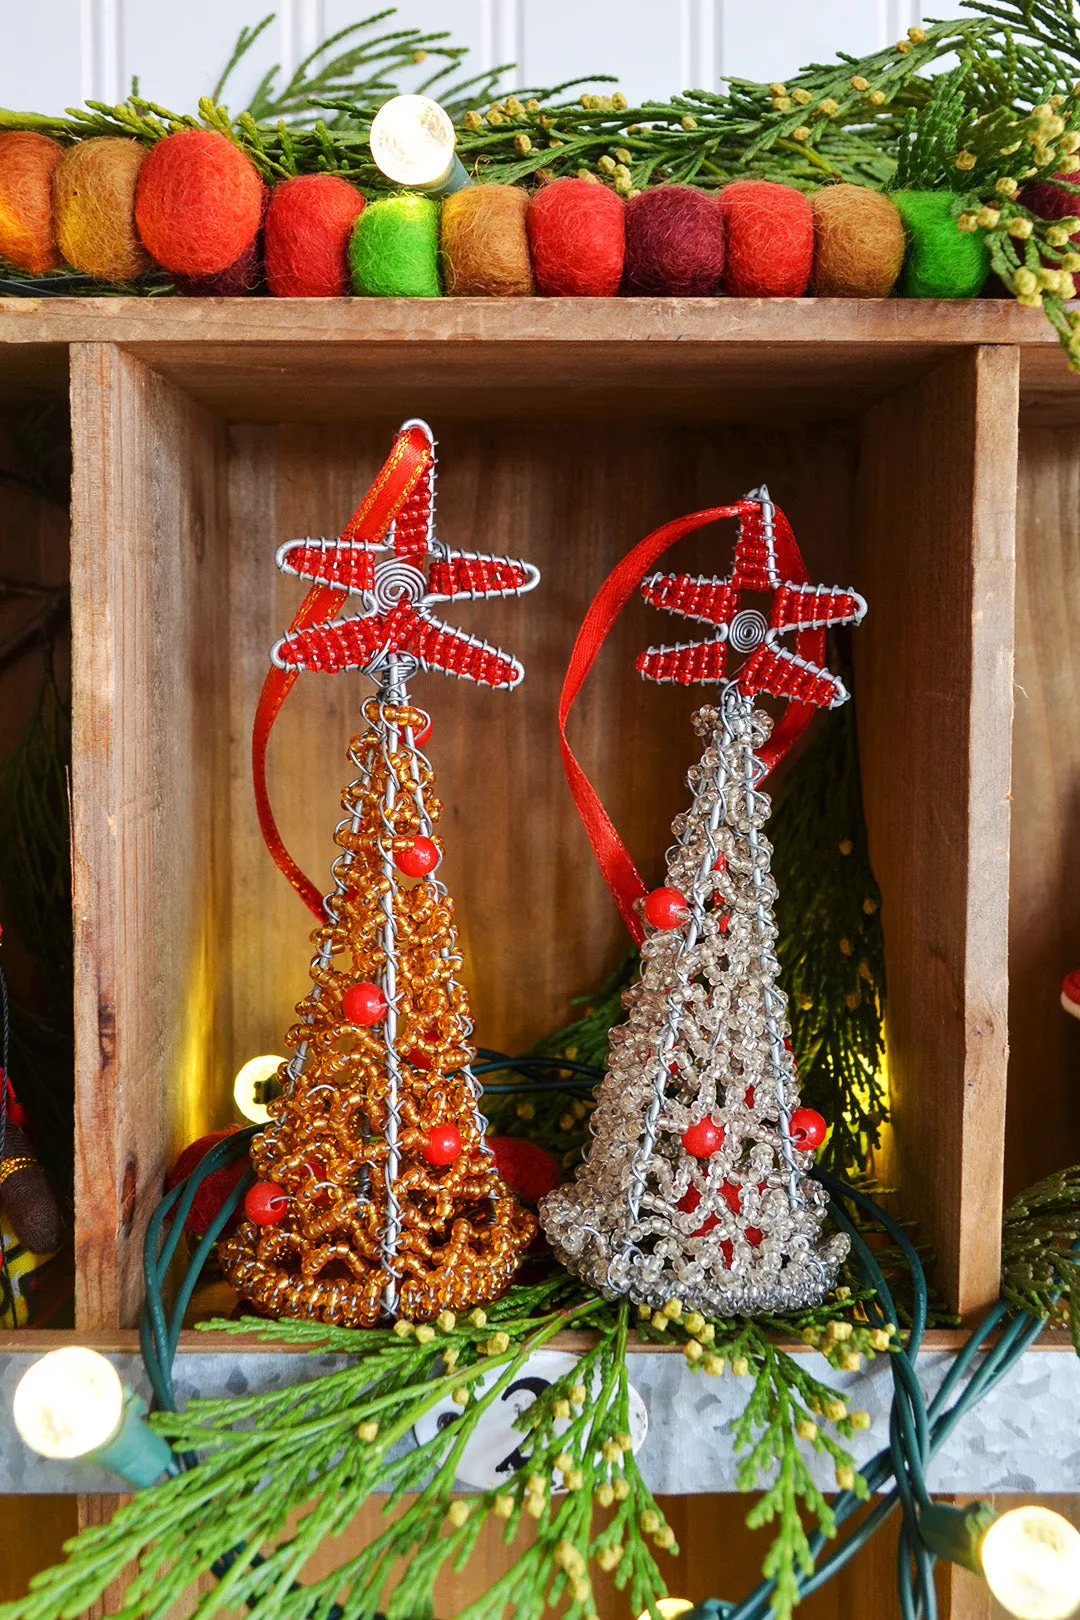
Beaded trees are heavier than they look and the wire ends are genuinely sharp. Bend every tail into a tight U before tucking it inside the frame, or you’ll find it with your forearm in March. Hang or stand them where nobody brushes past — a hallway cubby is a bad idea with kids in the house. And store them upright; laid flat for a season, the wire takes a set and the tree slumps.
24. Button-Filled Felt Trees for Little Hands
If kids are helping, swap the glue gun for tacky craft glue and choose shank-style buttons so there’s a stem to press into the felt. Cut the base 1.5 inches wide for a tree no taller than 5 inches — bigger than that and the felt flops forward once the buttons get heavy. Sew the ribbon hanger through both layers with a backstitch rather than gluing it; glue tabs are the first thing to fail in a warm attic.
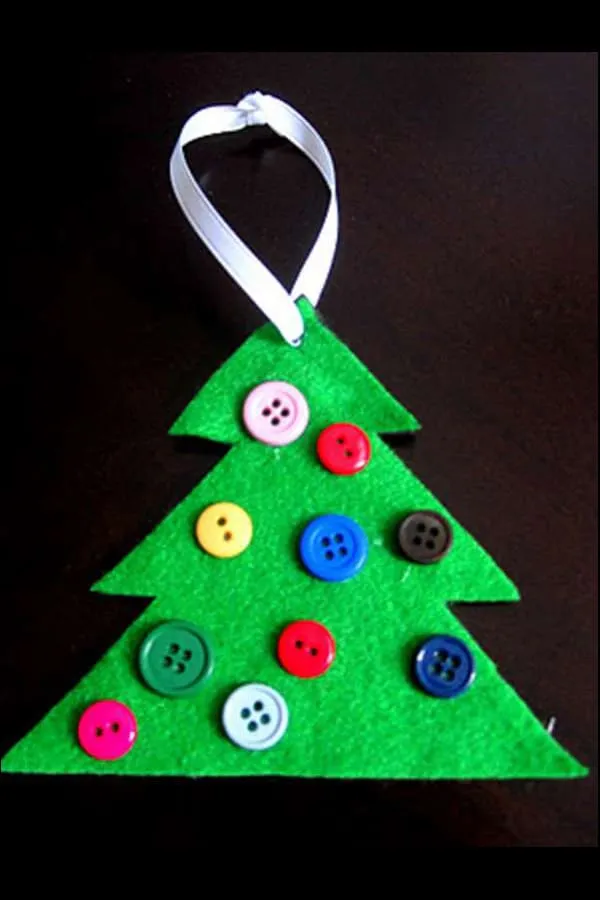
- Fold a 6-inch square of felt in half and cut a triangle from the fold.
- Repeat for a second identical triangle.
- Lay both together and whip-stitch the two long sides.
- Glue or sew buttons in a loose triangle shape, largest at the bottom.
- Loop the ribbon through the top and knot it inside the layers.
Twenty minutes and under $2 per ornament in materials.
25. Macramé Mushrooms and Wrapped Gift Baubles
Craft maximalism is the story of the 2026 tree: macramé, wooden beads, tiny wrapped packages, gold lettering signs, all layered together without apology. It’s a reaction to a decade of single-palette trees — people want to make instead of buy, and they want the tree to look like it was assembled by someone with hobbies. The macramé mushroom in particular has become a signature piece for the fiber-arts crowd.
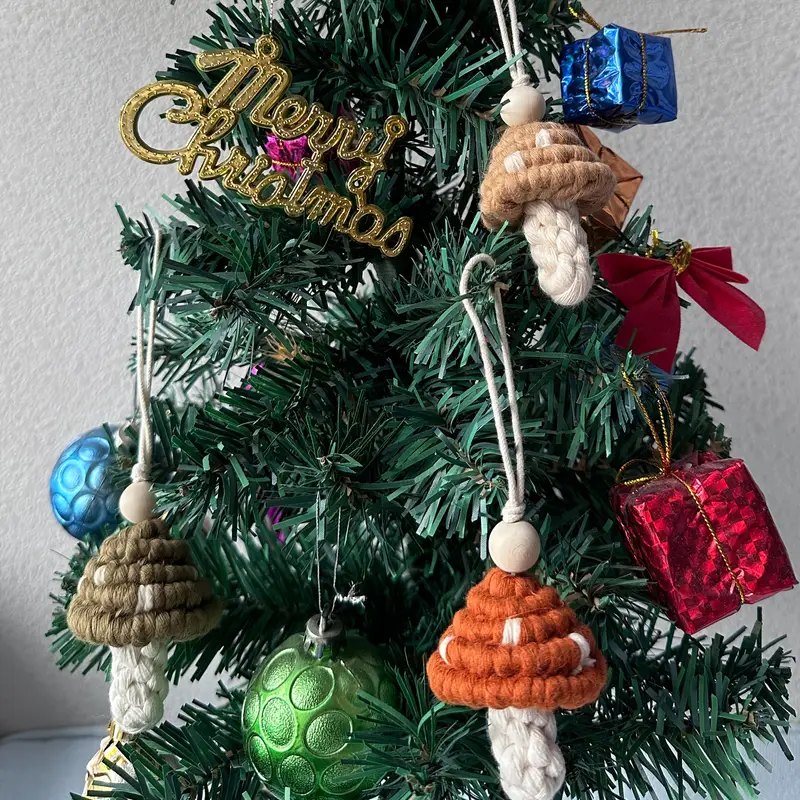
The gold “Merry Christmas” sign. It sounds like a throwaway, but it’s the piece keeping a mixed-material tree from reading as chaos. It’s a flat, high-contrast graphic element, and it anchors all that undulating texture so your eye has somewhere to rest. Without one graphic anchor, a craft-heavy tree starts to feel like a craft fair booth instead of a home.
26. Macramé Tree Wall Hangings Above the Fireplace
This pairing wants a wall at least 8 feet tall and a mantel roughly 5 feet wide so the two framed pieces can sit 4 to 6 inches apart without crowding. With 9-foot ceilings, hang the frames so their bottom edge lands 12 to 14 inches above the mantel decor — any closer and the garland fights them. Lower ceilings? Use one hanging, centered, and let the mantel do the rest of the talking.
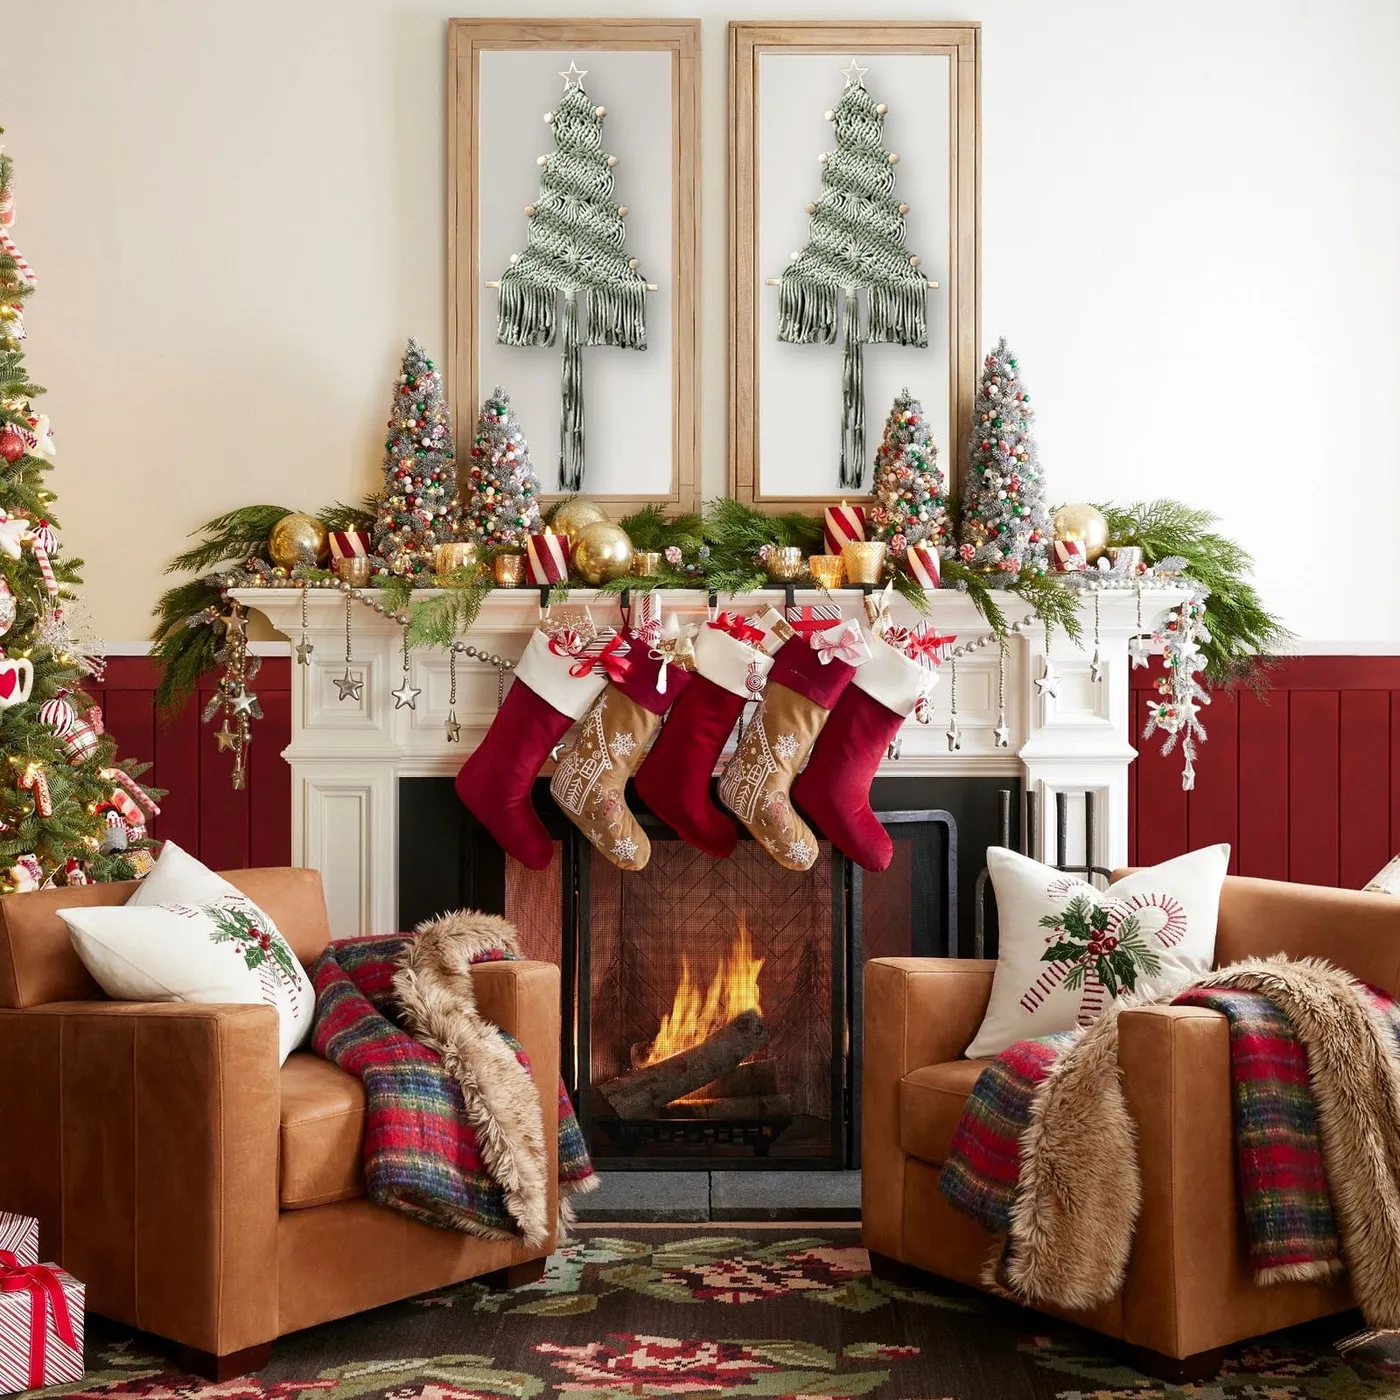
- Macramé cord, 3mm, 200 yards: $14–$28
- Two unfinished wood frames, 20×24: $30–$70
- Wood dowels for structure: $6–$12
- Green garland, 9 feet: $18–$45
- Frosted mini trees, set of 3: $15–$32
- Plaid and faux fur throws: $30–$80
Budget alternative: thrifted frames and a discount-store faux garland bring the whole wall story in around $45.
27. White Baubles with Gold Music Notes
70% matte white, 25% gold, 5% green foliage. The white needs to be matte, not pearl — pearl fights the metallic gold and the whole ornament turns muddy under tree lights. Gold appears in exactly two places: the musical note pattern and the satin ribbon bow. Change the notes to silver snowflakes and the piece turns cool and formal; keep the notes and swap the ribbon to burgundy and it lands squarely in traditional Christmas territory.
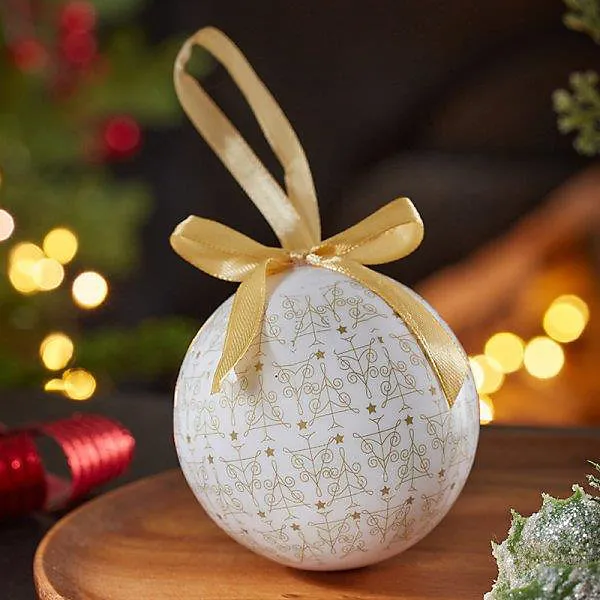
White ornaments are the most honest pieces on your tree. Every fingerprint, every dust film, every bit of glitter from a neighboring ornament shows up. Handle them with cotton gloves while hanging, wipe with a dry microfiber once a season, and store in acid-free tissue — newsprint and colored tissue transfer yellow onto white finishes over time. Replace gold ribbon every third year; it dulls.
28. Bird-and-Branch Motif Ornaments on Gold Strings
Every ornament is a different bird, but they share one white background — that’s the whole system. Variation within a fixed frame means the cluster reads as a set and as individuals at the same time. The thin gold strings are nearly invisible against foliage, so the pieces look like they’re floating. Hang them close, about 3 inches apart, and let the flock feel dense the way birds actually gather in winter.
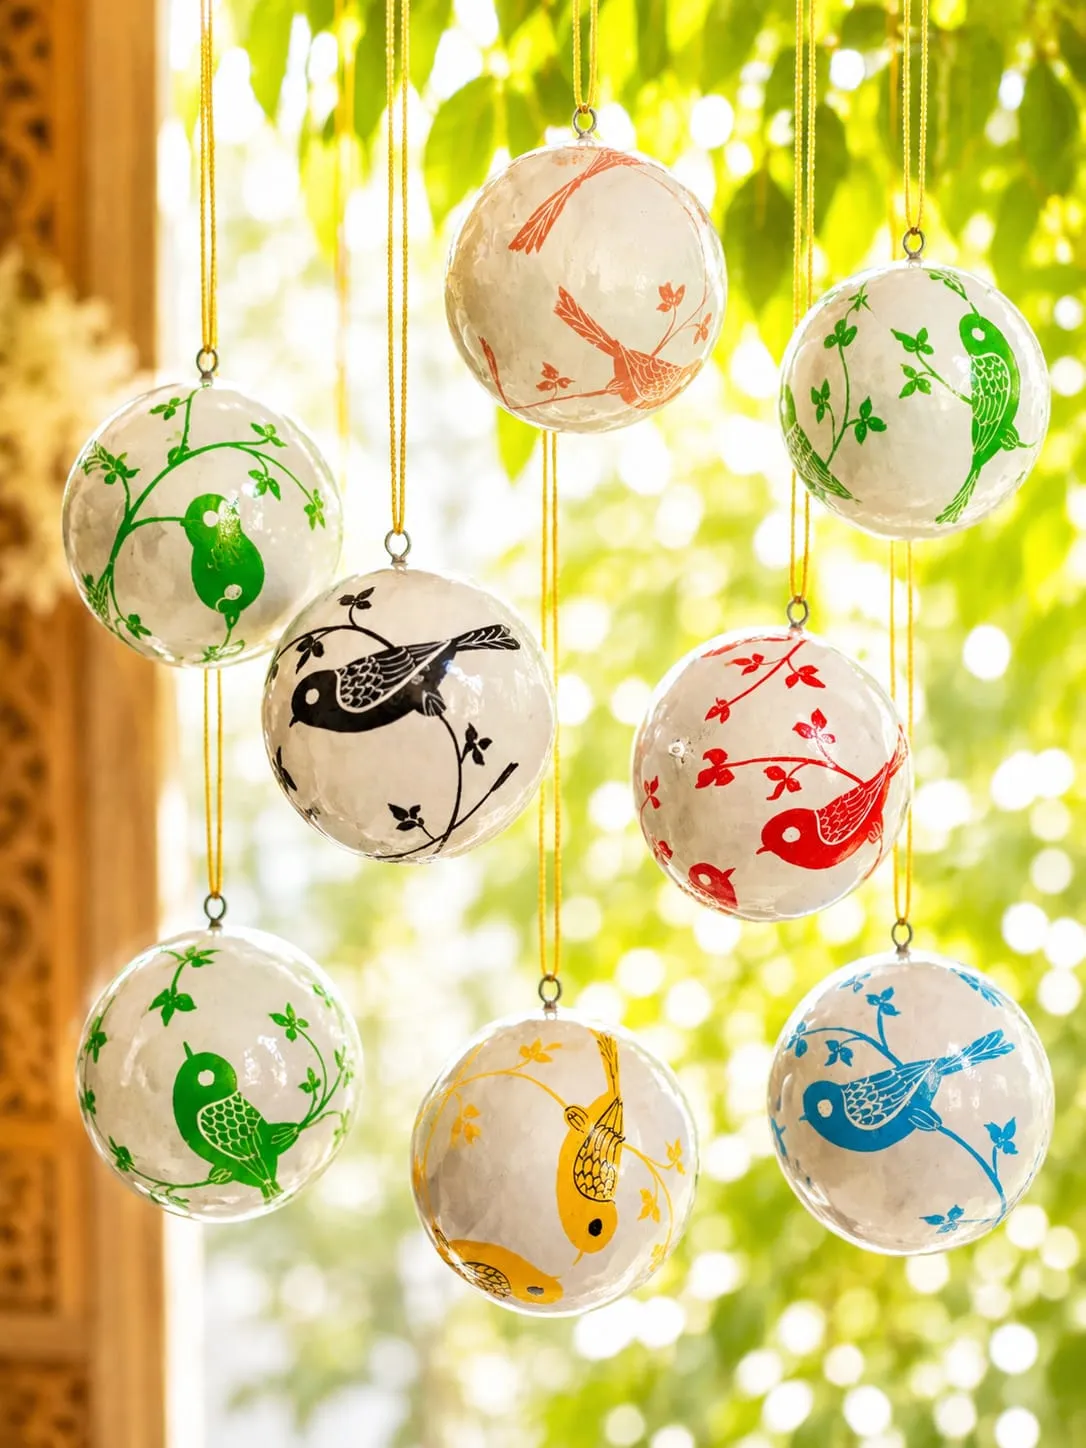
Plain white shatterproof baubles in a 24-pack cost about $12. Add a sheet of bird-and-branch rub-on transfers from a craft store for $6 and you’ve built the whole flock for under $20. Or paint simple branch silhouettes with a fine brush and one bottle of black acrylic. Either way, keep all the birds in the same color family — see Idea #27 for how a white base holds gold accents.
29. Hexagon Wax Ornaments with Star Anise and Cloves
- Melt wax in a double boiler or a dedicated pour pitcher — never directly on a burner.
- Dry your citrus peel fully, 3 to 4 days, or it will weep into the wax.
- Test your silicone hexagon mold with plain wax before adding botanicals.
- Work on parchment or silicone mats; wax drips are invisible until they harden.
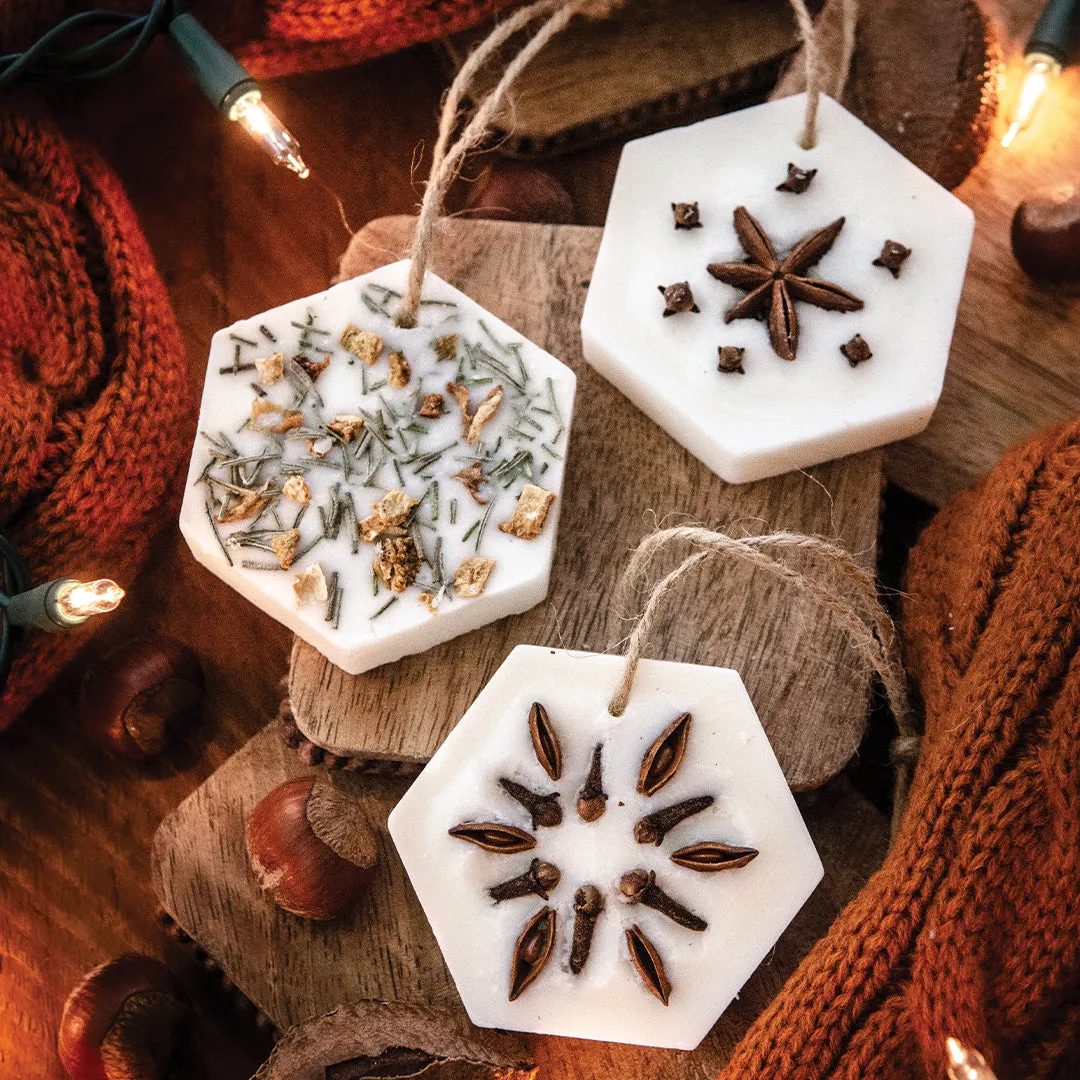
Press your botanicals against the mold surface before you pour — star anise and cloves sink, and anything that floats ends up on the back of the ornament. Pour at about 160°F and let the mold cool on the counter, not in the fridge; rapid cooling makes cloudy, brittle hexagons. Poke the hanging hole with a skewer while the wax is still soft, 10 to 15 minutes in. A light rub with a soft cloth brings up the sheen.
30. Embroidered Fabric Ornaments with Numbered Gold Tags
Metallic embroidery thread shreds. It’s beautiful and it will break three times in your machine before you give up and do it by hand — which is the right answer anyway. Use shorter strands, about 14 inches, thread a size 24 needle, and add a thread conditioner. The numbered tags are worth planning too: if you’re making a set for a family, decide the numbering system before you glue anything down.
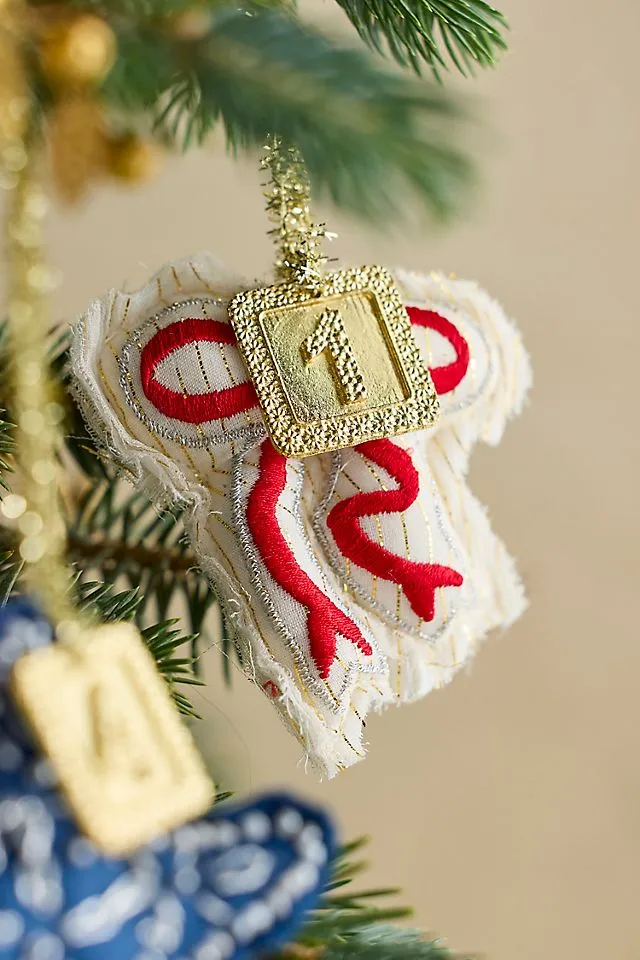
75% white or cream fabric, 20% red embroidery, 5% metallic gold and silver. The embroidery is the only detail, so it has to be confident — thin, tentative swirls read as a mistake. Restrict the swirl pattern to about a third of the ornament’s total width and let the rest of the fabric stay empty. Swap the red for indigo and the same piece becomes a quiet, modern heirloom.
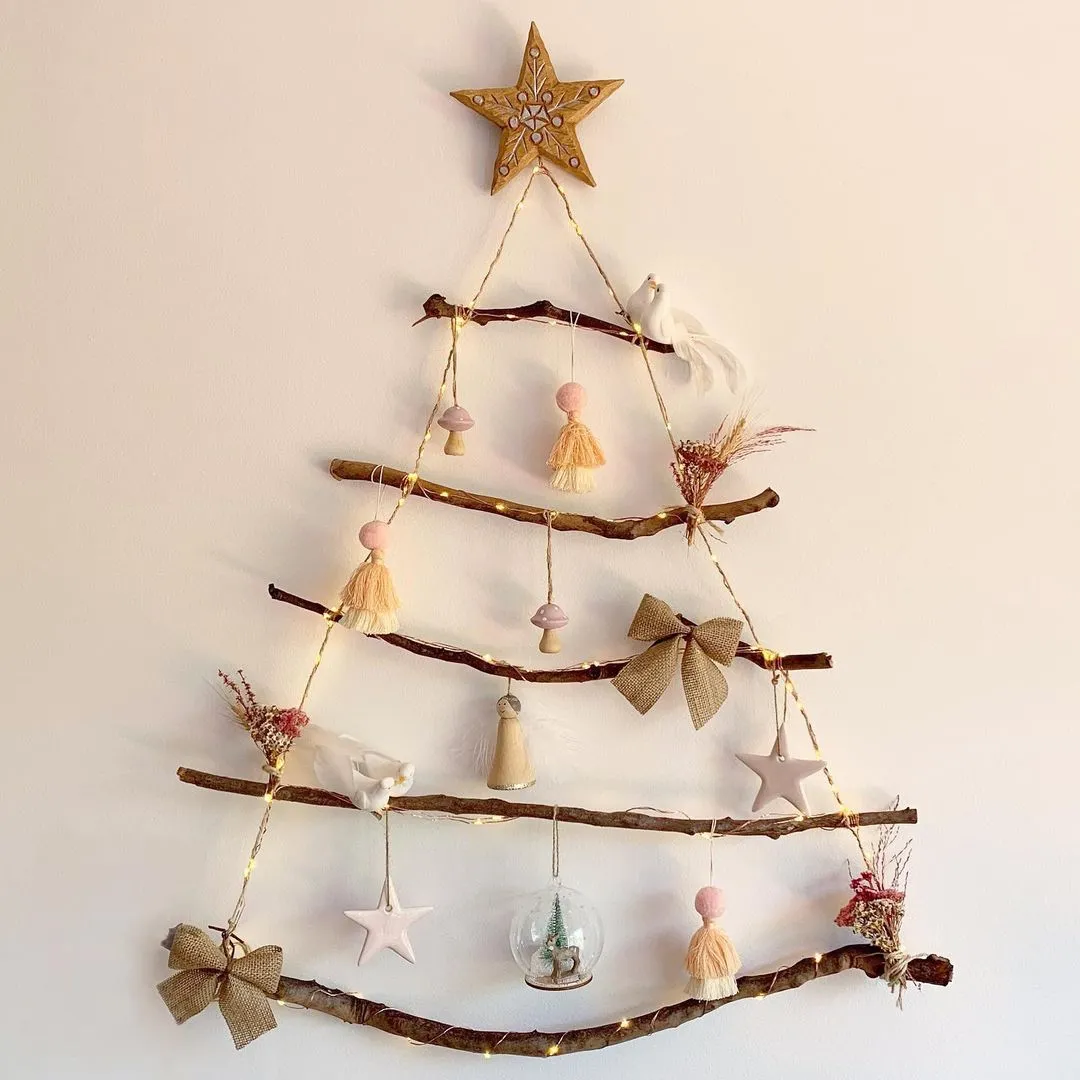
31. Branch Tiered Wall Display for Glass Ornaments
Two stacked branches want about 36 inches of horizontal wall space and at least 30 inches of vertical room between them, including the drop of the longest ornaments. The bottom branch should sit 18 inches off the floor in a large room and 24 inches in a hallway — you don’t want anyone’s coat catching the glass. Ceilings under 8 feet still work if the branches shrink to 24 and 30 inches.
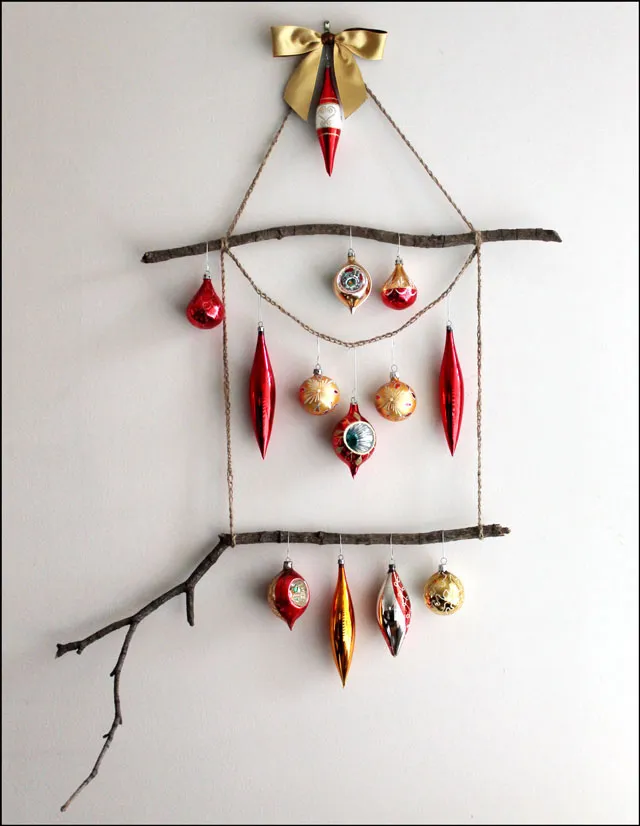
The asymmetry. Two branches of noticeably different lengths, hung so the shorter one sits about a third off-center, is what makes this read as designed rather than as two sticks. Mirror it exactly and it turns into a shelf. The gold satin bow at the anchor point is the second-best decision — it hides the hardware and gives the whole arrangement a deliberate top.
Thirty-One Ideas, One Glue Gun, Zero Store-Bought Regrets
Start with the one that matches materials you already have on hand — a hot glue gun and a bag of felt will carry you a long way, and the pieces that look slightly imperfect are usually the ones people ask about first.
Make two, hang them where you’ll see them daily, and let the collection grow year by year. 📌 Pin this guide now so it’s waiting for you when the first cold weekend hits.