Hot chocolate bars used to be a December afterthought: a slow cooker on a folding table and a bag of marshmallows. In 2026 they’ve become the most-photographed corner of the house, and Pinterest has noticed.
We spent serious time browsing World Market, Target, Etsy, Amazon, and Walmart to bring you only what’s worth your attention, and the ideas here run from about $6 for a jar of sprinkles to $180 for a proper three-tier stand.
After filtering through hundreds of options, we narrowed it down to 32 ideas that deliver: rustic wood trays, speckled enamel mugs, galvanized tiers, marble-and-pink party setups, and giftable basket stations. Budget and luxury versions sit side by side, and every idea is shoppable with direct product links.
Part of the push is the quiet-cozy shift. People want warm light, textured textiles, and one small ritual they can actually maintain. And stay until the end, we break down the most common mistakes that can ruin these looks.
📌 Save this to Pinterest for later — you’ll want to revisit these ideas.
1. Three Stainless Thermoses Corralled on Dark Wood
Those three steel thermoses aren’t just pretty, they’re doing structural work. Set your tallest vessel roughly 14 inches from the back edge of the surface, stack your mugs within a 20-inch radius of it, and keep the topping jars in one tight cluster instead of spreading them evenly. Grouping beats balancing every time: three jars touching read as a collection, while three jars spaced eight inches apart read as clutter.
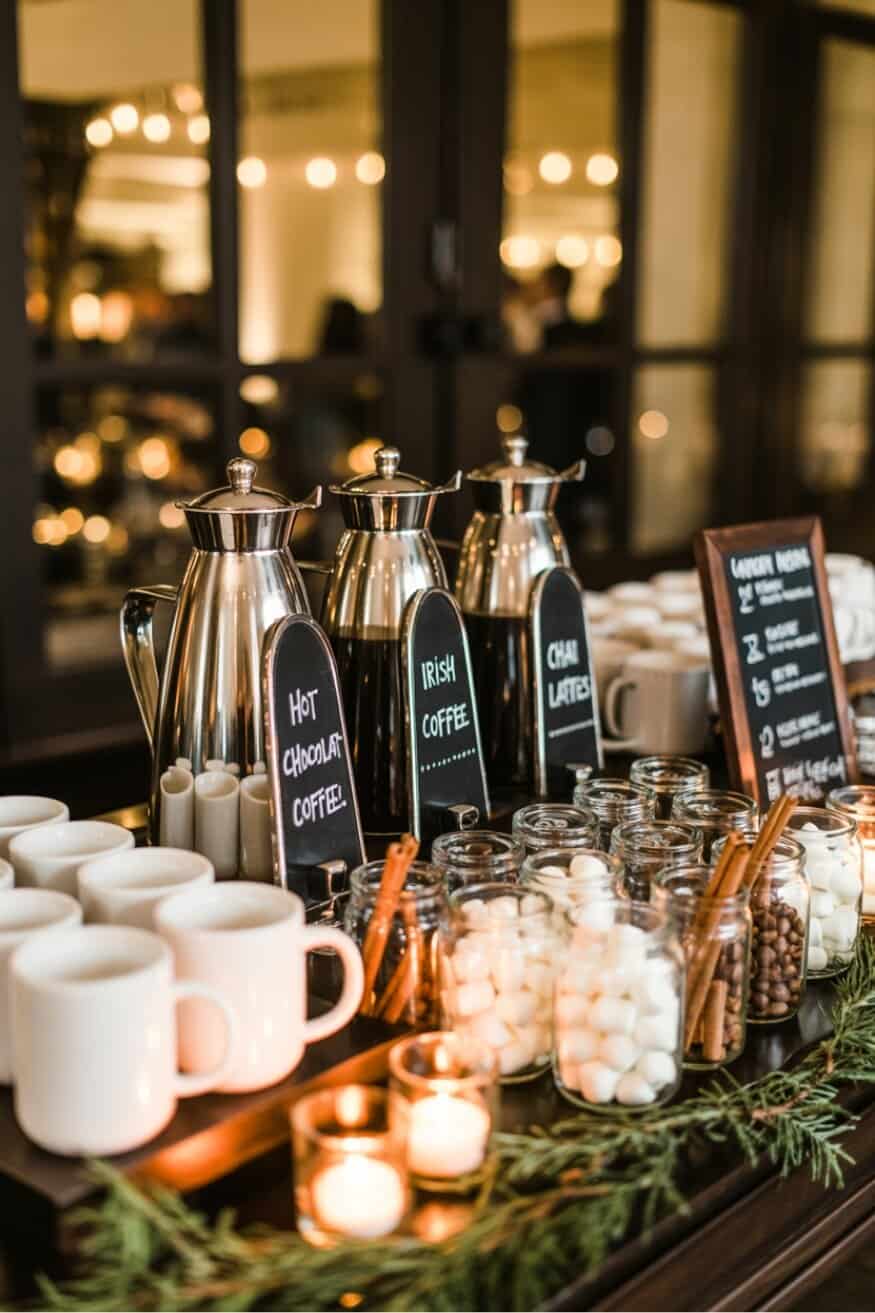
Run the numbers on the palette and it’s 60 percent dark wood counter, 30 percent silver and white ceramic, 10 percent deep green garland with candlelight. To swap it for a different season, keep the 60 and change the 10: burgundy berries and copper votives in fall, pale olive branches in spring. The proportions are what make it read as designed instead of collected.
2. A Galvanized Three-Tier Stand on Blue and Grey
The tiered stand is the whole idea here. Without it you have a tablecloth with jars on it, pleasant but forgettable. With it, a flat table becomes a vertical display that photographs like a shop window, and those blue-rimmed trays lift the sprinkles, rock candy sticks, and sauce bottles up into eye-level range where guests actually notice them.
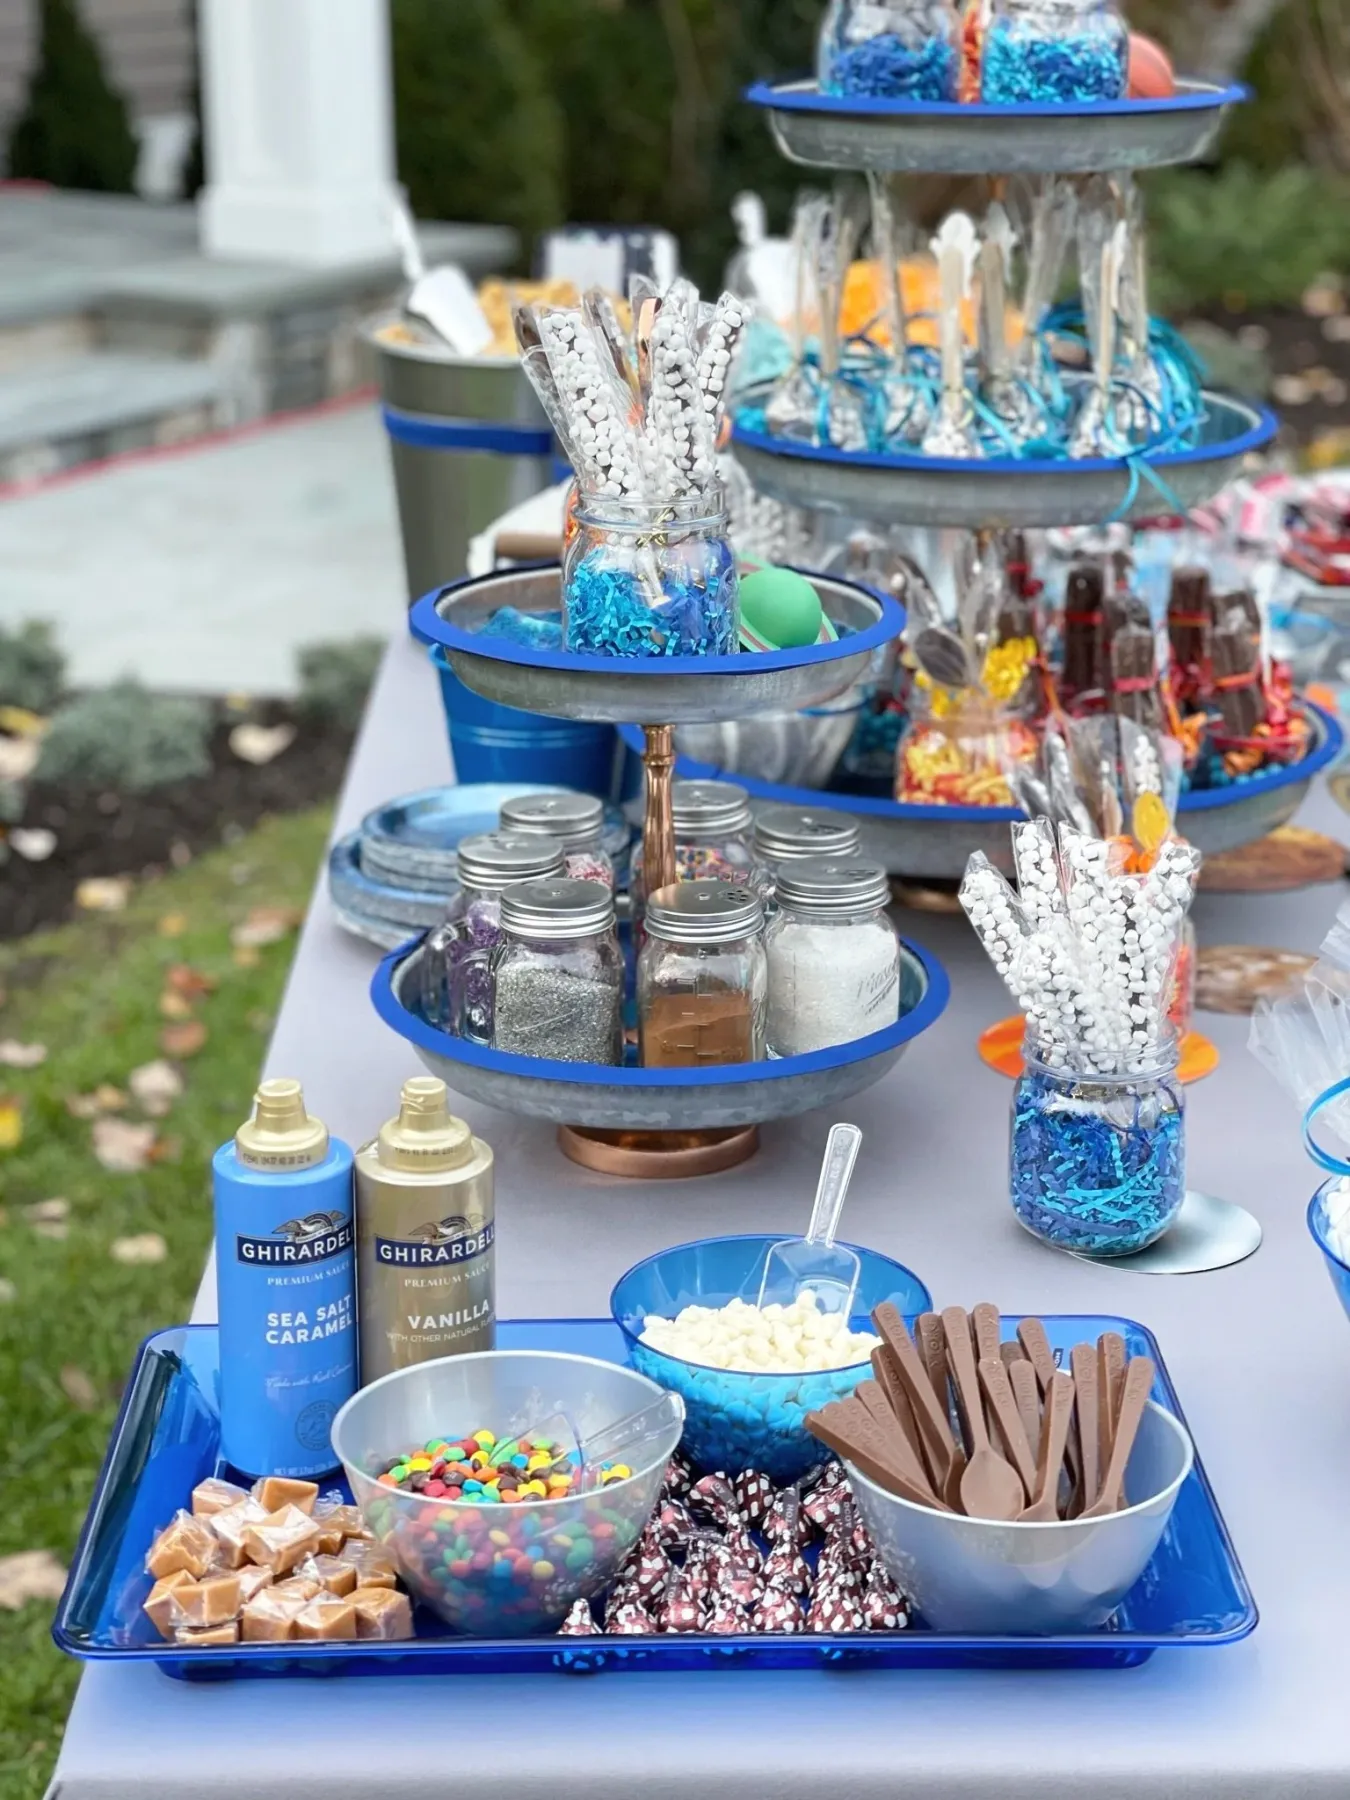
- Three-tier galvanized stand: $28–$55
- Glass jars and topping canisters (6–8): $18–$36
- Blue-rimmed serving trays: $12–$28
- Chocolate spoons and rock candy sticks: $10–$22
- Sauces and toppings: $20–$40
- Total: $88–$181
Budget alternative: a two-tier stand plus one tray gets you about 80 percent of the look for 45 percent less.
3. A Boozy Cocoa Flight with Miniature Bottles and Wafer Rolls
Miniature liquor bottles beside a hot drink station is a lovely idea with one catch: it changes who can serve themselves. If kids or guests in recovery will be at the party, split the setup. Cocoa and toppings on the main surface, miniatures on a separate tray at the far end with a small sign. You keep the indulgence without making anyone do math about which mug is theirs.
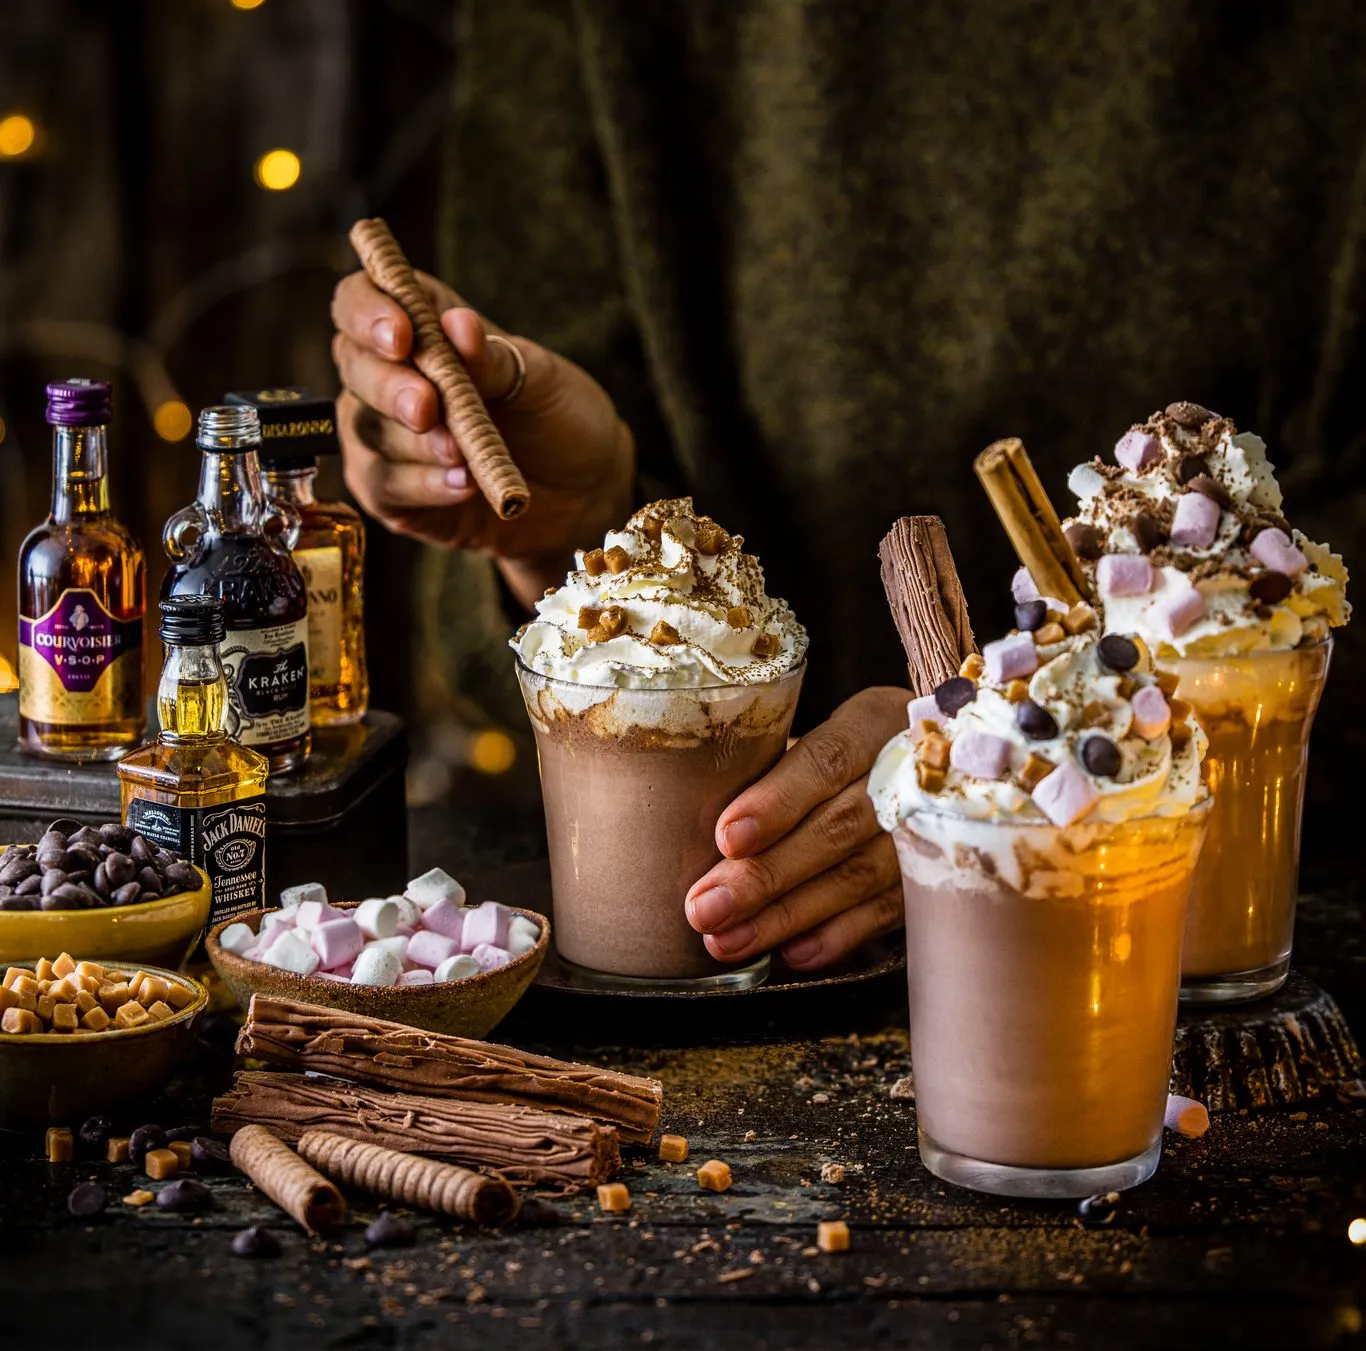
- Line up three mugs on a dark wood board, about six inches apart.
- Build whipped cream in a tall swirl, then add shavings while it’s still cold so they grip.
- Group toppings in small ceramic bowls, three per mug, no more.
- Stand the miniatures at the back on a narrow tray, labels facing out.
- Finish with warm bulbs behind, just out of frame.
Roughly 20 minutes, about $40 for the toppings and garnish. This is the grown-up cousin of Idea #19.
4. A Dark Wood Tray with Speckled Mugs and a Candy Cane Jar
The tray does two jobs at once. It protects light wood from rings, and it fences the scene so nothing has to be placed perfectly. Look at the contrasts inside the frame: matte speckled ceramic against glossy candy canes, soft gingham against hard wood, a spiky evergreen against round mugs. Three texture types in a 20-inch square is what makes a simple tray look styled.
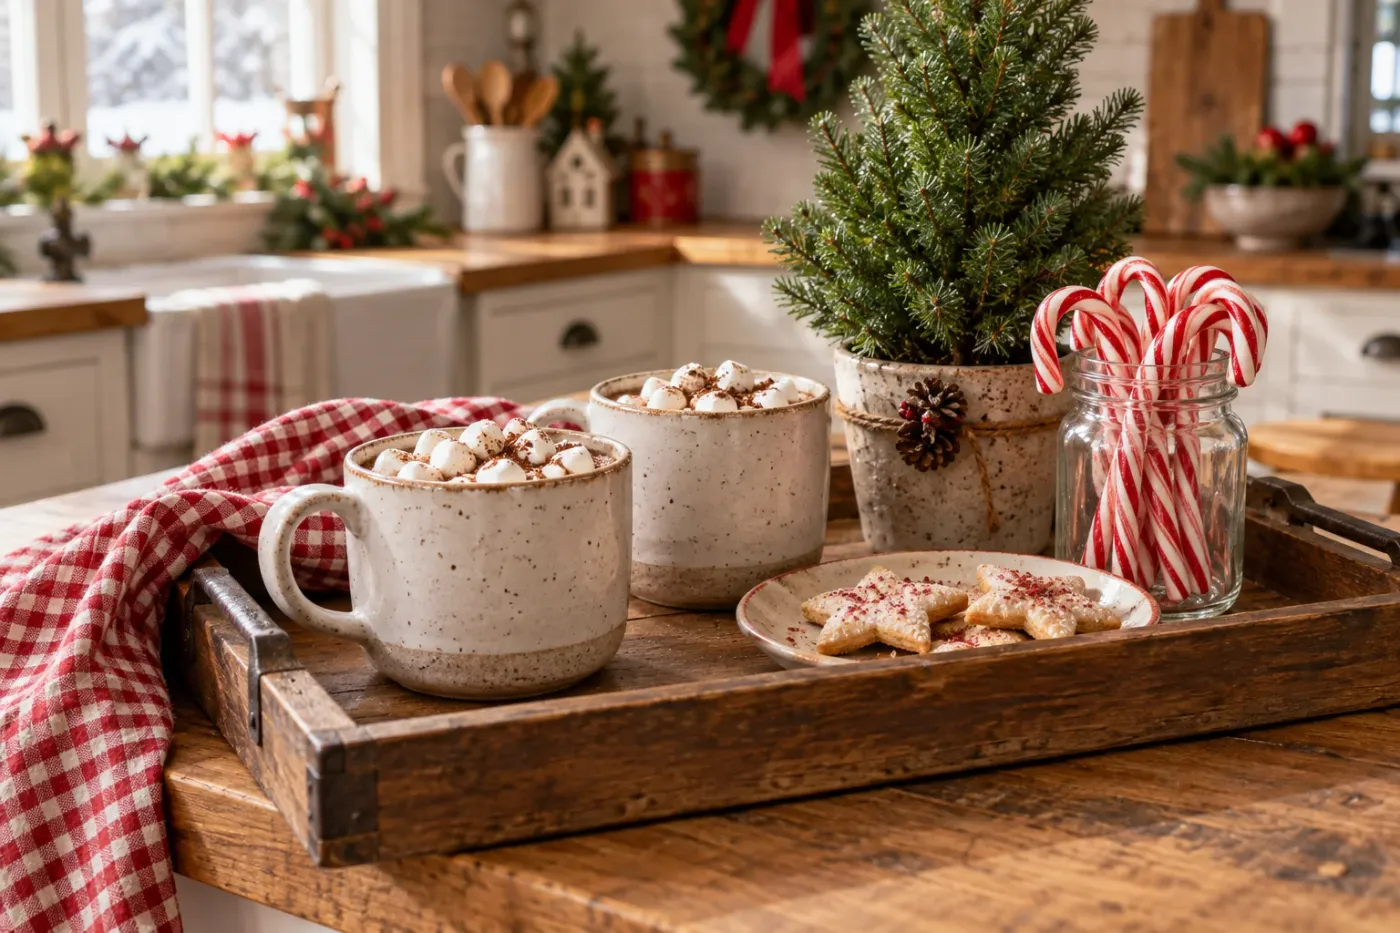
- Dark wood tray: thrift store, $6–$14
- Speckled mugs: Target or Walmart, $5–$9 each
- Glass jar for candy canes: IKEA, $3–$6
- Mini potted evergreen: grocery store, $8–$15
- Gingham napkin: fabric remnant, $4
Under $45 total, versus $120 or more for the boutique version of the same tray.
5. A Five-Jar Cocoa Kit Against White Subway Tile
This setup wants a counter run of at least 30 inches and 18 inches of depth, since the box, the mug, and breathing room all need a home. It also wants tile. White subway set in a running bond bounces light back onto the jars, which is why the cocoa powder reads rich instead of muddy. Against a dark backsplash the same kit goes flat. Short on counter? A 24-inch floating shelf at 52 inches does the same work.
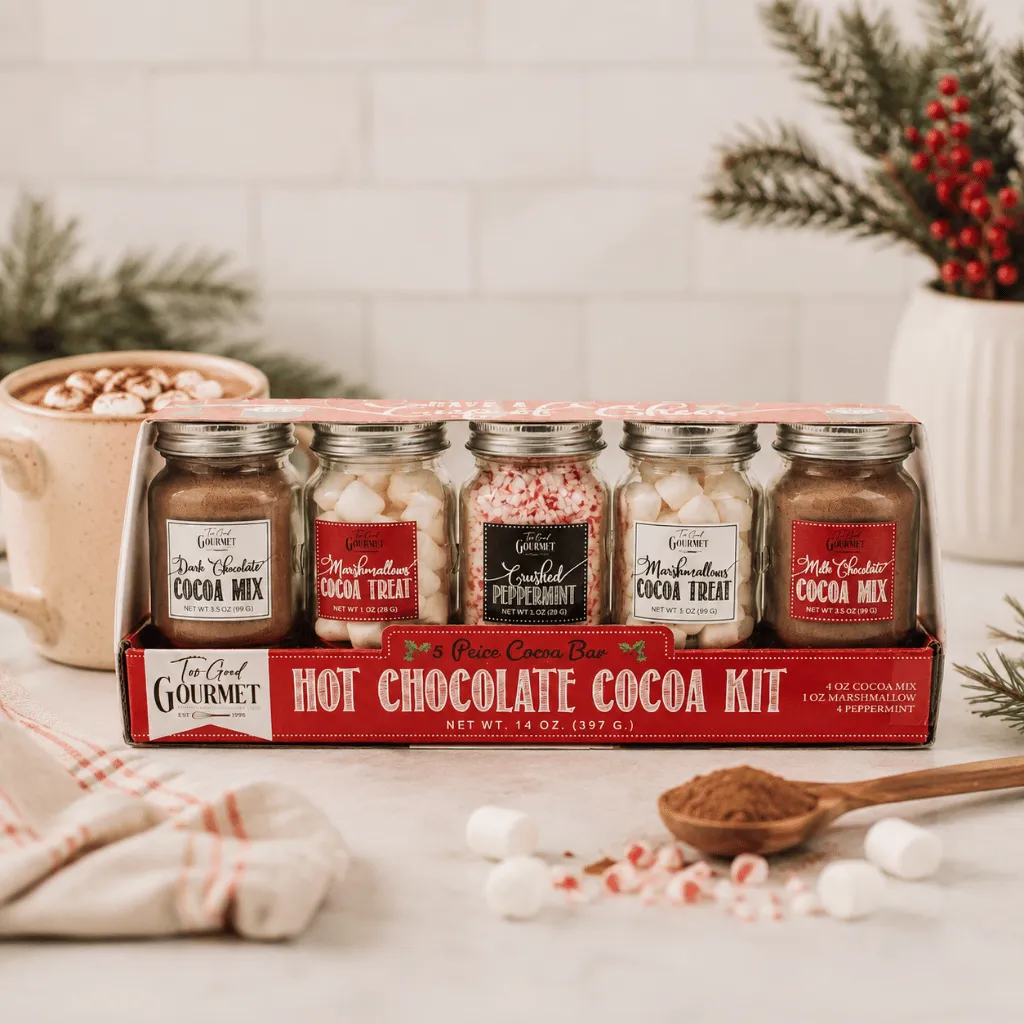
Curated cocoa kits are the 2026 version of the charcuterie board: everything portioned, everything labeled, nothing to assemble. The appeal is partly cultural, since we’re buying fewer things but photographing them harder. It’s a format with legs, too, because it works for housewarmings, teachers, and the neighbor who already has everything.
6. A Woven Basket Tray Anchoring a Gingerbread Vignette
The basket is charming and it is a dust trap. Seagrass and rattan collect cocoa powder in the weave, and artificial greenery sheds a fine layer of plastic needles you won’t notice until March. Shake the basket out every two weeks and wipe the jars with a damp cloth, not a spray bottle. If the gingerbread house is battery-powered, plan on a fresh set every three to four weeks of nightly use.
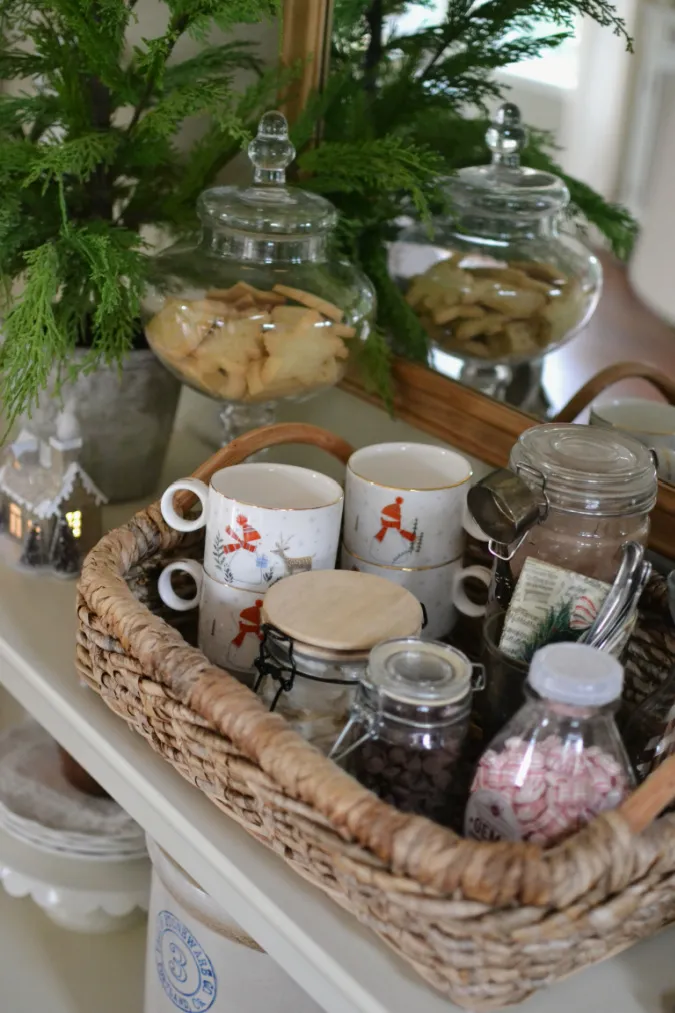
Three things to check before you commit to the basket:
- Measure your counter depth. A 16-inch basket eats most of it.
- Confirm your mugs stand upright inside it.
- Check for a nearby outlet, or plan on battery lights only.
- Make sure the basket has a flat rigid base, not just woven sides.
7. A Deep Forest Green Mug with Pink Marshmallows
Here’s a trick worth stealing: put your most saturated color in the vessel, not the background. A dark forest green mug on pale wood gives you high contrast with zero commitment. No paint, no wallpaper, no explaining yourself to a partner. If green isn’t your thing, the same move works with oxblood, mustard, or cobalt. Just keep everything else in the frame quiet so the mug does the talking.
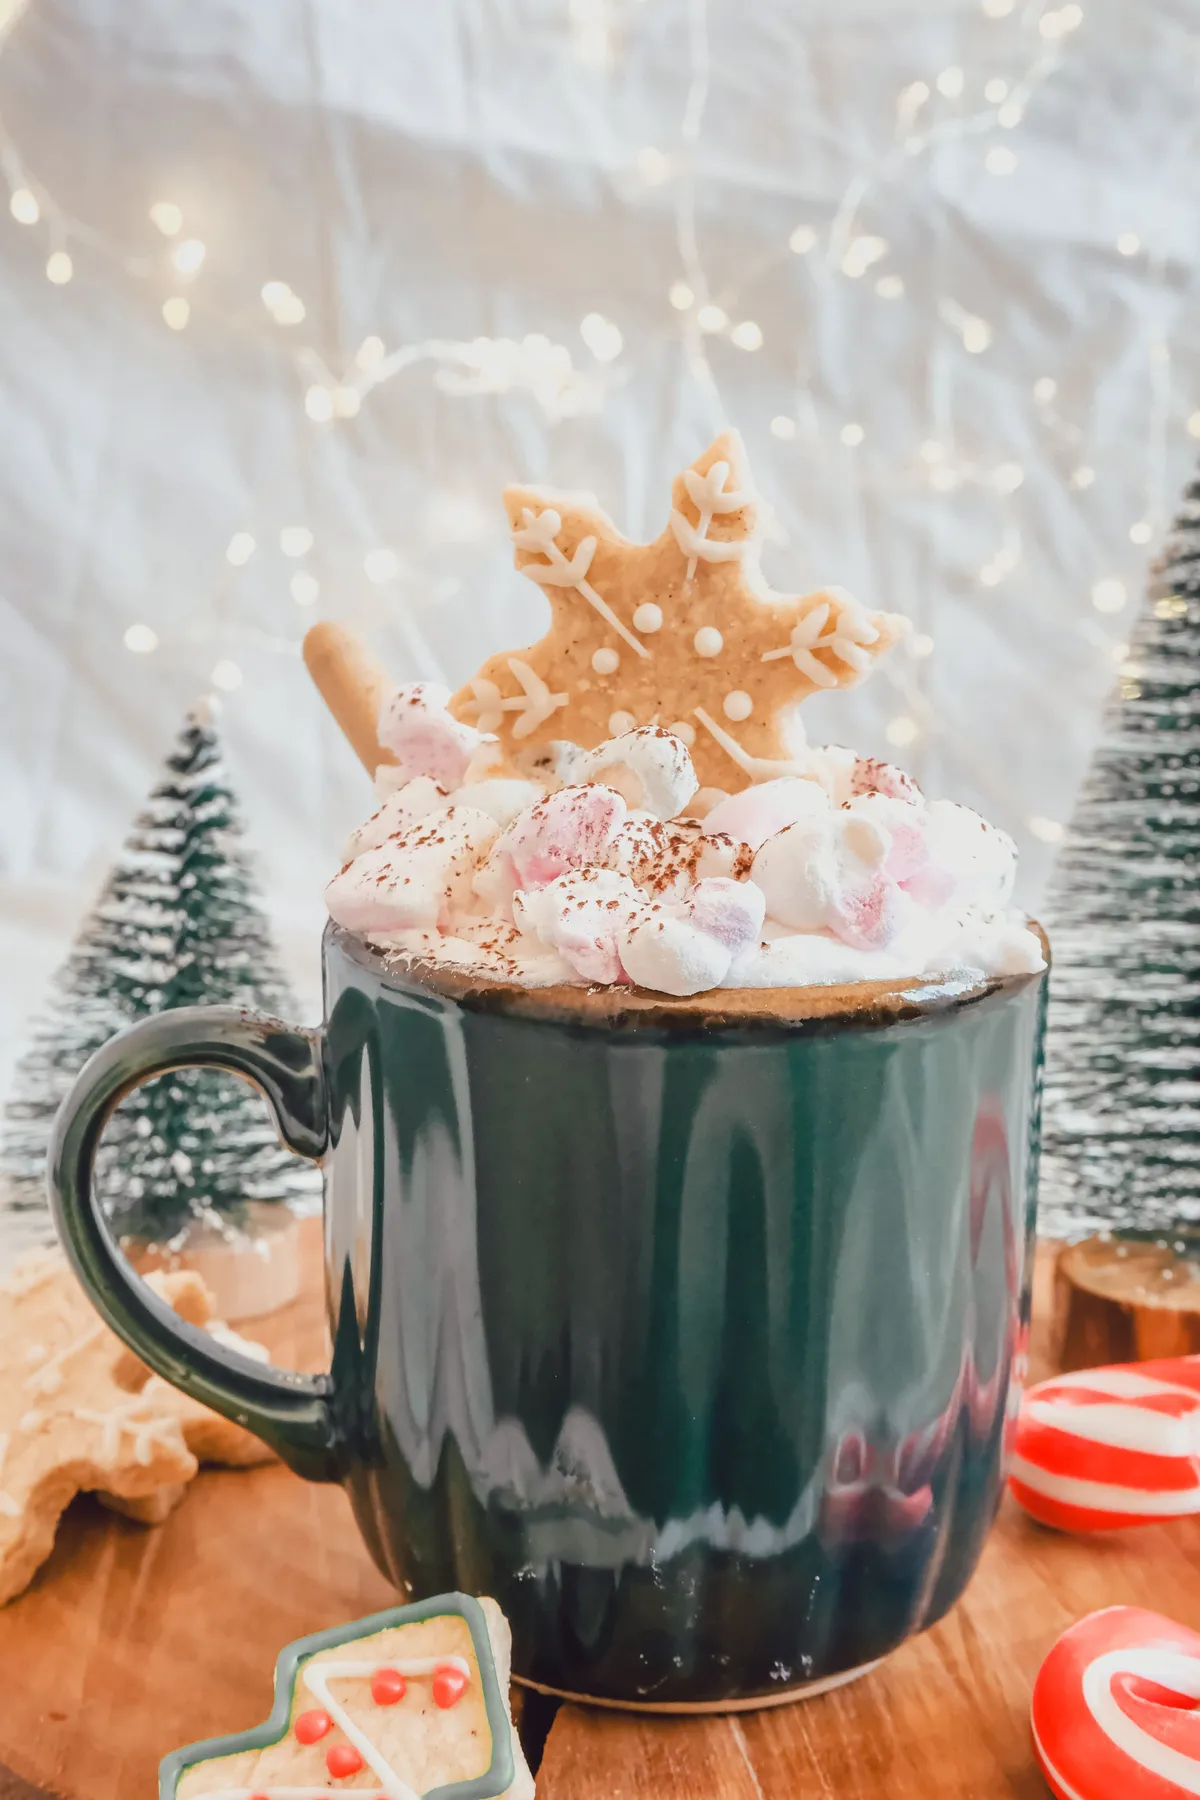
that makes this scene sing is the pink. Two pink-and-white marshmallows in a sea of cream and cocoa is a tiny, deliberate dissonance, which is why your eye lands there before it lands on the snowflake cookie. Remove them and it’s a nice cup of cocoa. Keep them and it’s a picture. Pastel marshmallows cost the same as white ones.
8. A Clear Glass Mug on Red Texture with Candy Canes
- Glass mugs (set of 4): $16–$34
- Textured red fabric or runner: $12–$30
- Candy canes and chocolate: $6–$12
- Warm string lights: $12–$25
- Whipped cream and toppings: $8–$15
- Total: $54–$116
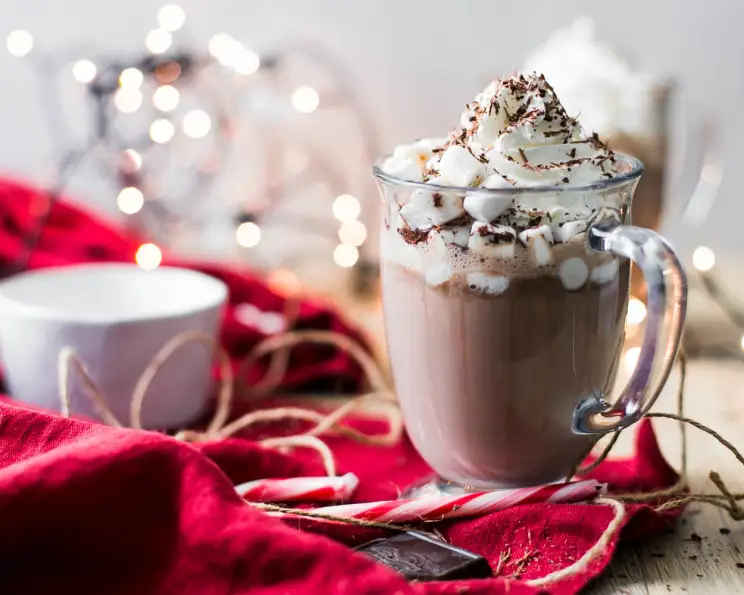
Budget alternative: drink from mason jars you already own and use a red scarf as the textile. That drops the total to about $25.
Glass looks gorgeous and it betrays you. Every fingerprint, cocoa smear, and hard-water spot shows up, both on camera and in person under string lights. For a crowd, save glass for the first round and switch to ceramic after, or wipe the rims with a vinegar-dampened cloth right before guests arrive. Compare with Idea #20 for a dressed-up version.
9. A Speckled Mug Beside a Stone Fireplace
- Choose a shallow wooden tray with a lip. Deep trays hide the goods.
- Set the mug slightly off-center, forward of the tray’s midline.
- Pile chocolates and dipped strawberries on one side only.
- Tuck pinecones into the empty corner to fill negative space.
- Add a folded knit throw behind, just out of focus.
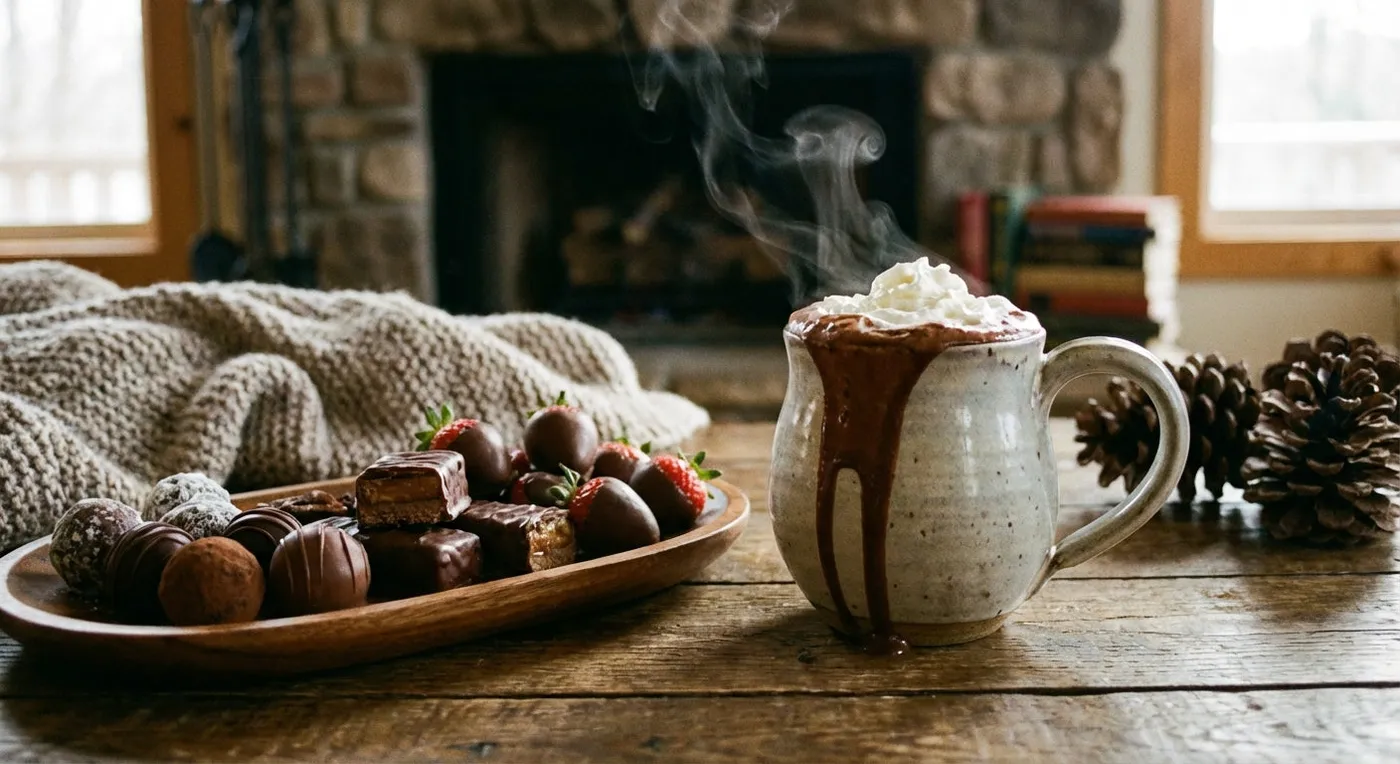
Fifteen minutes, about $25 if the tray is thrifted.
The palette formula is 60 percent warm brown wood, 30 percent cream and chocolate, 10 percent cool gray from the stone. That last 10 percent is the part people skip, and it’s why some cocoa scenes feel like they’re shouting. A single cool note gives all that warmth something to push against.
10. A Cream Alcove Nook with Lace Curtains and Corbels
You can build this alcove without custom millwork. IKEA wall brackets and a butcher-block slab run about $60 for a 48-inch span, and Target sells corbels for $8 each that read surprisingly close to hand-carved ones. Paint the wall behind a warm cream, hang a $15 lace valance on a tension rod inside the window recess, and let the machine be the only expensive thing in the frame.
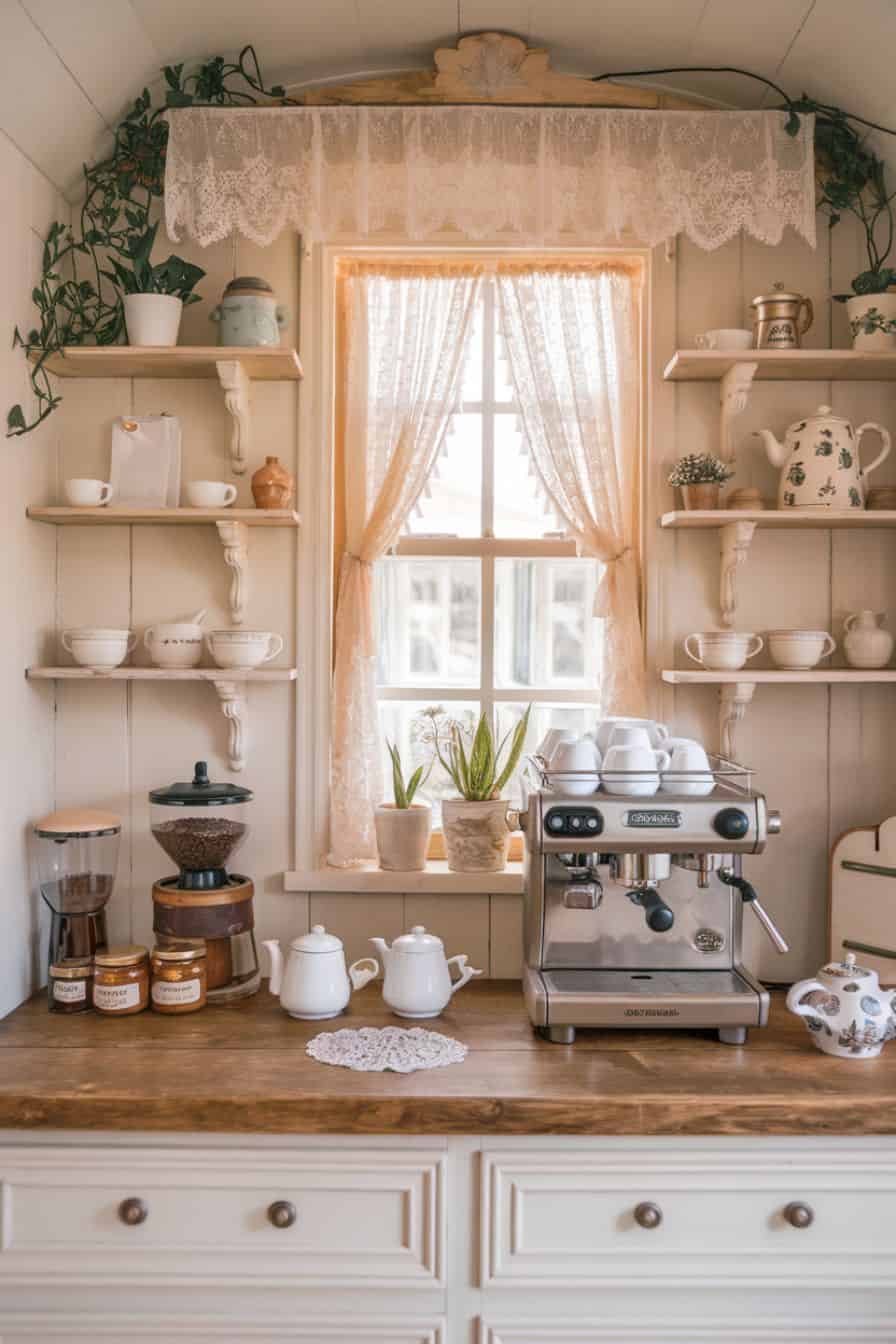
Three things do the heavy lifting. Symmetry, first, because shelving on both sides of a centered window calms a busy wall. Then scale: that thick countertop is nearly twice the depth of a standard shelf, so it holds a full espresso machine without crowding. Third, softness. Sheer curtains blur the hard rectangle of the window, which is why the corner feels like a room instead of a hallway.
11. A Snowman Mug with Star Marshmallows on Green Knit
This is the whole setup for a small apartment: one mug, an 18-inch square of surface, two textiles. You don’t need a bar. You need a windowsill or the end of a counter and about 12 inches of clearance so a knit blanket can drape instead of bunch. If your counter is deeper than 24 inches, push everything forward, because the back half will just collect mail.
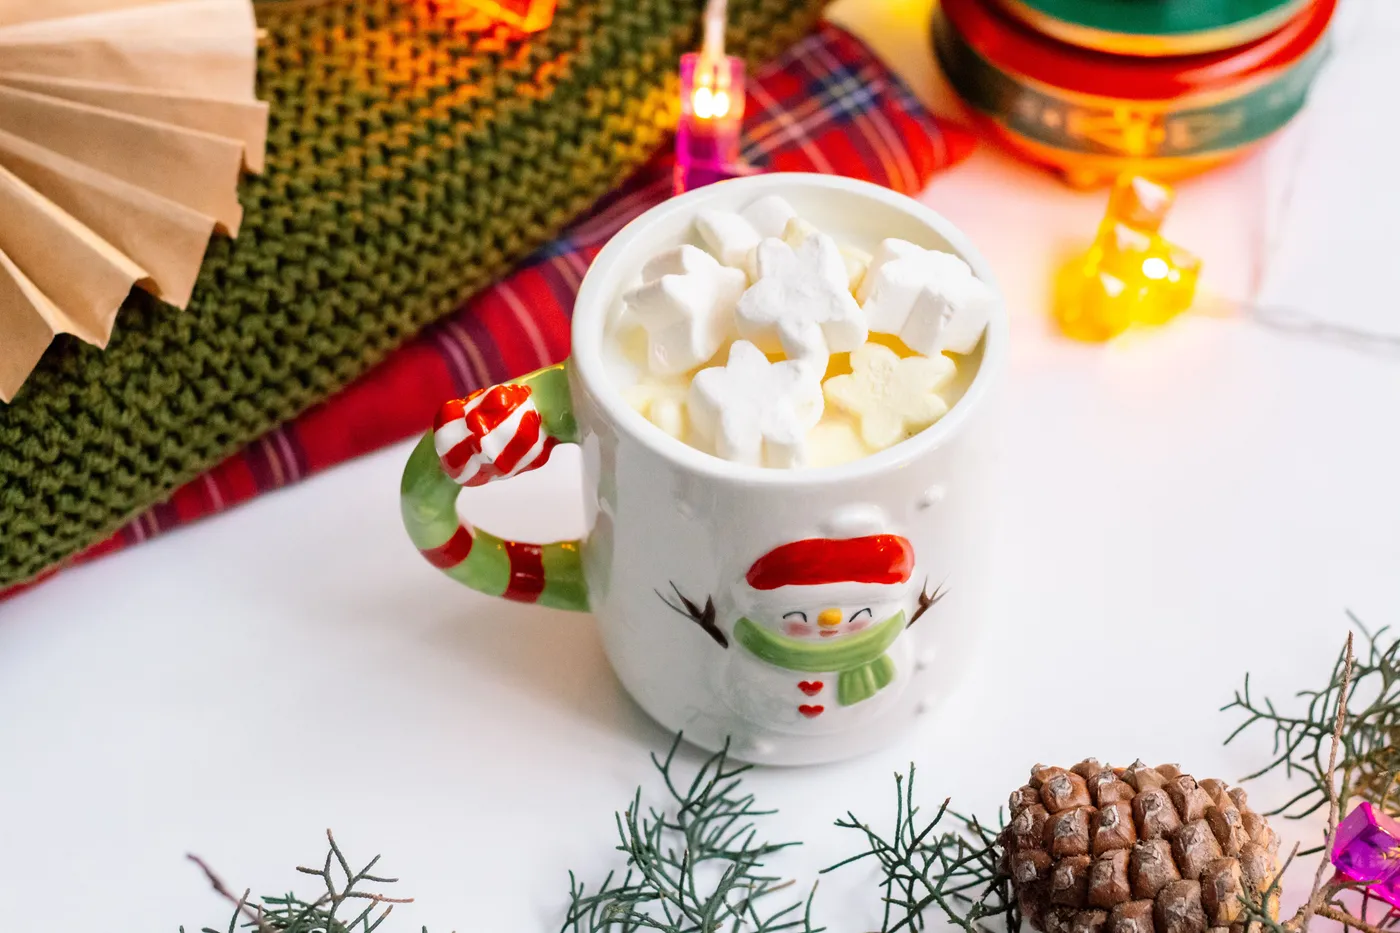
Layer textiles on a diagonal, not a stack. Fold the green knit into a loose triangle, lay the red plaid across it at roughly 30 degrees, then let one corner fall off the edge. Straight-on stacks read as laundry; angled layers read as styling. Drop a pinecone and an evergreen sprig where the two fabrics cross, since that intersection becomes the focal point.
12. A Footed Grey Mug with a Cinnamon Roll on Top
The pastry perched on the whipped cream is the entire gag, and it works because it breaks a rule you didn’t know you were following. Everything else behaves: the mug is centered, the cream is swirled, the cinnamon dust is even. Then a whole iced cinnamon roll lands on top. Take it away and you have a nice cup of cocoa in a good mug. Keep it and the photo has a punchline.
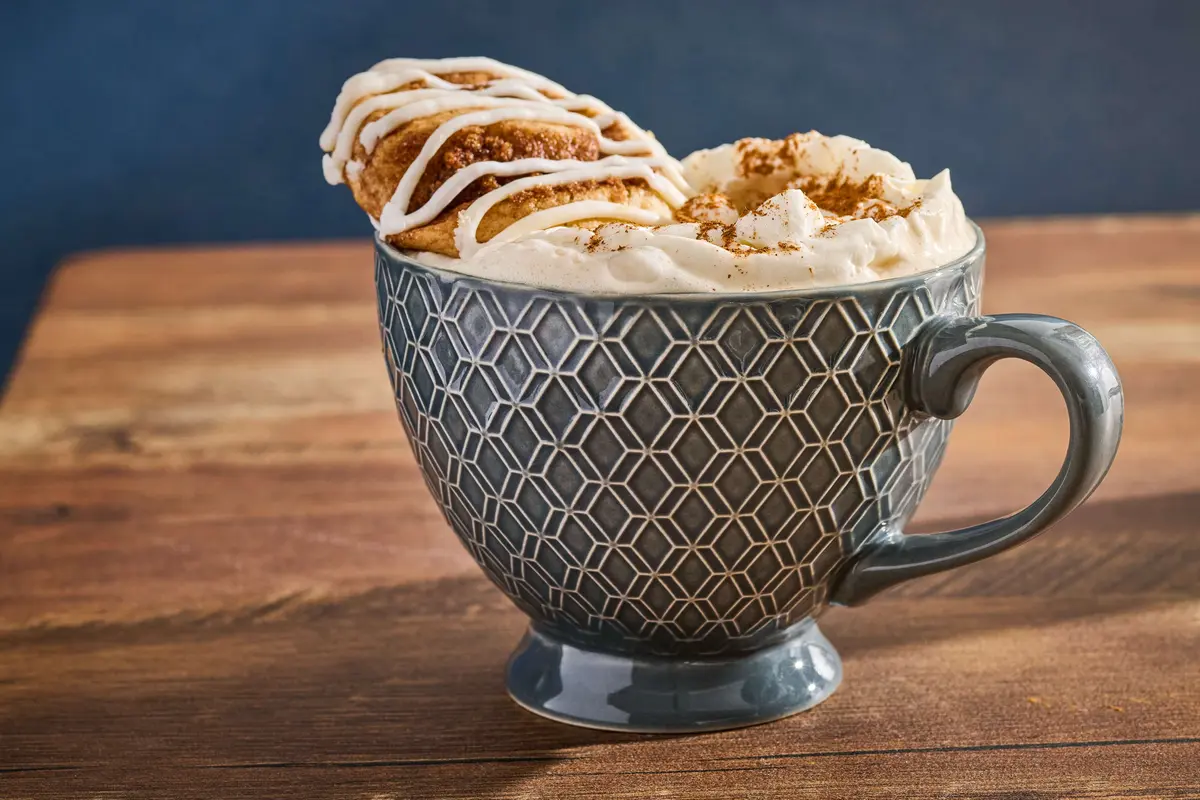
Footed mugs are top-heavy and they will tip if someone sets one down on a soft surface, so keep the saucer. A pastry balanced on cream also has a shelf life measured in minutes, because cream slumps and the roll slides and you get a sticky ring on the wood. Serve the pastry on the side and use a second, smaller one for the photo.
13. A Two-Tone Mug with Crushed Mini Eggs and a Wood-Handled Spoon
Check these before you build the tray:
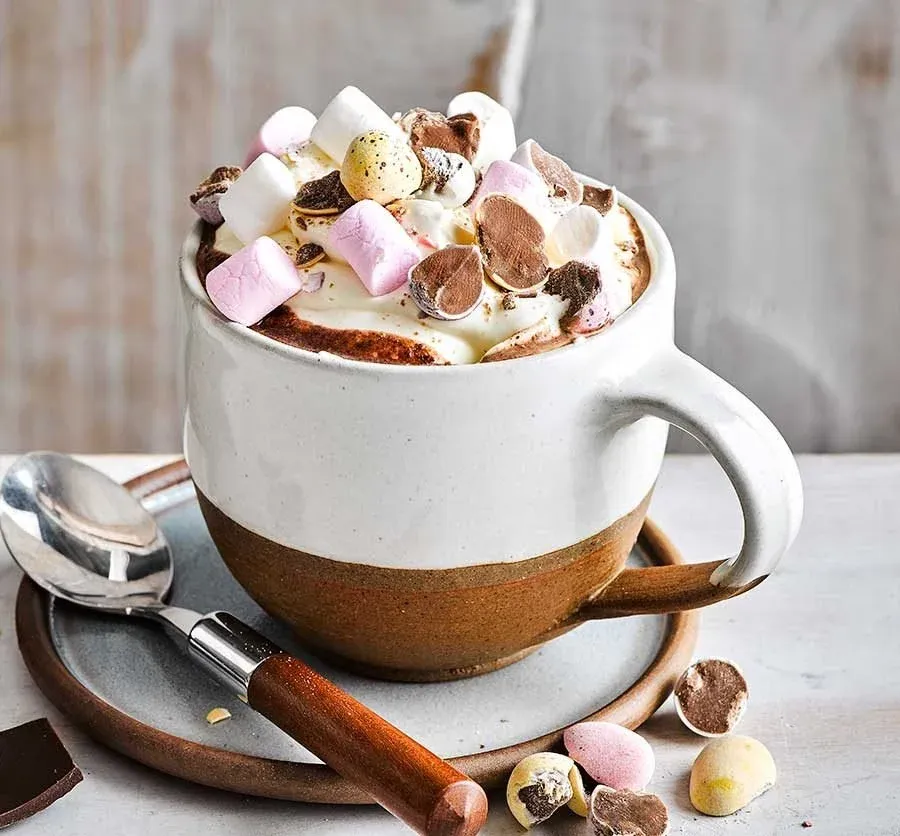
- Does the mug’s glaze actually contrast with your tabletop?
- Are the toppings small enough to sit on cream without sinking?
- Is the coaster wider than the mug’s foot?
- Do you have a spoon rest, or a second coaster to use as one?
- Two-tone ceramic mug: $12–$24
- Round ceramic coaster: $6–$14
- Wood-handled spoon: $8–$16
- Marshmallows, mini eggs, chocolate: $10–$18
- Total: $36–$72
Budget alternative: a plain white mug and a thrifted silver spoon land under $15 and photograph nearly as well.
14. An Ice Cream Float in a White Mug on Ornate Silver
Break it down and it’s 55 percent white, counting the mug, saucer, and foam, plus 30 percent dark brown cocoa and 15 percent reflective silver. That small metallic share is what makes this feel like a hotel dessert instead of a Tuesday night. Swap the silver for matte black and the mood turns modern; swap it for brass and it goes warm and vintage. The liquid and ceramic should stay neutral either way.
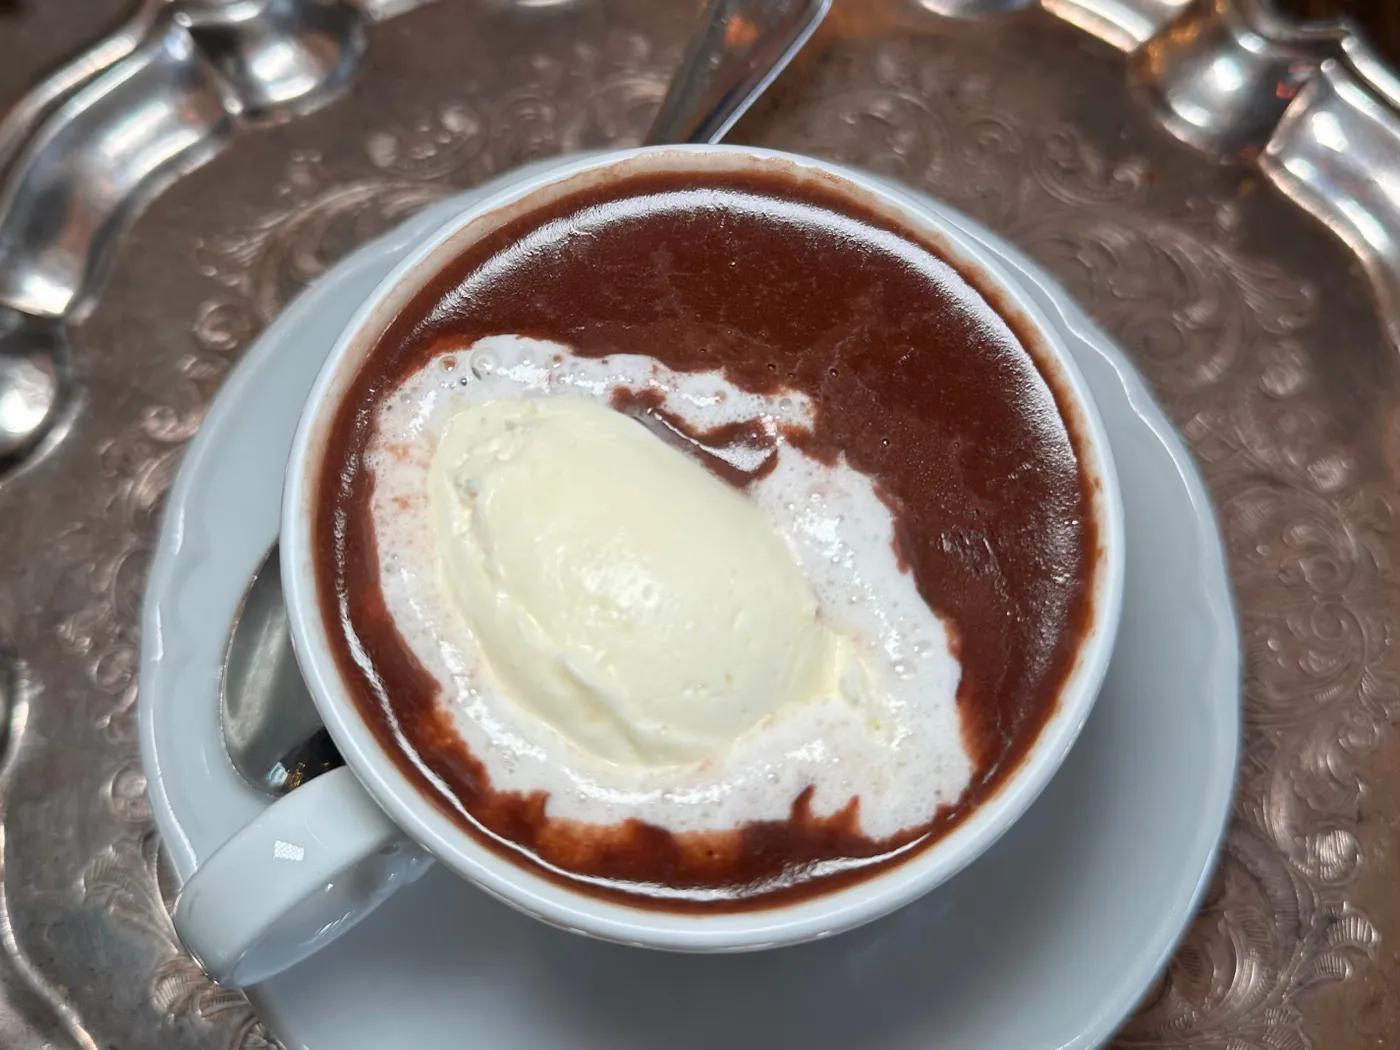
Ice cream in hot chocolate is a race against physics. It melts in about four minutes, dilutes the cocoa, and leaves a slick on the saucer. Fine for a photo, less fine for a party, so keep the ice cream in a bowl on the side and let people add it themselves. Also, that embossed tray will tarnish. For a less fussy version, see Idea #25.
15. A Keurig Station on Vintage Red Truck Print
Pod sprawl is the number one thing that makes a drink station look messy, and the fix costs almost nothing. Sort pods by roast into three clear containers rather than by flavor, because people pick on caffeine first. Keep the water tank behind the pod stand, never beside it, so the front edge stays clean. Leave eight inches of empty counter to the right of the machine too, since that’s the landing zone.
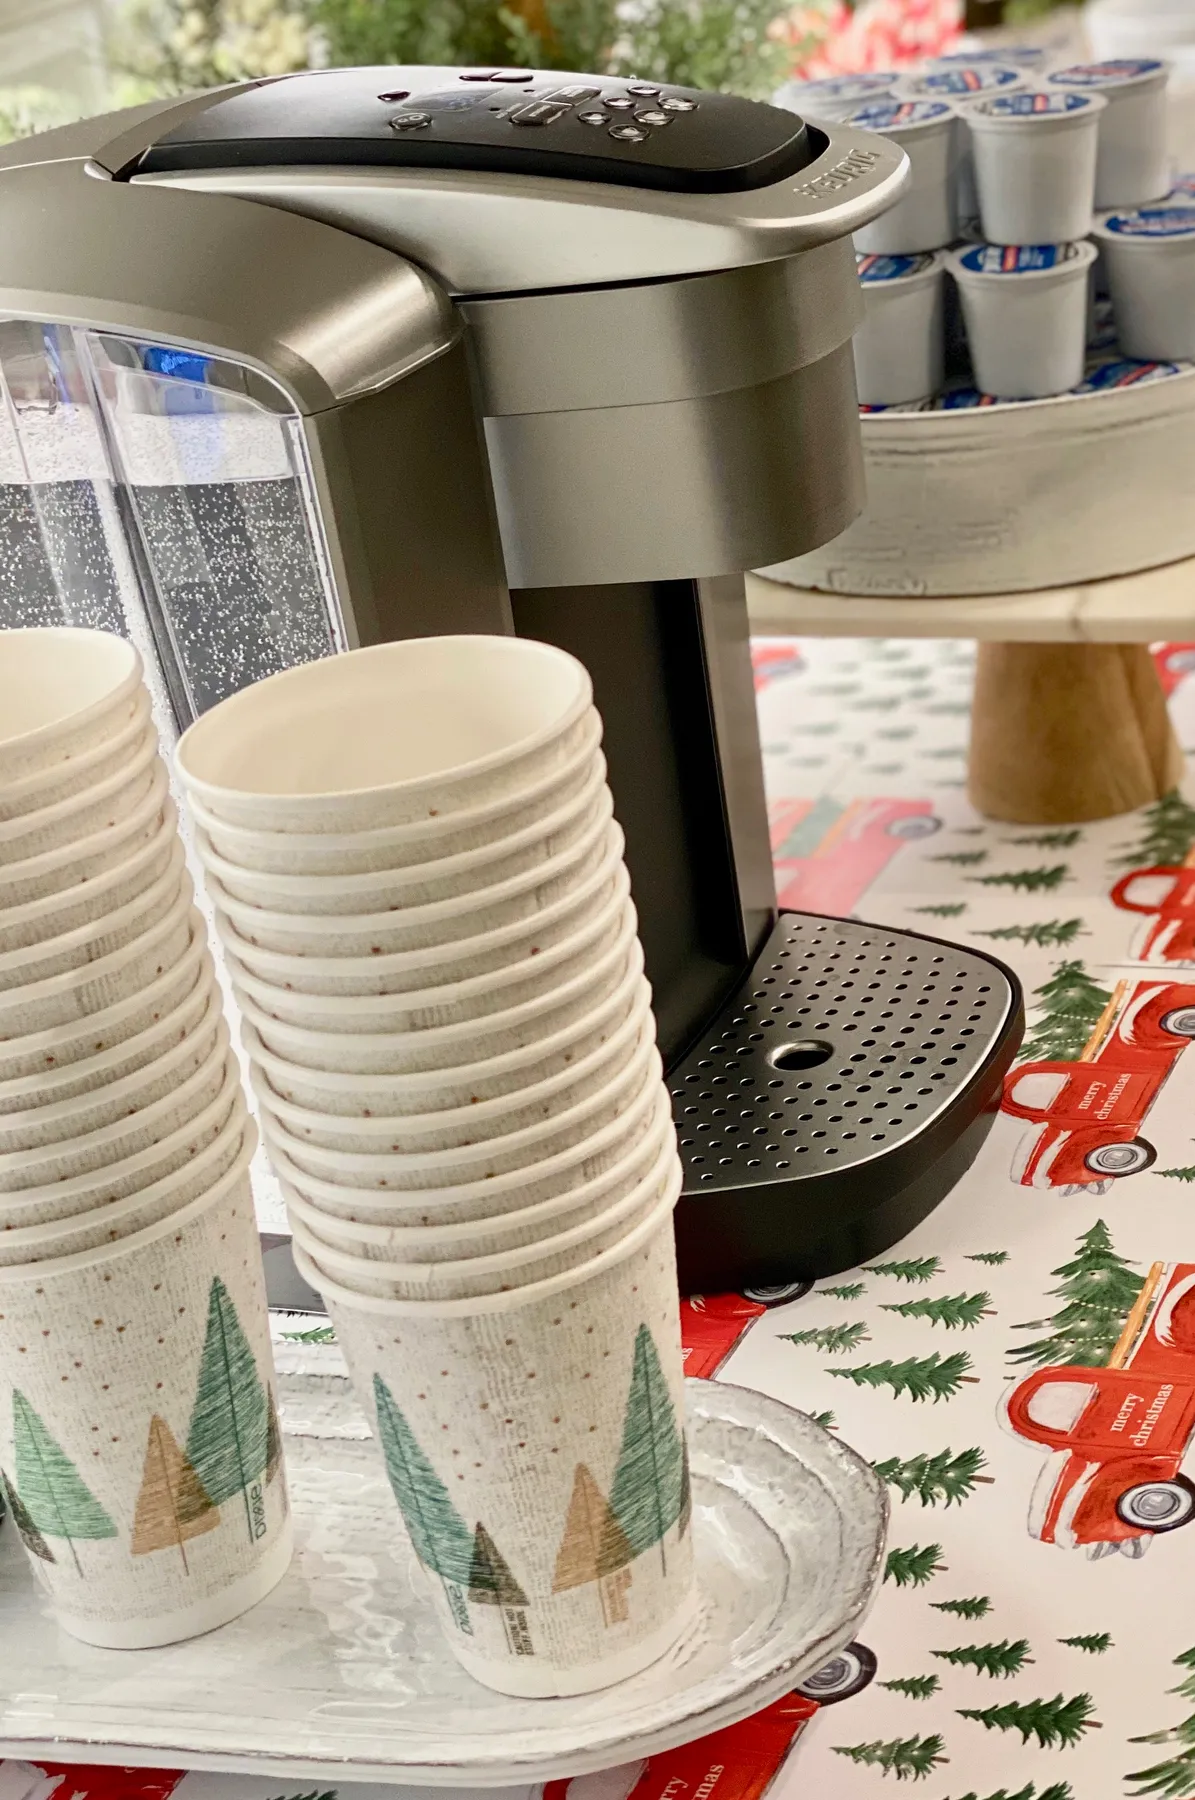
- Set the tray down first and center the machine on it.
- Stack cups in two columns of five, tallest at the back.
- Load the tiered stand with pods, darkest roast on top.
- Add a small dish for spent pods beside the machine.
- Wipe the print surface, because smudges show on light patterns.
About 15 minutes and $45 in supplies.
16. Blue Speckled Enamel Mugs with Sugar Cones and Dark Chocolate
Enamelware is where budget and boutique converge. A $9 speckled mug from a farm store looks nearly identical to a $28 one from a specialty shop, because they’re stamped from the same kind of steel. Spend your money on the chocolate instead. Good dark chocolate and proper cinnamon sticks read on camera, while cheap ones look dusty. This whole scene runs about $35 at Walmart or Tractor Supply.
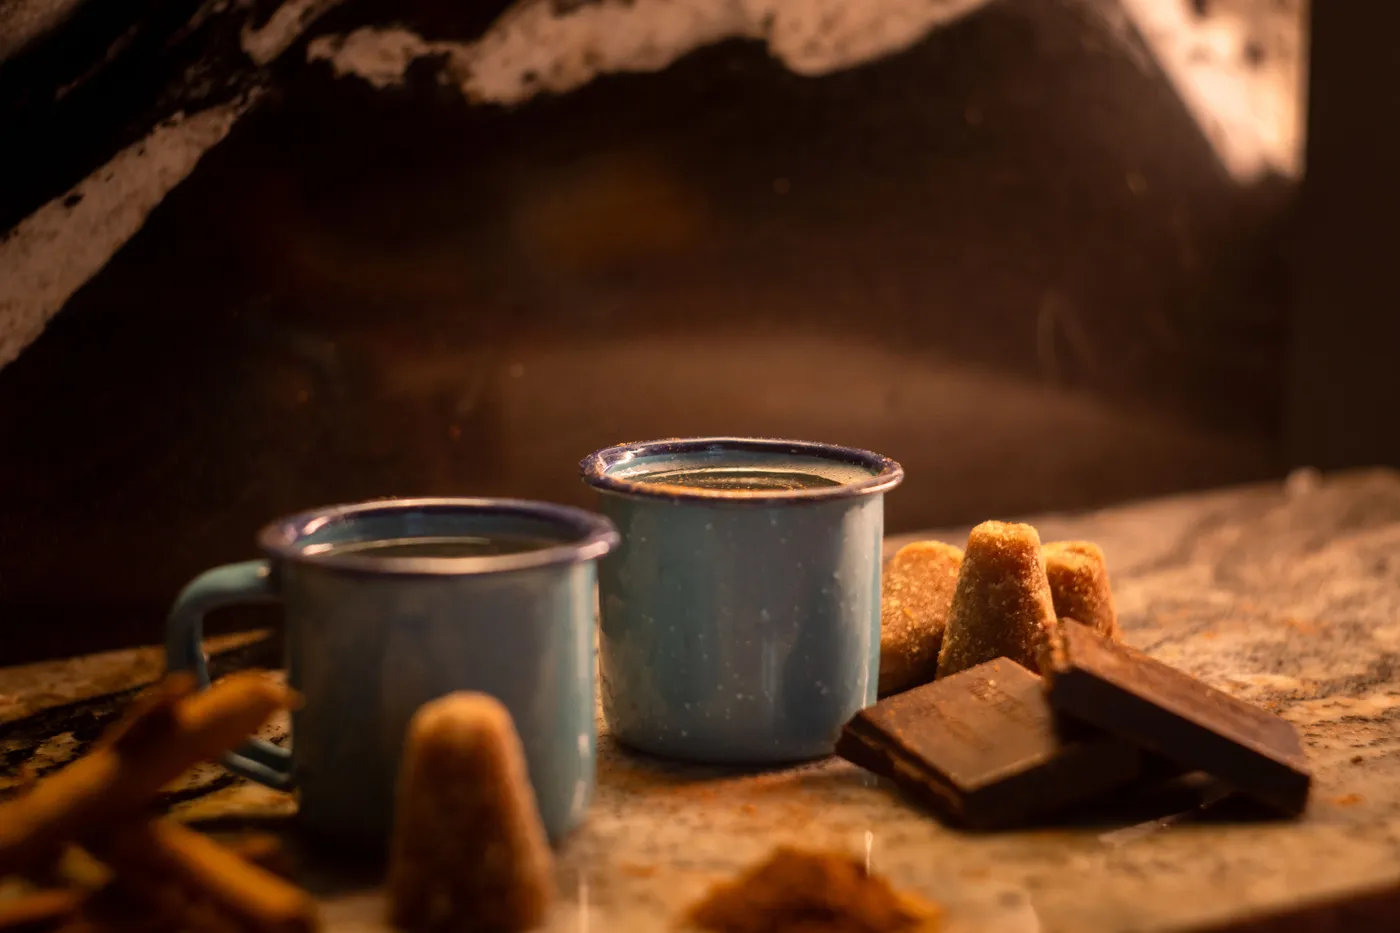
This is a two-person, hand-held composition, and it works best on a surface no wider than 30 inches. The mugs need about four inches between them so the dark background can show through the gap, and that little window of shadow is what gives the scene depth. On a big dining table, pull everything into the center third and let the outer thirds go dark.
17. Three Red Mugs, Three Different Garnishes
Garnish-forward cocoa is the 2026 answer to the cocktail garnish wars, same instinct with a softer landing. Star anise, red currants, crushed candy cane: they’re inexpensive, they photograph like jewelry, and they let a home host look like a stylist without hiring one. The trend will age well because it isn’t structural, so there’s nothing to rip out in two years.
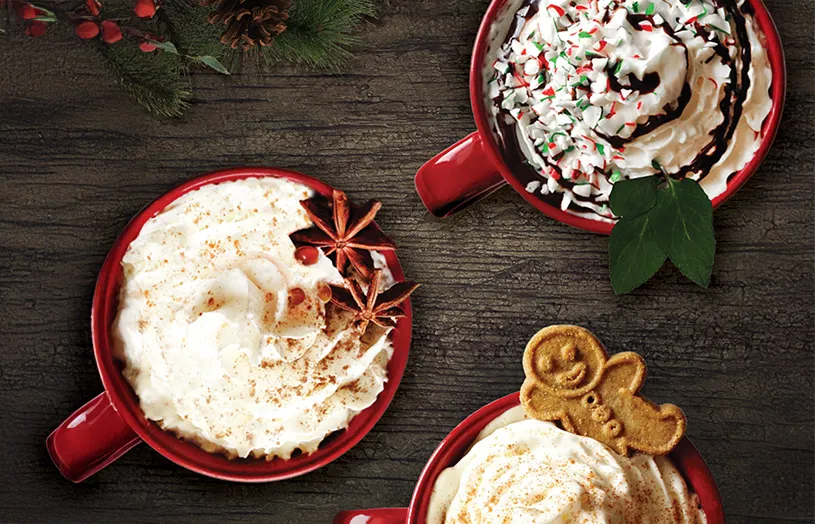
Three mugs beat one because of repetition with variation: same red ceramic, same cream swirl, three different tops. The eye reads the set as a series and then goes hunting for the differences. Try these:
- Crushed candy cane for bright pink-red speckle
- Star anise plus two red berries for structure
- A whole gingerbread man for a hit of tan
Keep the garnish sizes within about a third of each other so nothing overwhelms.
18. A Red Enamel Mug in Faux Snow with Heart Gingerbread
- Red speckled enamel mug: $9–$18
- Heart-shaped gingerbread, bakery or homemade: $8–$20
- Cinnamon sticks and star anise: $5–$10
- Faux snow blanket: $8–$16
- Pine sprigs: $4–$9
- Total: $34–$73
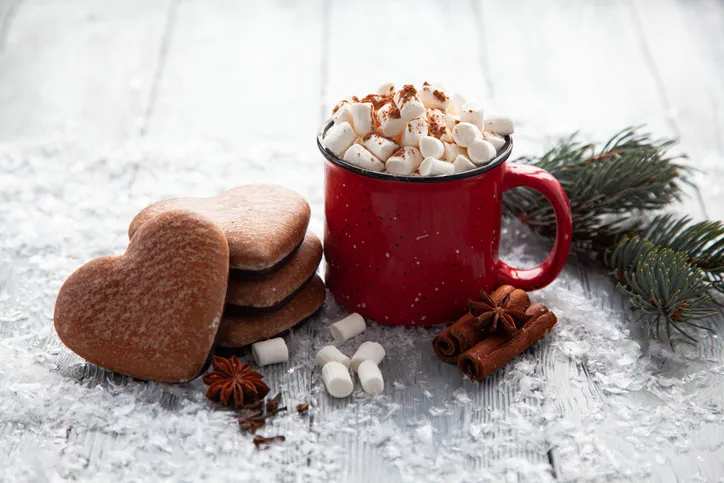
Budget alternative: skip the faux snow and use a white flour-sack towel. About $20 all in.
A few things worth checking first:
- Does your faux snow shed? Test it over a bin before it touches wood.
- Is the gingerbread sturdy enough to lean, or will it crumble?
- Will red enamel show every drip and hide the fill line?
- Is the surface sealed? Snow plus condensation equals a ring.
19. Two Red Mugs of Toasted Marshmallow Cocoa on Bare Wood
Toasted marshmallows are the highest-reward, highest-risk garnish on this list. A kitchen torch gives you that golden crown in seconds, but they go from toasted to on fire faster than you’d believe, so keep a lid nearby and don’t work under a cabinet. The broiler works too, on foil, with your eyes on it the whole time. Toast before the cocoa goes in or you’ll be fishing them out.
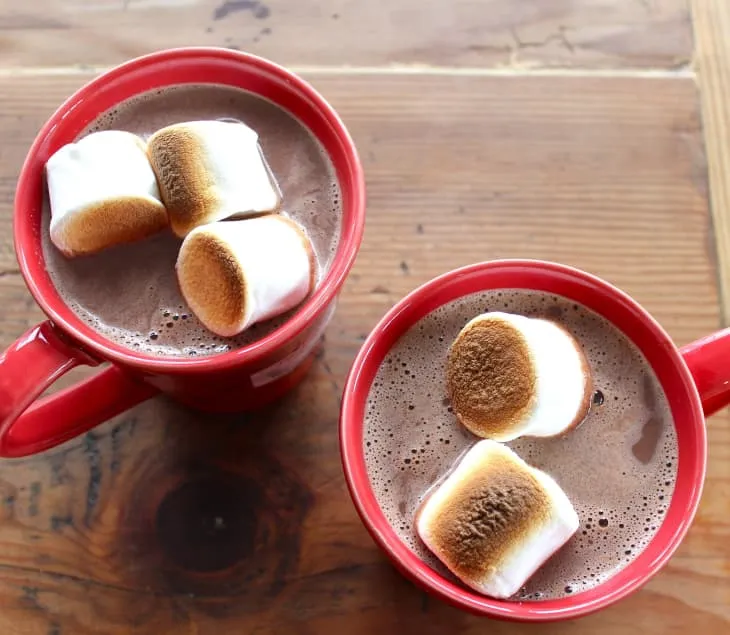
Browning matters more than size here. Two or three large marshmallows sitting proud of the rim look intentional, while a full raft of minis looks like cereal. Leave a half inch of visible cocoa between them so the dark liquid frames each one. And match your mug reds, because two slightly different reds will read as a mistake rather than a choice.
20. Two Hands, Two Mugs, Raspberries and Red Currants
Fresh berries are the unexpected element. Everything else in a cocoa scene is brown, cream, or sugar, and raspberries with red currants cut through with acid-bright red and a little green stem. They also signal effort, because nobody keeps red currants around by accident. One small handful per mug, placed after the cream so it sits on top, is all it takes. The garnish logic matches Idea #17.
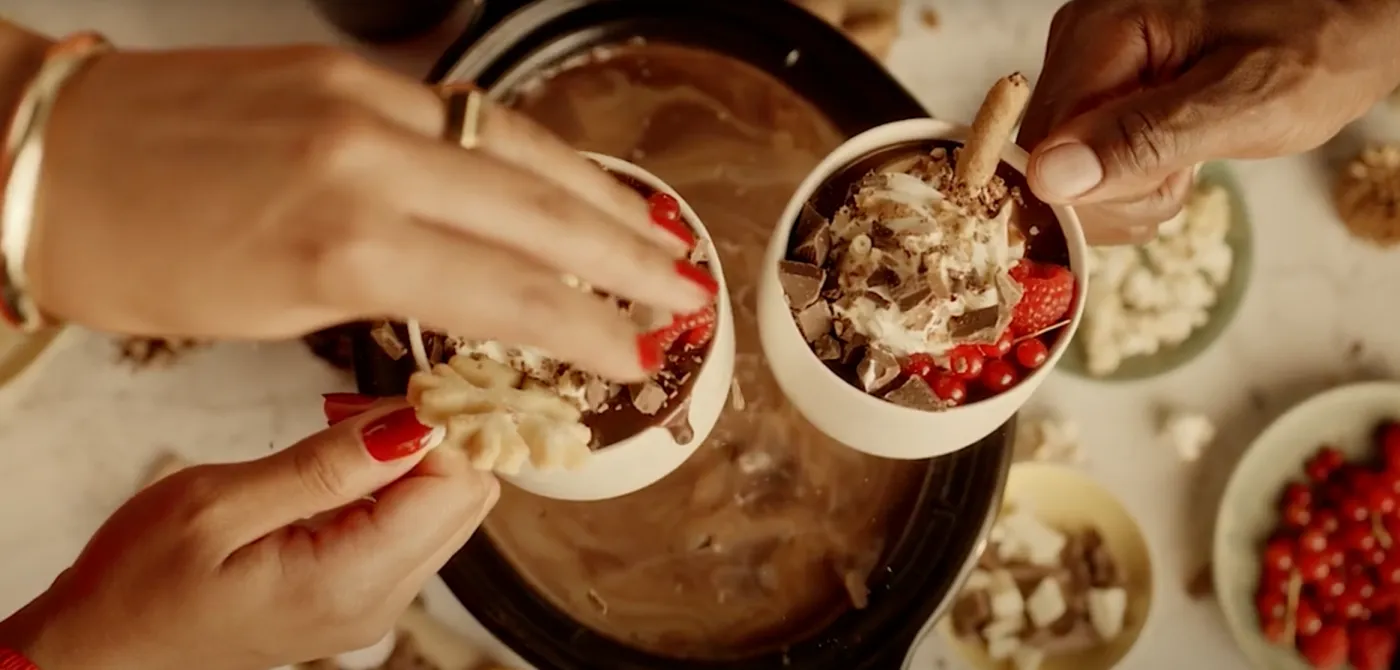
Count it out: 60 percent dark cocoa and white ceramic, 25 percent cream and chocolate, 15 percent red fruit and green stem. The fruit share stays small on purpose, because past 20 percent it stops reading as garnish and starts reading as a fruit salad. For another season, keep the 60 and swap the fruit: blackberries and thyme in fall, sliced strawberries in summer.
21. An Amber Glass Mug and a Steel Shaker of Spice
- Fill the mug to a half inch below the rim so cream has room.
- Whip to soft peaks, not stiff, since stiff cream won’t settle.
- Hold the shaker 8 to 10 inches above and tap lightly.
- Work from the outside in so the center stays clean.
- Wipe the rim after, because powder on glass ruins the shot.
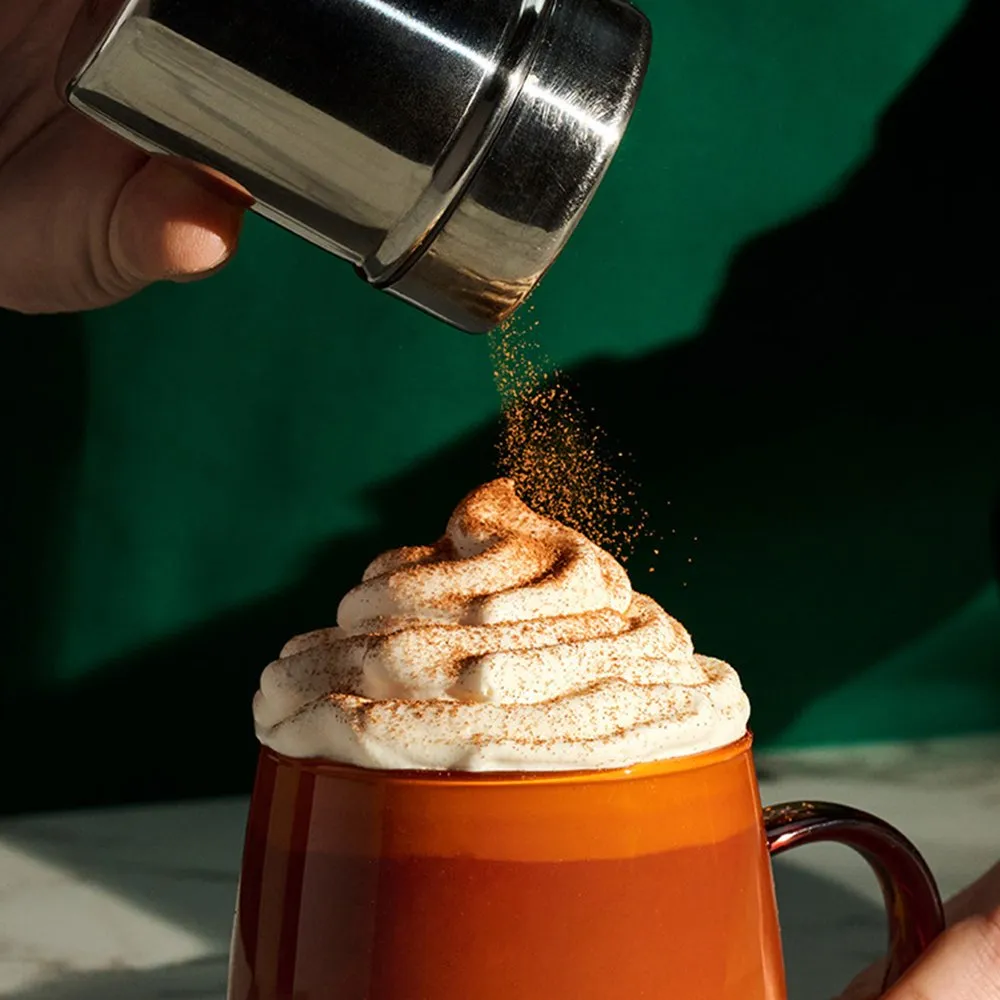
Three minutes, and the shaker costs about $8.
Amber glass is beautiful and it stains. Cocoa leaves a film that regular dish soap won’t lift, so plan on a baking-soda soak every couple of weeks. Skip the dishwasher, since heat clouds the glass over time. And check that your mug is drinking-glass safe, because some decorative amber glass is meant for shelf display and will crack under boiling liquid.
22. Pastel Pink Cocoa with Heart Sprinkles on Marble
Party setups like this need a surface of at least 36 by 24 inches to hold two mugs, a jar, and a spoon without crowding, and they read best against something pale and cool: marble, quartz, a white lacquer tray. The pink is already loud, so let the surface stay quiet. A grey-veined counter works. A warm butcher block fights it.
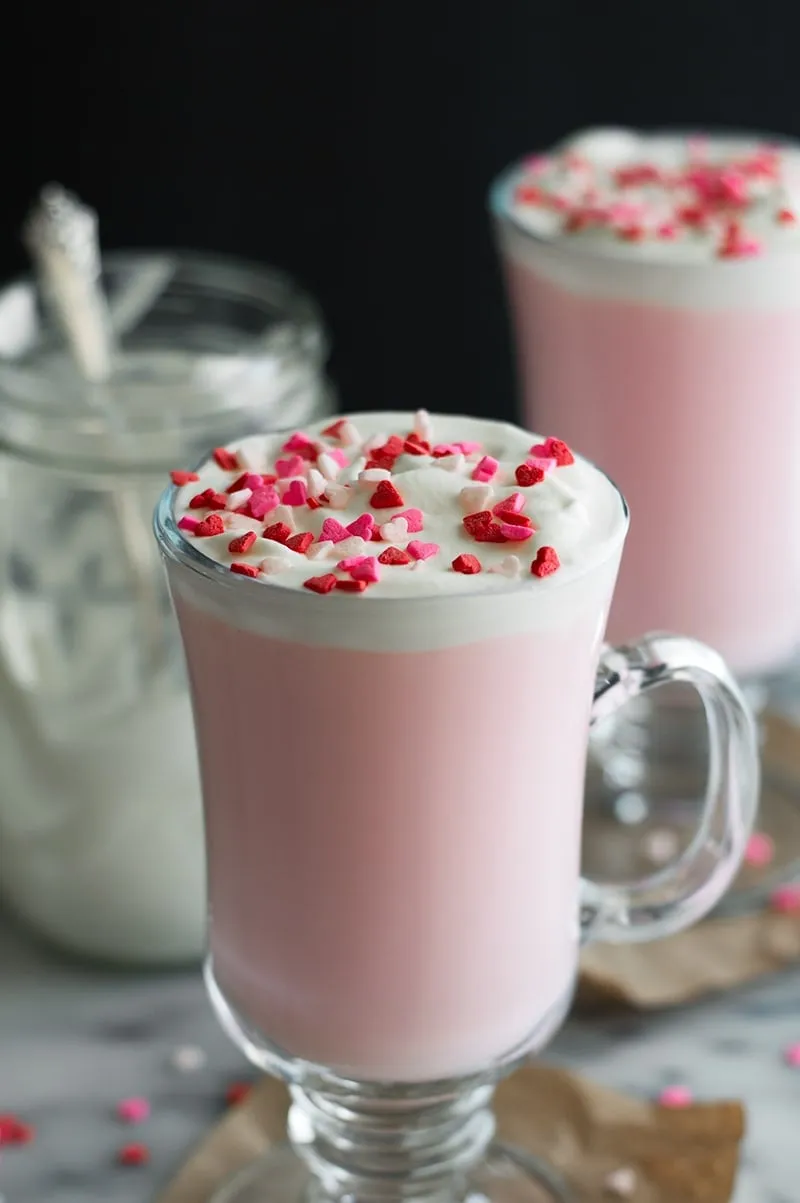
Pink cocoa is mostly white chocolate and food coloring, which means the expensive part is the aesthetics, not the ingredients. Clear glass mugs run about $4 each at Walmart, heart sprinkles are under $5, and marble-pattern contact paper over an existing tray costs around $12. That’s under $30 for the whole scene, versus $90 for a specialty party kit with the same contents.
23. Three Hands, Three Candy Cane Mugs, One Couch
If you’re styling a scene for friends, get hands into the frame. Three mugs floating on a surface look like a product shot; three mugs held by three people look like a memory. It’s a practical party tip too, since handing people their cocoa beats making them navigate a bar. The candy cane hooked over each rim gives every guest something to do with their hands.
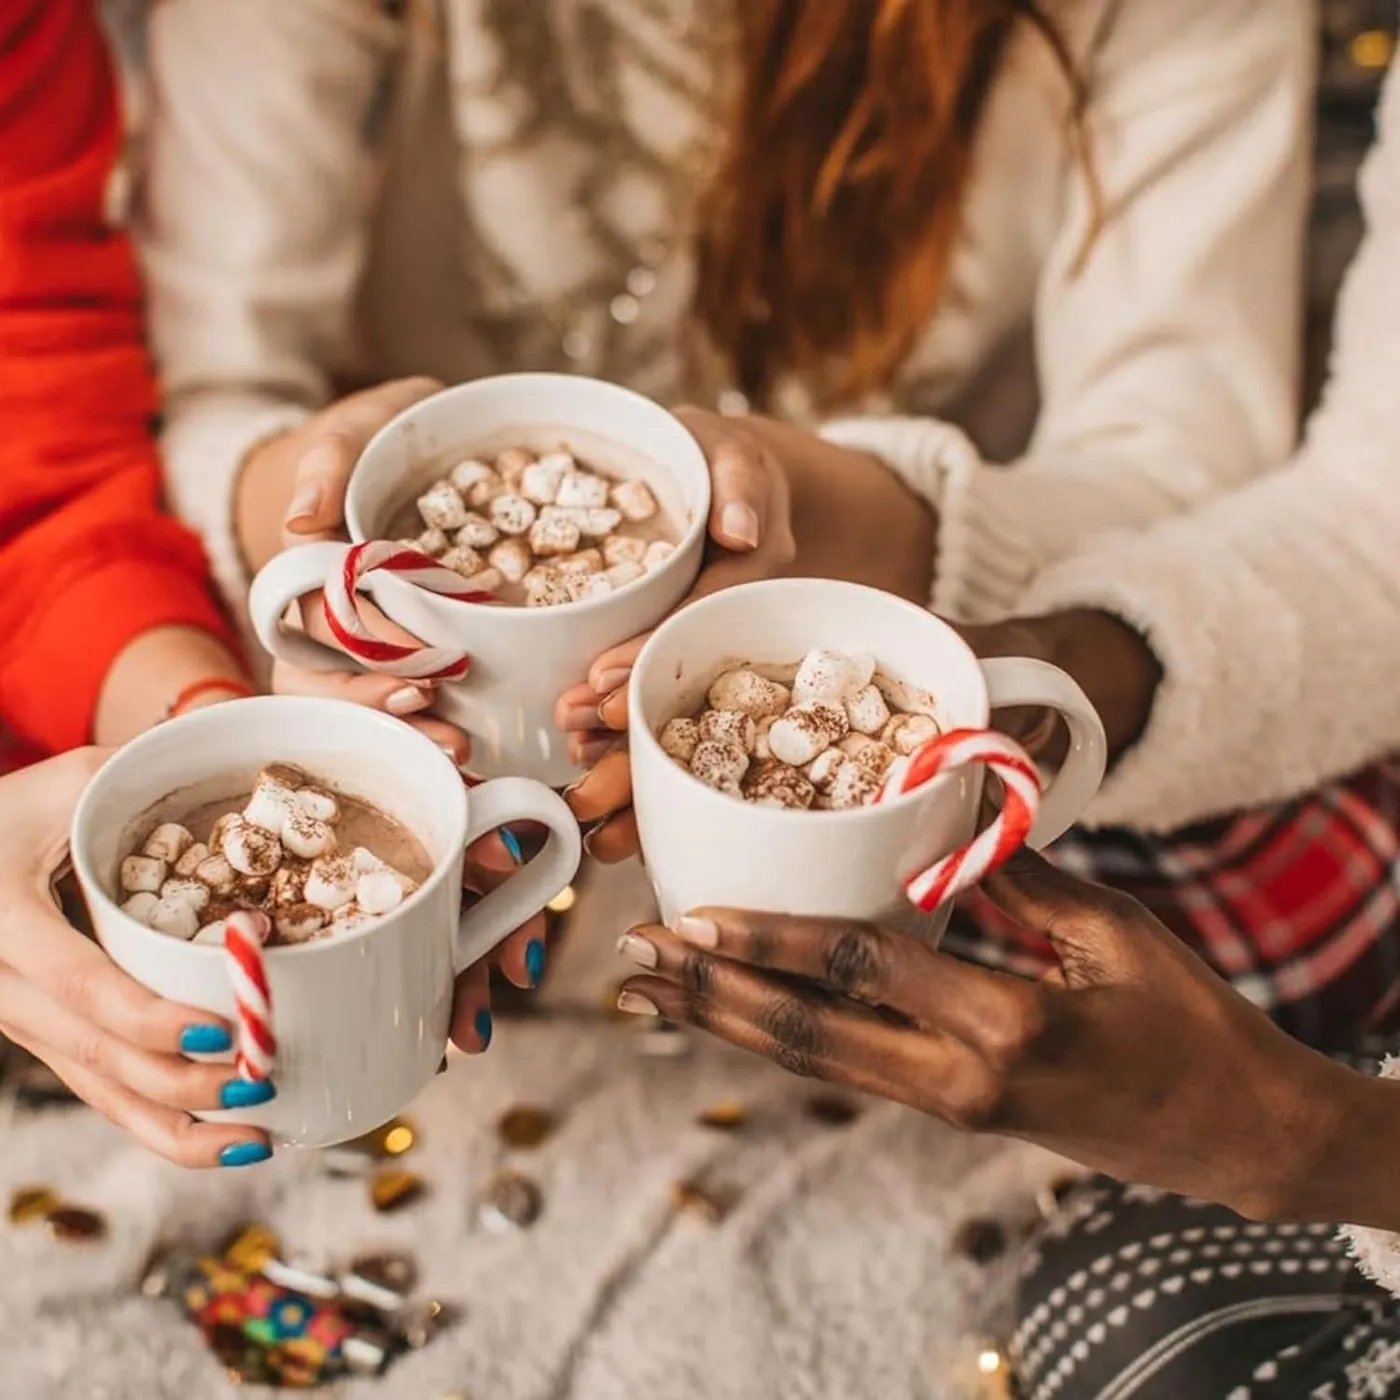
The gathering shot is having a moment, as saves for hands-and-mugs imagery keep climbing. In 2026 the aspirational image isn’t a spotless table, it’s a slightly cluttered one with people in it. Lean into it: knit textures, a scatter of gold confetti, mismatched sweater sleeves, and nobody looking at the camera.
24. Kraft Paper, Dark Chocolate Shards, and Halved Hazelnuts
Crumpled brown paper is doing something specific: it adds shadow and irregularity a flat surface can’t. Without it, this is a mug, some chocolate, and nuts. Technically fine, visually inert. The paper gives the eye texture to travel across between objects, and it makes the mess look deliberate. The same trick works with parchment, a linen runner, or brown butcher paper.
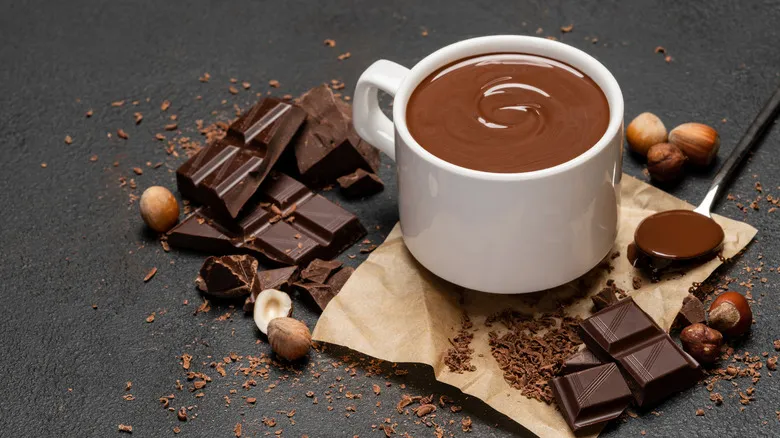
- White ceramic mugs (set of 4): $14–$28
- Dark chocolate bar, good quality: $6–$14
- Whole hazelnuts: $7–$12
- Kraft paper roll: $5–$10
- Silver spoon, thrifted: $2–$8
- Total: $34–$72
Budget alternative: skip the hazelnuts and use shavings only, and you’re at about $22.
25. Whipped Cream, Shaved Chocolate, and a Broken Bar
Four quick checks before you pour:
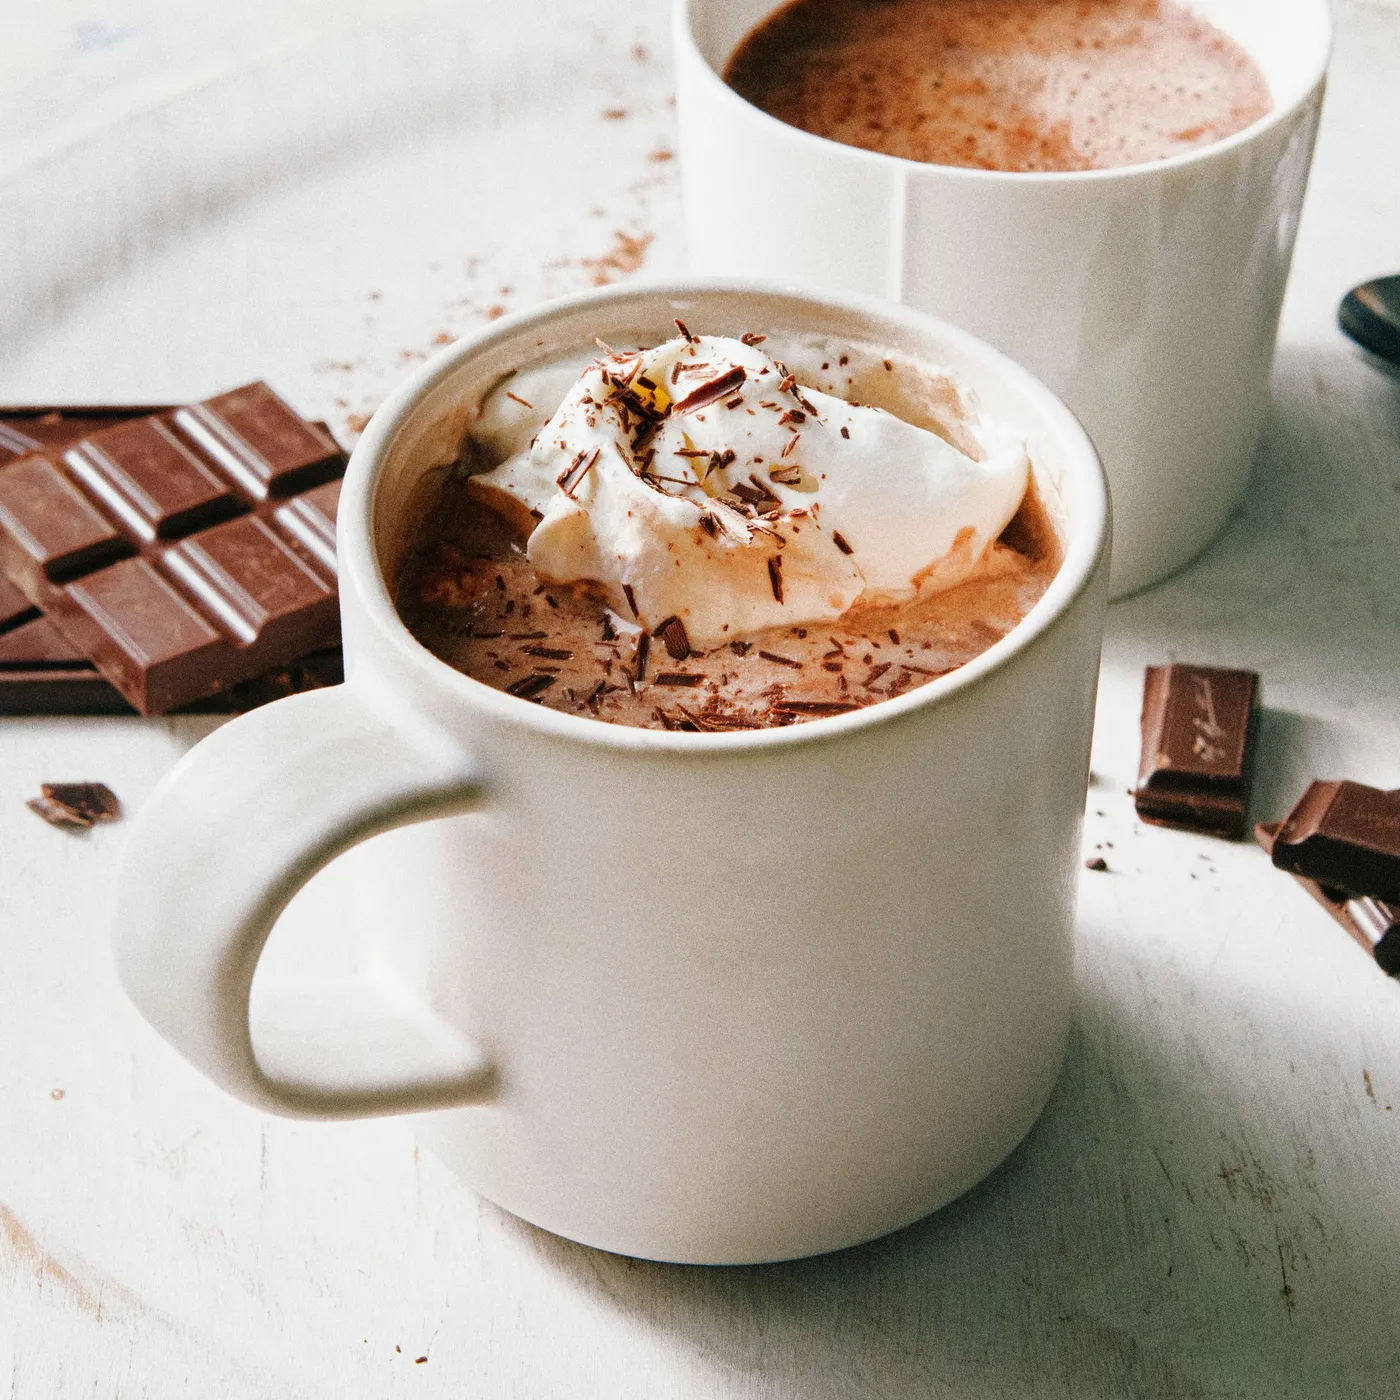
- Is your cream cold enough to whip? Thirty minutes in the freezer for the bowl helps.
- Do you have a vegetable peeler for shavings, or just a grater?
- Will the mug hold cream plus shavings without overflowing?
- Is the chocolate bar at room temperature? Cold chocolate shatters.
Chocolate shavings are photogenic for about six minutes, then they melt into the cream and leave brown smudges. Shave them fresh, right before serving, and keep the bar somewhere cool rather than the fridge, where condensation ruins the surface. Same chocolate-forward idea as Idea #24, one step more refined.
26. Pink and Gold Sprinkle Foam on Weathered Planks
The formula is simple and surprisingly strict: 70 percent neutral, meaning light weathered wood, clear glass, and silver spoons, then 20 percent white foam and 10 percent color in the sprinkles. The saucers sit right in that neutral zone with a whisper of blue-grey and a brown rim, which is why the whole thing feels calm instead of candy-shop. Three pairings to try:
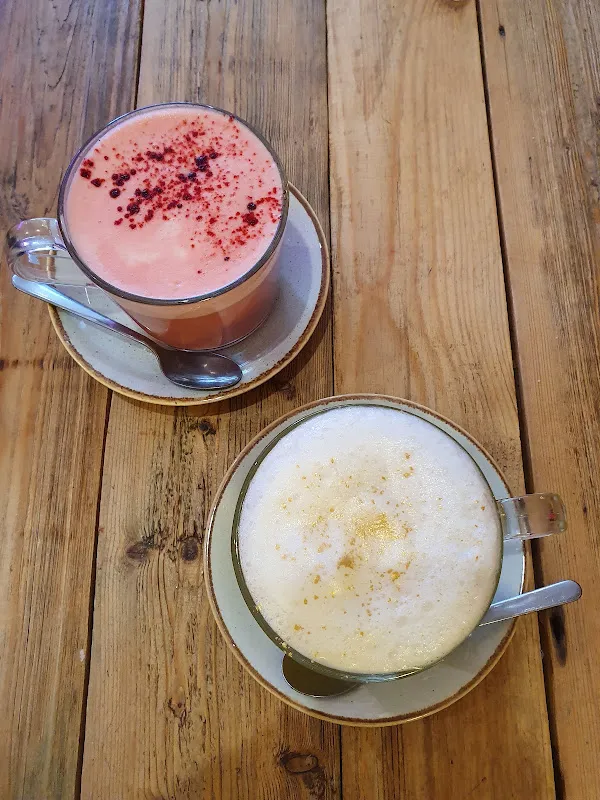
- Pink foam, red sprinkles, blue-grey saucer
- White foam, gold sprinkles, warm cream saucer
- Caramel foam, cocoa nibs, dark stoneware saucer
- Chill the glass mugs in the freezer for five minutes.
- Whip cream to medium peaks and tint with a drop of food gel.
- Spoon cream on and flatten the top with the back of the spoon.
- Sprinkle across one diagonal, not the whole surface.
- Set the mug on a saucer wider than the glass foot.
27. Royal Blue Tile, One Swirl Mug, Two Labeled Jars
The tiled surface is the star, and everything else serves it. A busy cobalt-and-yellow tile pattern would wreck most tabletop scenes, but here the mug and the tile share a palette, so the chaos reads as intentional. Take the tile away and you have a patterned mug on a plain table, nice but ordinary. The lesson is bigger than cocoa: one intensely patterned surface can carry an entire composition.
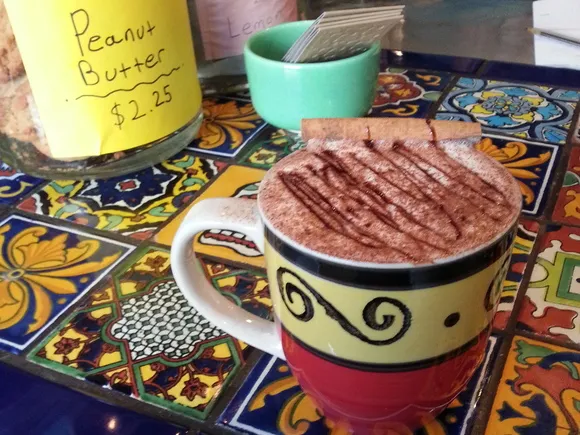
When you’re working with a busy pattern, keep props to three and make two of them transparent. Those glass jars of peanut butter and lemon curd nearly disappear against the tile because your eye can see through them, which gives the mug room to be the subject. Put anything opaque and patterned on that table and it collapses into visual noise.
28. A Lidded Wicker Basket Station on a Rustic Counter
Gift baskets are where markup lives. A pre-assembled cocoa basket runs $95 to $160, while the same contents cost about $45 if you build it yourself. Start with a lidded wicker basket from a thrift store ($8 to $15), add two mugs from Target at $6 each, a few packets of good cocoa, a bag of marshmallows, and some tissue paper. Tuck a $4 rose stem in at the end for the detail that makes it look bought.
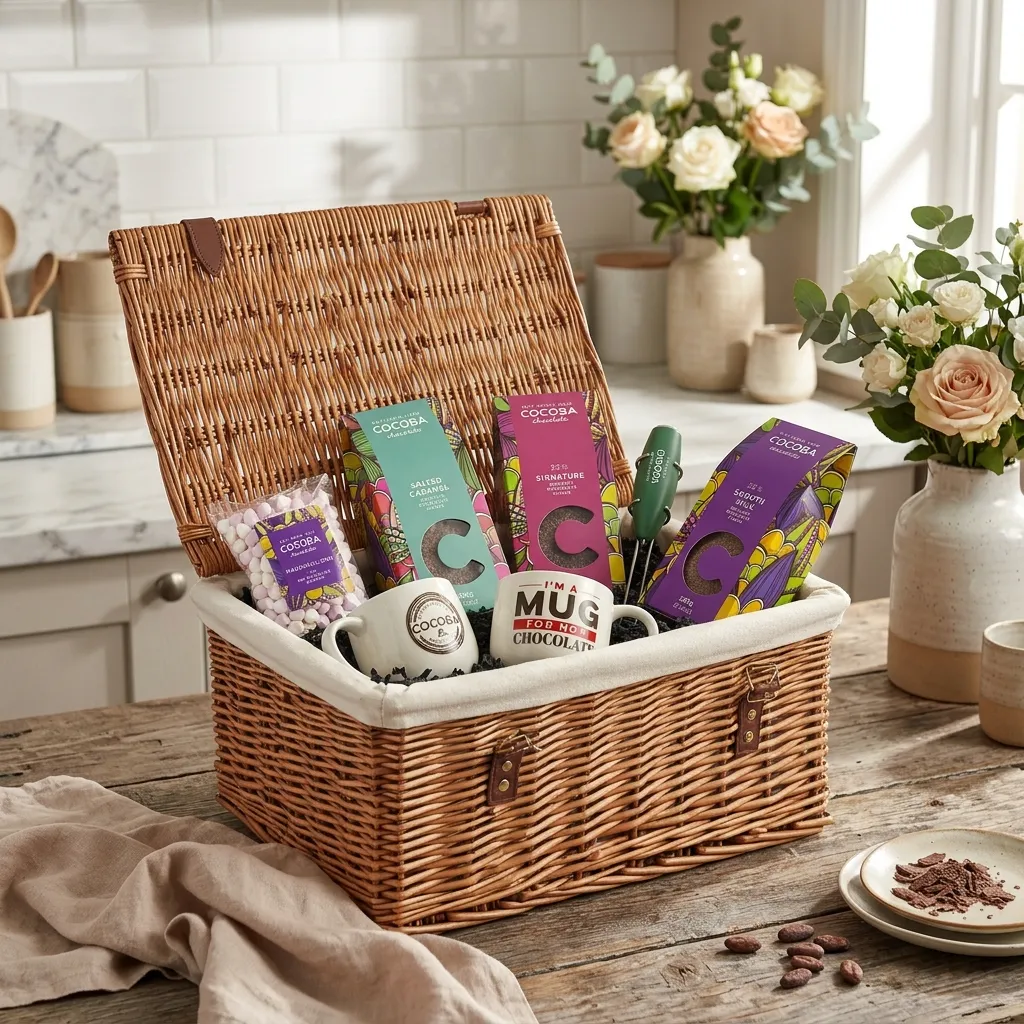
This basket needs a counter run of at least 36 inches and, critically, a wall behind it. The white subway tile is what makes the wicker read warm instead of muddy. If your kitchen has dark cabinetry, set the basket on a light tray to lift it. In a small kitchen, scale down to a 12-inch basket and let it live on an open shelf at eye level.
29. Six Silver-Lidded Jars and One Gold-Rimmed Mug
- Six small glass jars with lids: $15–$30
- Cocoa mix and toppings to fill them: $18–$35
- White mug with gold rim: $10–$22
- Labels or a chalk pen: $5–$12
- Total: $48–$99
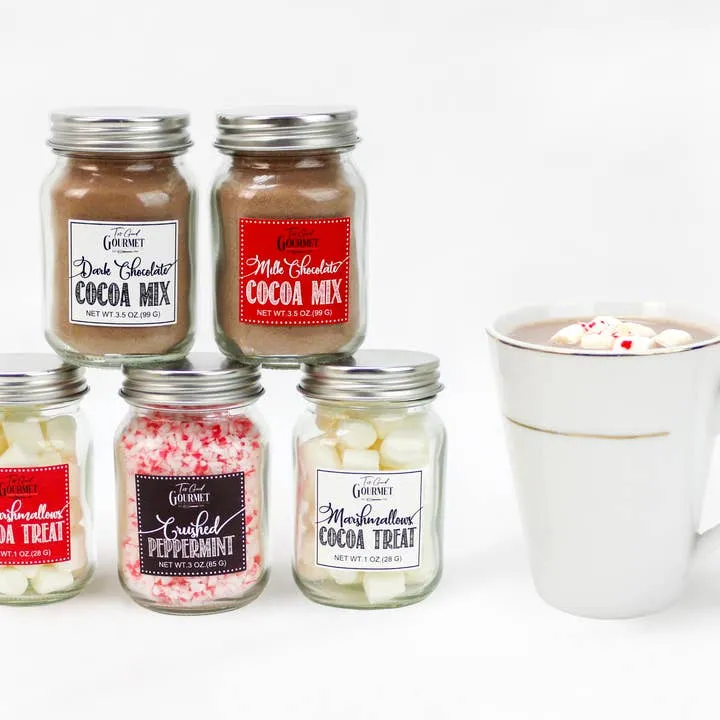
Budget alternative: save small jars from spices and pickles, buy new lids for about $3 total, and you’re at roughly $25.
Decanting is the organizing trend that won’t quit, the same instinct behind matching pantry jars and refillable soap dispensers. It works because it removes visual noise. One uniform jar shape repeated six times reads as calm, while six branded packages read as a grocery run. The jars also outlive any single season’s packaging.
30. A Matte Pink Mug and One Hard Diagonal Shadow
Hard light is a choice, not an accident. That diagonal shadow comes from a single small source, either a window with a partially drawn blind or one lamp at a low angle, and it makes a plain mug look dramatic. Recreate it by killing overhead light entirely and placing one bulb or window about 45 degrees off the subject. Soft, diffuse light is safe. Hard, directional light is interesting.
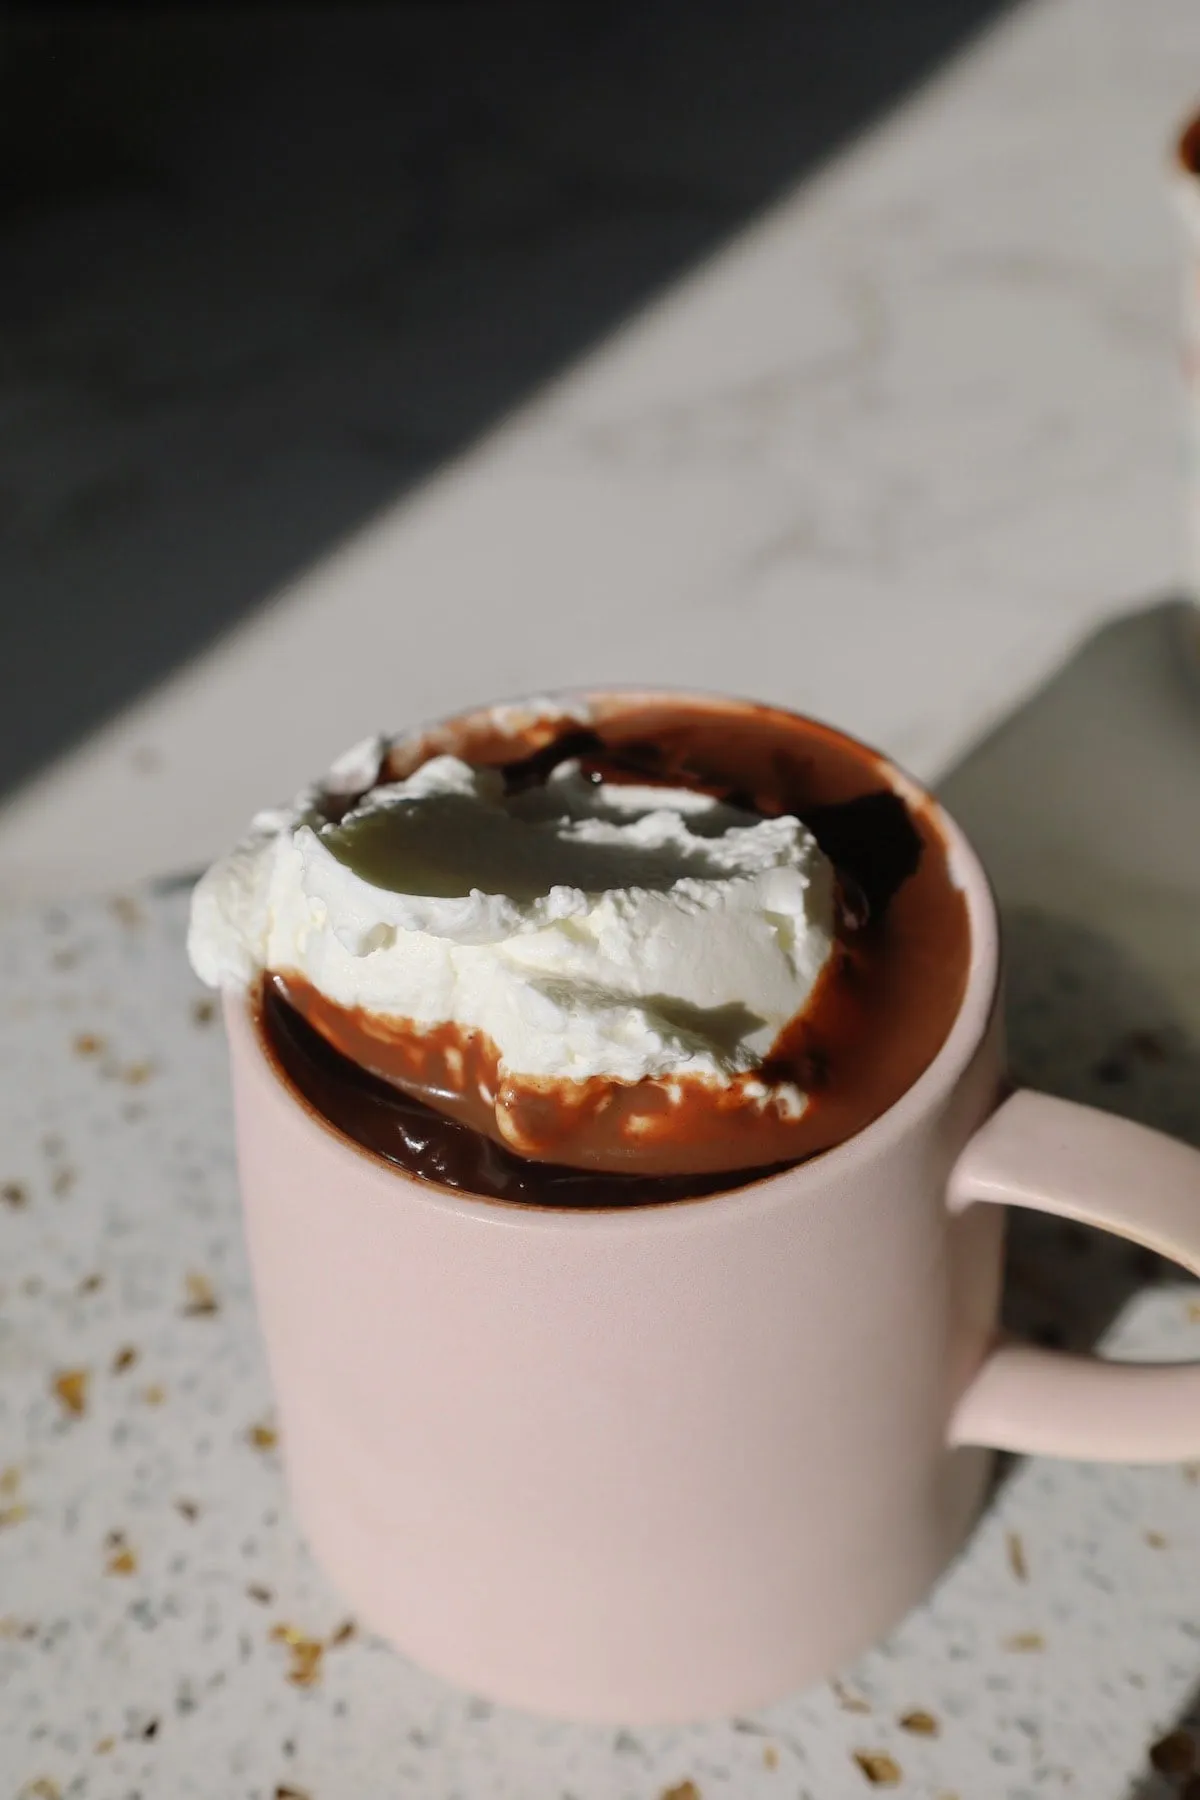
Take away the shadow and this is a nice pink mug on a counter. The shadow is the whole photograph. That’s worth internalizing for real rooms too, because an unremarkable corner becomes a moment when one strong light shape falls across it. You don’t need new furniture, you need to notice where the sun lands at 3 p.m. Compare with Idea #22 for the same pink in softer light.
31. A “HOT COCOA” Mug with Star Gingerbread and a Red-Lidded Jar
Printed mugs are charming and they fade. If the lettering is a decal rather than kiln-fired, the dishwasher will take it off within a couple of months. Wash by hand and keep hot liquids below boiling, since thermal shock is what kills the print, not the soap. Check the interior glaze too, because some novelty mugs have a rough inner surface that holds onto cocoa film no matter how you scrub.
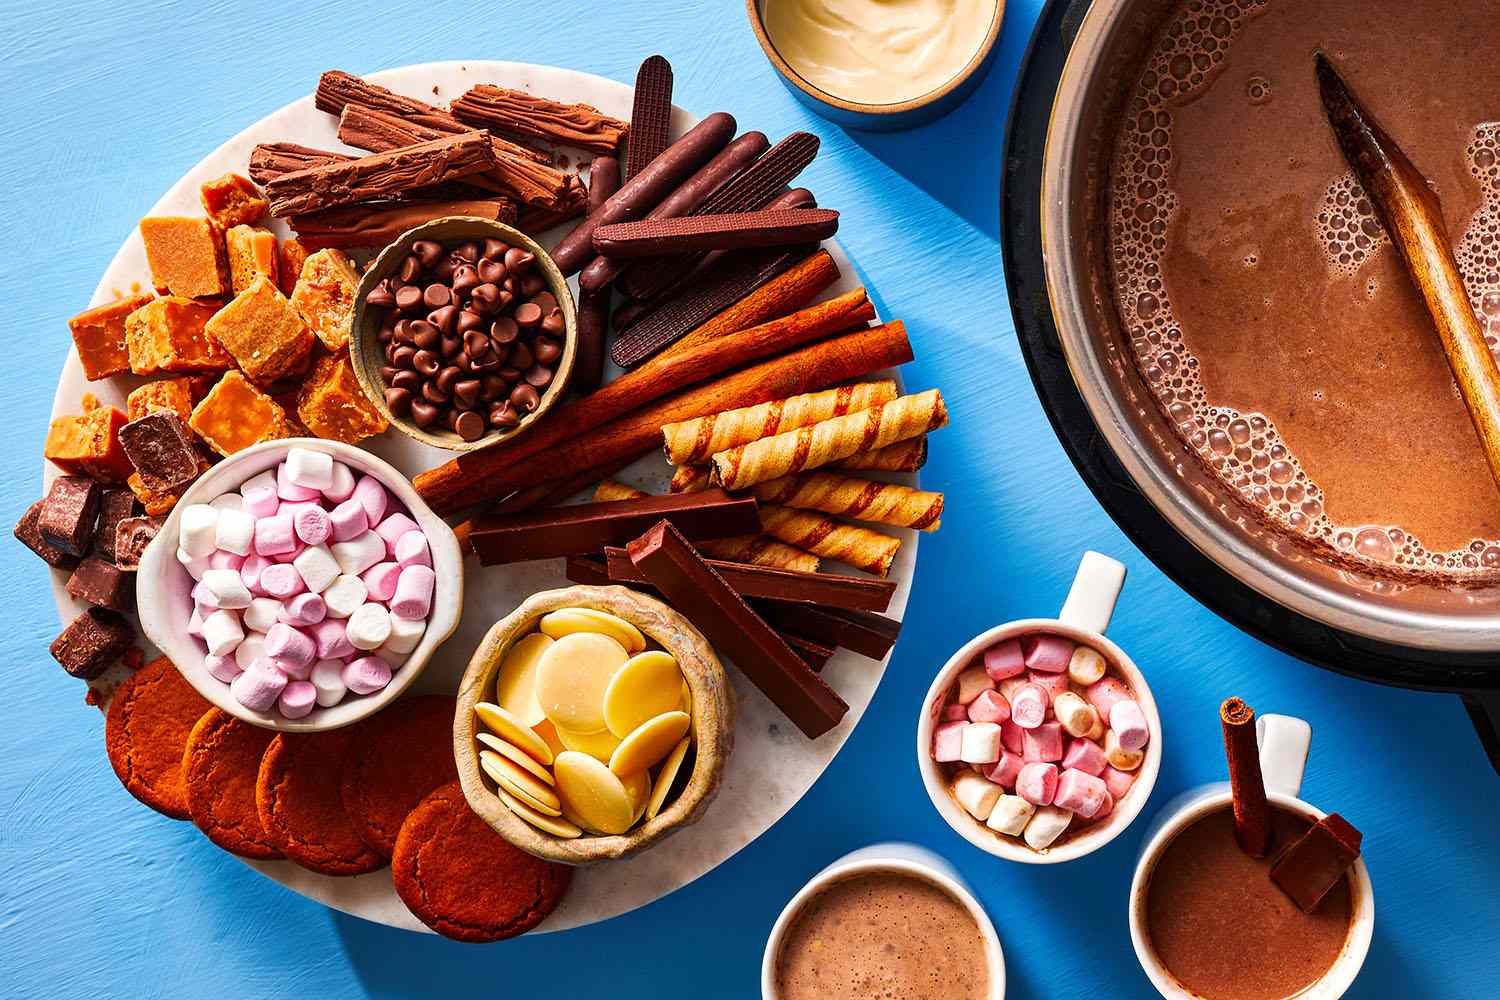
Before you set the scene:
- Is the gingerbread cool and firm enough to sit on a plate edge?
- Does the candy cane hook over the rim without tipping the mug?
- Is the jar’s red lid the same red as the plate rim?
- Is the wood surface dry? Wet rings show for weeks.
32. Packing Hot Chocolate Bombs into Kraft Gift Boxes
- Chill the bombs until fully set, at least 20 minutes.
- Slip each one into a clear bag, seam side down.
- Add a pinch of mini marshmallows on top before tying.
- Knot burgundy ribbon and trim the tails on a diagonal.
- Nestle them into shredded filler so nothing shifts in transit.
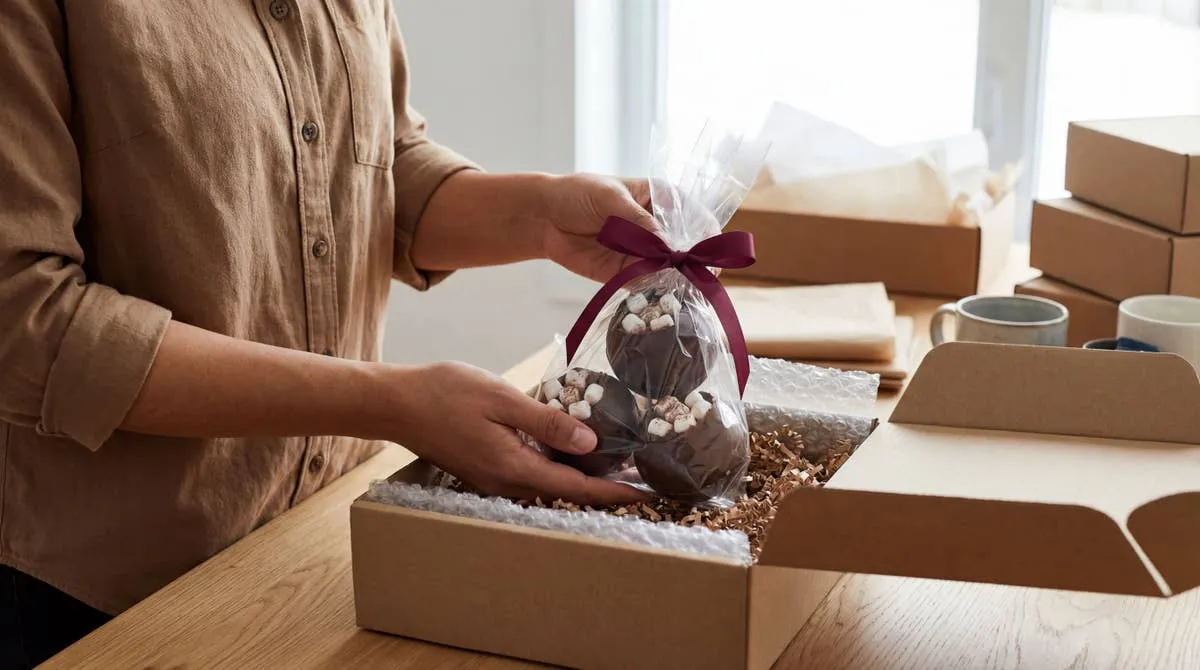
A batch of twelve takes about 45 minutes and $20 in packaging.
Chocolate bombs are delicate in a way gift baskets aren’t. Above 72°F they soften and the seams split, and below freezing they bloom white and look stale even though they’re fine. Store them in a cool closet rather than the fridge, and build these boxes the same week you deliver. Kraft boxes absorb grease, so keep the bombs bagged.
Your Cocoa Corner Is One Tray Away
You don’t need a dedicated alcove or a custom built-in to get this look. Pick one idea from above, pull together a tray, three jars, and a mug you already love, and you’re most of the way there. Snap a photo when the light is good, because it will look even better than you expect.
📌 Pin your favorite from this list now, so it’s waiting for you when the first cold weekend hits.