You know the feeling: the box is open, every little house is unwrapped, and the whole thing looks… fine. Just fine.
After filtering through hundreds of village sets, display platforms, and lighting kits at Michaels, HomeGoods, Etsy, Amazon, and Target, we narrowed it down to 33 ideas that actually deliver — from $12 bottle-brush trees to a $680 tiered porcelain setup.
Inside you’ll find 33 curated ideas spanning frosted neutral villages, pastel glitter cottages, character-themed scenes, brick-built towns, coastal lighthouses, and mantel-scale layouts — with budget and luxury versions compared side by side, and every idea shoppable with direct product links.
Why now? In 2026 the village moved off the floor: people are building vertically on tiered stands and mantels, and monochrome white-and-silver villages are the fastest-growing Christmas display search on Pinterest.
And stay until the end — we break down the most common mistakes that can ruin these looks.
📌 Save this to Pinterest for later — you’ll want to revisit these ideas.
1. A Frosted Winter Village Lit by String Lights
Warm string lights make or break a frosted village, and the number that actually matters is color temperature: stay at 2700K. Anything at 4000K or above reads blue-white and instantly kills the cozy factor. Wrap each bare frosted branch with 20 to 30 micro lights spaced roughly 3 inches apart, and run the wire along the back of the branch so it disappears into the frost. Then put the whole display on one smart plug with a dimmer — after 9 p.m. you’ll want it at about 60%.
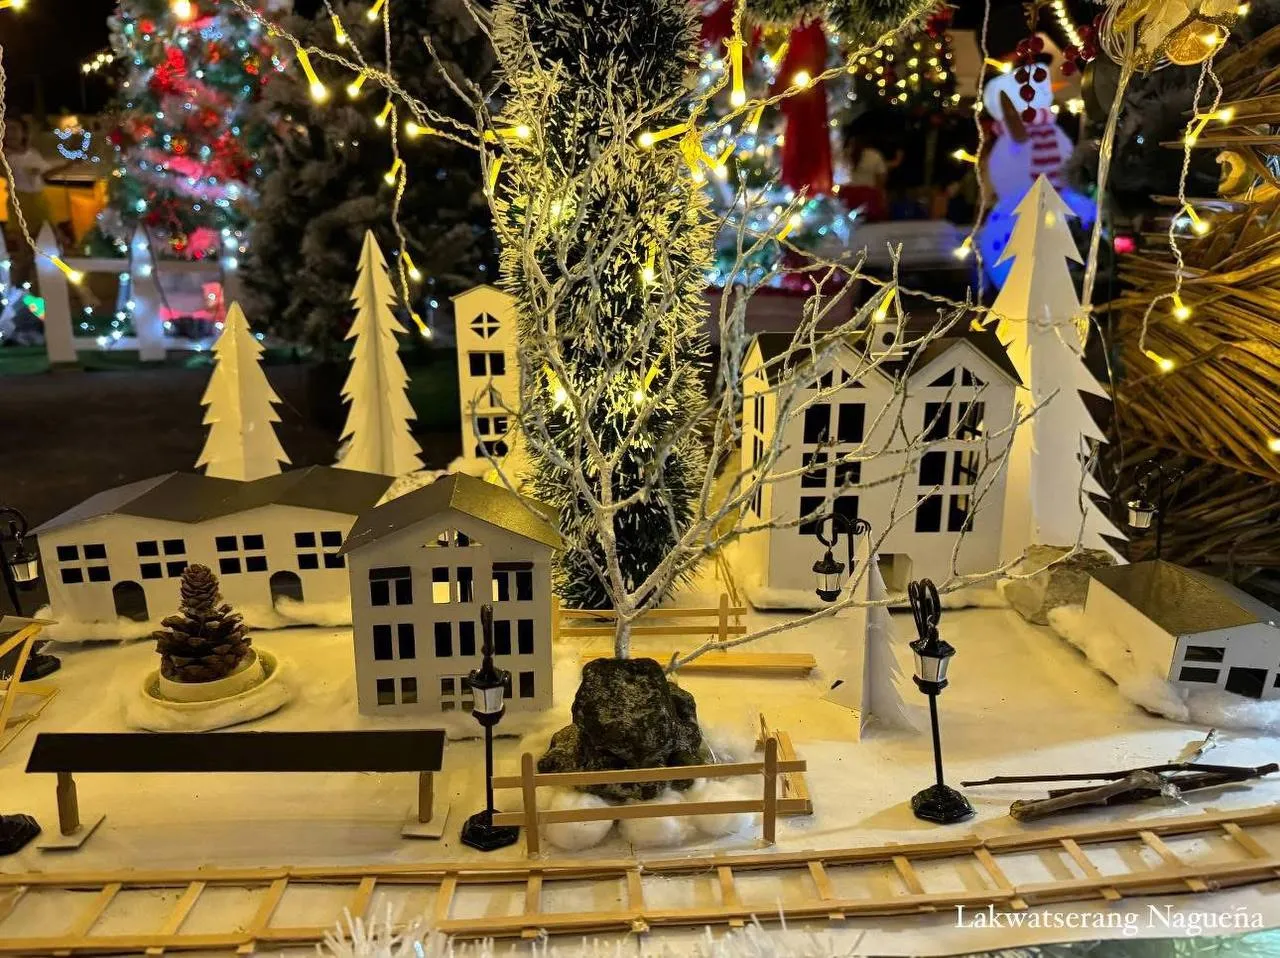
The frosted-bare-branch look is the 2026 answer to a decade of tinsel. Searches for neutral Christmas villages and all-white displays have climbed steadily since 2023, partly from the quiet-luxury spillover into holiday decor and partly from people who got tired of packing away forty multicolored figurines. It has real staying power because it’s essentially a winter scene, not a Christmas scene — swap the tiny wreaths for bare birch and it works straight through February.
2. The Disney Village With a Candy-Cane Archway
- Illuminated character houses (set of 3): $120–$260
- Character figurine set: $40–$90
- Candy-cane archway with lights: $18–$35
- Faux snow, 5 lb bag: $12–$20
- Red lampposts, set of 4: $16–$30
- Mini decorated trees, set of 6: $14–$28
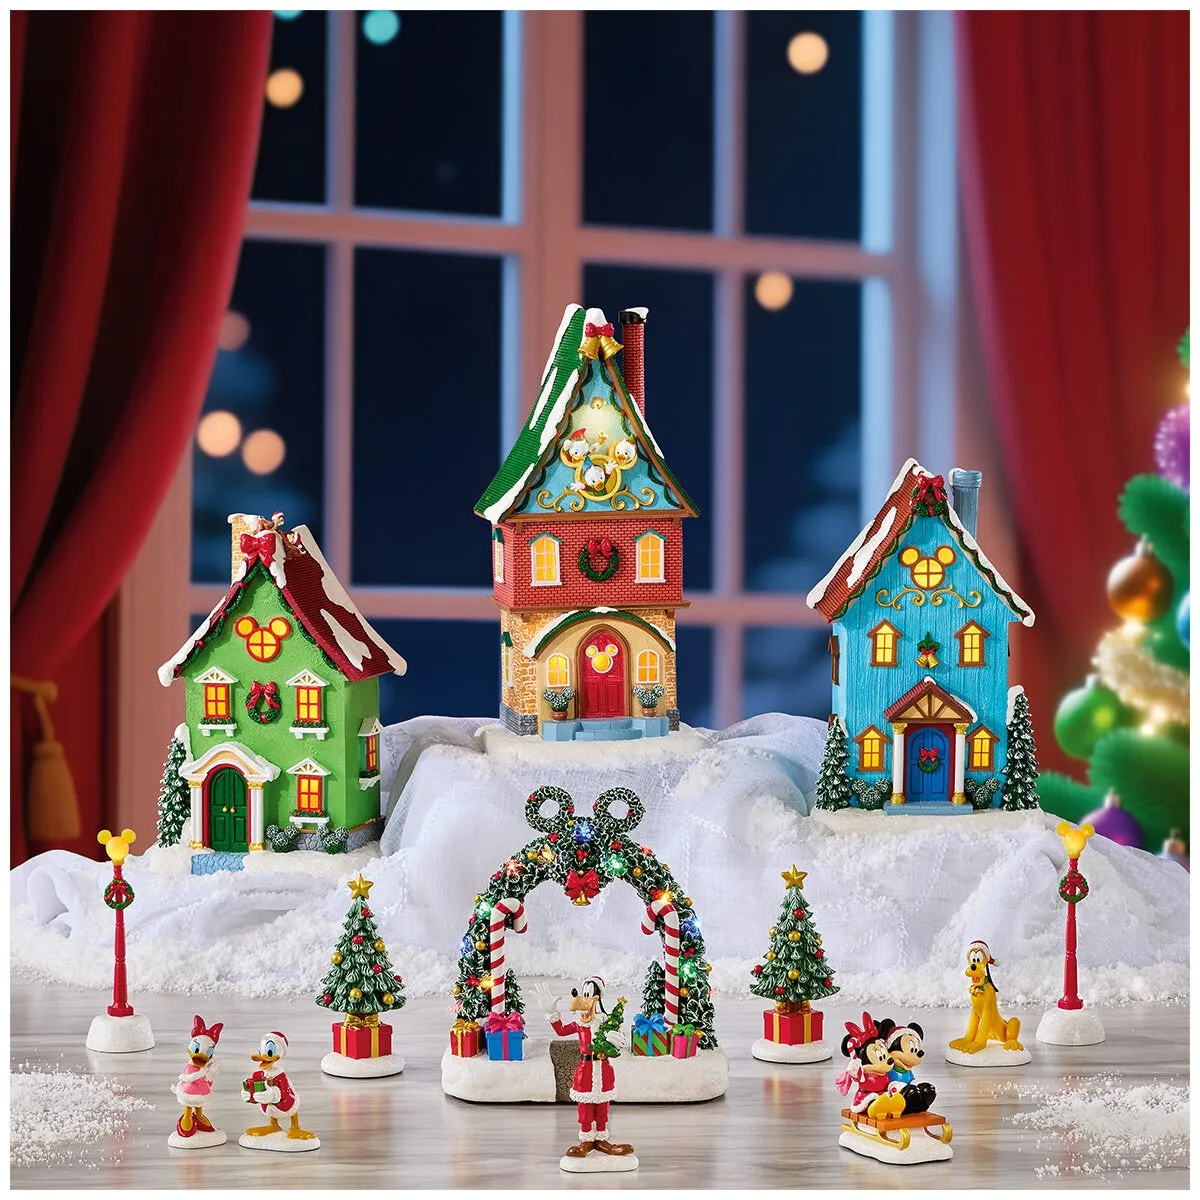
Total: $220–$463
Budget alternative: buy the houses secondhand on Facebook Marketplace — character village pieces turn up constantly in January, often half price — and build the archway from dollar-store candy canes and one battery light strand. About $70 all in.
What makes this one work is restraint in the background: a plain red curtain instead of more scenery. The eye lands on the three lit houses, travels to the candy-cane arch, and stops. Add a printed backdrop or a second row of buildings and the whole thing flattens into visual noise. Notice, too, that the figurines are posed doing things — standing at the arch, carrying gifts — so the scene reads as a moment rather than a product lineup. Pose your figures before you glue anything down.
- Measure your surface first — this setup wants about 30 inches wide by 18 inches deep.
- Check that an outlet is reachable or budget for battery packs; three lit houses plus an archway can mean four plugs.
- Decide the viewing angle before placing anything, so the archway sits at the front corner instead of dead center.
- Confirm you’re fine storing the figurines separately — small characters vanish inside a single tote.
3. Multicolor Lights Meet a Snowman and Santa
here is the light-blue house. Surrounded by white snow, forest-green trees, and a dozen multicolored bulbs, that single cool roof is what keeps the display from collapsing into a candy-colored blur. Take it out and the palette goes generic red-and-green. If you’re building your own, choose exactly one building in a color that matches nothing else — sky blue, sage, or lavender — and set it slightly off-center so it reads as a decision rather than an accident.
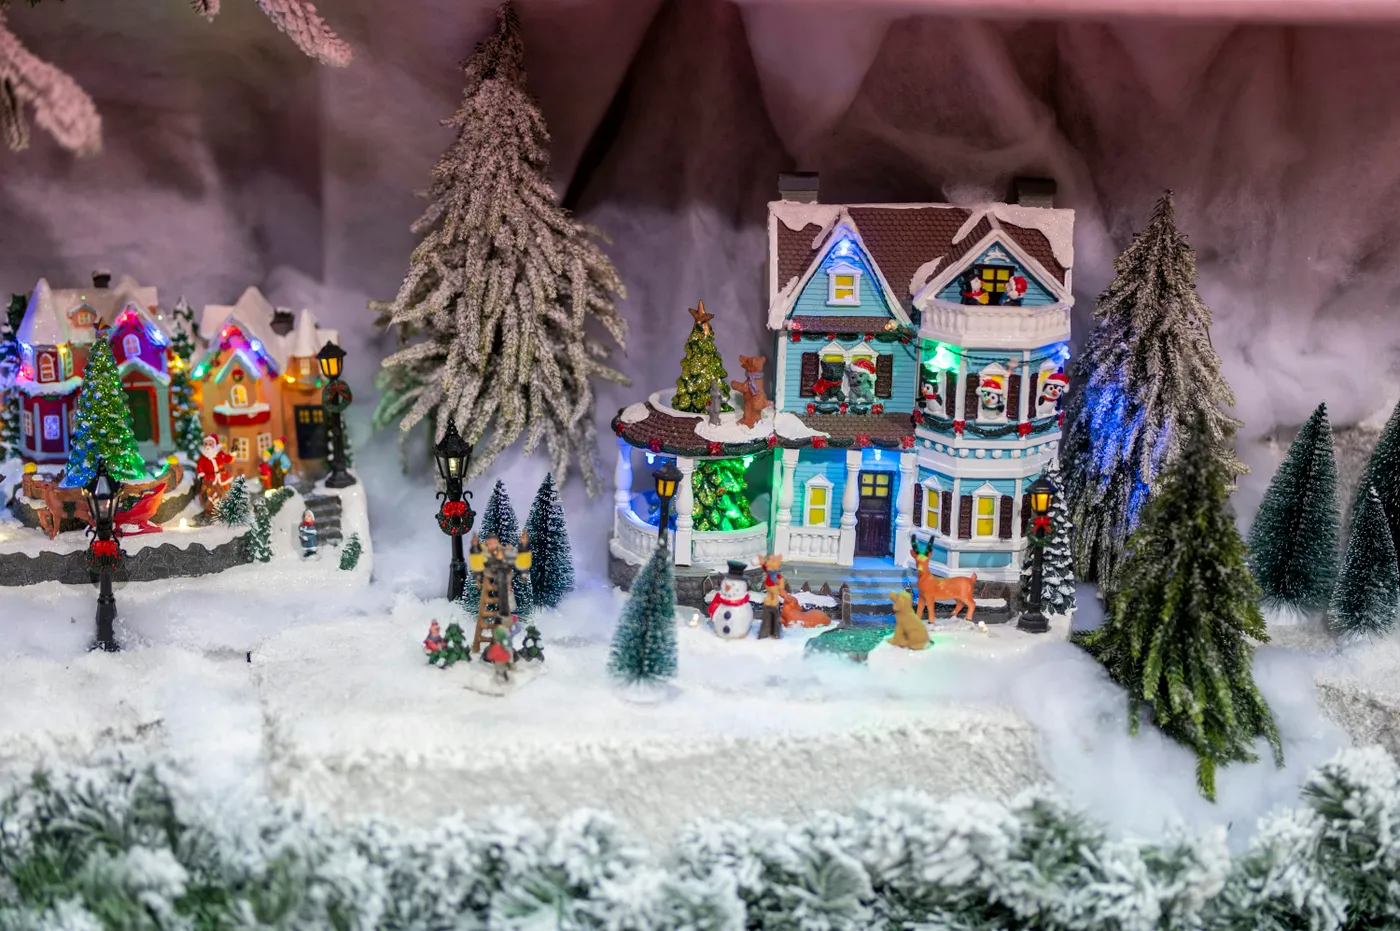
This density suits a surface at least 36 inches wide and 20 inches deep — a sideboard, a low bookshelf top, or a dedicated card table. The frosted trees need vertical room too, so plan on 14 to 18 inches of clear height above the tallest roof. In a small apartment, steal the formula rather than the scale; Idea #22 shows a similarly busy village packed into a much tighter footprint.
4. Tiered Snowscape Under a Starry Backdrop
Building the starry backdrop takes about an hour and under $25.
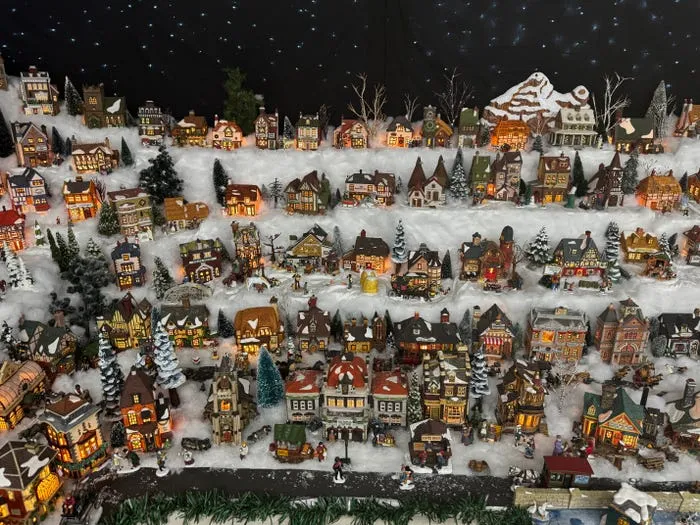
- Cut foam board to your display width and paint it matte black or midnight blue — two coats, fully dry.
- Mark a loose diagonal band across the upper half where stars will cluster; real night skies get denser near the top.
- Push mini warm-white LED dots through the board from behind, spacing them 2 to 4 inches apart and varying the gaps.
- Tape a battery fairy strand along the back for ambient glow.
- Lean the board 2 inches behind the top tier so light spills onto the snow.
Tiered displays fail for three predictable reasons, and all three are fixable before you build.
- Weight — foam tiers sag under ceramic. Use 1-inch foam board with a plywood spine, or stack hardcover books under batting.
- Cords — six lit buildings means six plugs; run a power strip behind the bottom tier.
- Access — if you can’t reach a house without dismantling a tier, you will never dust it.
One more thing: faux snow under a dark backdrop shows every fingerprint. Keep a soft brush within reach.
The same tiered look costs about $60 instead of $400. Skip the pre-built risers and use what’s in your kitchen — upside-down cake stands, stacked books under a white sheet, cardboard boxes wrapped in batting. Floral foam blocks from the dollar store carve into believable hills with a serrated knife. For buildings, thrift stores and estate sales are the move: ceramic light-up houses from the 1980s and ’90s turn up for $4 to $12 apiece, and they’re often better glazed than current mass-market versions.
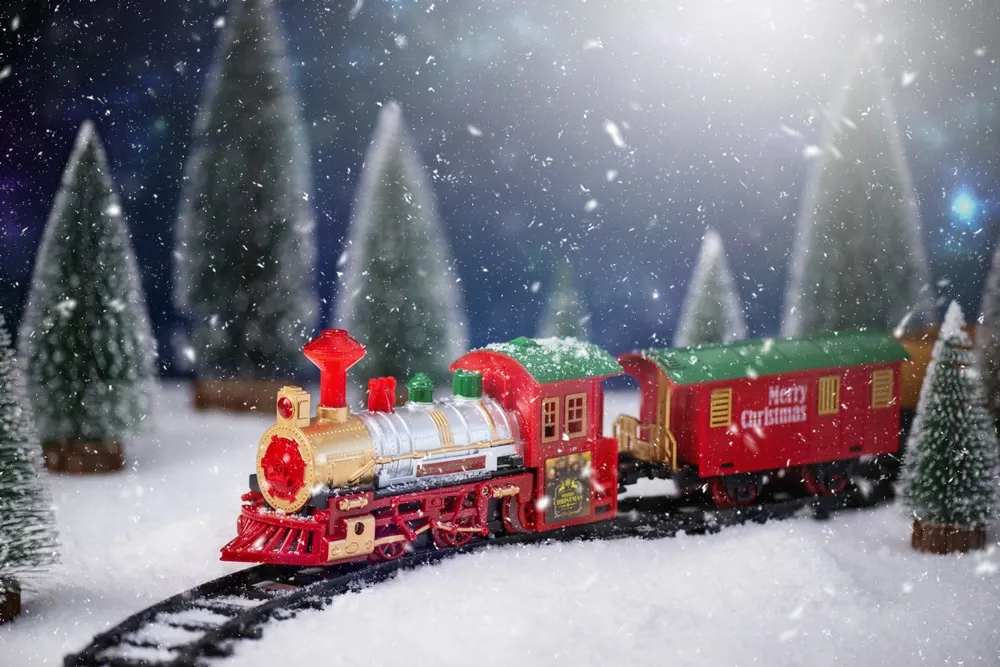
5. A Train Winding Through a Tabletop Snowscape
- Multi-level display table or sturdy folding table: $60–$180
- Model train set with track: $90–$300
- Lit houses and church (6–10 pieces): $150–$400
- Faux snow, batting, and foam risers: $25–$60
- Miniature evergreens, bulk bag of 30: $18–$35
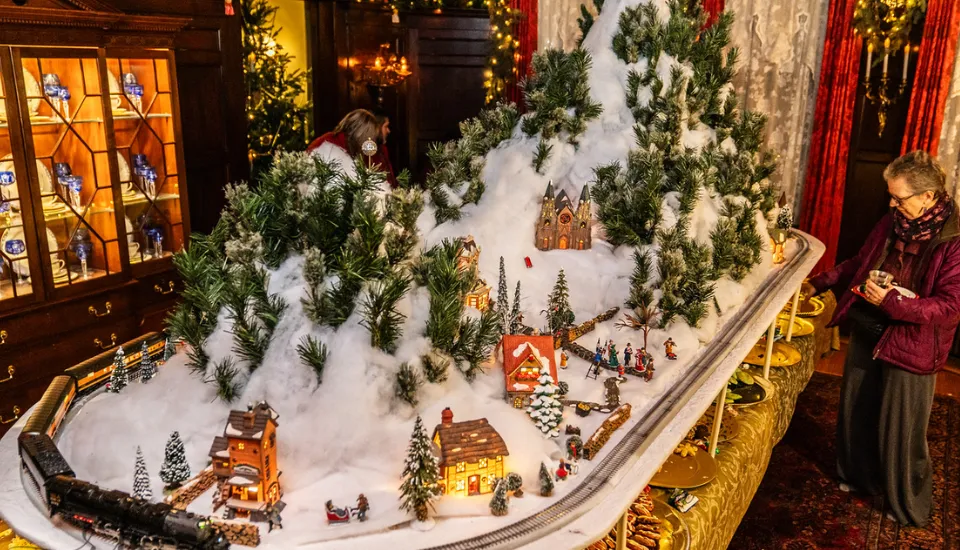
Total: $343–$975
Budget alternative: start with a used train set from a hobby shop or Marketplace ($35–$70) and three houses you already own. Snow batting from a fabric store runs about $6 a yard and does most of the heavy lifting.
The formula is roughly 55% white snowscape, 25% dark green trees, 15% glowing architecture, and 5% track and rolling stock. That last number matters — the train should feel like it’s passing through town, not headlining. To shift the palette, change only the buildings: cream and gold instead of red and brown gives you a Victorian village from the exact same layout. Keep the track dark; shiny silver rail reads toy-like from across the room. For a version where the trains genuinely take over, see Idea #18.
6. Village Under the Branches of a White Tree
Borrow light from the tree above. Point a single warm-white spotlight up through the white branches and let it bounce back down onto the roofs — you get soft, even illumination without running a cord into every building. Aim for 2700K and around 400 lumens; brighter than that and you wash out the window glow you paid for. If your white tree isn’t pre-lit, add one 100-light strand through the lower third only, so the village stays the brightest thing in frame.
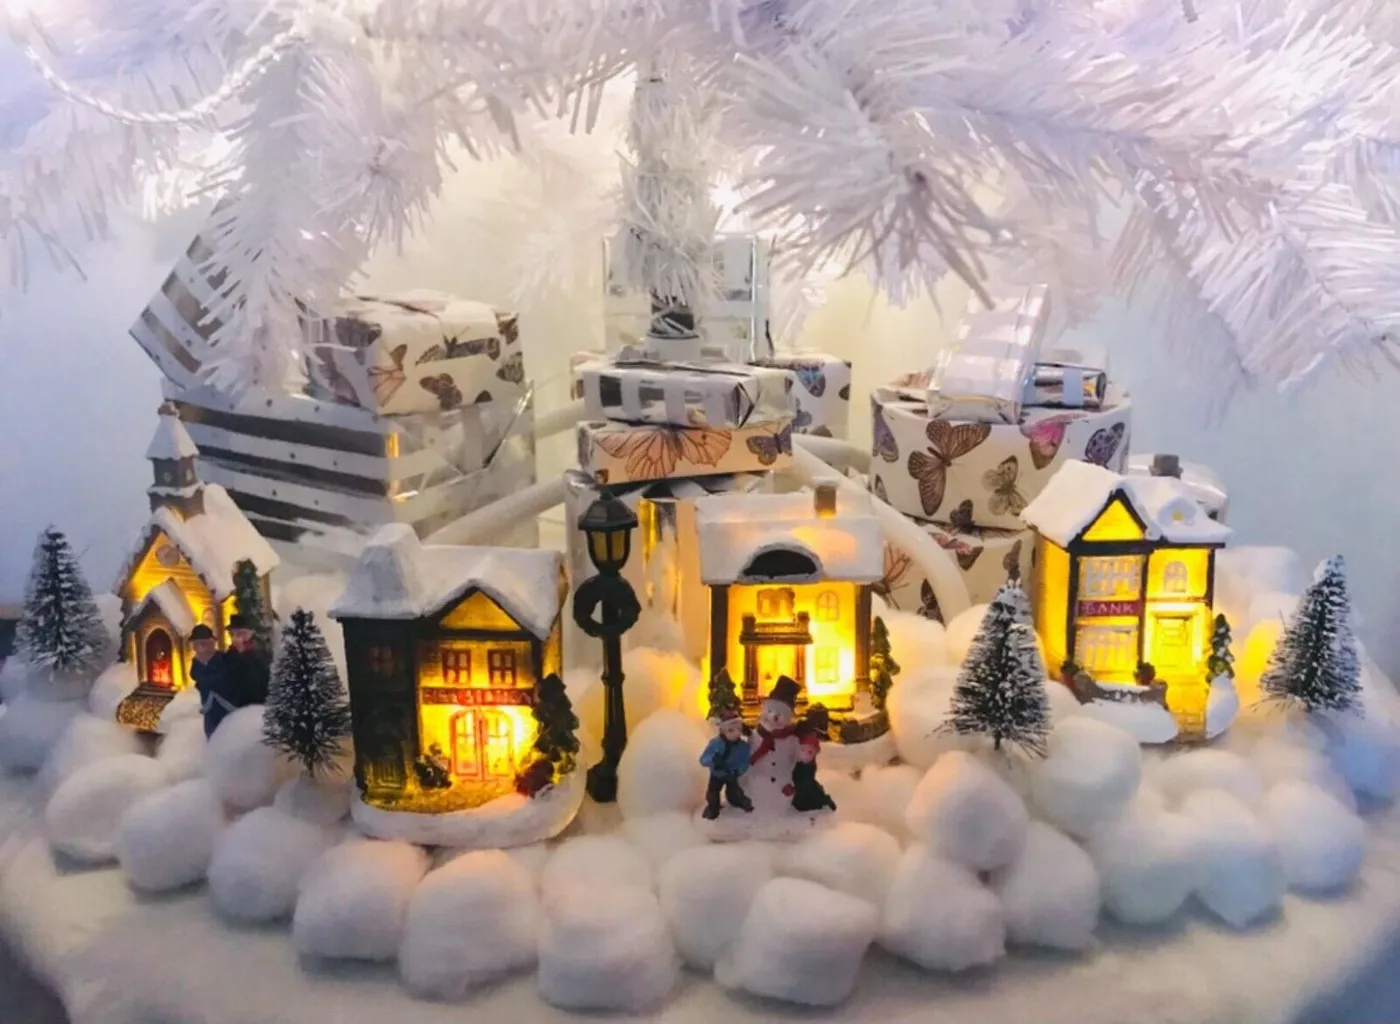
- Measure clearance under the lowest branches — you need at least 12 inches.
- Check that gifts won’t block the front row of houses once they arrive.
- Test how a white tree reads against your wall; on cream or off-white it can disappear.
- Decide now whether the village stays up all season or gets swapped for presents on the 24th.
- Confirm the tree skirt doesn’t swallow the front row of buildings.
7. Footprints and Tire Tracks in Faux Snow
The detail that lifts this display above every other snow village is the marks in the snow — tire tracks curving along the road, boot prints leading up to a front door. Without them the surface is just white fluff. Press them in with the back of a butter knife, a ridged toy tire, and a blunt pencil for heels. Do it after the houses are placed so the trails lead somewhere, and don’t overdo it — three or four paths, not twenty.
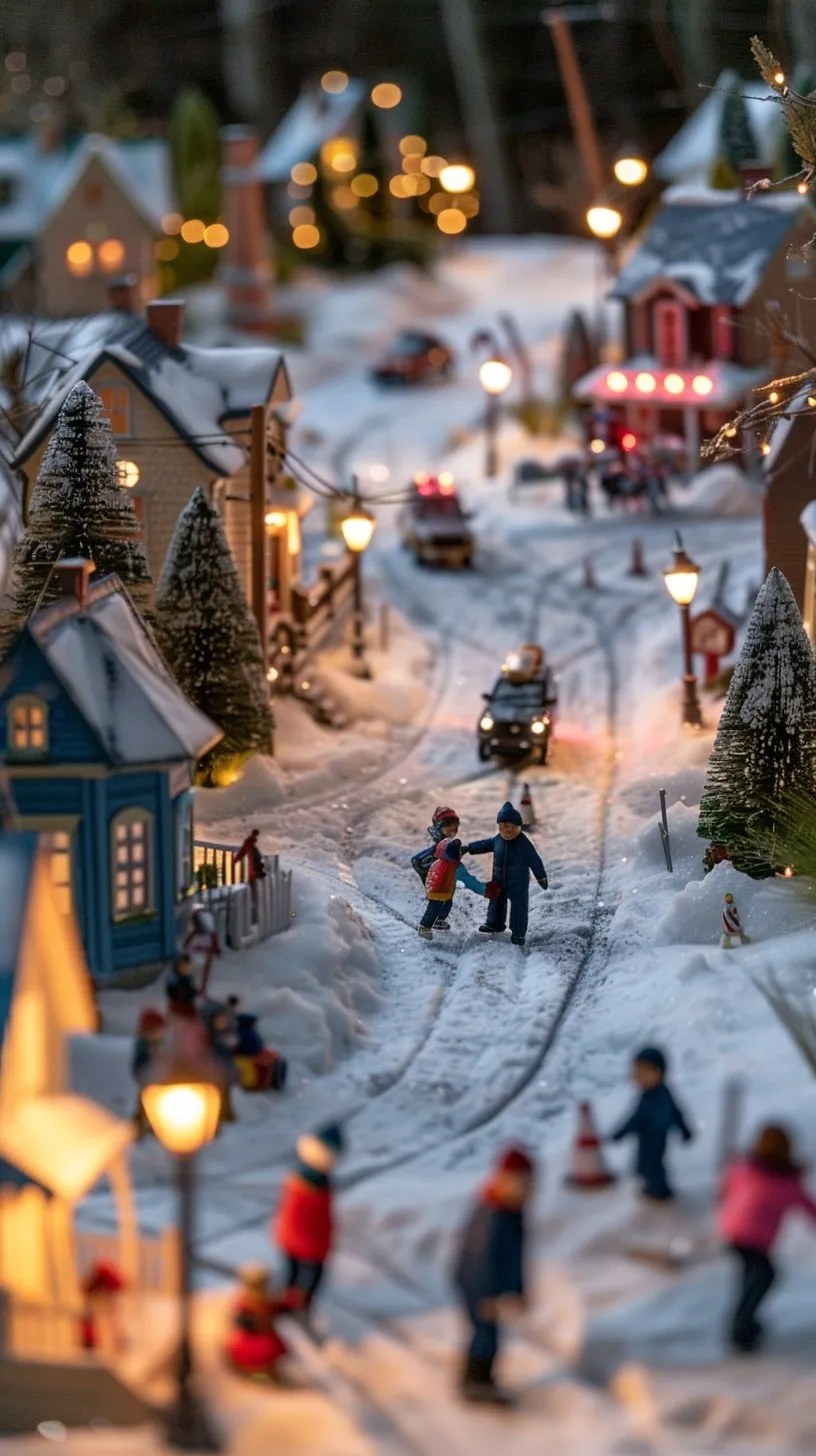
You don’t need a $200 lighting kit to get this glow. A 100-light warm white strand from Walmart is about $5, a battery pack a few dollars more, and a handful of clear plastic beads scattered across the snow gives you the same bokeh in photos. The buildings can come from thrift stores and Marketplace — mixed-era ceramic houses actually look better together than a matched set. A nine-building version runs about $85.
Two principles are doing the work: repetition and depth layering. Repeated roof shapes and window grids create rhythm, while warm window glow against cool snow gives you contrast without a single loud color. The footprints add a third thing — narrative. Your eye follows them, which means it travels through the whole display instead of stopping at the first house. That’s the difference between a collection of objects and a place.
8. Grey Painted Roads and a Tiny School Bus
This layout wants at least 40 by 24 inches — roads need room to wind or they look like stripes. It’s happiest on a dining table you don’t use daily, or a card table pushed against a wall. If your space is smaller, keep the road but shorten it: one gentle S-curve, two buildings, one vehicle, and you still get the whole effect. The village doesn’t need to be big, it needs to look like somewhere people live.
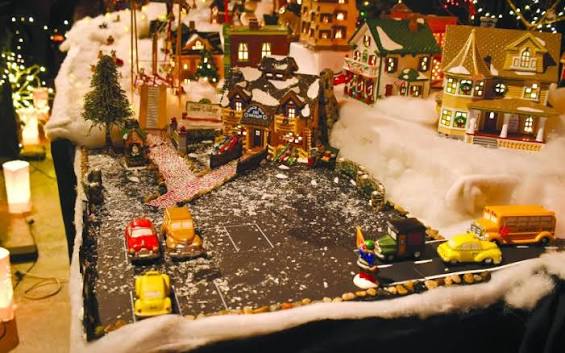
Painted roads are the highest-maintenance piece here. Acrylic craft paint on foam board chips at the edges after a season or two, and the white lane markings go first — repaint them with a fine-tip paint pen each November. Faux snow pressed into wet paint will never come out. Store road sections flat, never on edge, and keep them away from heat; foam starts to warp around 150°F, which is exactly what a sunny attic hits in July.
9. Bottle Brush Trees Around a Silver Airstream
- Lit buildings, mixed set of five: $110–$280
- Silver miniature Airstream or camper: $18–$45
- White bottle brush trees, 24-piece bag: $16–$32
- Artificial snow blanket, 30×60 in: $15–$28
- Mini wreaths and garland: $10–$22
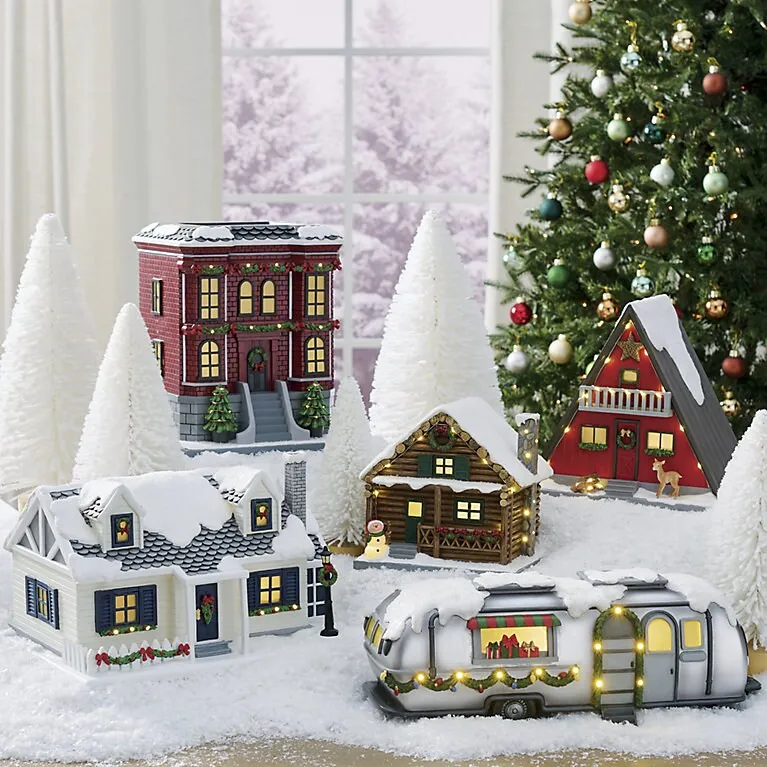
Total: $169–$407
Budget alternative: buy one good lit house and three cheap ones, then unify them with a coat of matte white spray paint on the roofs. Dollar-store bottle brush trees come six for $1.25 and look nearly identical to the $2-each versions.
Match your bottle brush heights. Most bags mix 3-, 5-, and 7-inch trees, and the trick is to plant them in descending order going back — tallest at the rear edge, shortest up front, the way you’d stage a bookshelf. Keep the front row under 3 inches so nothing blocks a lit window. Group them in odd numbers; three or five in a cluster reads intentional, two reads like an accident. If you’d rather start small, Idea #26 proves the same palette works with a single house.
Roughly 50% white base, 25% red and green architecture, 15% silver accents, 10% warm light. The silver trailer is the wildcard holding it together — pull that one piece and the display becomes a standard red-and-green village. Want a different mood without buying anything new? Swap silver for copper and red for deep plum, keep the white and the proportions identical, and you’ve got a completely different scene.
10. A Dense Village of Frosted Evergreens
Dense, layered villages are having a moment thanks to the maximalism swing that started with overflowing Christmas trees around 2023 and hasn’t slowed since. Pinterest boards full of packed mantels and stacked shelving pushed the look mainstream, and collectors responded by buying trees in bulk bags instead of singles. It’ll age well, too — this is essentially the traditional village layout your grandmother had, just lit better and staged with more care.
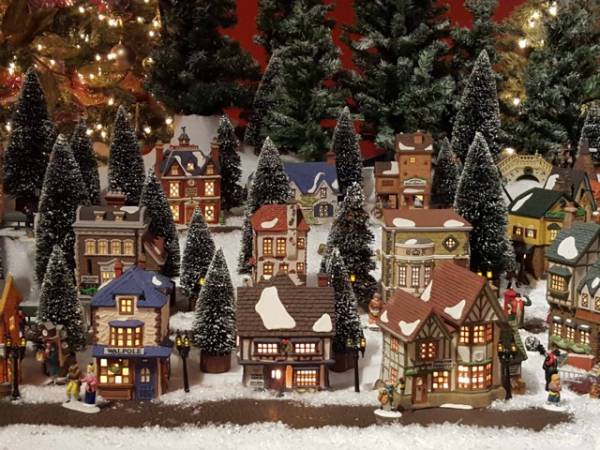
What makes this one work is tree density. There are probably sixty evergreens in this scene, and they’re what turn a row of lit houses into an actual landscape. Buildings alone read as a shelf of objects; trees give the eye somewhere to rest between them. If you buy nothing else this year, buy a bulk bag of frosted mini pines — they’ll do more for your display than another house ever will.
11. A Fantasy Castle With a Train at Its Base
Fantasy pieces are the hardest thing to blend into a village, and there are two traps. First, scale: a castle built for a 1:32 train layout will dwarf 1:64 houses, so measure the doorway height before you buy — a 1-inch door next to a 2.5-inch door reads as a mistake, not a style choice. Second, lighting temperature. Castle LEDs tend cool white while village windows run warm. Swap the bulb or hide it behind frosted trees.
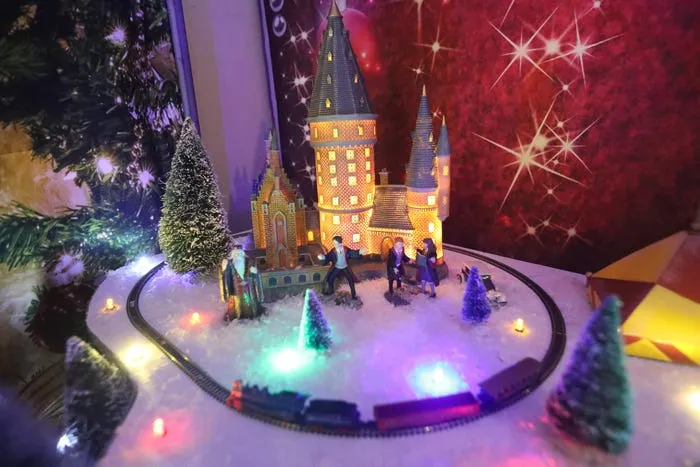
Castle displays need height more than width — 30 by 36 inches of surface and at least 20 inches of clearance lets the towers read. It’s one of the few layouts that genuinely benefits from a corner, because the star backdrop can wrap two walls. Small rooms can still handle it by building up rather than out: a narrow console with three stacked risers gives you the height without the footprint.
12. Pastel Glitter Houses Against Dark Teal
Restyling a thrifted house in pastel glitter takes an afternoon and about $15.
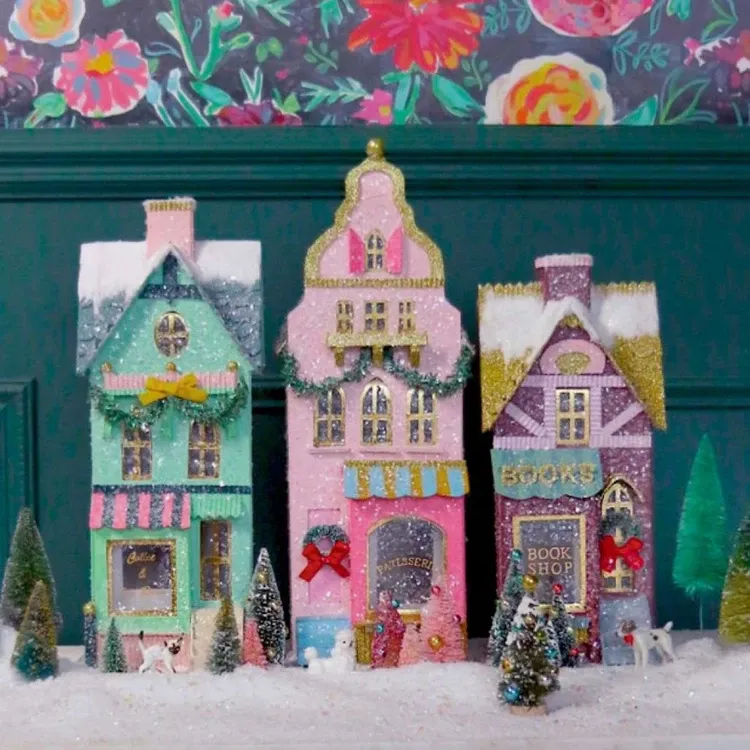
- Wipe the house with rubbing alcohol and let it dry — glitter won’t stick to factory gloss.
- Mask the windows with painter’s tape and the door with a scrap of paper.
- Brush on one thin coat of matte craft paint in blush, mint, or lilac. Two thin coats beat one thick one.
- Sprinkle fine glitter over the wet paint, working in sections, and tap the excess onto paper you can funnel back into the jar.
- Peel the tape while the paint is still slightly tacky, then cure 24 hours before lighting it up.
The same look runs about $45 at home instead of $300 at retail. Pastel village houses are one of the great underrated thrift finds — 1990s ceramic buildings in mint and blush show up for $3 to $8 because most shoppers walk right past them looking for red and green. Grab them, swap in LED bulbs, and pair with dollar-store bottle brush trees sprayed white. The dark teal wall behind? A $28 gallon of paint is the single most transformative purchase in this whole article.
13. Let It Snow: A Glowing Sign Over Snowy Roofs
The sign is why this display photographs so well. It sits at the top of the frame, gives the eye an anchor point, and introduces a cool color that makes the warm window light underneath read warmer by contrast. It also solves a practical problem — it tells you where the display ends, so the clustering of houses stops looking accidental. Take the sign away and you’d have a pleasant village with no top edge at all.
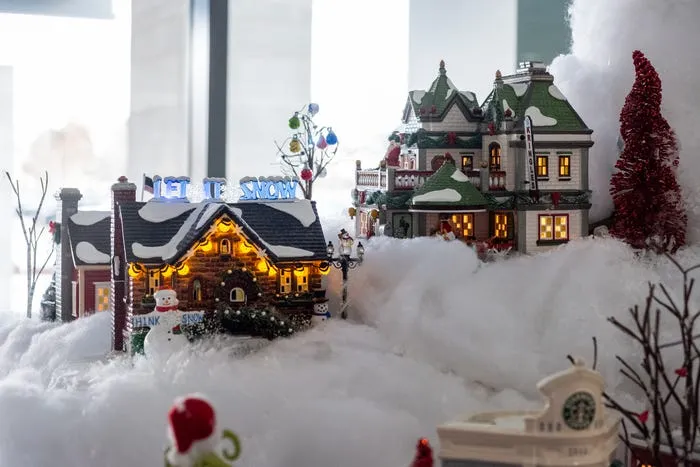
About 60% snowy white ground and rooftops, 25% brick red and dark grey architecture, 10% warm yellow window light, 5% cool blue from the sign. The key is that the blue appears exactly once. Sprinkle blue anywhere else — a blue house, blue tree lights — and the sign stops being special. To shift the mood entirely, swap the blue for amber and the whole scene turns golden and nostalgic.
14. A Small Wooden Stable Lit From Within
You don’t need a spotlight for a nativity scene. One warm LED inside the stable, aimed slightly upward at the roof beams, does everything — it lights the figures from above and throws a soft glow onto the base. Keep it at 2700K and under 100 lumens. If your stable has a thatched roof, place the bulb at the ridge rather than the floor; thatch casts beautiful shadow patterns but blocks light from below entirely.
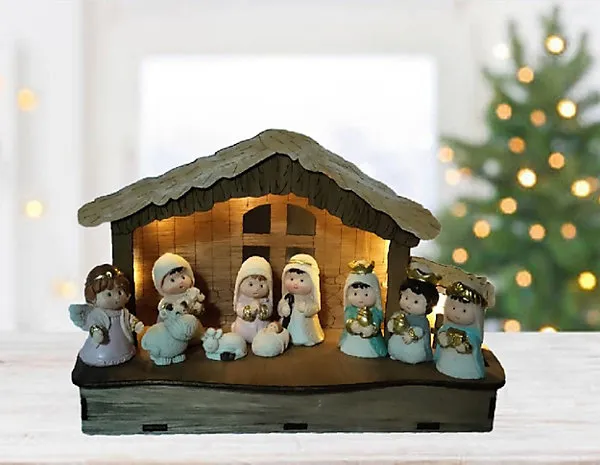
Nativity scenes and village displays are quietly merging. Instead of two separate setups, more people are placing a stable at the edge of a village as the old town — the same instinct that makes every holiday movie end in a town square. The trend toward smaller, single-piece nativities in wood and matte ceramic has grown right alongside it, which is a rare case of a traditional object getting more minimal rather than more elaborate.
15. Village on the Console, Garland Up Above
- Measure your console depth — anything under 14 inches won’t hold a village plus a front row.
- Check where the outlet is; a console village usually needs two power strips.
- Look up: is there a mirror, art, or mantel above? If yes, you’re building a two-tier display whether you planned to or not.
- Confirm the console isn’t your only storage — you’ll want the drawers clear during setup.
The thing that makes this layout special isn’t the village — it’s the white mantel above it with a single green garland. That’s the frame. Without it, the houses read as clutter on a table. With it, the whole wall becomes one composition. If you have a console and nothing above it, hang a plain wreath or lean a mirror; it costs almost nothing and does more for the display than another lit building. See Idea #16 for what happens when you commit fully to the mantel itself.
16. White Deer Flanking a Mirrored Mantel Village
- Ornate white-framed mirror: $120–$380
- Large white deer figures, pair: $80–$220
- Miniature village buildings (10+): $180–$450
- Tiered white display platforms: $40–$95
- Faux snow, trees, warm LED string lights: $35–$75

Total: $455–$1,220
Budget alternative: skip the designer mirror and have a plain thrifted frame fitted with glass at a local shop, usually $40 or less. Deer figures turn up at HomeGoods and T.J.Maxx for $25–$40 each in October, well before holiday markup hits.
Two real risks here. First, a mirror behind a village doubles every cord and every crooked rooftop — it is completely unforgiving. Run all wiring straight down and hide it behind the deer. Second, tiered platforms above a fireplace get warm; if your mantel sits over a working fire, keep lit buildings at least 12 inches back and never drape fabric batting near the opening. Use LED bulbs, not incandescent, if the fireplace runs.
17. A Blue Ice Rink Beneath a Stone Bridge
Plan on about 24 by 16 inches for a rink this size, plus 10 inches of height for the bridge and bare tree. It’s a shelf or sideboard display, not a floor one. Low ceilings are fine — everything sits below eye level when you’re standing. If you have extra width, extend the rink rather than adding buildings; an unusually long, narrow skating pond reads far more elegant than a crowded square.

Three things are working at once here:
- Contrast — the flat blue rink against textured white snow.
- Scale play — the bridge and trees are life-size relative to the skaters, which sells the illusion.
- A single focal point — every figurine faces the ice.
Fix the rink first, then decorate around it. If the blue surface isn’t clean and flat, nothing else lands.
18. Three Trains and a Santa Sleigh
Laying track so it disappears and reappears takes about two hours and roughly $20 in materials.
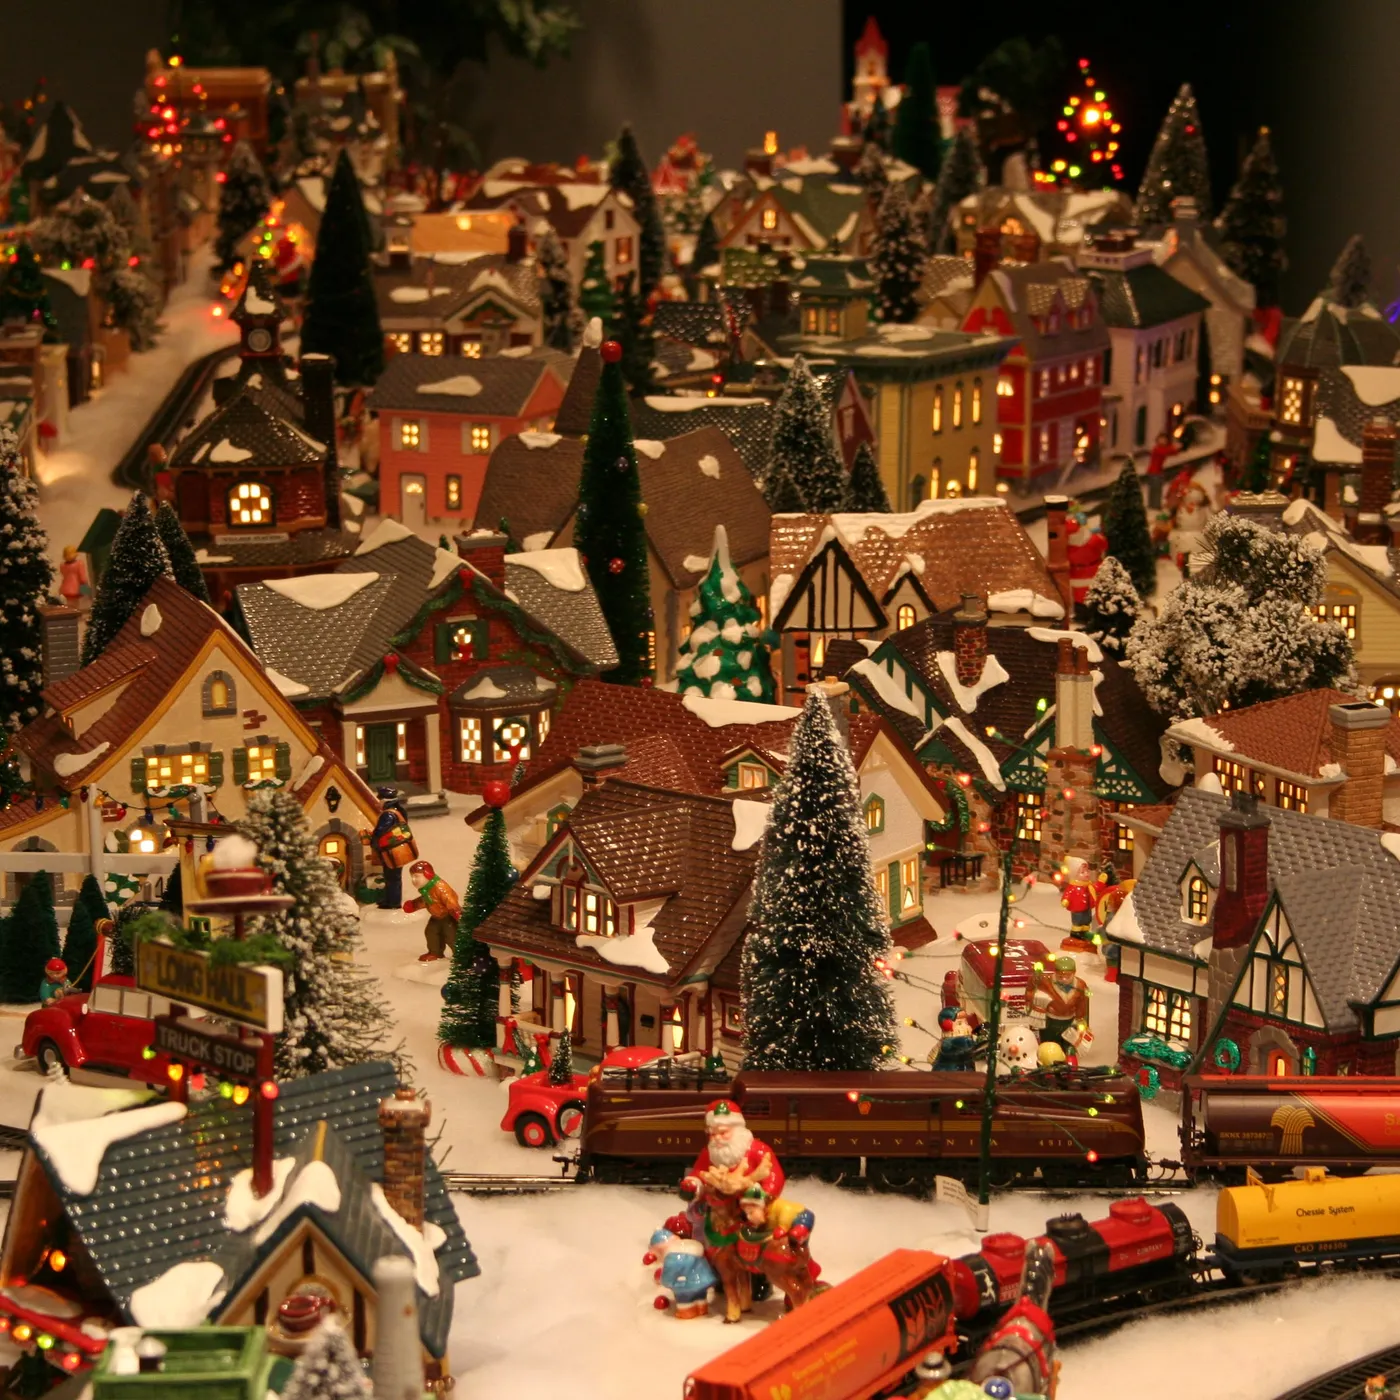
- Sketch the route on paper first — one crossing, one tunnel, and one long straight is plenty.
- Cut foam risers so the track climbs gently; more than 1 inch of rise per foot will derail short trains.
- Cover the approach and exit of each tunnel with batting, leaving 3 inches of clearance on either side of the rails.
- Test the full loop with the slowest train before adding a single tree.
- Plant trees last, keeping them 2 inches back from the rails.
Running three trains gets expensive fast. Start with one set and one loop — a used Lionel or Bachmann starter set from Marketplace runs $40 to $90 and does everything a $300 set does at this scale. The second train can be a $15 battery-powered novelty that just sits on the track looking busy. And a Santa sleigh figure is $8 at a craft store, not $45 as part of a licensed set.
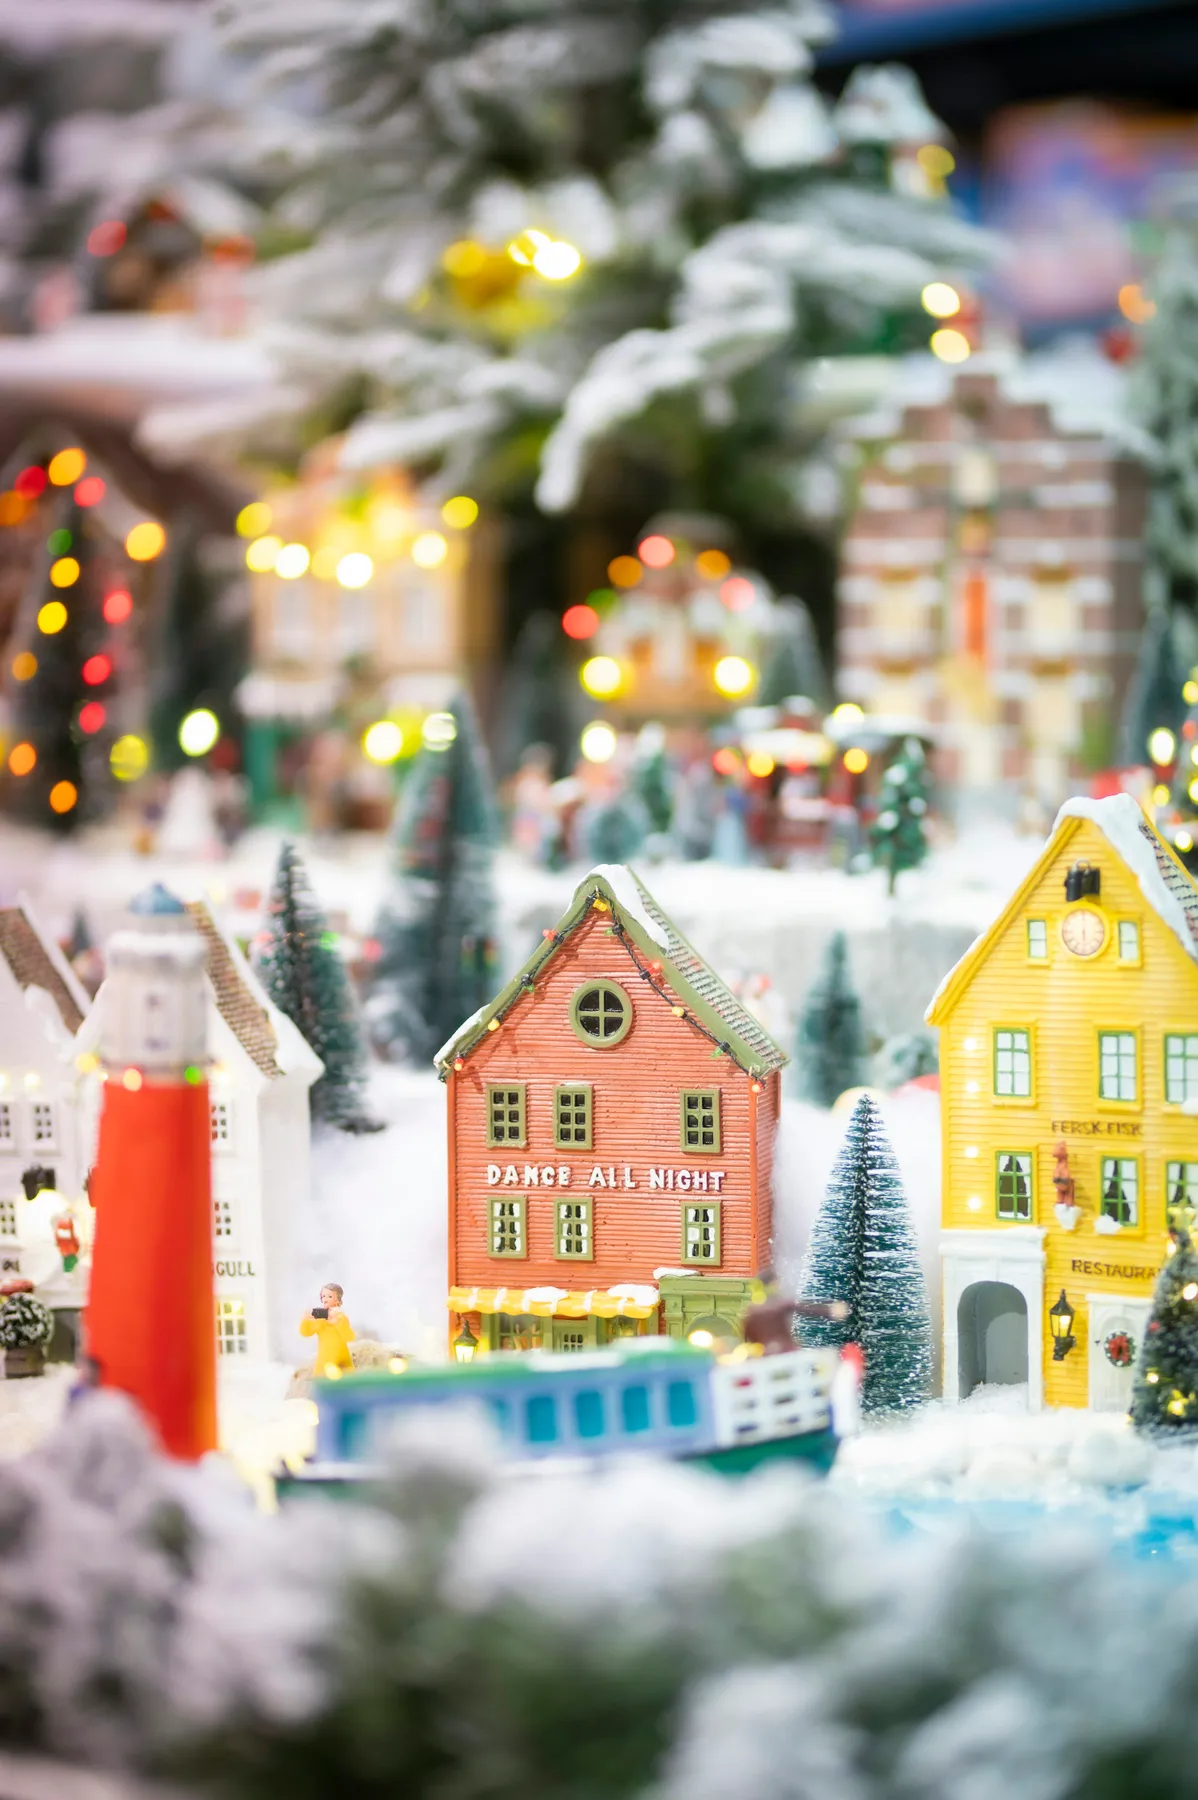
19. A Red-and-White Lighthouse in the Snow
- Coastal village house set: $90–$220
- Miniature lighthouse with light: $28–$65
- Flocked evergreens, 20-piece bag: $18–$35
- Faux snow blanket and drift powder: $20–$40
- Warm white string lights, 2 strands: $10–$20
Total: $166–$380
Budget alternative: a plain wooden lighthouse from a craft store is about $6 and upgrades fast with red and white paint plus a battery tea light inside. Terracotta houses from a garden center cost a third of what ceramic village pieces run.
Flocked trees shed. Not a little — a fine white dust that finds its way onto every surface within three feet. Plan on a lint roller and a soft brush once a week, and never place a flocked display under a ceiling fan or directly beneath an HVAC vent. The lighthouse bulb is usually the first thing to burn out; replace it with an LED before the season starts and you’ll get five years instead of one.
Snow drifts should be deepest wherever something vertical meets the ground — the lighthouse base, tree trunks, the corners of houses. Real snow piles where surfaces touch, and a perfectly flat, even field of faux snow is the fastest way to make a display look store-bought. Use a small spoon to build 1- to 2-inch drifts against the lighthouse, then dust a little powder up the sides. Ten minutes, and it changes everything.
20. Red Path Markings Draw the Eye In
Look at the red lines on the ground — that’s the whole trick. This display is bright, busy, and packed with color, and those paths are what keeps your eye moving from house to house instead of bouncing around. They’re also the cheapest element in the entire setup: tape, or a paint pen on a light board. If your village feels scattered, the problem usually isn’t the buildings. It’s that nothing guides the eye between them.
The formula runs about 40% white snow, 25% red paths and roofs, 20% green trees, 15% mixed brights. Red is doing double duty as both accent color and directional device, which is why it works here even though red is a loud choice. Want a calmer version? Change the paths to warm grey and the roofs to sage, and the exact same layout reads as a quiet New England town instead.
21. Silver and Ice-Blue on a Tiered Stand
Silver finishes show fingerprints, dust, and every stray pet hair within three feet. If you have kids or cats, put this one up high — a tiered stand at toddler height is a magnet. Also check your stand’s rating: most multi-tier display stands are built for about 15 pounds total, and ceramic buildings add up faster than you think. Weigh one house, multiply by your count, and buy accordingly.
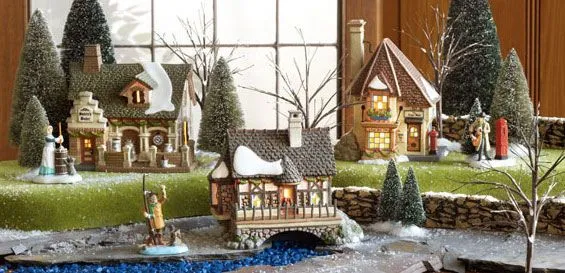
This format scales unusually well. A three-tier stand around 18 inches wide holds a complete miniature village and fits on a bookshelf, a bathroom counter, or the end of a kitchen island. Larger four- and five-tier versions, closer to 30 inches, suit a dining table. Ceiling height doesn’t matter — everything hugs the stand. And because the whole thing is self-contained, it’s the easiest display in this article to move out of the way when guests arrive.
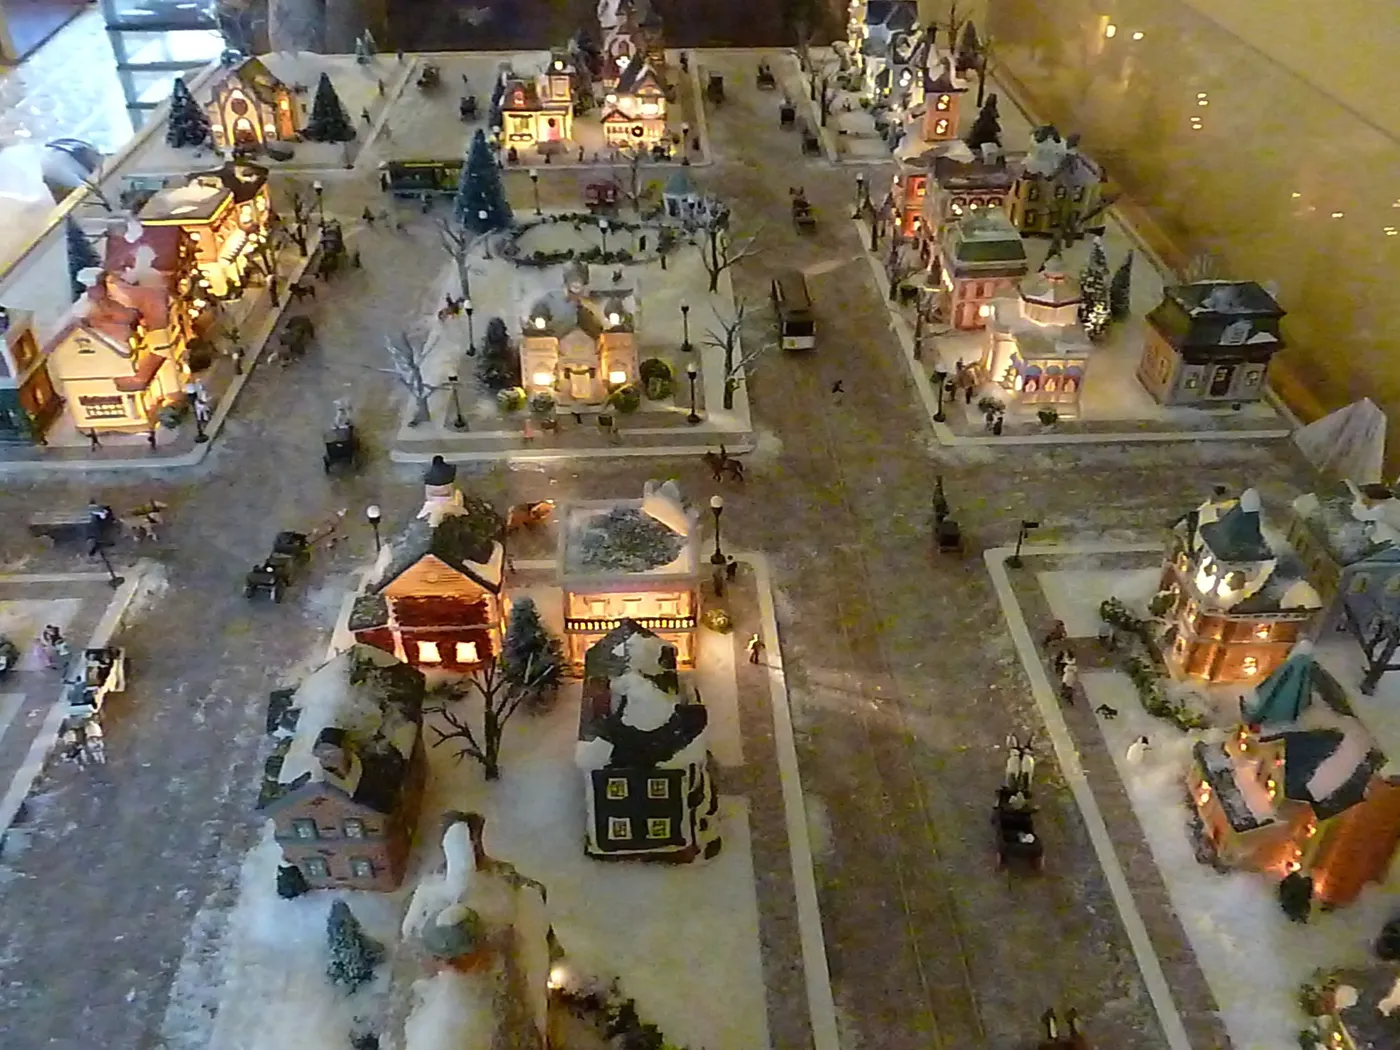
22. A Lit Tree at the Center of the Village
The lit tree gives the display a sun. Everything else — houses, street lamps, snow — radiates outward from it visually, which is why this reads as a town square instead of a lineup. It also solves a lighting problem: rather than illuminating twelve buildings evenly, you let one bright object do the work and keep the rest at half brightness. In real life, contrast reads as realism.
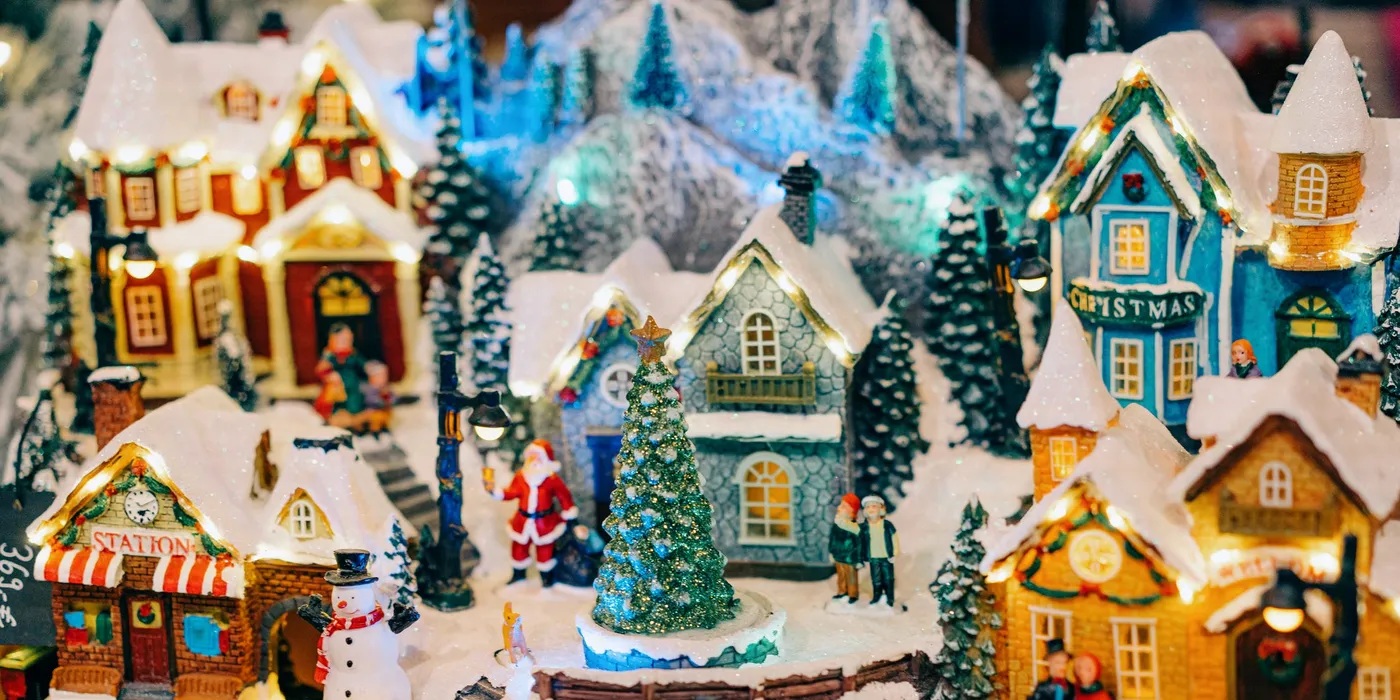
If you’re adding a lit centerpiece tree, drop the brightness of everything around it by about 30%. Practically, that means a plug-in dimmer ($12) on the house strands, or swapping to lower-lumen LED bulbs inside the buildings. Most village kits ship with bulbs around 40 lumens, which is already dim — the mistake people make is adding a spotlight on top. Let the tree be the only genuinely bright thing.
23. Tunnels, Bridges, and a Winding Track
- Ceramic village buildings (12–15 pieces): $220–$520
- Train set with extra track: $110–$320
- Tunnel portals and bridge pieces: $30–$80
- Faux snow and risers: $25–$60
- Warm LED string lights and street lamps: $20–$45
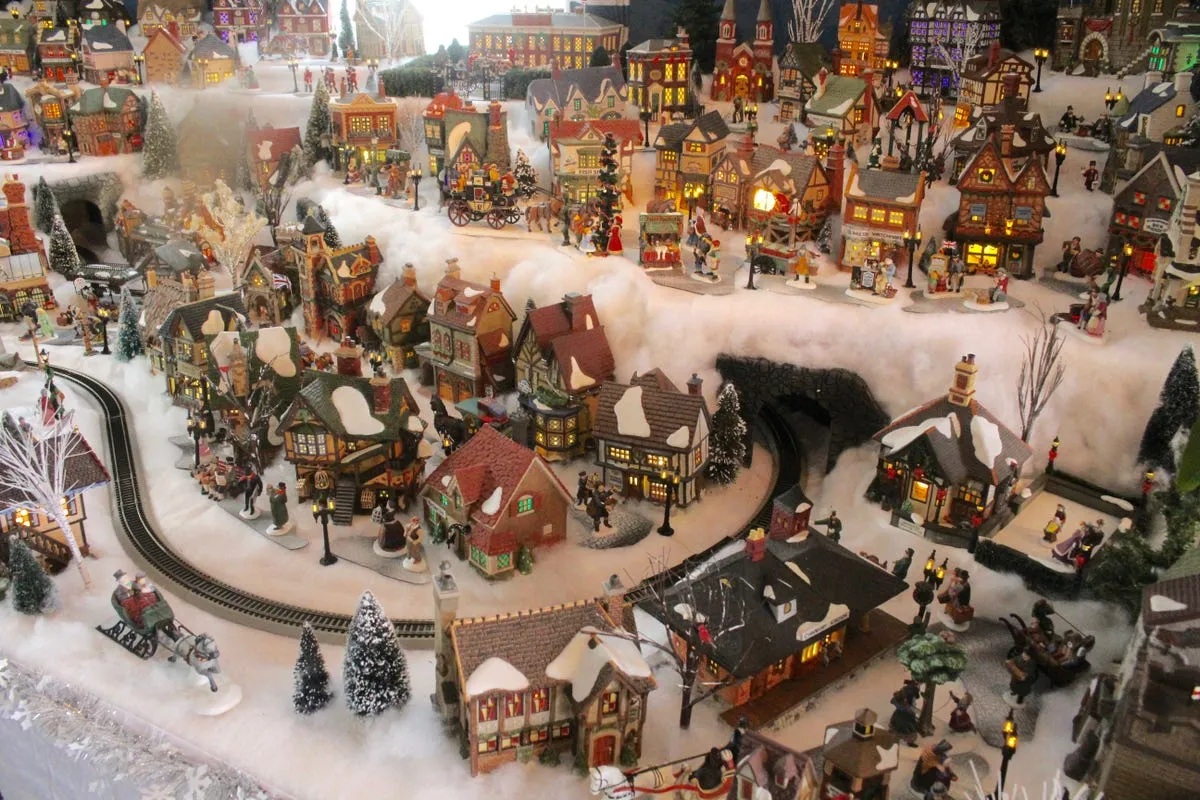
Total: $405–$1,025
Budget alternative: build tunnel portals from cardboard tubes wrapped in stone-textured contact paper (about $6), and buy track by the piece on eBay instead of in sets. Most people’s spare track drawer is worth $60 of perfectly usable curves.
Big layouts like this are driven by two things: the return of analog hobbies among adults who spend all day on screens, and the fact that model train clubs spent a decade making the hobby more welcoming. Starter-set sales climbed through 2024 and 2025, and LED-lit village buildings followed right along. This is a trend with real staying power — the pieces are durable, collectible, and never really go out of style.
Getting a train under a bridge without a derailment takes about 45 minutes of fiddling.
- Lay the full loop on the bare table first and run the train until it’s reliable.
- Mark where the bridge and tunnel will sit with painter’s tape.
- Build the bridge supports on both sides and check clearance with a coach car, not the engine — coaches are longer.
- Set the tunnel shell over the track, leaving a finger-width gap on each side.
- Cover with batting and plant trees last.
24. A Painted Starry Sky Behind the Rooftops
This one wants a wall. Plan on at least 48 inches of width, a solid 24 inches of depth for the terraced levels, and vertical space from roughly 12 inches off the floor up to 40 inches. It fits beautifully on a long dresser or a low sideboard against a wall you can paint or lean a board against. In a small apartment, a two-level version on a 30-inch console still gives you most of the effect.
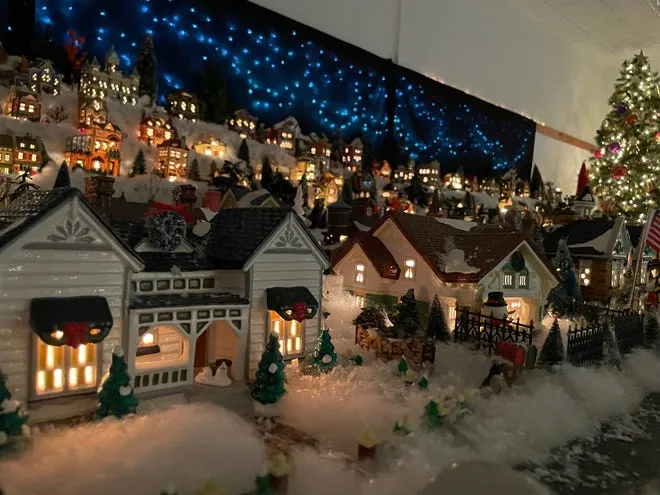
- Confirm you can paint or attach a board to that wall — renters, check first.
- Measure from your surface to the ceiling; a tall tree on the right needs six feet.
- Decide where the star field ends so you don’t paint yourself into a corner.
- Test your backdrop color under the room’s actual evening lighting before committing to dark blue.
25. Minimalist White Ceramic, Zero Clutter
Nothing is decorated here, and that’s the point. Just white ceramic houses, a few dark green trees, and a light surface. Every other display in this article earns its look through accumulation — this one earns it through subtraction. Remove the trees and you’d have a sculpture garden; remove the white and it’s a generic village. Both halves matter equally, and neither can carry the scene alone.
Matte white ceramic shows dust and fingerprints more than any other finish, so a weekly pass with a dry microfiber cloth is genuinely necessary. The upside is everything you don’t deal with: no flocking to shed, no glitter, no tangled mini lights. Set the houses on felt pads so they don’t scratch the surface underneath. If you want truly zero maintenance, choose glossy white porcelain instead — less soft, dramatically easier to live with.
26. One Flocked House and a Warm Glow
The whole composition is roughly 70% white and neutral, 20% green from branches and the small tree, 10% warm yellow light. That’s a ratio you can apply to almost any holiday vignette — mantels, side tables, entryway trays. Swap the green for grey-blue and you have a frosty coastal version; swap it for black and you have something modern. The proportions stay exactly the same.
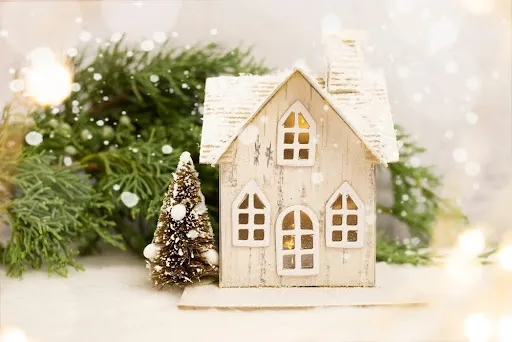
This is the cheapest idea in the article and one of the best. A single flocked house runs $12 to $30 at Target or Walmart, a small flocked tree is about $8, and a warm LED tea light is $2. Under $40 total. Want the blurred bokeh background in photos? String one $5 strand of fairy lights out of focus behind the house — that’s the entire trick. To see how density changes the mood, compare with Idea #10.
27. A LEGO Village Reflected in Black Glass
The reflective surface is doing 60% of the work. Every lit window and every miniature tree gets doubled, which makes a modest build look three times as elaborate. It also enforces discipline: anything on the surface has to be intentional, because flaws get reflected right along with the good stuff. A dark glossy tabletop or a sheet of black acrylic under the display is the single best upgrade you can make to any lit village.
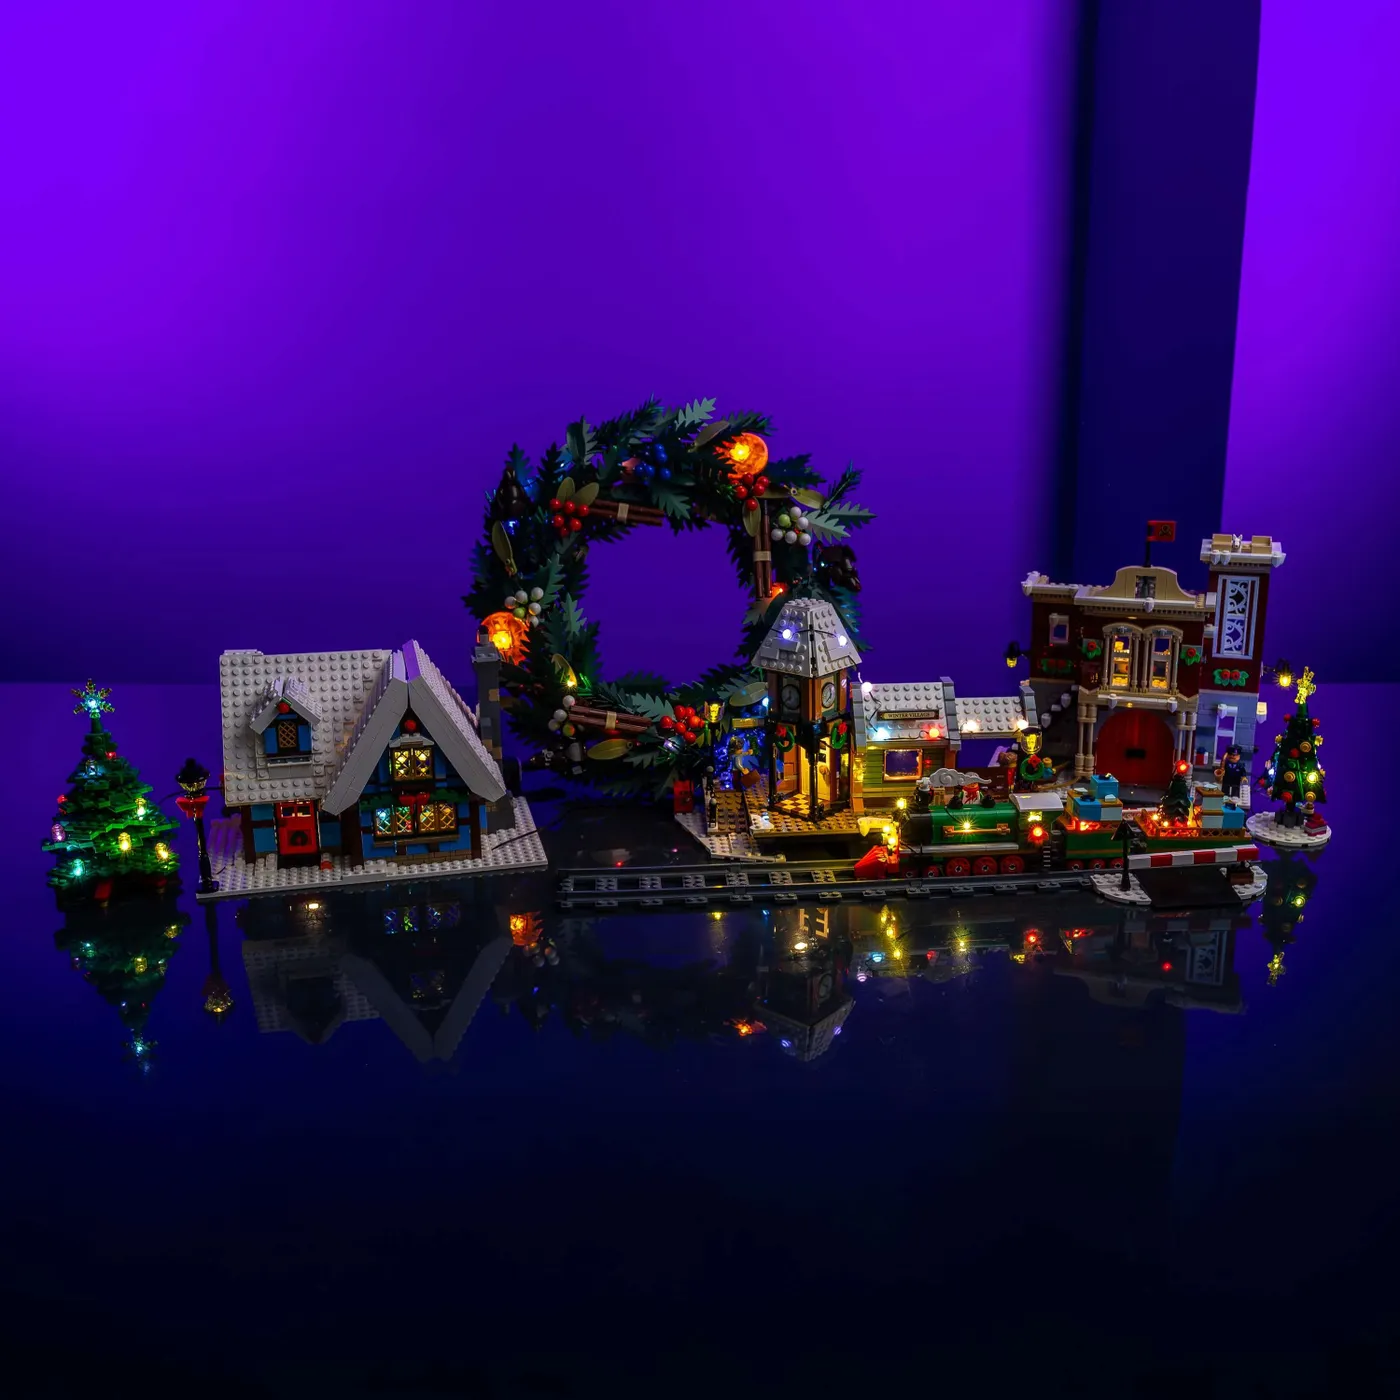
Two warnings. Reflections only work if the surface is genuinely clean — smudges read as holes in the image, so keep glass cleaner within reach. And brick-built villages plus small children is a known conflict: the structure is stable, but individual pieces migrate. If you have a toddler, put this one on a high shelf, or accept that the wreath will be partly disassembled by New Year’s. Not a dealbreaker, just plan for it.
Black reflective surfaces show dust within about 48 hours and fingerprints within seconds of being touched. Budget two minutes a day with a microfiber cloth, or choose a dark walnut finish instead — it still bounces light, just less literally, and forgives far more. The colored backdrop behind this one also fades if it’s paper near a window, so keep it out of direct sun.
28. Three Houses, Three Very Different Roofs
Getting three mismatched houses to read as one village takes about 30 minutes.
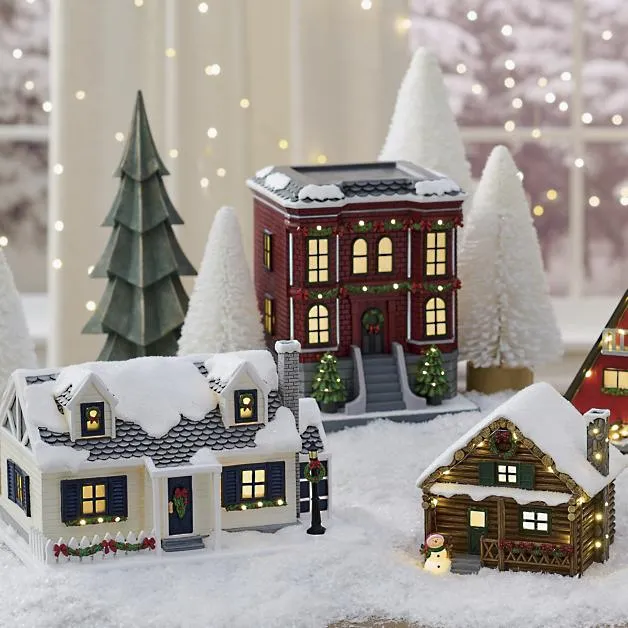
- Line them up and note the roof pitches — red brick, white cottage, log cabin are your anchors.
- Pick a shared element and repeat it three times: a wreath on every door, a garland on every porch.
- Bury the base of each house in an inch of snow so they sit at the same visual depth.
- Plant trees between them in odd numbers to break up the gaps.
- Add one lamppost in front, slightly off-center, to tie the group together.
Mixing house styles only works when three things line up:
- Roof color family — keep browns with browns and greys with greys.
- Window scale — glass panes should be roughly the same size across all three.
- Snow depth — the same amount on every roof.
If a house fails one of these, it moves to the back row or comes out entirely. Three consistent houses beat six inconsistent ones every single time.
29. Mantel Village Framed by a Berry Garland
- Miniature lighted ceramic buildings (6–8): $130–$320
- Faux evergreen garland with berries, 9 ft: $35–$90
- Miniature evergreen trees, mixed: $18–$40
- Faux snow and batting: $15–$30
- Warm white string lights, 1 strand: $8–$18
Total: $206–$498
Budget alternative: skip the designer garland and build your own from a $12 plain pine strand, a bag of pinecones, and a handful of faux berries. About $22 total, and it looks fuller and more custom than anything boxed.
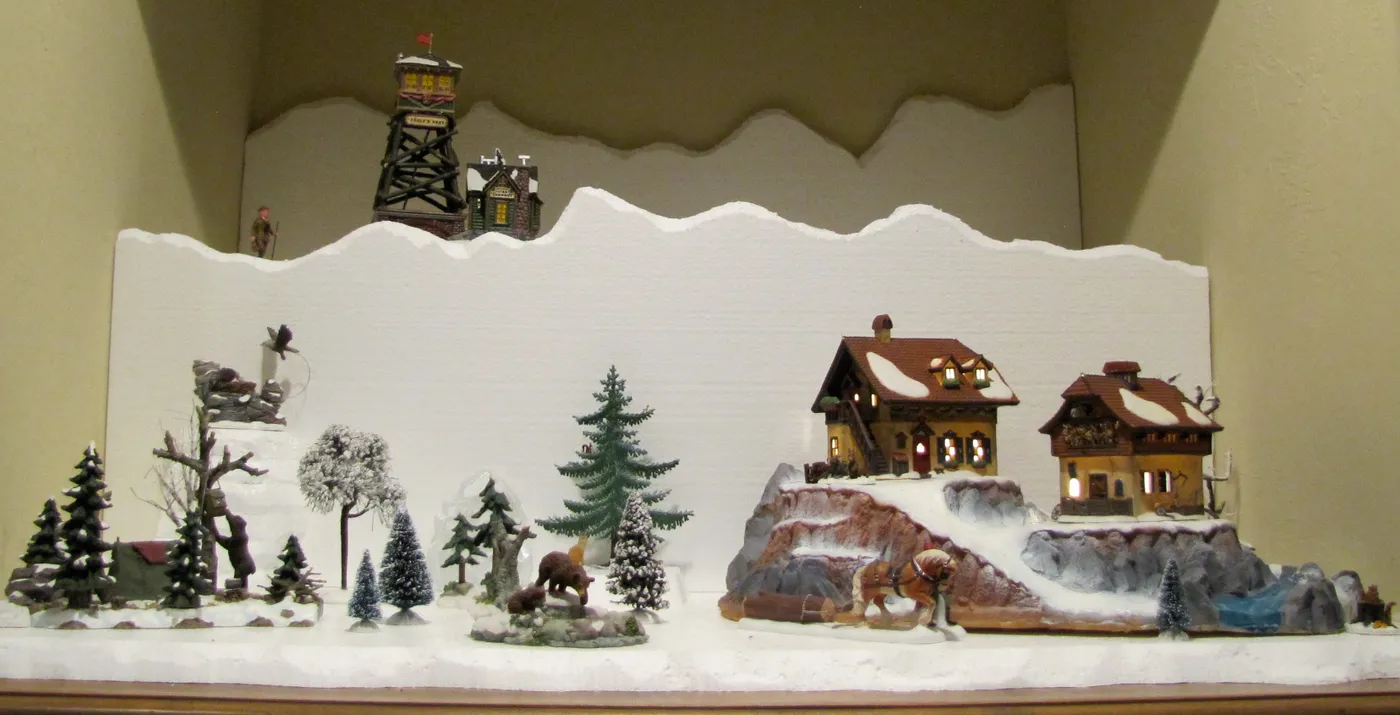
Mantels are usually 60 to 72 inches wide and only 8 to 10 inches deep, which is the real constraint. You can absolutely fit a village on an 8-inch mantel — just single-file. Angle the houses slightly toward the room and stagger them 2 inches front to back; that tiny stagger is what makes a shallow mantel look deep. If yours is deeper than a foot, run two rows and put the taller buildings in back.
- Measure mantel depth before buying anything — 8 inches is tight, 10 is comfortable.
- Confirm the chimney isn’t in use; if it is, keep everything 12 inches from the opening.
- Check outlet access — most mantels have none, so plan on battery packs.
- Decide how the garland attaches before the village goes up, not after.
30. A Gingerbread Facade With Candy-Cane Columns
The candy-cane columns are the entire idea. Without them, this is a decorated gingerbread door. With them, it reads as architecture — a facade you could actually walk through. That’s the difference between a cookie and a set piece, and it costs nothing but patience with a piping bag. If you’re building one, put the columns in first; the icing swags and candy rosettes are just trim around them.
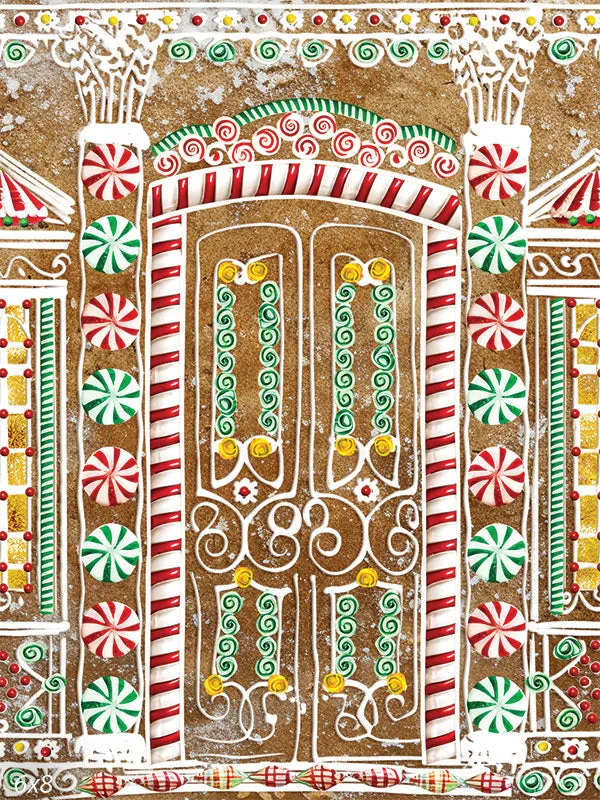
Roughly 60% gingerbread brown, 25% white icing, 15% red and green candy. The icing is the connective tissue — it outlines the door, swags between the columns, and separates brown from bright. Skip it and the candy just looks dumped on. Swap the red-and-green candies for all-white and silver dragees and you get an elegant, nearly monochrome facade from the exact same recipe.
31. Characters Mid-Skate Around a Central Tree
The figures are posed mid-action, and that’s what sells the scene. Someone’s crouched beside a sled, another is mid-turn on the ice, a third is just walking a path. Posing figurines in motion is a small choice that turns a display from a shelf of objects into a story. Rule of thumb: every figure should be facing something, and no two should be doing the same thing.
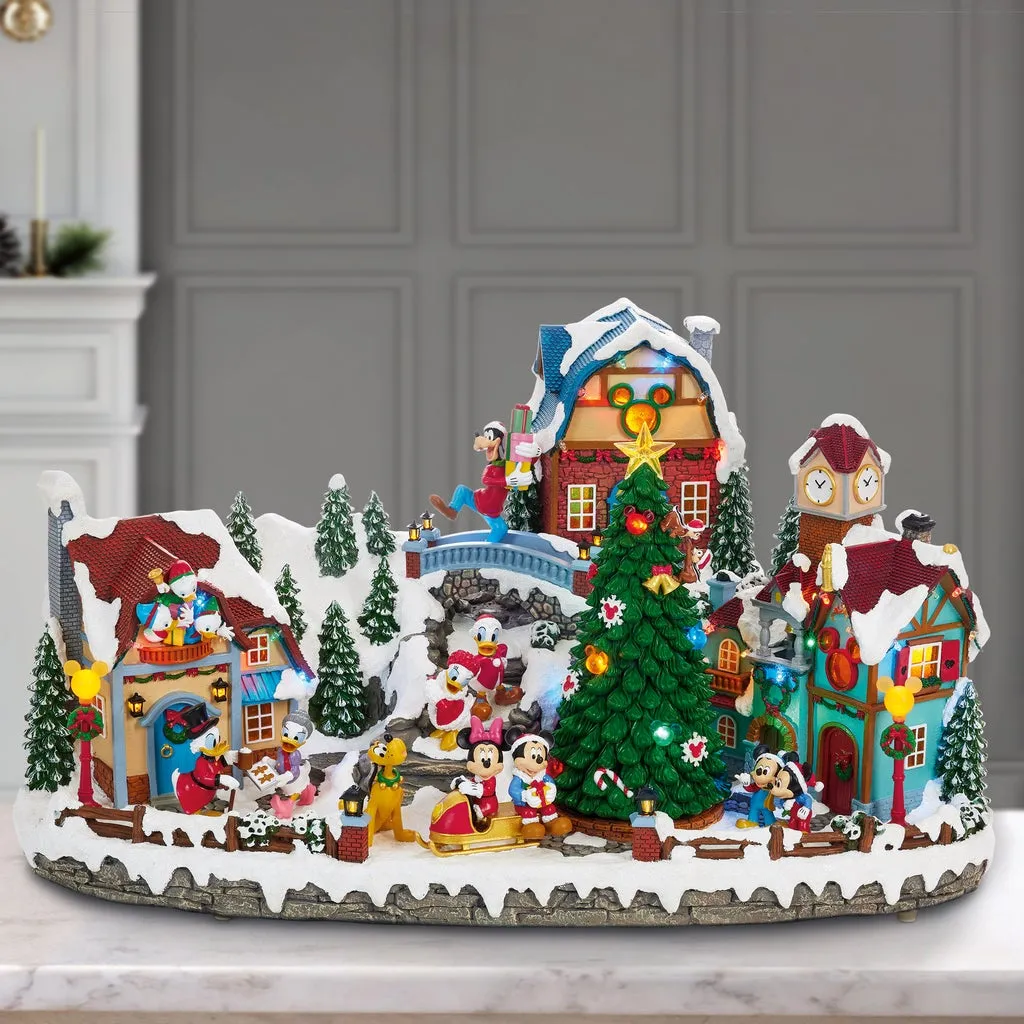
If the licensed version is out of reach, remember that you’re buying structure, not characters. A stone bridge ($12 at a craft store), a central lit tree ($15), a snowy base, and a bag of twelve generic miniature skaters ($9) gets you 80% of the look for under $60. Then add one or two character pieces you genuinely love — a single figure can carry the theme. Compare with Idea #3, which runs the same multicolor energy across a tiered snowscape.
32. Warm White Meets Cool Blue on One Tree
Mixing warm white and cool blue lights on one tree is a gamble that pays off at scale and usually fails on a tabletop. At fifteen feet with hundreds of bulbs, the two temperatures blend into something silvery. On a six-foot tree with 200 lights, you get stripes. If you want to try it indoors, keep the ratio around 70% warm white to 30% cool blue, and wrap the blue strand deeper in the branches so it glows instead of glares.
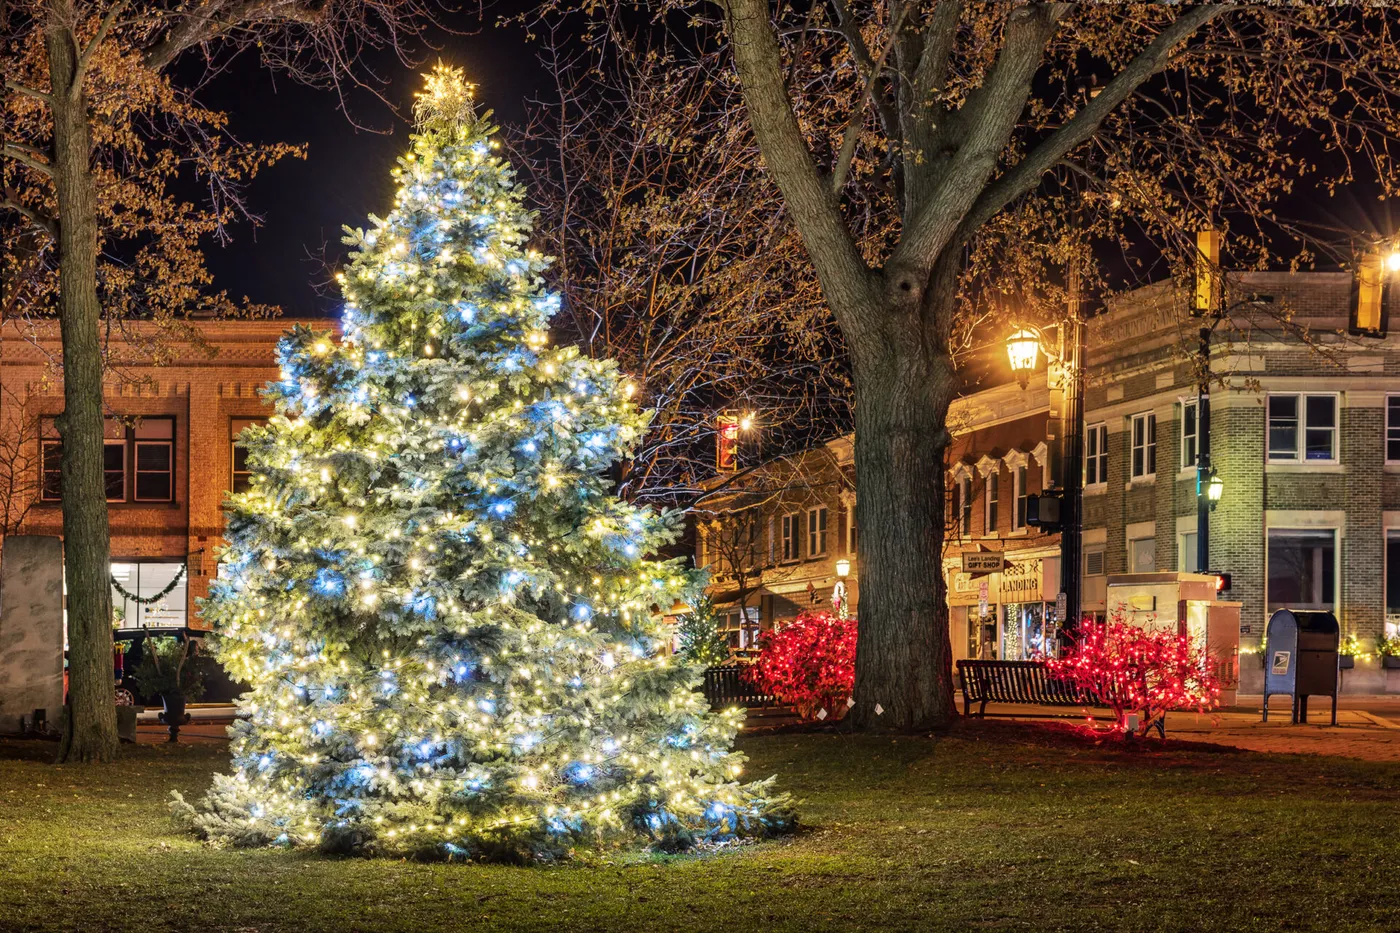
The star topper and the red-lit bushes in this square are doing something specific: they cap the top and anchor the bottom, so your eye lands on the tree and doesn’t wander to the buildings behind. Recreating this indoors, repeat the move — one warm accent up high, one deep-toned accent at the base. Two accent points are enough. Add a third and the composition starts to feel noisy.
Civic tree lighting has quietly become the reference point for home decorating. Towns moved toward mixed-temperature lighting around 2022 and never looked back, and everyone who sees it in person ends up copying the palette at home. It’s a good reminder that the best holiday ideas usually come from walking around your own downtown in December with your phone out.
33. Light-Curtain Backdrop Behind Glowing Gifts
- Prefab green tree, 6–7 ft: $150–$500
- Light-curtain backdrop, 6×8 ft: $35–$90
- Lighted gift boxes, set of 3: $45–$120
- White skeletal or flocked tree, 4–5 ft: $60–$180
- Artificial turf mat, 6×8 ft: $40–$110
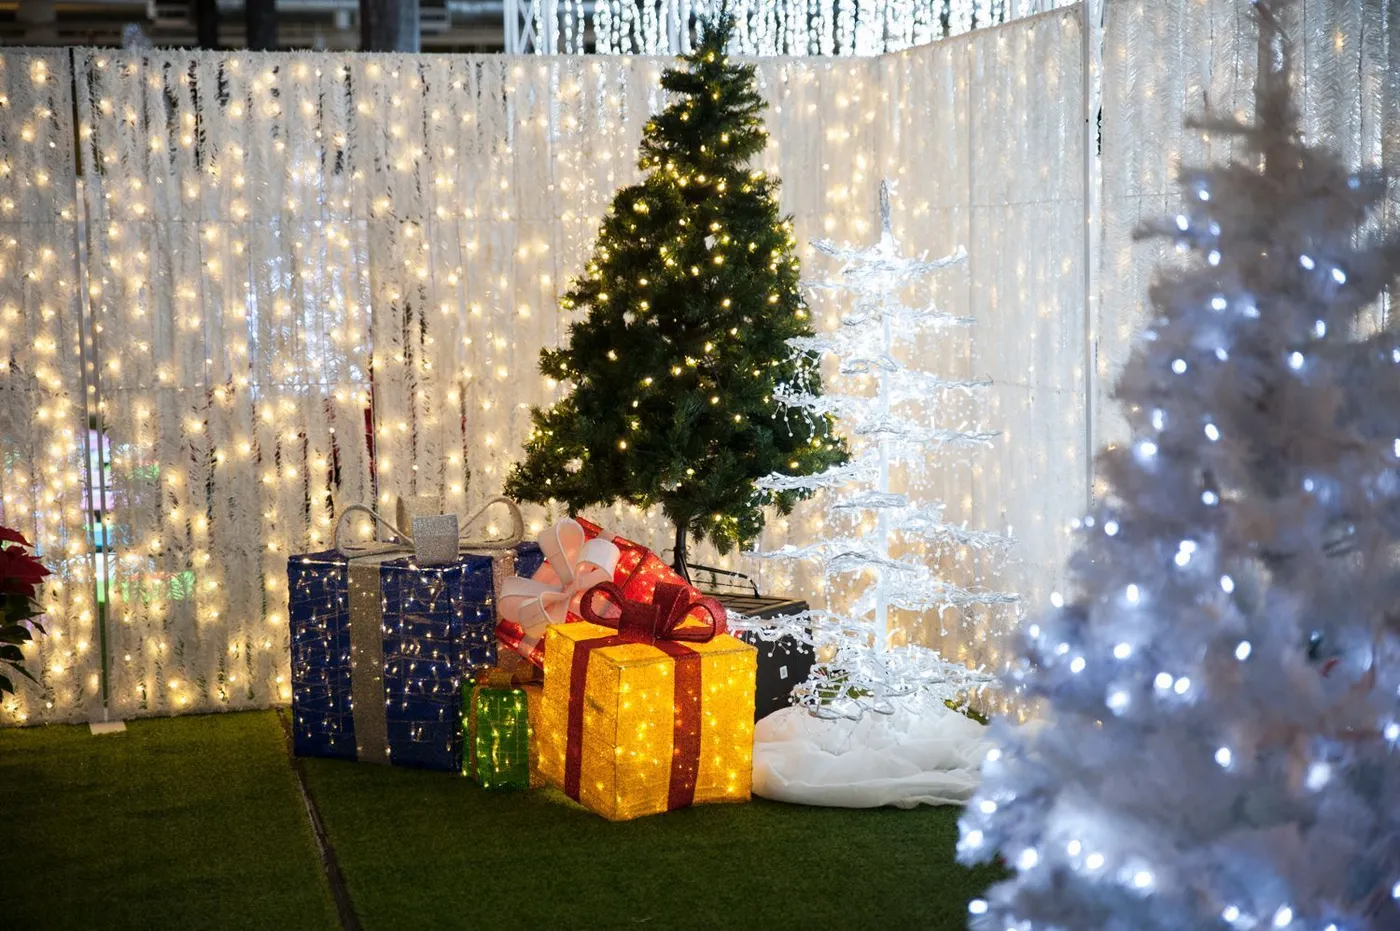
Total: $330–$1,000
Budget alternative: a $28 light curtain from Walmart plus three plain boxes wrapped in tissue paper with a $5 strand tucked inside gives you the same sparkle for under $60 total.
Light curtains burn out section by section. Expect to lose a strand or two each season, and buy a spare box now while they’re in stock in December. Artificial turf under a display needs vacuuming more often than you’d guess, and indoor turf mats shed for the first two weeks. Set it up somewhere you can shake it out, or you’ll still be finding green fibers in March.
Hanging a light-curtain backdrop takes about 25 minutes and no tools.
- Measure your display wall and choose a curtain 6 to 12 inches narrower on each side.
- Attach adhesive hooks rated for at least 3 pounds — curtains are heavier than they look.
- Hang the curtain first, then position the trees so you see it behind them, not around them.
- Bunch the curtain slightly instead of pulling it flat for a denser glow.
- Run the cord behind the tallest tree.
Now Go Build Your Own Little Town
You don’t need a spare room or a four-figure budget — the best displays in this list started with one lit house and a bag of bottle-brush trees. Pick a surface, pick a palette, and let it grow year by year.
Start with the idea that matches the space you actually have, not the one you wish you had. 📌 Pin this guide before you start shopping — you’ll want it in November.