You know the feeling: you’re in the Dollar Tree checkout line, you spot a tiny flocked tree for $1.25, and it’s in your cart before you’ve thought of a single thing to do with it. That impulse buy is about to become the best small-space decoration in your house.
We spent serious time browsing Dollar Tree, Target, and Walmart — plus a few Etsy and Facebook Marketplace finds — to bring you only what’s worth your attention in 2026. The ideas below run from roughly $1.25 to $85, because a mini tree can be a five-minute craft or a full tabletop installation.
Inside: 33 curated ideas across four dominant moods — pastel and whimsical, rustic buffalo plaid, glass-and-gold glam, and vintage traditional. Budget and luxury versions sit side by side, so you can see exactly where the money changes the look. And stay until the end — we break down the most common mistakes that can ruin these looks.
Why now? Apartment renters and shelf-stylers have pushed tabletop trees into full tablescape territory this year.
Save this post now — you’ll want it when you’re ready to shop.
1. Pastel Mini Village With Frosted Bottle Brush Trees
The houses are the star, but the pastel palette is what makes them work. Three little buildings in pink, beige, and mint, each with a glitter-dusted roof and lit windows, could easily read as thrift-store clutter — the discipline of keeping every house in the same soft family is what turns them into a village. Add the frosted bottle brush trees, including taller cream ones hung with tiny red ornaments, and you get scale variety without a single color argument. Take away the palette and you lose the entire mood.
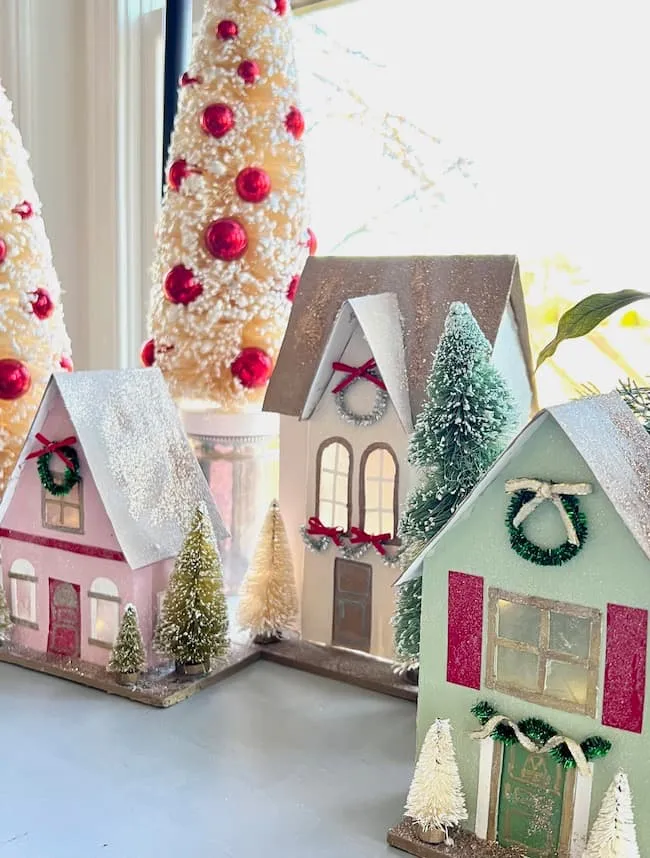
Here’s the formula: 60% pastel base (pink, mint, beige houses), 25% frost white from the glittered roofs and bottle brush tips, 10% micro red from the miniature ornaments, and 5% warm glow from the lit windows. Swap the pastels for all-white houses and the same layout reads Scandinavian; swap frost for matte finishes and it goes distinctly modern. Keep the proportions and the palette can go anywhere.
2. A Flocked Mini Tree in Sky Blue and Silver
Flocked trees shed like a husky in July. Before you decorate, mist the whole thing with a light coat of unscented aerosol hairspray and let it dry for 20 minutes — it locks the fake snow to the needles so you stop finding white dust on your mantel in February. Keep a mantel mini under 18 inches tall so it doesn’t compete with art or a mirror above it, and set it about a third of the way in from one end rather than dead center.
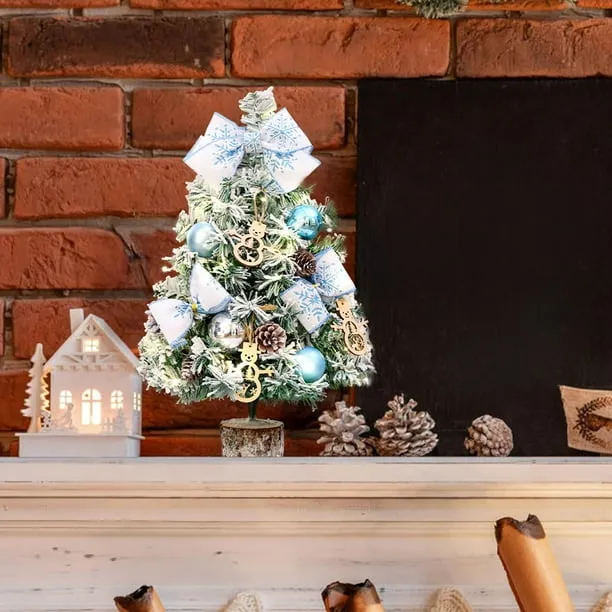
Blue and silver is the coldest ornament combo you can buy, and under warm white bulbs it can look almost icy-grey. That’s exactly why it works against the red brick here — the brick’s warmth keeps the tree from feeling like a frozen display. If your walls are grey or cool white, add one warm element nearby, like a wood slice base or a cream ribbon. Use 2700K warm white bulbs. Cool white will flatten every metallic on that tree.
3. A Clear Glass Mini Tree Dressed in Gold on a Wood Slice
Three materials, three jobs. Clear glass plays with negative space — you see through the tree, so a small object reads bigger and lighter than it actually is. The round wood slice underneath gives it weight and a warm matte surface glass can’t offer. Then the gold star topper and gold baubles catch light from the blurred fairy lights behind. It works because nothing competes: no color, no pattern, just transparency, grain, and shine. Set it on a bed of artificial snow and it looks twice as expensive as it is.
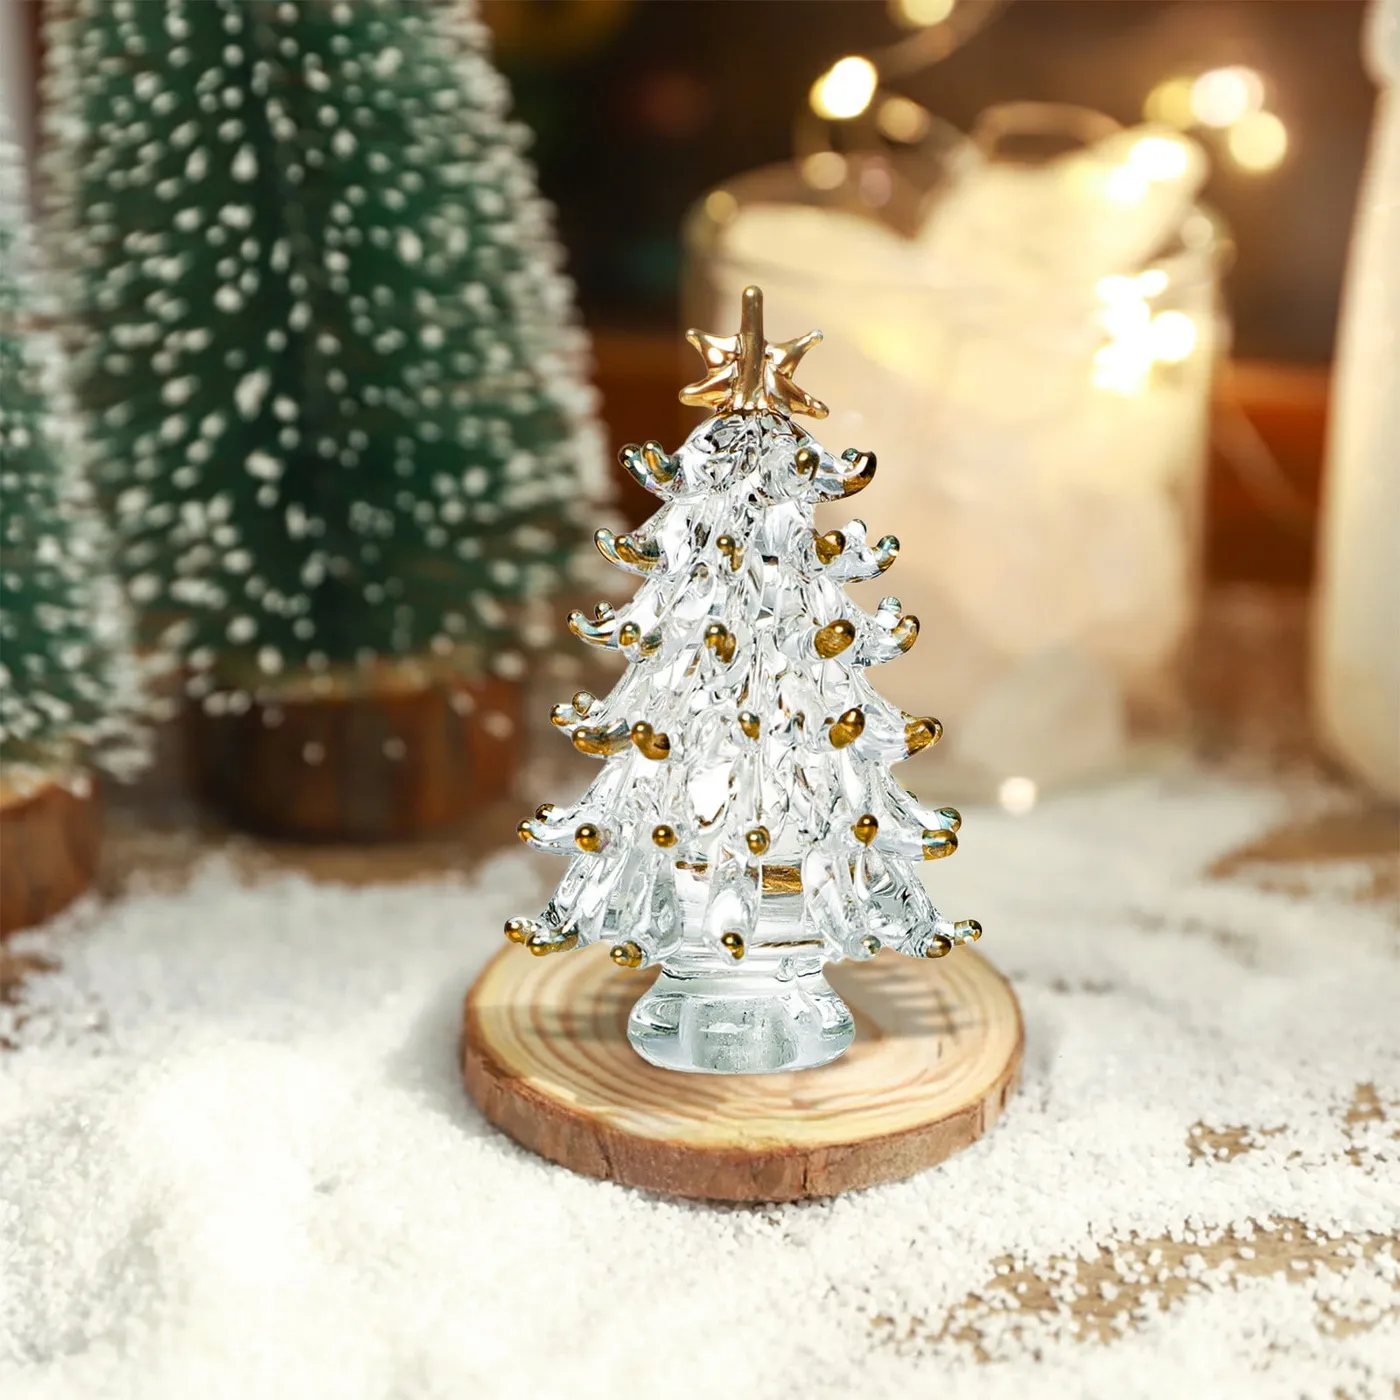
- Glass mini tree: $12–$30
- Gold star topper plus 6–10 gold baubles: $5–$15
- Wood slice base (craft store or a cut log): $2–$8
- Bag of artificial snow: $3–$6
- Warm fairy lights behind: $6–$12
- Total: roughly $28–$71
Budget alternative: a Dollar Tree acrylic look-alike tree with gold spray-painted bead ornaments and a log slice from the yard keeps the whole thing under $12.
4. Four Frosted Bottle Brush Trees, One Warm Glow
Bottle brush trees are having their biggest decade since the 1950s, when Japanese manufacturers first cranked them out by the thousands. What changed in 2026 is who’s buying them: thrifters hunting vintage originals on Etsy and eBay, and crafters frosting new ones with white paint and a stiff brush. The appeal is that they photograph beautifully — that bristly texture catches light in a way plastic never will. They’re also small enough that a whole collection costs less than one nice tabletop tree, which is why the trend has legs.
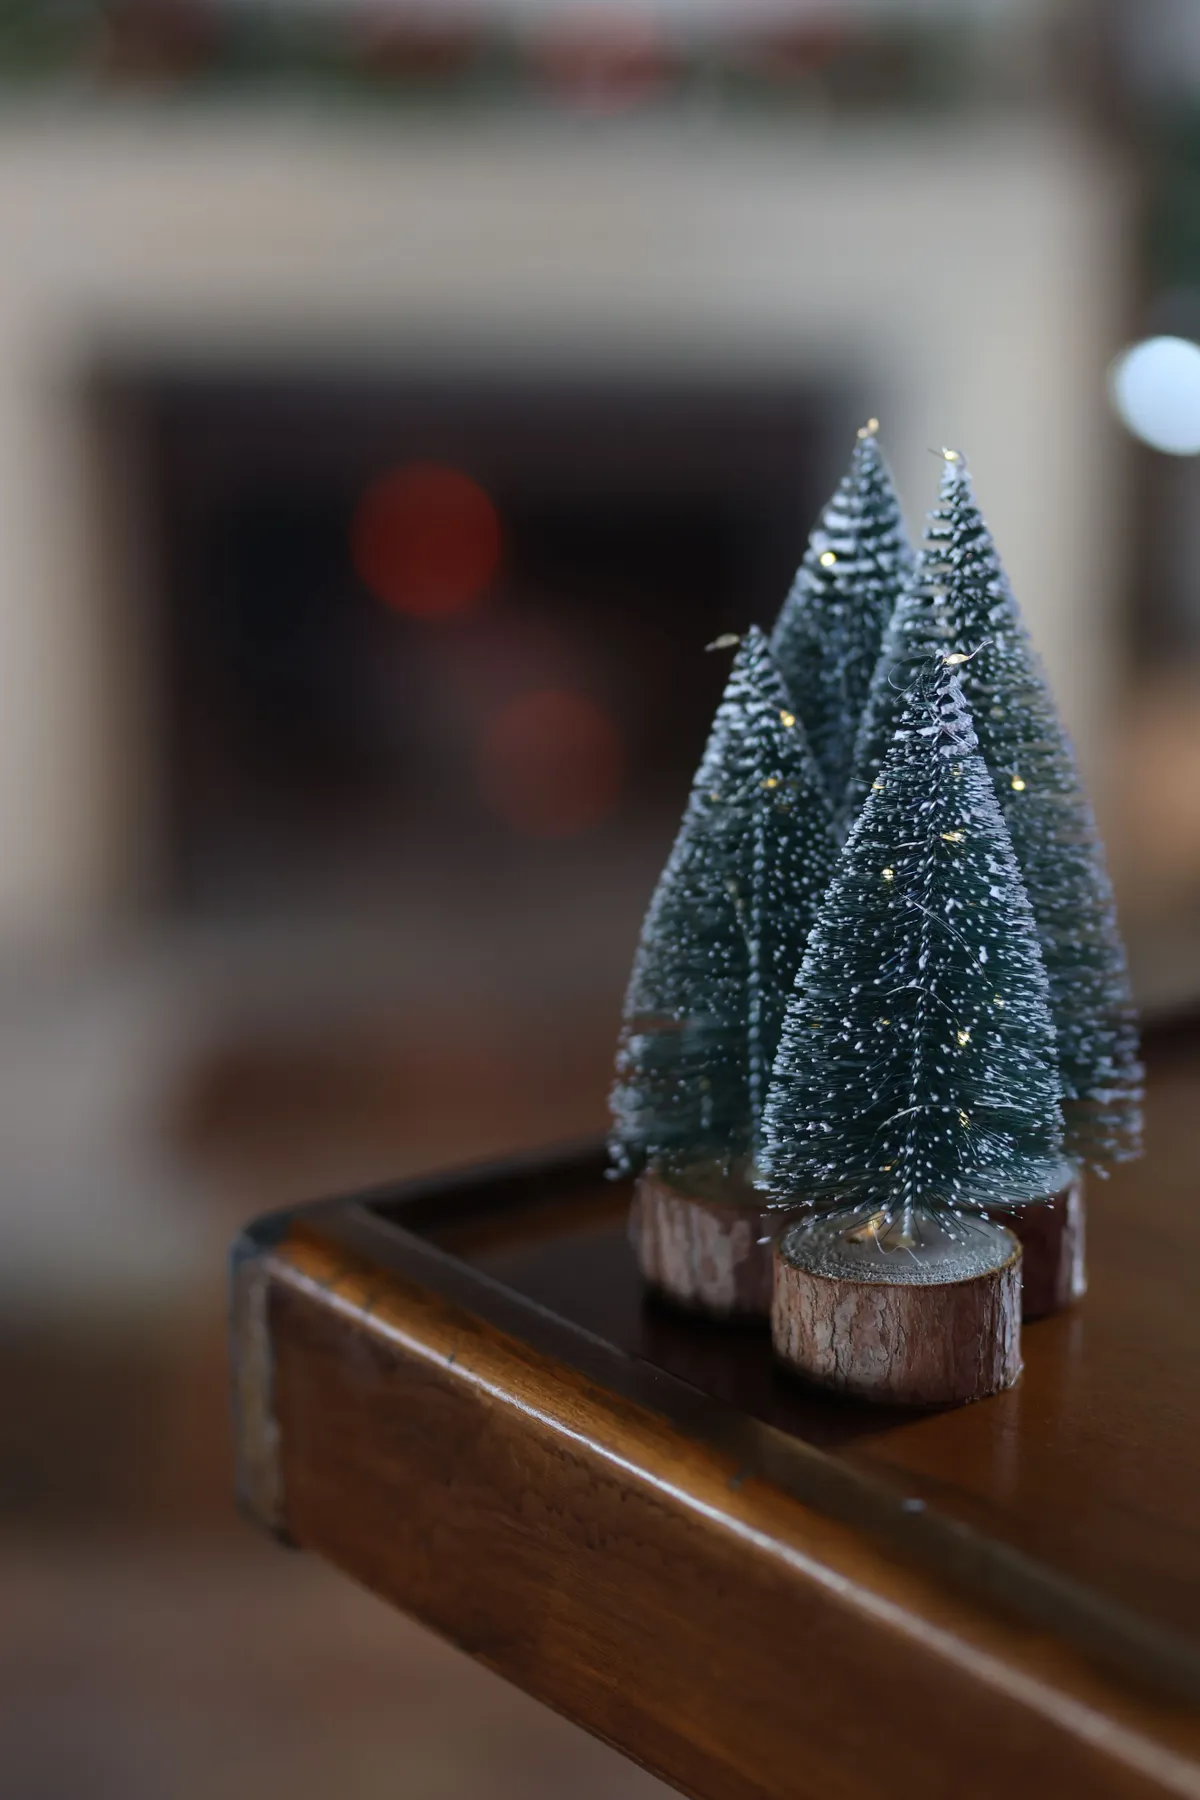
Lighting a bottle brush tree is a small engineering problem. Use a battery micro-LED strand of 20 to 30 lights, warm white around 2700K — anything cooler and the frost turns grey. Wrap from the base upward in a loose spiral so the wire disappears into the bristles, then tuck the battery pack behind the tallest tree in the cluster where the fireplace glow hides it. If the trees sit on polished wood, angle one light downward; the reflection doubles the glow without adding a bulb.
5. Paper Advent Village in Candy Colors
Build the tiered base first — it’s what makes a scatter of paper houses look curated.
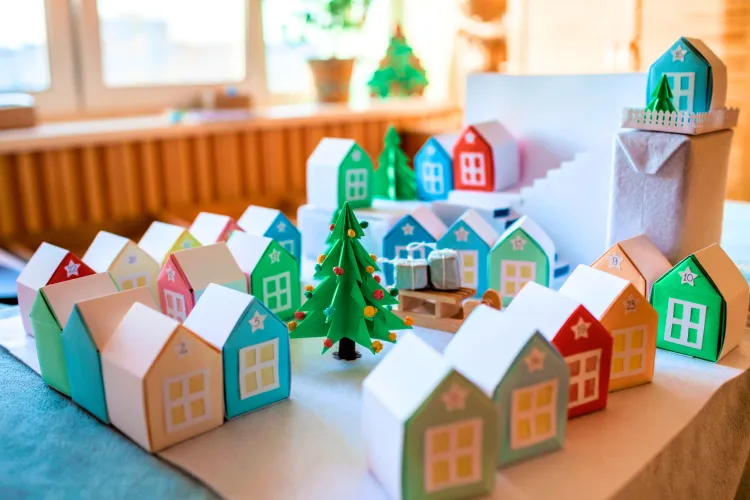
- Find three boxes or cake stands in graduated sizes, 4 to 10 inches wide.
- Drape each in a plain white cloth, tucking corners underneath so the top reads flat.
- Stack them slightly off-center rather than centered, so the silhouette steps sideways.
- Place houses back to front, tallest at the rear, with paper trees filling the gaps.
- Finish with the tiny gift boxes on the sleigh at the lowest level, angled toward the front.
About 45 minutes and roughly $10 to $15 in materials if you already own the boxes.
Paper village kits run $15 to $40, but the look is very copyable. Dollar Tree sells cardstock and house templates are free online — print, score, fold, and you’re in for about $3 plus glue. Target’s dollar spot and Walmart’s seasonal aisles carry small paper houses for $3 to $6 each, and Facebook Marketplace in late November is full of people offloading last year’s village. Mixing new and secondhand houses actually looks better than a matched set. For a more grown-up version of the same layered shelf, see Idea #9.
6. Frosted Mini Pine Wrapped in Buffalo Plaid
The formula here is 70% forest green, 20% black-and-white buffalo plaid, 10% natural twine. That’s it — three things, and the plaid does all the personality work. Swap buffalo plaid for red-and-black check and you get the cabin version, which shows up again in Idea #22. Swap it for cream linen and the same tree goes soft and farmhouse. The twine bow matters more than you’d expect: it’s the only brown in a two-color scheme, and it ties the tree to the wood surface it sits on.
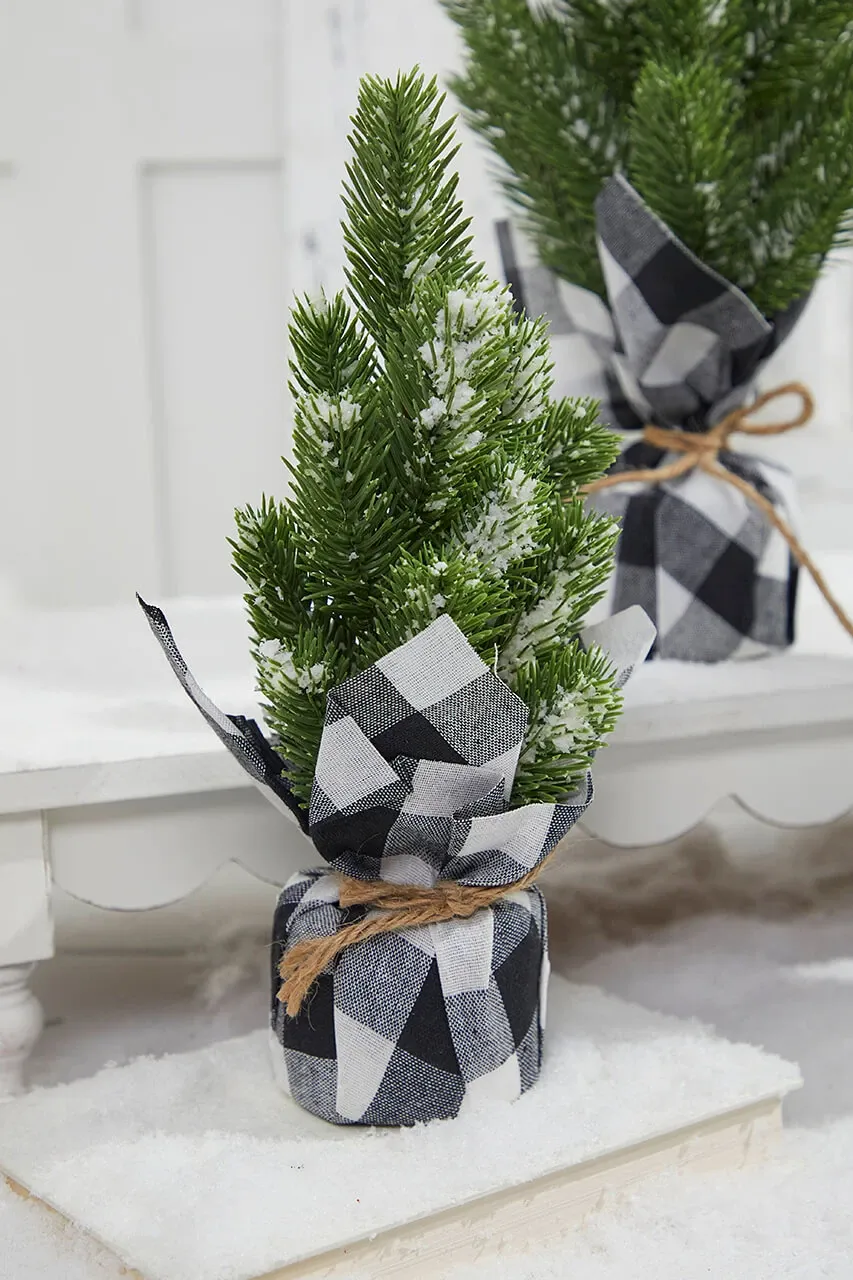
If you’re wrapping a real mini tree instead of a faux one, do not wrap the pot in fabric. Burlap and plaid trap moisture against the soil, and a week later you have mold and a dying tree. Use a plastic liner inside the decorative pot, or wrap an empty container and set the nursery pot inside it. Also: plaid fabric needs ironing or it looks like a laundry pile. A five-minute press on low before you tie the twine is the difference between styled and sloppy.
7. Red and Gold Mini Tree With Cookie Favors
- Mini artificial tree (18–24 inches): $8–$25
- Red and gold balls, mixed shiny and glitter: $6–$18
- House ornaments plus Santa topper with bell: $5–$14
- Packaged cookie favors and ribbon: $8–$20
- White serving surface or cake stand: $5–$15
- Total: about $32–$92
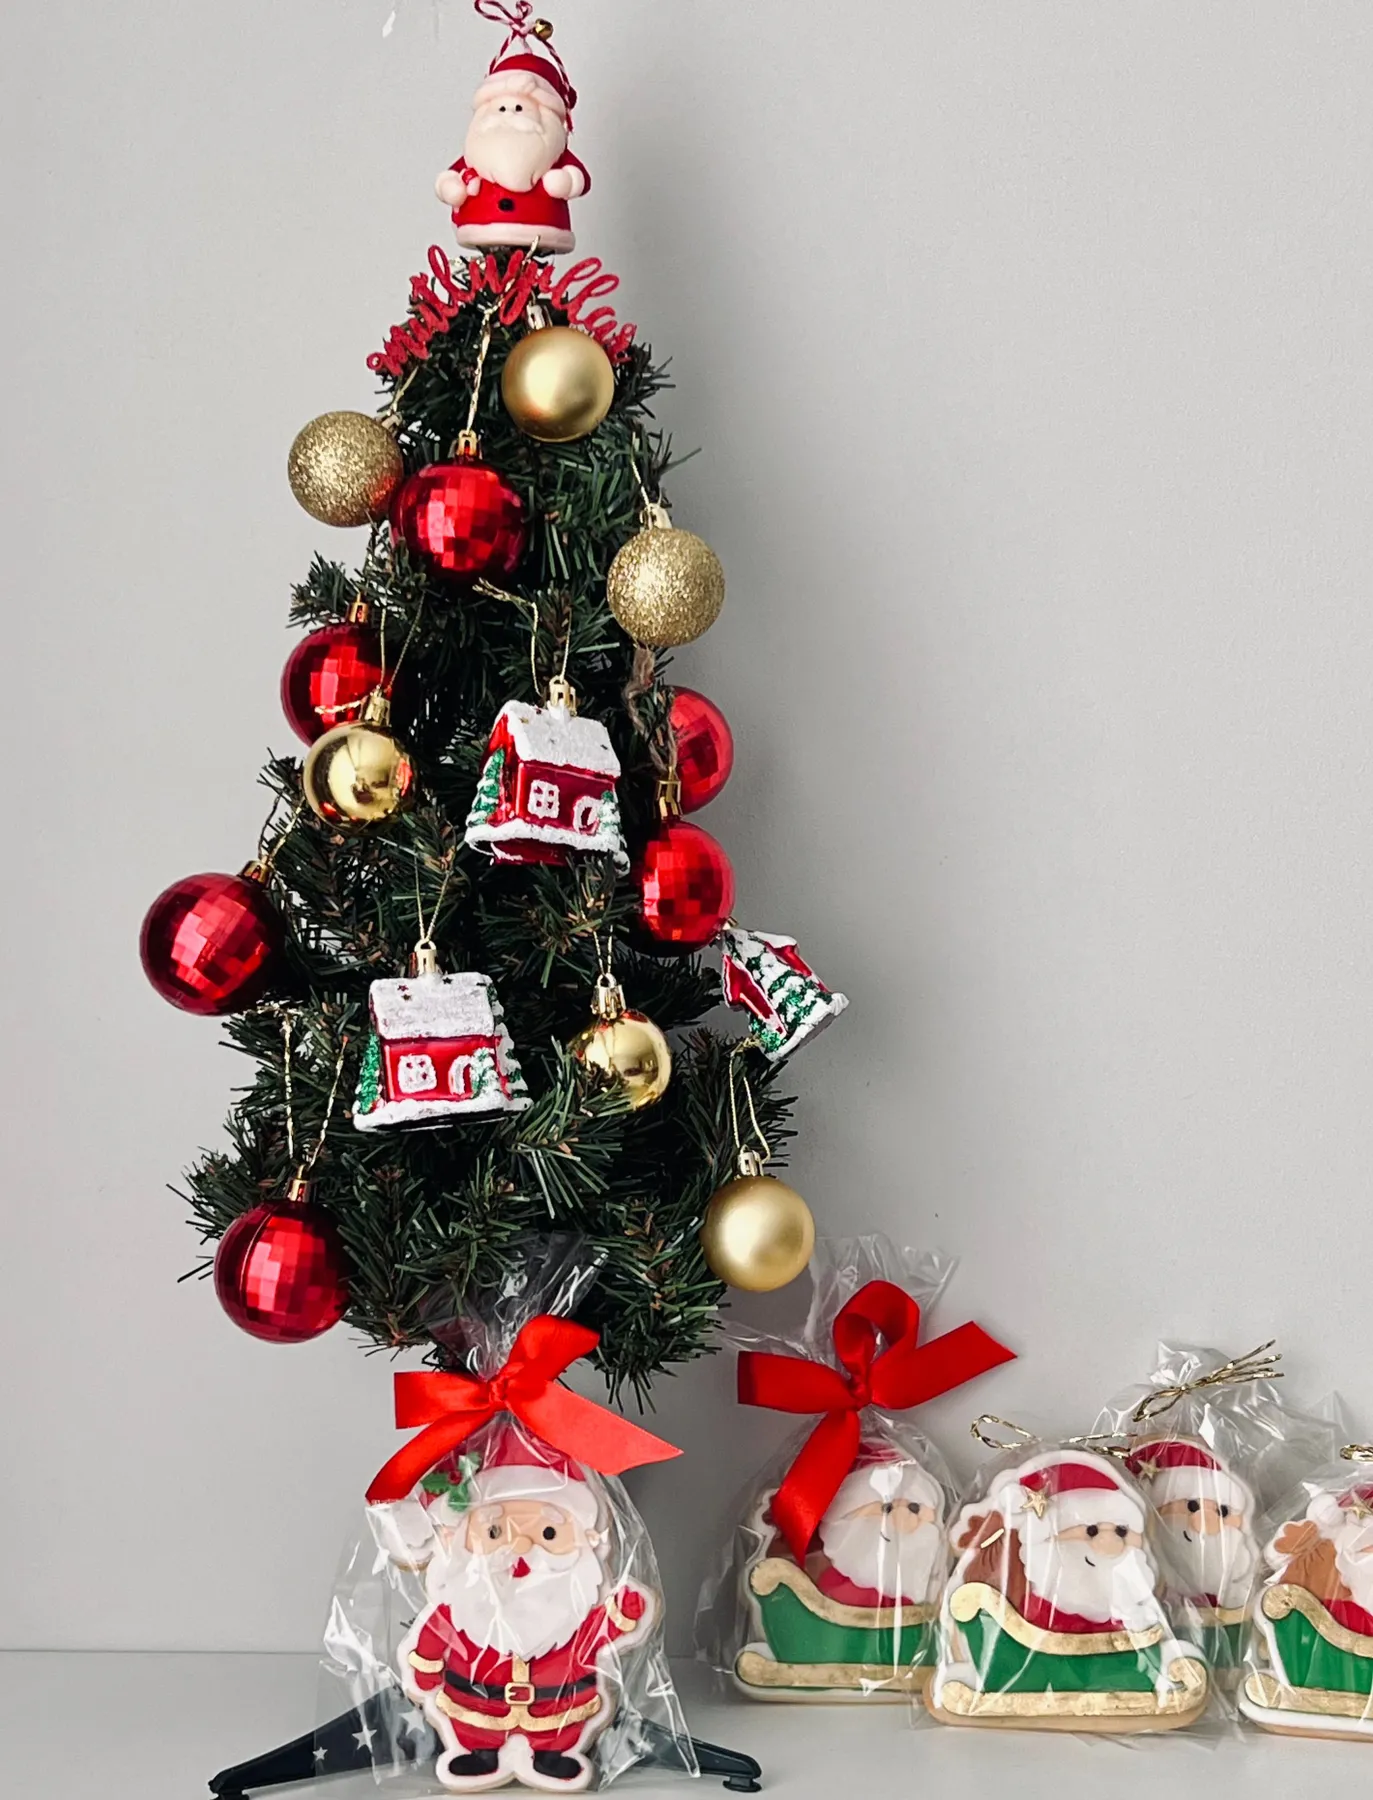
Budget alternative: a Dollar Tree tree, a 12-pack of red and gold ornaments at $1.25 each, and cookies baked at home in cellophane bags with red curling ribbon — under $20 total.
The cookies are the one thing here, and no, that’s not a joke. Without them this is a nice traditional mini tree, one of thousands. With them, the display has a job: it’s a favor station, a hostess gift pile, a take-one-and-thank-you moment. That single decision changes how the tree is styled too — the ornaments stay red and gold and glossy because they’re framing the sweets, not competing with them. Every element supports the fact that someone is going to eat something here.
8. Birch Log Bases With Painted Deer Figurines
This pairing is happiest on a shelf 36 to 48 inches wide and at least 8 inches deep, so the deer have room to face each other instead of standing shoulder to shoulder. Anything narrower and the two trees start reading as one green blob. Tabletop height works too — a console at 30 to 32 inches puts those birch logs right at eye level when you’re seated, which is when the rough white edges really land. If your shelf is under 24 inches wide, drop to one tree and one deer and give the figurine the center.
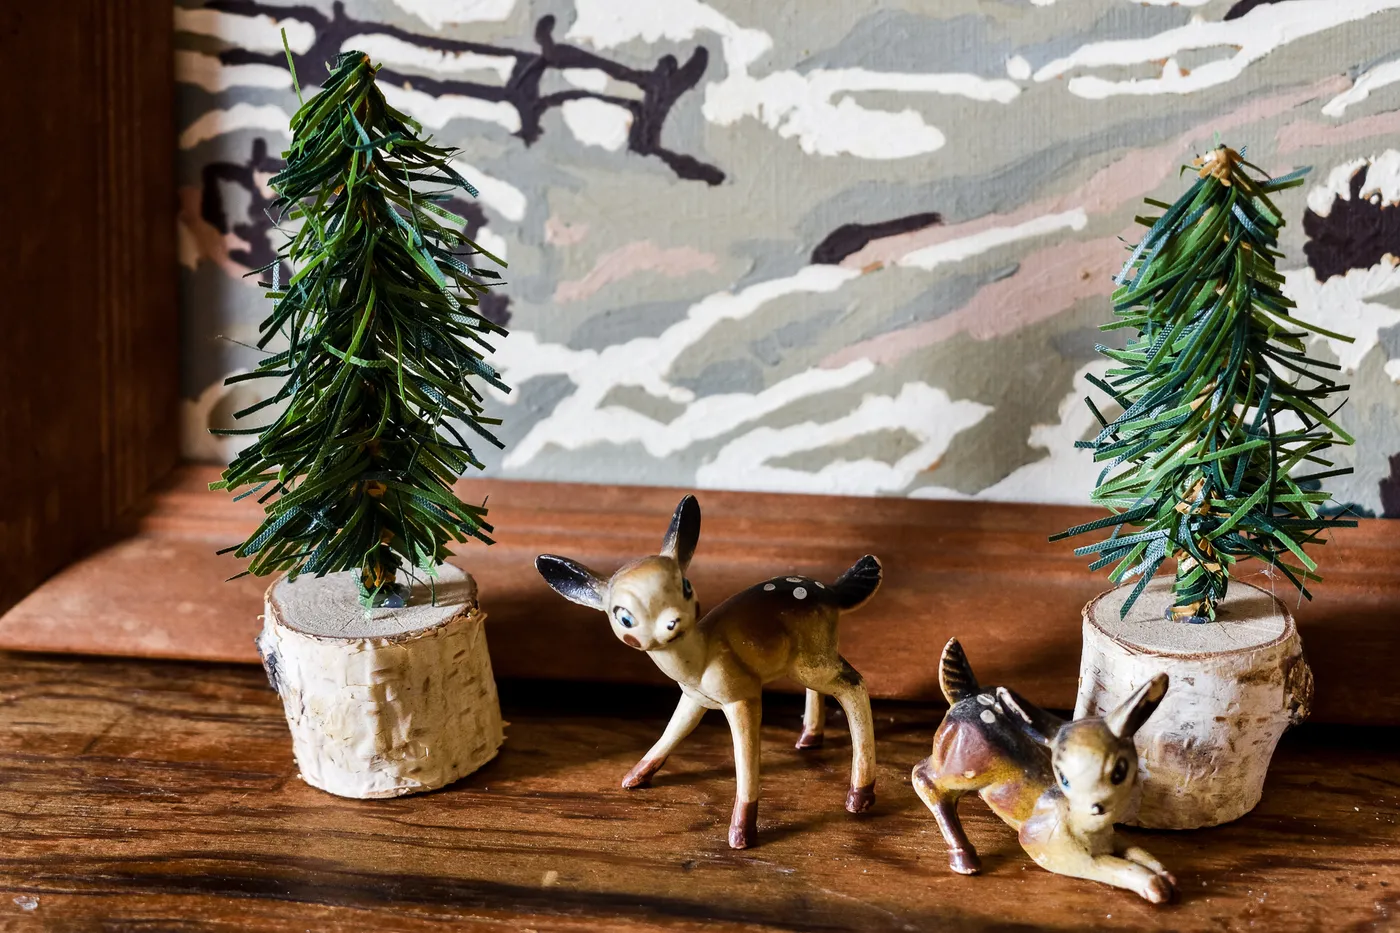
Two principles are doing the heavy lifting. First, repetition with variation: two trees, two deer, but every piece is a different size and pose, which reads as a collection rather than a matched set. Second, material contrast — deep green needles against pale birch bark against a dark wood surface gives you three values in a row, so the eye keeps moving. The muted abstract print behind it is doing quiet work too: those grey and blush tones keep the green from going saccharine.
9. A Mini Tree Collection Ringed in Poinsettia Garland
Fabric poinsettia garlands are dust magnets, and they’re nearly impossible to clean once dust works into the petals. Plan on a monthly pass with a vacuum brush attachment on low, or a canister of compressed air outdoors. The white display cloth underneath has the same problem — it shows every speck and needs a wash or a lint roller every couple of weeks. Store the garland loosely coiled in tissue paper rather than crushed in a bin, or the petals crease and never fully recover. Real poinsettias, for the record, drop leaves the moment you look at them wrong.
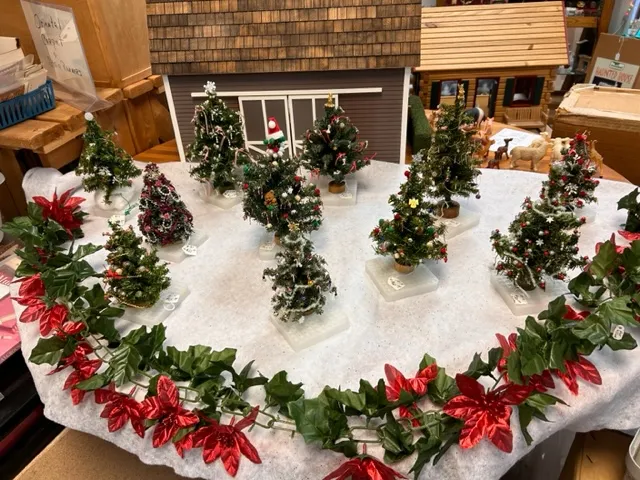
Group mini trees in odd numbers and vary the heights in 3-inch increments — 8, 11, 14 inches — so the silhouette steps up in a rhythm instead of a ramp. Put the smallest trees in front and angle them about 15 degrees toward each other; that slight inward turn makes a scatter of individual trees read as one display. And if a tree looks too bare next to its neighbors, don’t add ornaments. Raise it on a small box hidden under the cloth. Height fixes more styling problems than decoration does.
10. The Crafting Table That Builds the Whole Display
- Check your surface: a 5-foot table gives you three zones — supplies left, work center, finished pieces right.
- Count what you already own before buying anything. Baskets, bowls, and vases are usually already in a closet.
- Confirm a power source nearby for the string lights, or buy a battery strand.
- Set a hard budget cap. Craft tables are where $40 quietly turns into $140.
- Protect the wood — a runner or kraft paper under the work zone saves you from glue and glitter scars.
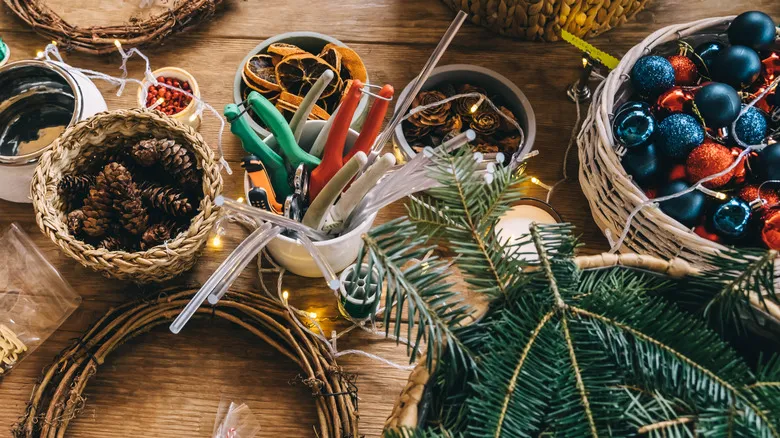
Dried orange slices are the cheapest thing on this table and they smell incredible.
- Slice oranges 1/8 inch thick — thicker and they mold before they dry.
- Blot both sides with a paper towel to remove excess juice.
- Lay them in a single layer on a wire rack over a sheet pan.
- Bake at 200°F for 3 to 4 hours, flipping once at the halfway point.
- Cool completely, then thread with twine or tuck into bowls with red berries.
Two hours of hands-off oven time, about $4 of oranges, and they hold up for years if stored dry.
11. Disco Ball Ornaments on a Corner Mini Tree
Disco ball ornaments are the most overpriced item in holiday decor — $12 for four is normal. Dollar Tree sells mirrored ball ornaments in packs, and a can of silver spray paint plus small mirror tiles turns plain plastic balls into the same thing for about $5. Thrift stores in early December are goldmines for vintage disco ornaments at a quarter apiece. If you want the sparkle dialed up to full glam rather than corner-subtle, Idea #26 takes the same impulse all the way.
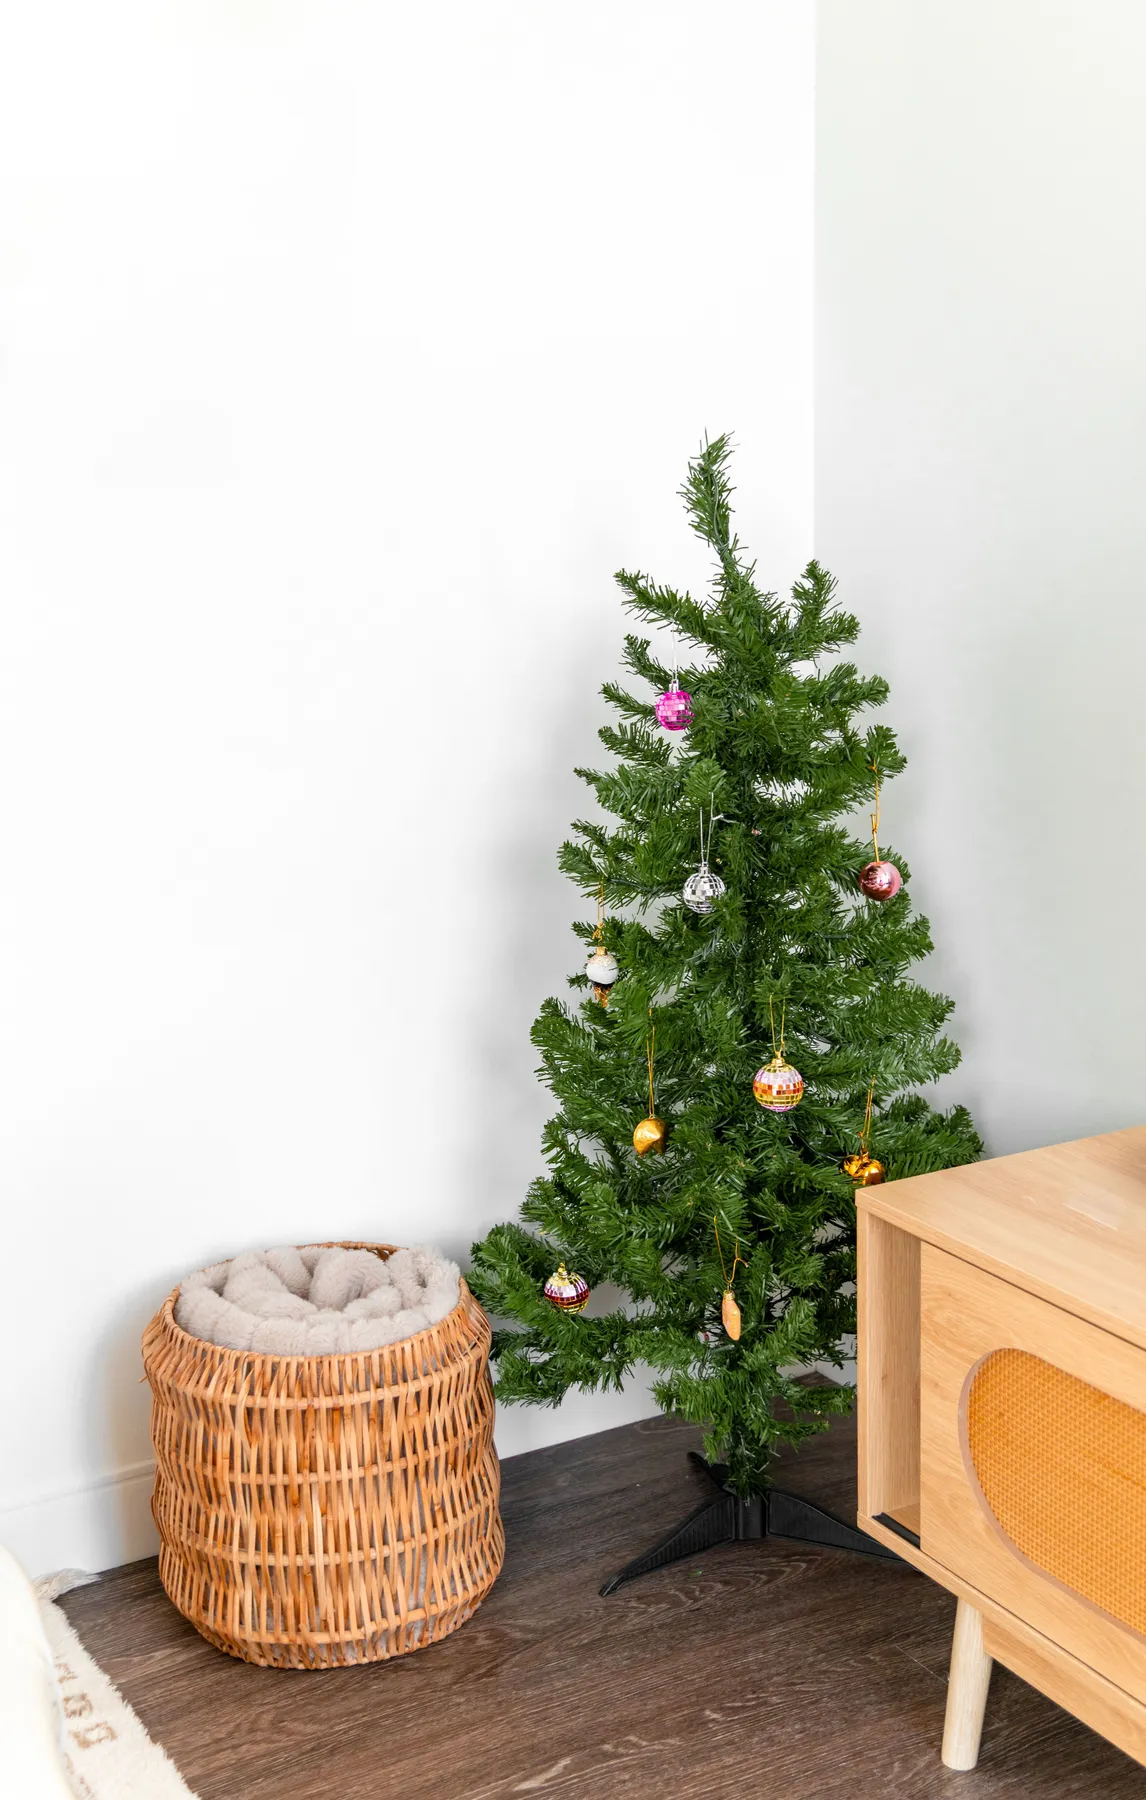
A corner needs about a 30-by-30-inch footprint to feel intentional rather than shoved. An 18-to-24-inch tree fits that slot perfectly, especially when a woven basket with a fluffy liner sits beside it to widen the visual base — that basket is what keeps a small tree from looking lost against two tall walls. Ceiling height isn’t the issue here; wall length is. In a corner with less than 24 inches of clear wall on one side, skip the tree and style the basket alone.
12. Ruffled Red Placemats and Two Burlap-Wrapped Minis
Two things to know before you hand small children a box of mini ornaments. First, anything under about an inch and a quarter is a choking hazard for kids under three and a swallowing risk for pets — use shatterproof balls no smaller than a golf ball, and skip wire hooks entirely in favor of ribbon loops. Second, if these trees live on a dining table, expect them to be redecorated daily. That’s not a problem, it’s the activity. Just keep the base stable; a burlap-wrapped pot on a slick table slides.
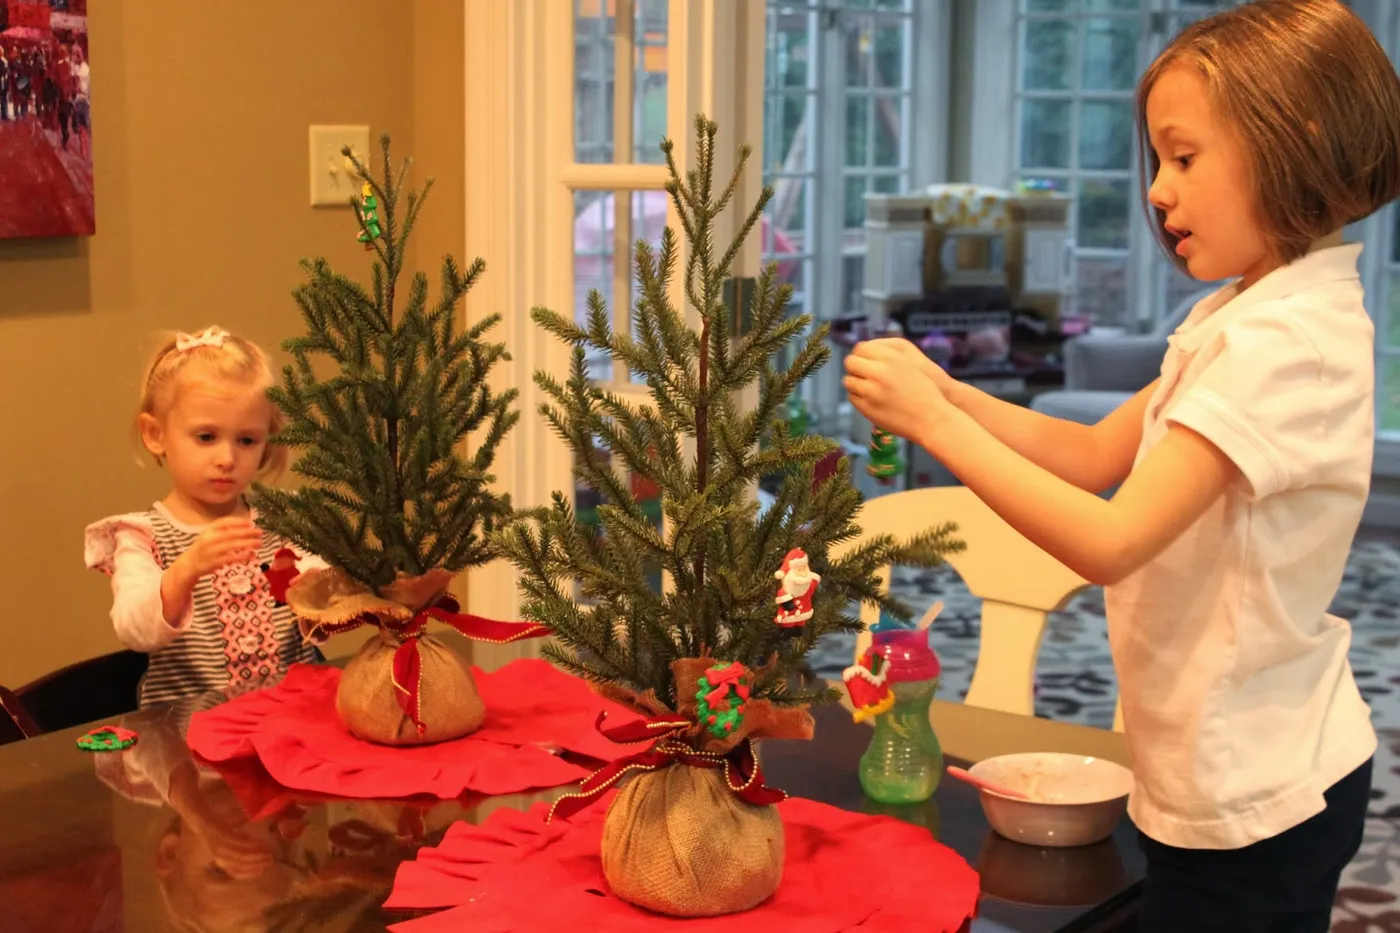
The ruffled red placemats are the one thing. Take them away and you have two small trees on a dark table, which is fine and forgettable. Add them and suddenly the trees have a defined zone — a stage with an edge, in a color that makes the evergreen pop instead of blending into the wood. They also solve a practical problem: they catch fallen needles and stray glitter before it hits the tabletop. One detail, two jobs. That’s the kind of buy that earns its storage space.
13. Candy-Colored Ornaments Packed on a Burlap Base
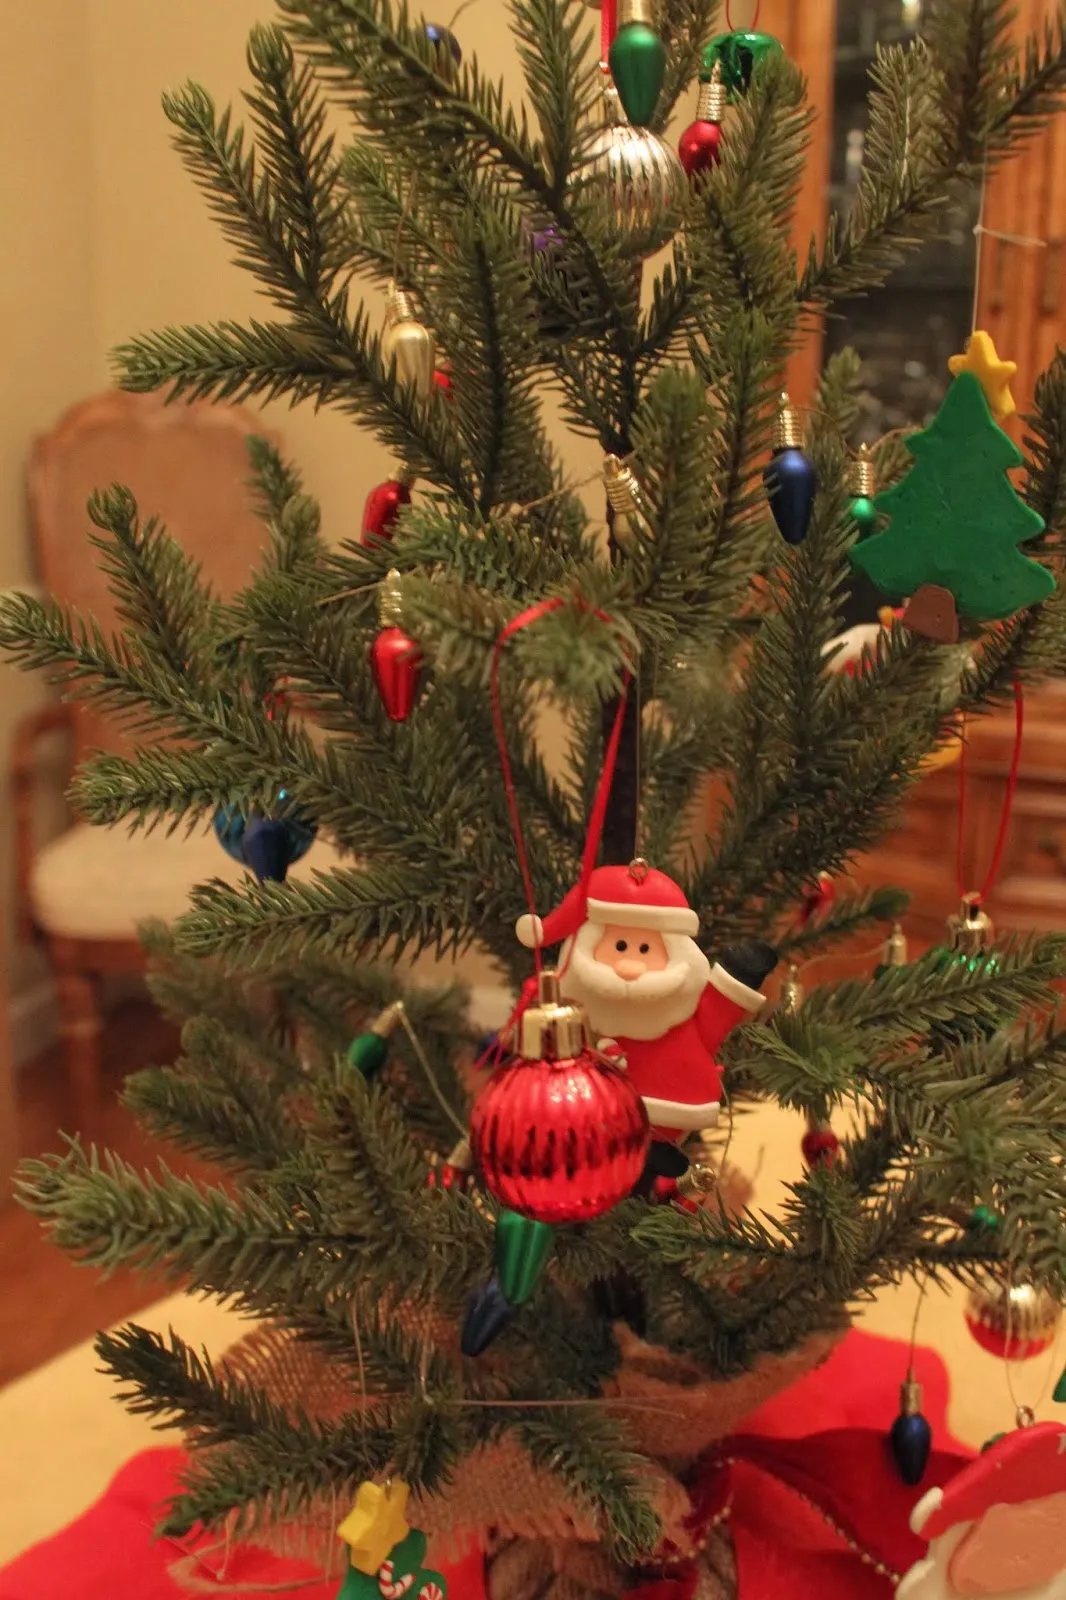
This is the anti-minimalist formula: density over restraint. For a 24-inch tree, plan on 100 to 130 ornaments, roughly 12 to 15 per foot of height. The color mix that keeps it from becoming chaos is about 50% red, 20% gold, 20% blue and silver, 10% novelty shapes — the tiny light bulbs, the Santas, the tree-shaped baubles. The burlap and soft red fabric at the base act as the neutral anchoring all those candy colors. Swap burlap for a white linen wrap and the same tree gets noticeably brighter and more modern.
- Mini artificial tree (24 inches): $10–$28
- Assorted ornaments, 100-plus pieces from multi-packs: $20–$45
- Burlap and red fabric for the base: $4–$10
- Craft wire or ribbon for hanging loops: $3–$7
- Total: roughly $37–$90
Budget alternative: buy ornament multi-packs after Thanksgiving when they hit 70% off, and fill gaps with Dollar Tree 6-packs at $1.25 each. A fully packed mini tree for around $20 is very doable.
14. A Candy Cane Mini Tree Planted in a Coffee Mug
A tree in a mug tips over the second someone bumps the desk. Fix it with weight, not tape: drop a small zip bag of dried rice or beans into the mug first, then set the tree’s base on top. A 10-to-14-ounce mug holds a 6-to-9-inch tree comfortably, and the rim should land somewhere in the bottom third of the branches. Anything shorter and the tree looks like it fell in; anything taller and the mug reads as an afterthought. If the mug has a wide handle, turn it to the back.
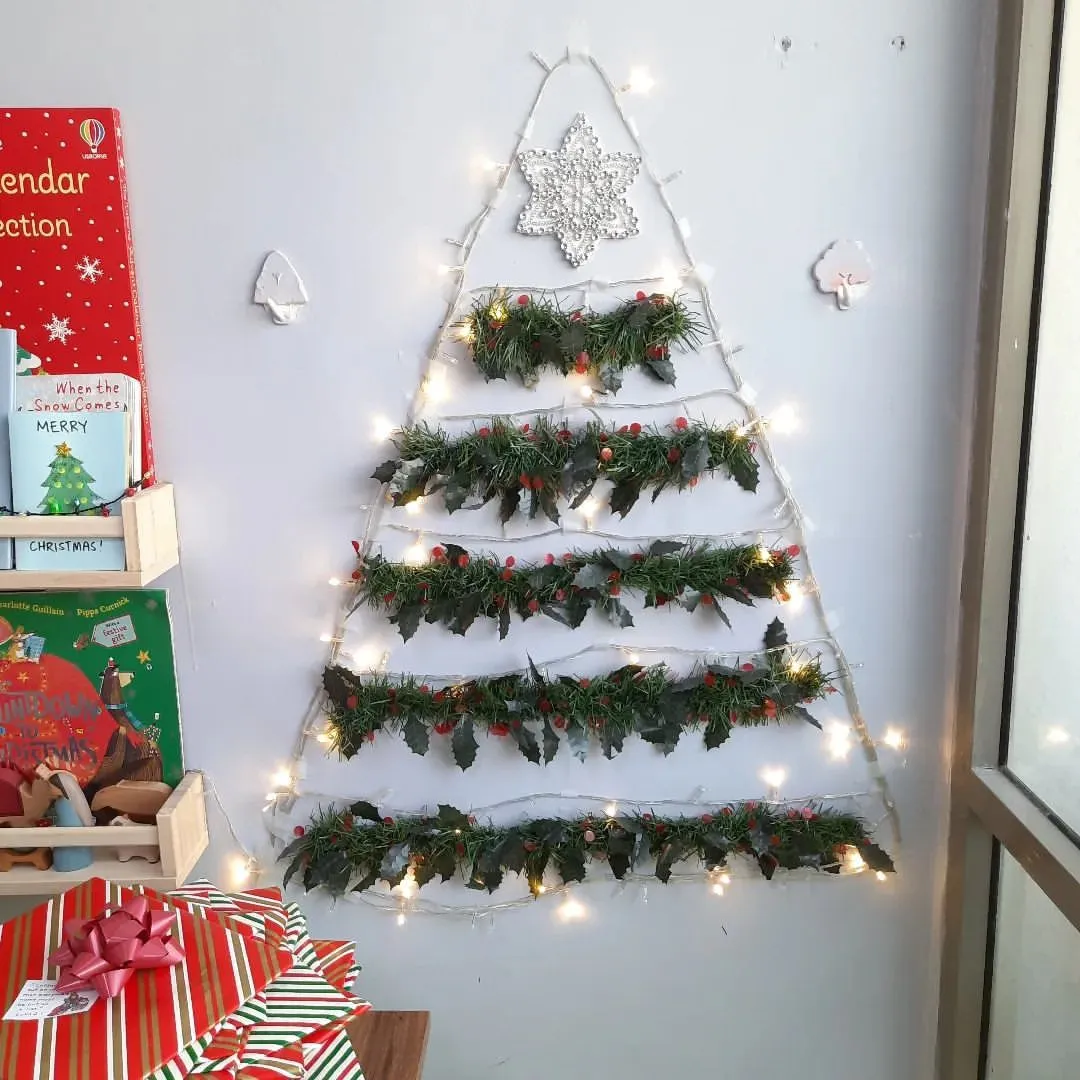
- Fill the mug two-thirds with rice or beans in a zip bag, or cut floral foam to fit.
- Test-fit the tree; the trunk should sit snug with 4 to 5 inches of branches above the rim.
- Tie six to eight candy canes to the branches with thin red ribbon, spaced evenly.
- Tuck small red ornaments into the gaps left by the candy canes.
- Set the mug on a coaster and angle the handle toward the wall.
Fifteen minutes, about $5 in materials, no glue required.
15. A Sugar-Rimmed Martini Ornament in the Branches
The joke works because of scale. A cocktail ornament is comically oversized compared to the real thing, but on a tree it’s just small — that gap between what it represents and how big it is, is the entire gag. Two details sell it: the sugar-rimmed edge, which reads as a cocktail even from across the room, and the single red garnish against the pale yellow-green. Without the garnish, it’s a clear glass blob. The cream ribbon hanger is doing quiet work too — a metal hook would kill the softness.

Cocktail and food ornaments exploded once home bars became standard furniture in the 2020s, and 2026 is peak era for it. The driver is simple: people decorate for the life they actually live, and for a lot of us that includes a Friday night martini. Novelty ornaments also photograph better than traditional baubles, which matters on a platform where decorating is half performance. It’s a trend with staying power because it’s personal. Nobody throws out an ornament that makes them laugh.
16. The DIY Supply Flat Lay That Starts It All
- Inventory first: count ornaments, twine, picks, and glass balls you already have before buying a single thing.
- Check ornament sizes against your tree. A 24-inch tree cannot carry six-inch finials.
- Confirm you own wire cutters for decorative picks — scissors will wreck the stems and your wrist.
- Decide on a color story before the store, or everything comes home in six colors.
- Read packaging on stickers and decals; some won’t stick to glass or painted surfaces.

Craft supply hauls are the most common way people overspend on a small display. Clear glass ball ornaments are everywhere and tempting, but they’re also the hardest to decorate — glue shows through and paint slides off. If you’re filling them, use lightweight filler like tinsel, paper strips, or fake snow, never anything wet. The plaid wood-slice ornament and the glitter tree stickers in a spread like this are the easy wins; loose pinecones and berry picks need cutters and a plan. Buy the easy wins first and see if you need the rest.
17. A Sculptural Gold Tree With Leaf-Layered Branches
The single central rod is the one thing. This tree isn’t pretending to be a tree — it’s a sculpture shaped like one, and the slender rod holding it up is the tell. Because the branches are layered metallic leaves tapering into a star, everything else has to stay quiet: no ornaments, no lights, no tinsel. What you’d lose without the rod is the honesty of the object. It would read as a cheap imitation instead of deliberate decor, and the whole reason to own it disappears.

Gold decor dies in isolation. Put this on a bookshelf or console at 14 to 18 inches tall against a dark backdrop — charcoal, navy, black, deep green — so the metallic has something to reflect against. Mix one matte gold object with one glossy gold object within a few feet; all glossy reads cheap, all matte reads flat. And leave at least 12 inches of clear space around it. Crowd a sculptural piece with three other shiny things and it stops being sculptural.
18. A Santa-Topped Mini Tree With a Metallic Gift Pile
- Mini artificial pine (18–24 inches): $8–$22
- Assorted miniature ornaments: $12–$28
- Santa spring topper: $4–$10
- Red ruffled tree skirt: $6–$15
- Metallic-wrapped mini gift boxes: $8–$18
- Gold fabric tablecloth: $10–$25
- Total: roughly $48–$118
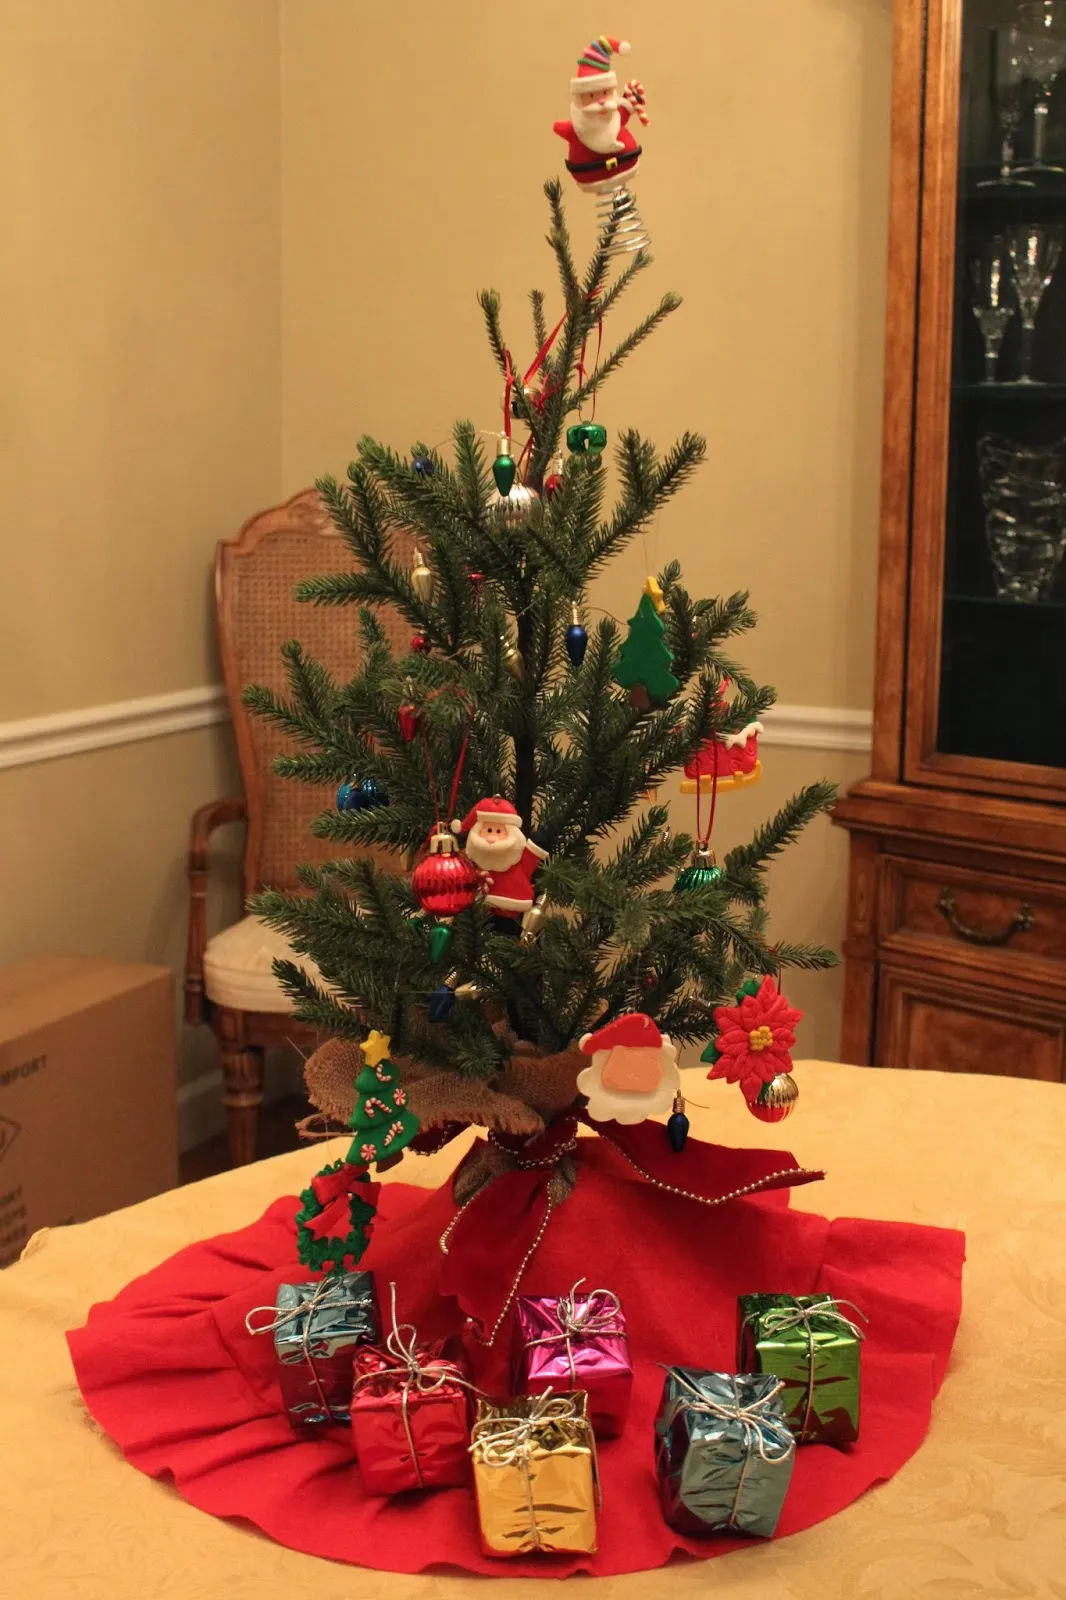
Budget alternative: Dollar Tree gift boxes in foil wrap, a red fabric remnant for the skirt, and a thrifted gold tablecloth keep you under $30 without losing the look.
This arrangement needs a table at least 36 inches across, because the gift pile spills a good 8 inches beyond the tree’s footprint. On a smaller 24-inch side table, use three mini gifts instead of six and skip the tablecloth — the gold is already covered by the wrapping. Ceiling height is irrelevant here; what matters is that nothing tall sits within 18 inches of the Santa topper, or the proportions flatten out. For the same formula with more casual energy, Idea #12 swaps the ruffled skirt for placemats.
19. Snow Dust and Amber Fairy Lights, Up Close
Bottle brush trees are dust traps with a very short patience span. The bristles grab lint, pet hair, and cooking grease from the air, and once it’s in there you can’t wipe it out. Compressed air on a low setting, outdoors, once a month, is your best option. The frosted tips go first — cheap white flocking yellows within a year or two, especially near a fireplace. Store them in individual zip bags with the bristles facing up rather than crushed in a box, and they’ll last a decade. Sunlight fades the green fast, so keep them off a south-facing sill.
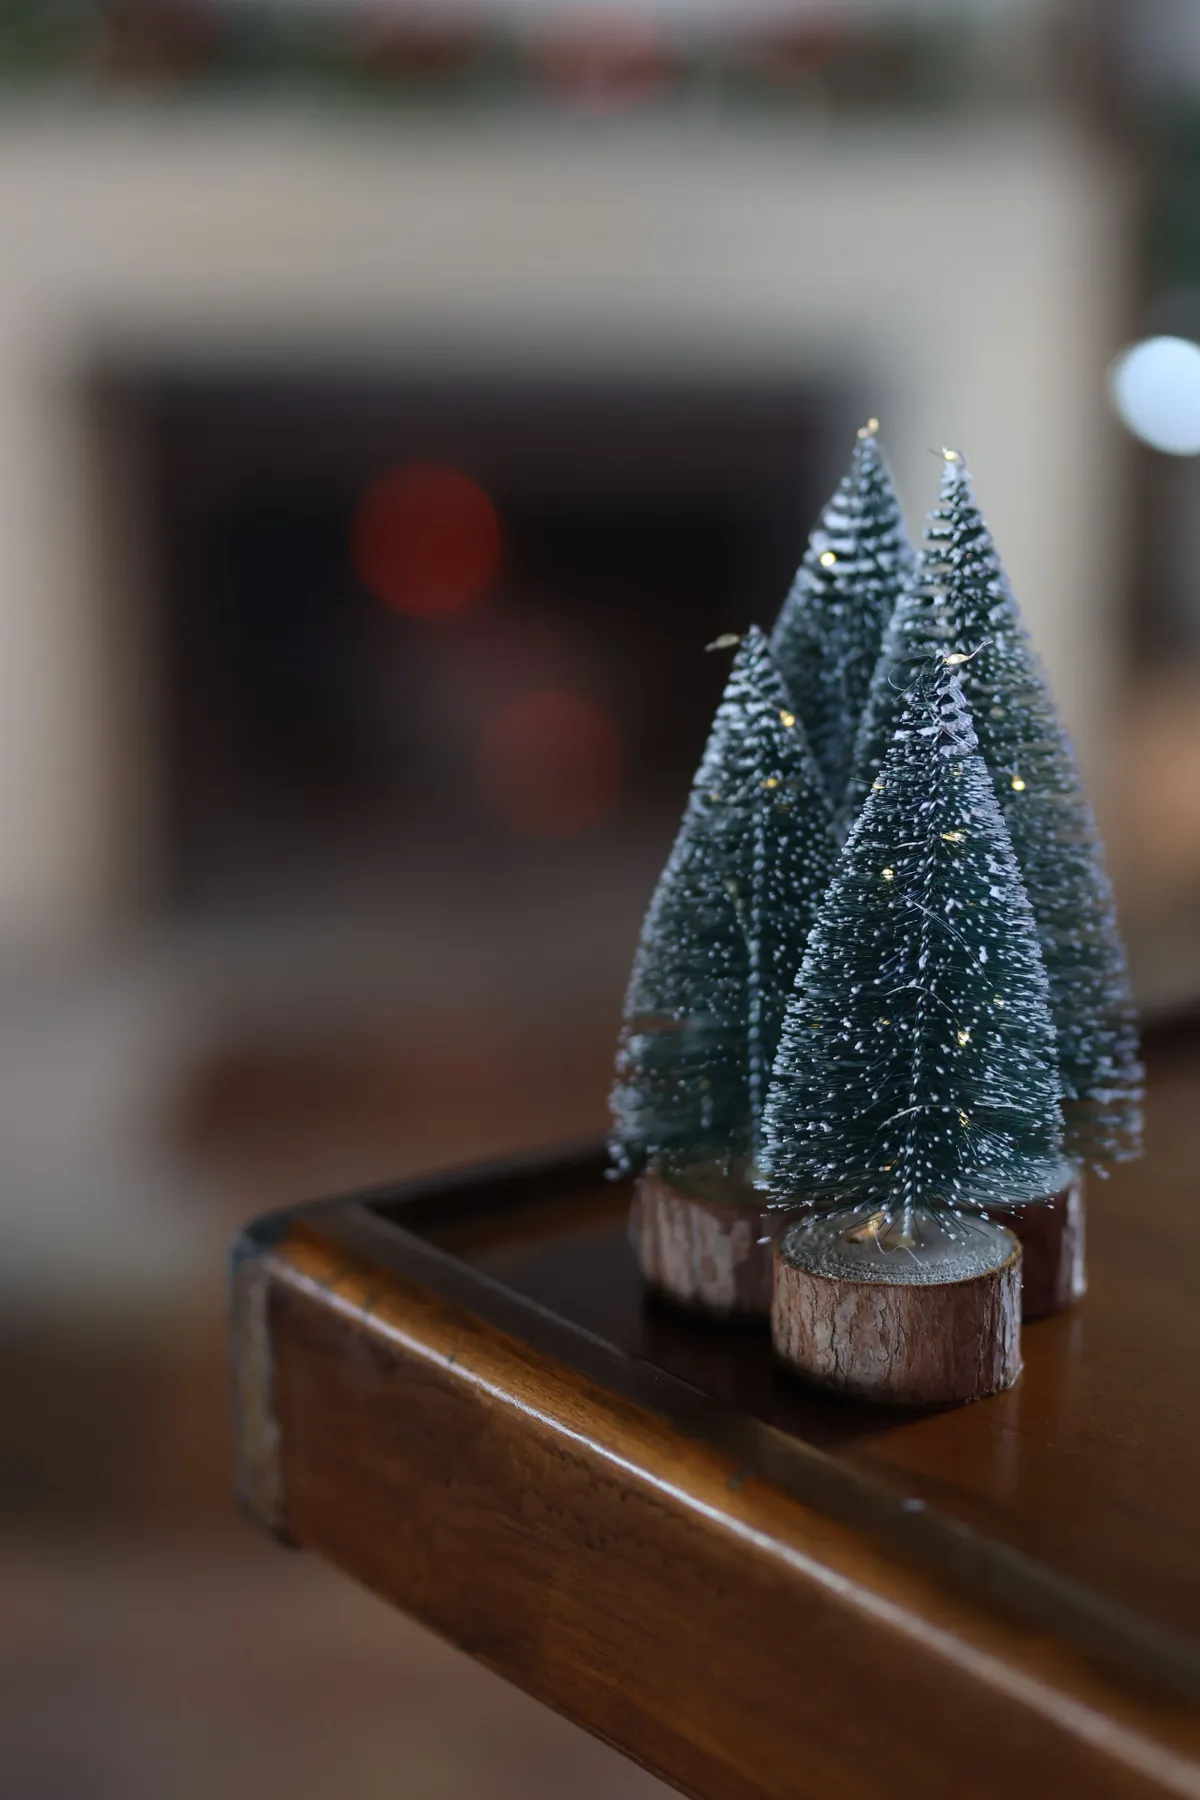
Get close and the trick is obvious: it’s all surface. The snow dusting on the bristles gives you texture at a distance, the amber bulbs give you warmth, and the polished dark wood below does the rest by mirroring both. That reflection is why the trees look like they’re floating in light instead of sitting on furniture. The blurred background isn’t a flaw either — soft focus separates the display from the fireplace behind it, exactly what you want in a small arrangement.
20. A White Ceramic House Among Teal Bottle Brush Trees
50% white — the ceramic house and the plain wall — 40% greens and teals across the bottle brush trees, and 10% gold and silver glitter from the flat cutouts standing behind. That last 10% is the part people skip, and it’s the part that makes the display feel finished. Swap teal for blush and the whole thing goes soft and romantic; swap gold glitter for matte white cutouts and it becomes a Scandi village. The proportions hold either way.
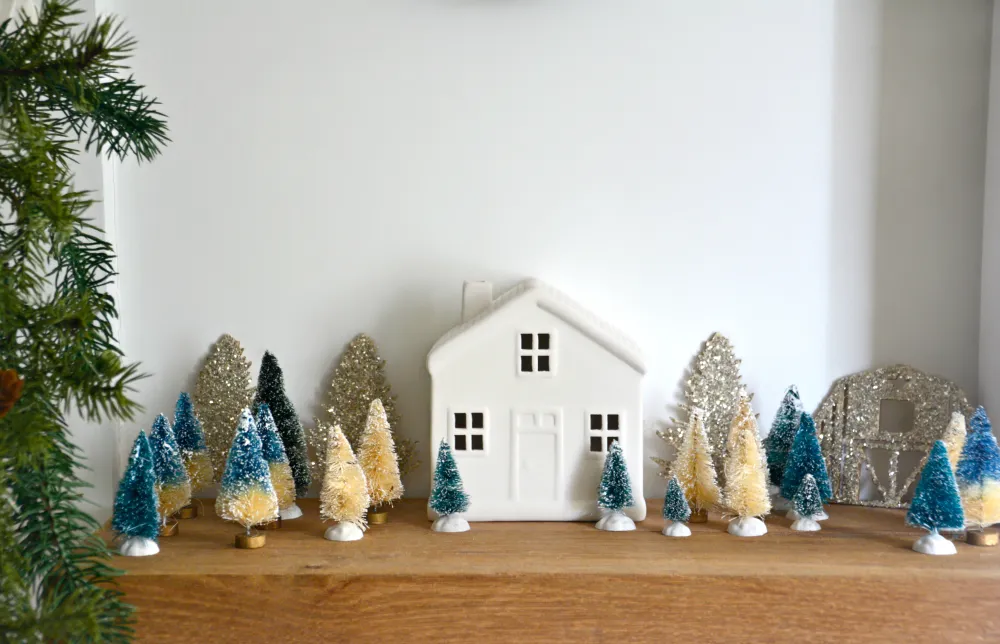
Bottle brush trees run $1.25 to $3 at Dollar Tree and Walmart, and at that price you can buy twelve and still spend less than on one designer version. The ceramic house is the splurge-prone piece — but thrift stores and Facebook Marketplace are full of plain white ceramic houses and churches in December, usually under $8. The flat glitter trees are the easiest DIY here: cut shapes from cardstock, coat with glue, dip in glitter. This whole display can stay under $30.
21. Dried Orange and Cinnamon on Mini Evergreens
- Cut a square of burlap roughly three times the width of the pot.
- Center the pot, pull the fabric up, and gather it just below the rim.
- Tie with red velvet ribbon, leaving 6-inch tails, and trim burlap to an inch above the bow.
- Hot-glue a thin layer of artificial snow over the burlap top.
- Set a single pinecone on the snow and press gently into the glue.
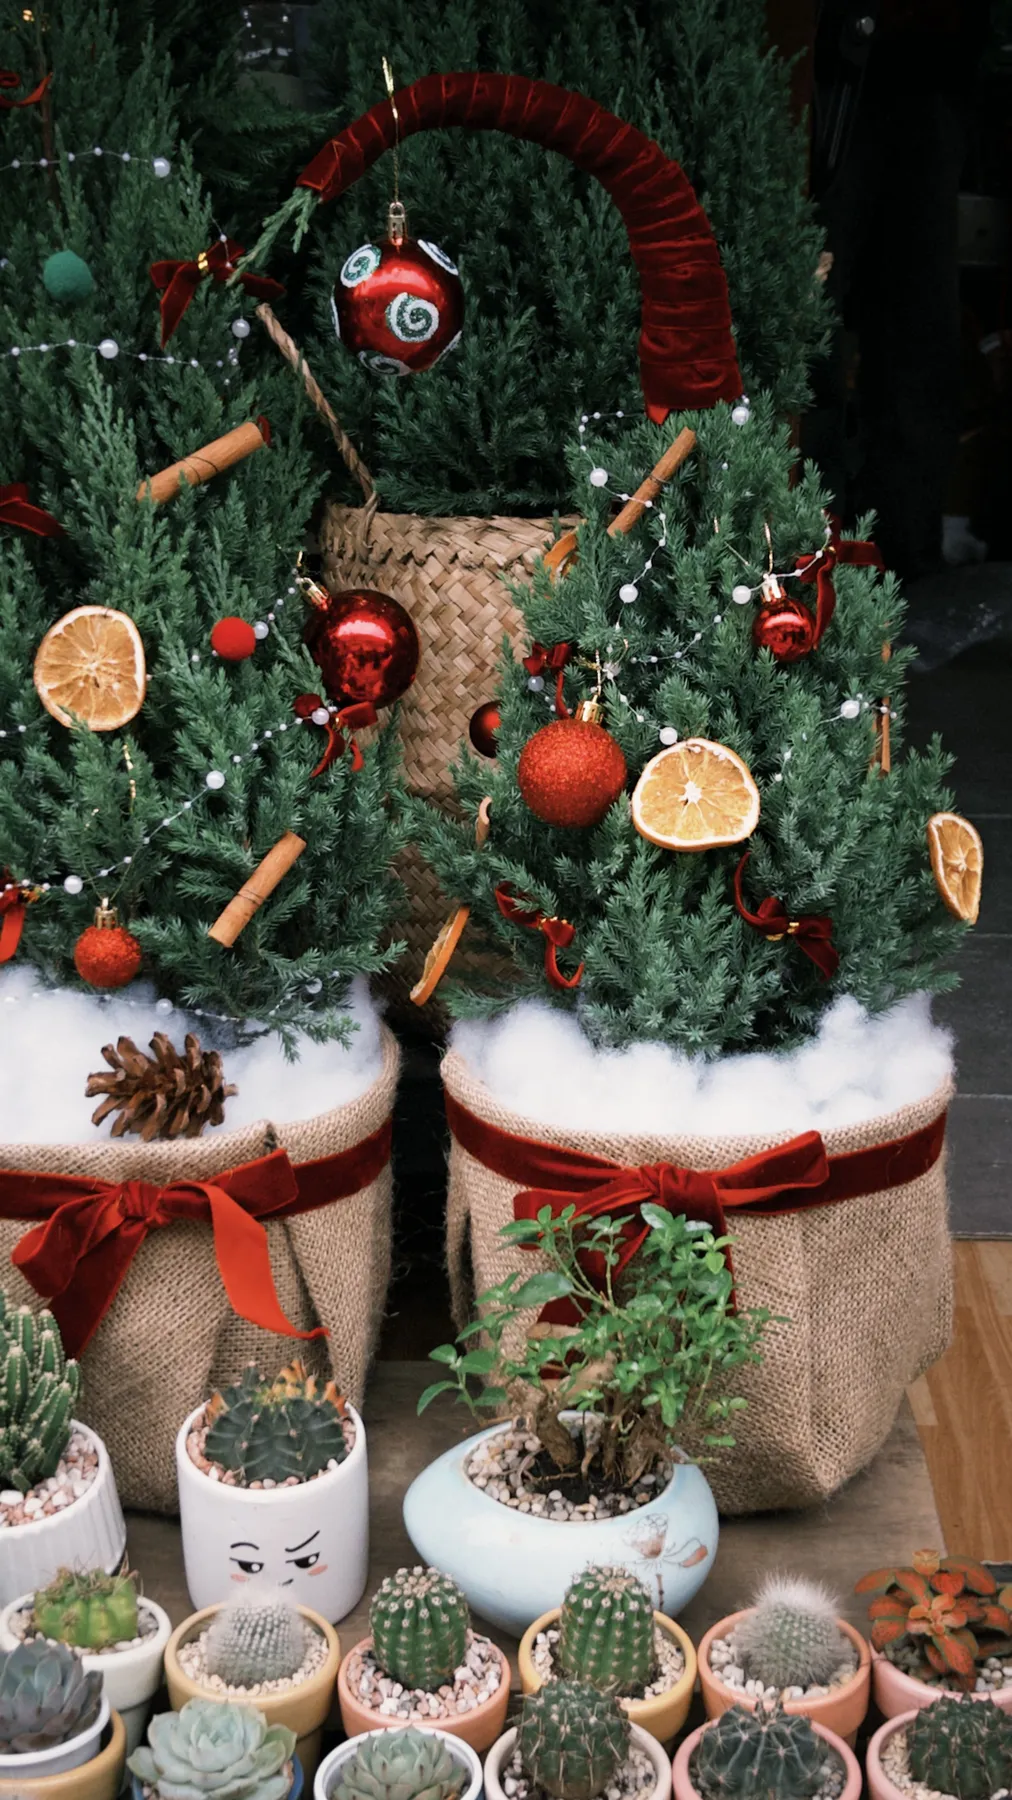
About 20 minutes per tree, roughly $6 in materials if you buy burlap by the yard.
Notice the cacti and succulents in the foreground — that’s not an accident, it’s a cue. Setting a holiday mini next to your everyday plant collection makes it feel like part of the room rather than a seasonal invasion. It’s practical too: plants and small trees want the same light, so the shelf already works. If you don’t own plants, a stack of books and a ceramic bowl nearby does the same job. Style minis with the objects you already live with, not just with other Christmas things.
22. A Trio of Minis Raised on a Wood Log Stand
Three trees need about 5 feet of shelf or mantel to breathe, spaced roughly 10 to 14 inches apart. Height them at 12, 15, and 18 inches so the eye rises left to right — a flat trio reads as a store display. The wood log riser under the tallest tree adds 3 to 4 inches, which is exactly enough to break the baseline without making the group top-heavy. On a narrower 3-foot shelf, drop to two trees and keep the riser; on a wide 6-foot mantel, add a fourth and push it slightly behind the others.
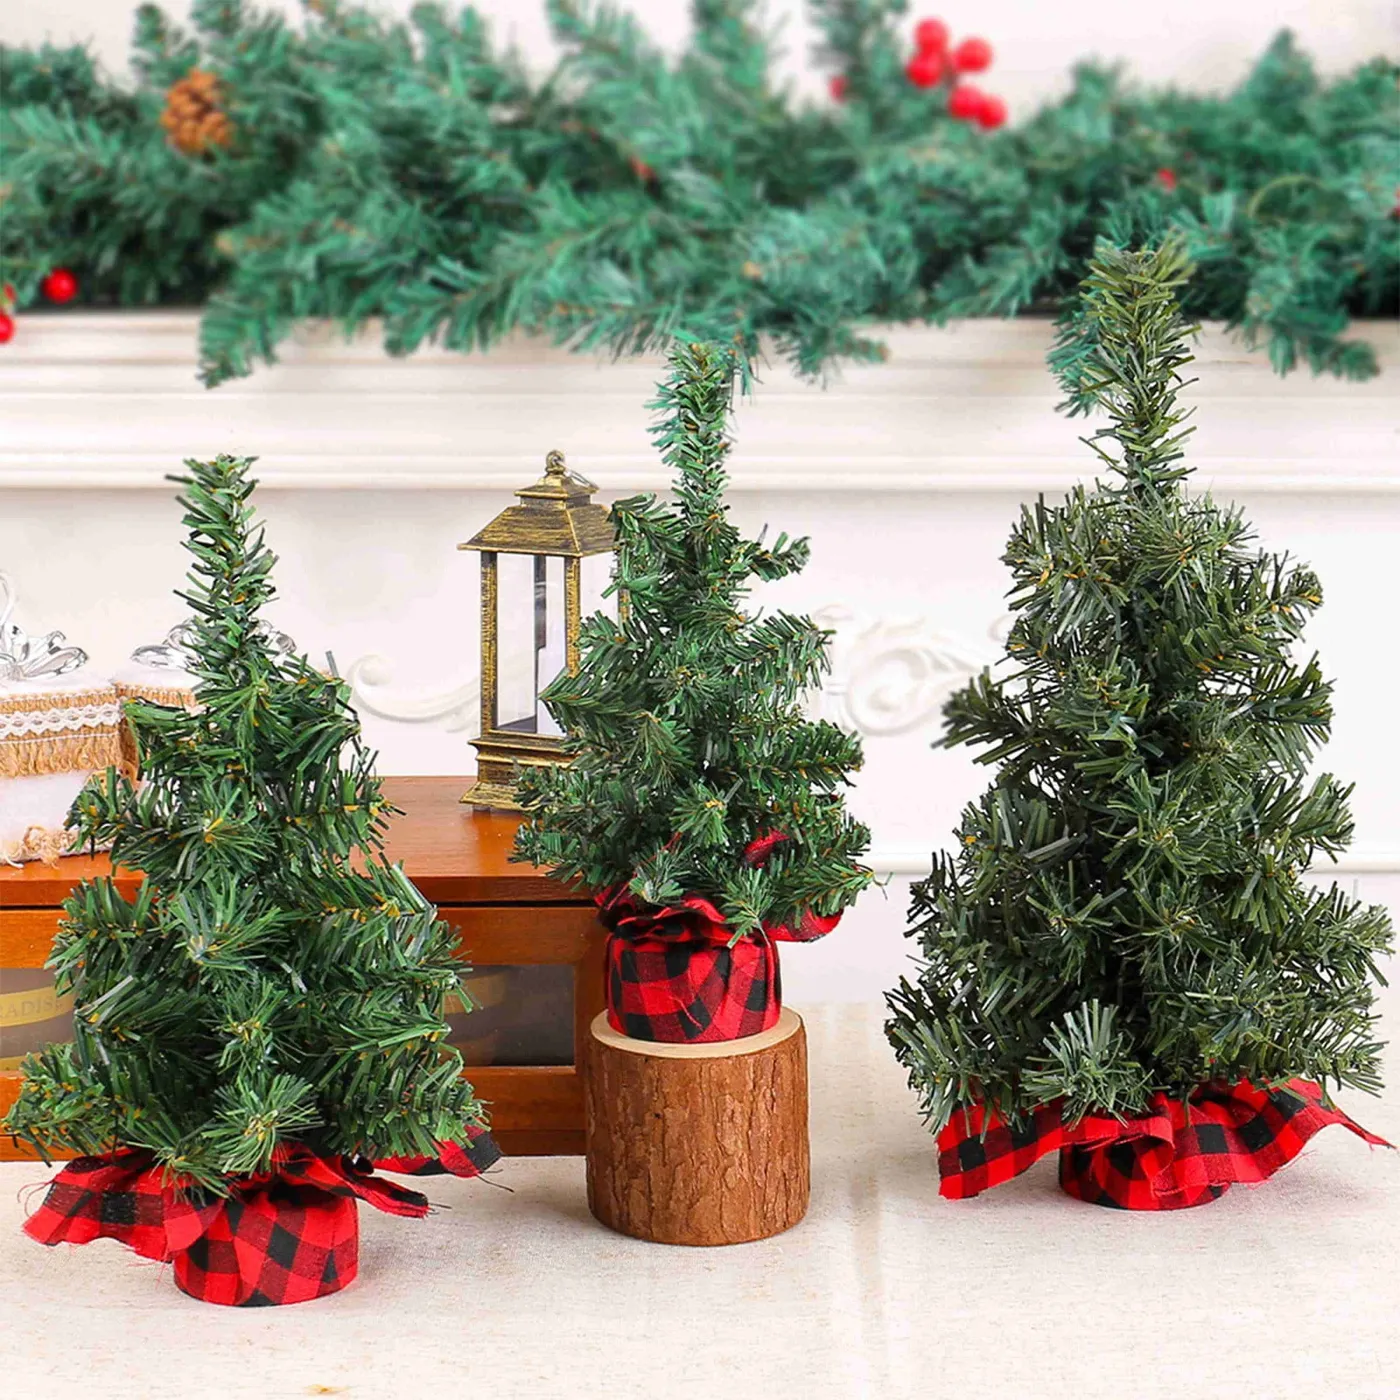
The wood log riser is the one thing. Three mini trees in buffalo plaid bases would already be a decent mantel arrangement, but lifting the tallest one on a natural log stand creates a second level — and second levels are what separate styled from placed. It also gives the green garland with red berries behind the group something to sit above and below. Remove the riser and the trio flattens into a row. One cheap piece of wood, and the whole thing gains depth.
23. Countdown Blocks Meet a Tiny Village Scene
Countdown decor is the sleeper trend of the mid-2020s. Advent calendars stopped being chocolate and became display pieces — wooden blocks, fabric pockets, little shelves you actually want on the mantel. The appeal is that they earn their space: unlike a decorative figurine, a countdown does something every day. Combine it with a miniature village and you get nostalgia and function in the same 12 inches of shelf. Retailers noticed. Anything kids can touch daily tends not to go out of style.
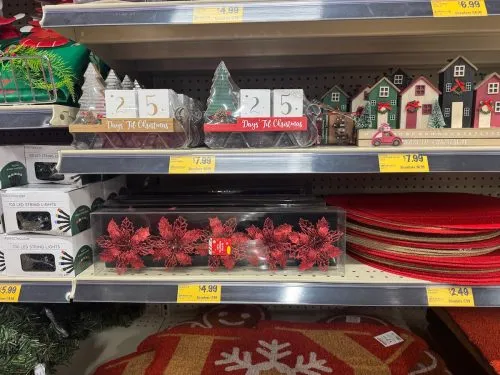
- Clear a shelf at kid height, or at least where the blocks won’t get swept off.
- Set the countdown block at one end, angled about 20 degrees toward the room.
- Build a village cluster beside it using three to five houses in green, red, and grey with white roofs.
- Tuck tiny wreaths on the doors and scatter a red glitter poinsettia pick behind the houses.
- Lay stacked red-and-gold round placemats underneath as a soft base and set a small red car in front.
Under an hour, mostly rearranging. The paper version in Idea #5 works if you’d rather build than buy.
24. Berry and Gold Gift Minis on a Window Ledge
Window ledges are backlit, which means most ornaments vanish into silhouette. Beat it with finish, not size: choose ornaments with a metallic or glossy surface — the gold gift-shaped baubles and red berry clusters here do the work — and skip anything matte. Place the tree 4 to 6 inches in from the glass so the light rims it instead of blowing it out. And check the direction: a south or west window will bleach needles and fade fabric within a season. A north or east ledge stays safe and gives you that soft glow all day.
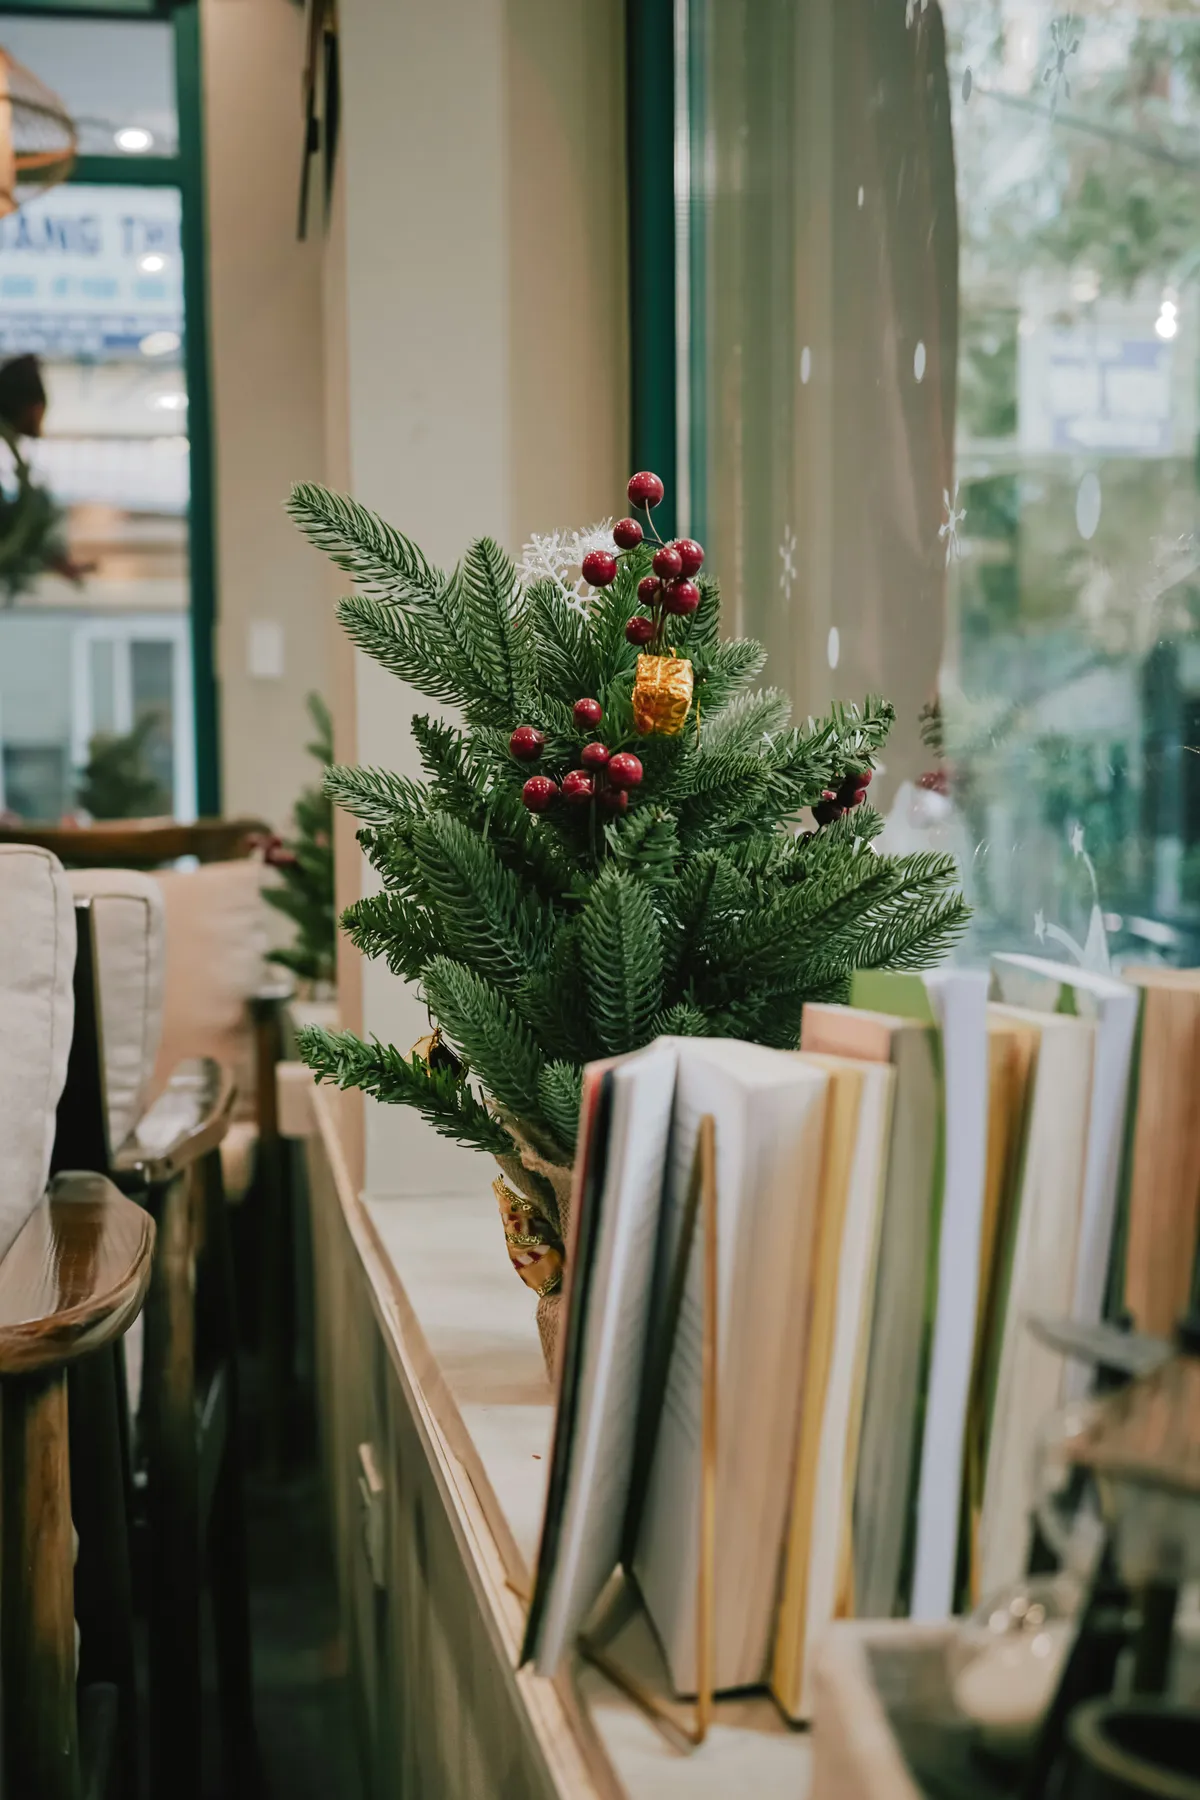
The whole vignette is a light study. The window behind creates a bright backdrop, so the dark green tree and red berries register as silhouettes with color — high contrast, almost graphic. The snowflake decals on the glass add a second layer without adding an object, which keeps the sill from getting crowded. And the burlap base plus the stack of books is what stops it floating. Books on a window ledge are an old trick: they give a small seasonal object an everyday reason to be there.
25. Sunlit Mini Tree With Pinecones and Red Baubles
Sparse mini trees are the hardest ones to decorate, and most people get it wrong by using tiny ornaments. A sparse tree needs bigger pieces — 2-to-3-inch baubles and full-size pinecones — because the gaps between branches are already doing work. Fill those gaps with small stuff and the tree looks like it’s losing a fight. Natural light is beautiful and unforgiving too: this shot works because the shadows fall away from the camera. Move the same tree 6 inches and it looks flat. Test your placement in the morning and again at 4 p.m. before committing.
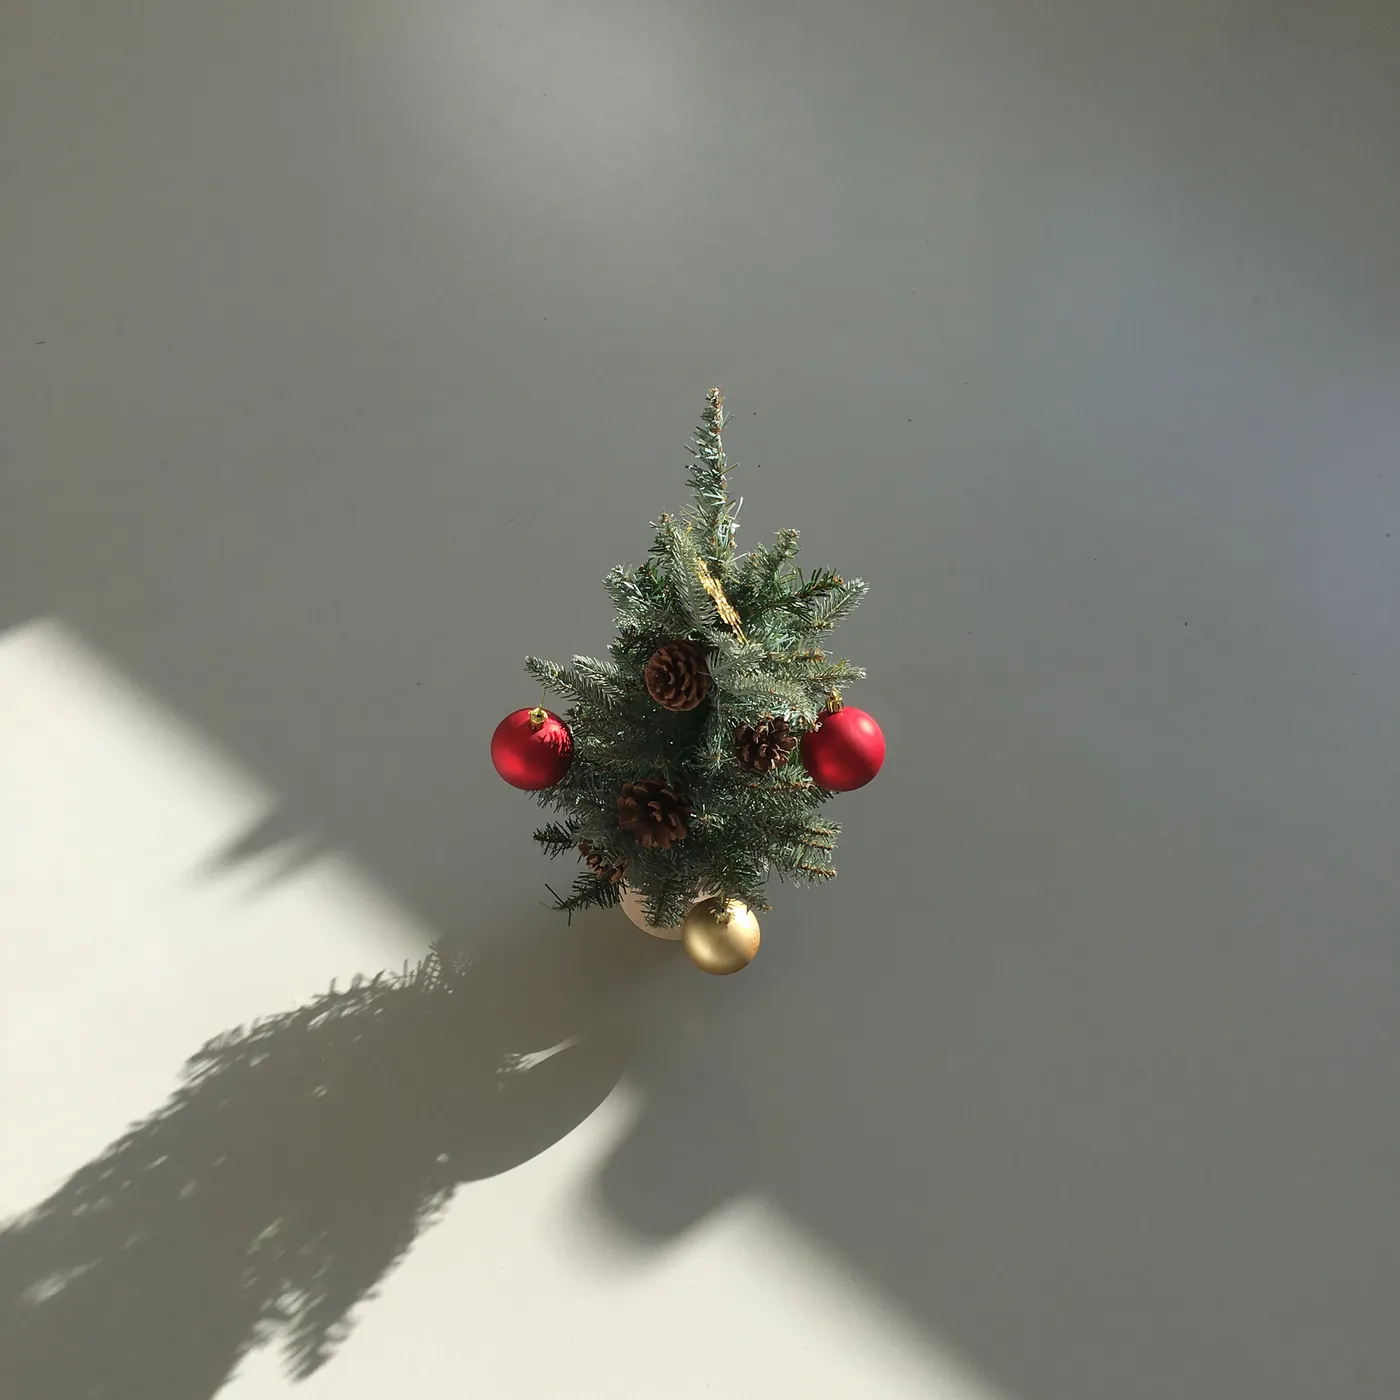
60% light grey and pale surface, 30% green from the tree, 10% red and gold combined. The pinecones count toward the 30% — they’re brown, but they read as part of the natural, muted side of the palette rather than a separate color. Swap the grey surface for dark walnut and the same tree goes dramatically moodier. Swap the red baubles for all gold and it goes quiet and elegant.
26. A Pink Mini Tree Against a Rose Wall
Pink trees are marked up everywhere, but a white Dollar Tree mini plus two cans of blush spray paint gets you the same thing for about $8. Spray outdoors in thin coats and let each one tack up before the next, or the branches stay sticky. The gold baubles and snowflake topper are standard ornament-aisle finds, and that plush skirt at the base is a $6 throw blanket from Walmart bunched around the pot. The whole vanity setup can come in under $25. The rose wall behind it is the real investment — peel-and-stick panels on Etsy start around $40.
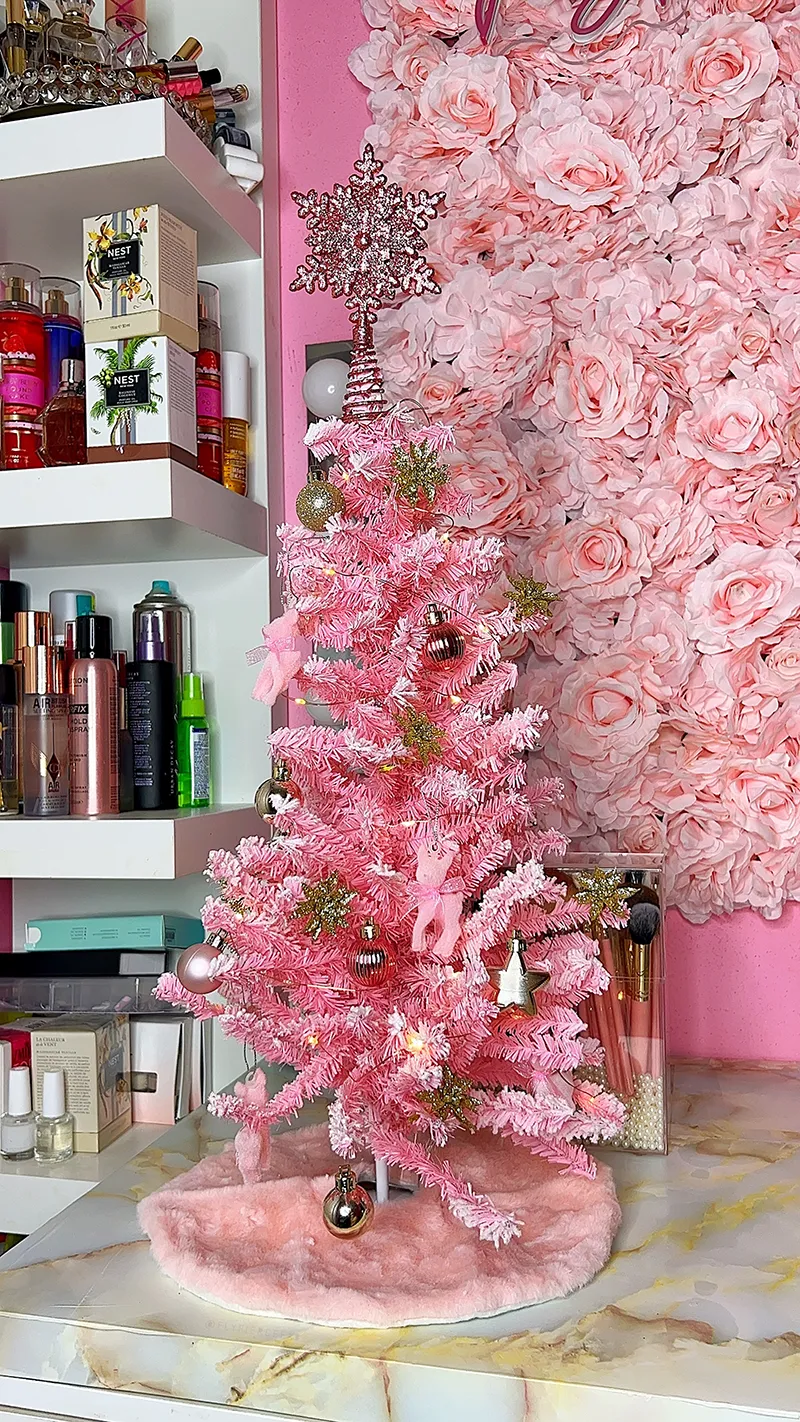
Faux fur and beauty products are a bad combination long-term. Hairspray, powder, and serum residue drift, and faux fur holds onto all of it — a lint roller weekly is genuinely necessary, and a gentle hand wash every couple of months keeps it from going grey. The rose wall is the other project: fabric petals collect dust and hold humidity, so plan on compressed air monthly in a damp room. The pink tree itself is easy — painted needles just need a soft brush and a bag in storage.
27. A Textured Tiered Tree With a Frosted Finish
The shape is the one thing. This isn’t a cone with branches — it’s a stack of rounded tiers on a rough, frosted surface, closer to a topiary than a Christmas tree. That single decision means it needs zero ornaments. No lights, no baubles, no topper; the texture and the tiered silhouette carry it. Remove the tiering and you’re left with an ordinary dark green tabletop tree that would look bare and unfinished. This one looks finished while empty, which is the whole point of buying it.
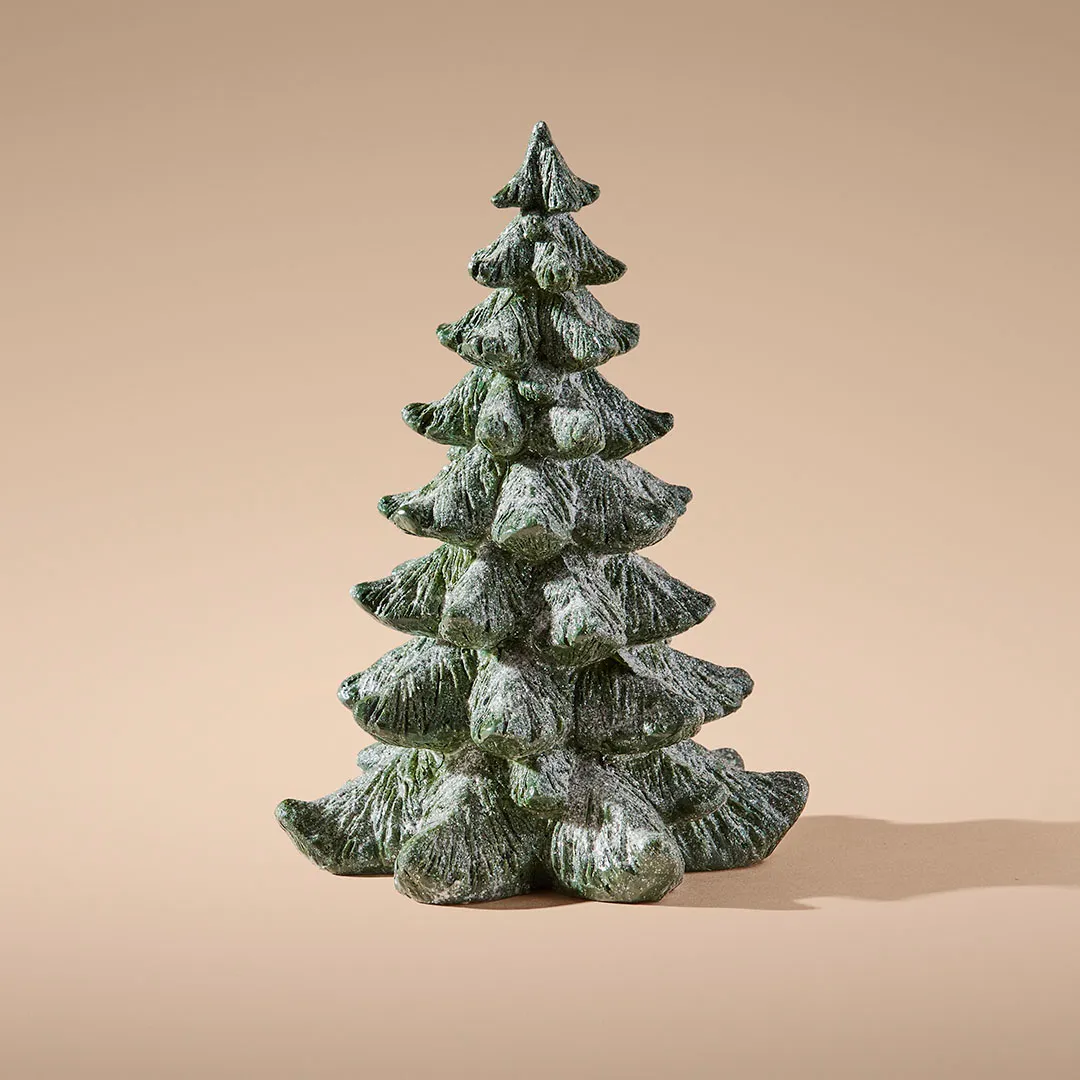
- Textured tiered tree (12–18 inches): $15–$45
- Or DIY: cone form plus faux moss or textured fabric: $8–$20
- Dark base or tray to ground it: $4–$12
- Single warm spotlight or uplight: $10–$25
- Total: roughly $19–$82
Budget alternative: a Dollar Tree foam cone wrapped in nubby cream knit cut from a thrifted sweater, misted with a light coat of white spray paint for the frost — around $5.
28. A Flocked Pair on a Tiered White Display
Tiered stands work best at 10 to 12 inches in diameter; wider and the top tier swallows the smaller tree. Put the taller flocked tree on the top tier and the shorter one below, with at least 3 inches of height difference so the pair reads as a pair and not a mistake. The whole setup needs about 18 inches of depth on a console or dresser. If your surface is only 10 inches deep, use a flat tray instead and set the two trees side by side with a 4-inch gap. It’s the same buffalo plaid language as Idea #6, just doubled and lifted.
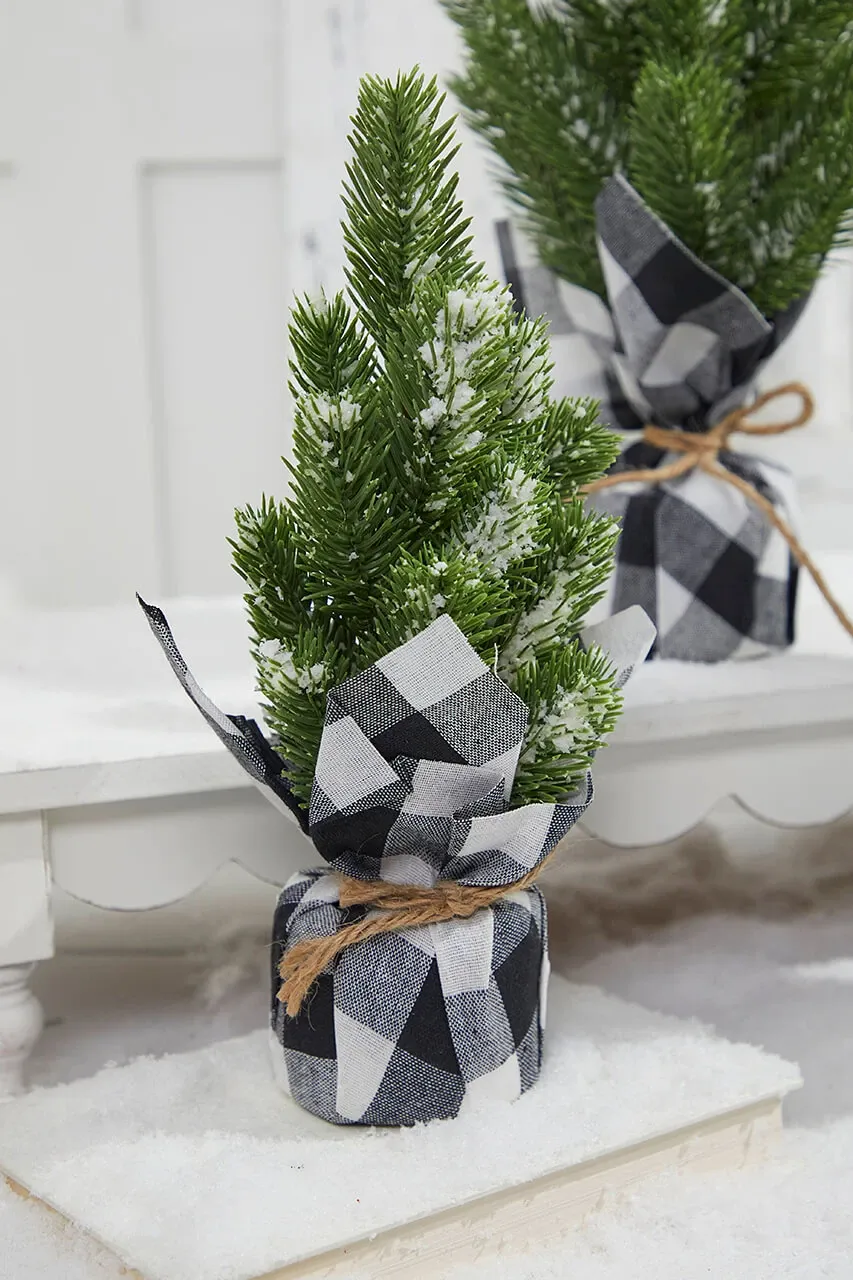
Flock sheds, so treat the display surface as part of the design. A white tiered stand hides the dust; a dark wood one shows every speck within a day. Set the faux snow down first and press the bases into it — that seals the bottom edge so nothing slides and the snow looks like it accumulated rather than got sprinkled on top. For the twine bow, tie it low, right at the pot’s rim, and trim the tails on a diagonal. A long, straight cut makes an elegant tree look like a package.
29. Colorful Baubles in a Distressed Green Crate
Two honest notes about the vintage-crate look. First, chippy paint on genuinely old furniture can contain lead, especially anything made before 1978 — if this sits at floor level near kids or pets, seal it or use a reproduction. Second, sparsely branched trees with beaded garlands need steady hands: the garland sags and the beads slide, so wrap it in a spiral and anchor every few inches with a tiny wire loop. And distressed finishes show dust in the cracks. A soft brush once a month keeps it looking intentional instead of neglected.
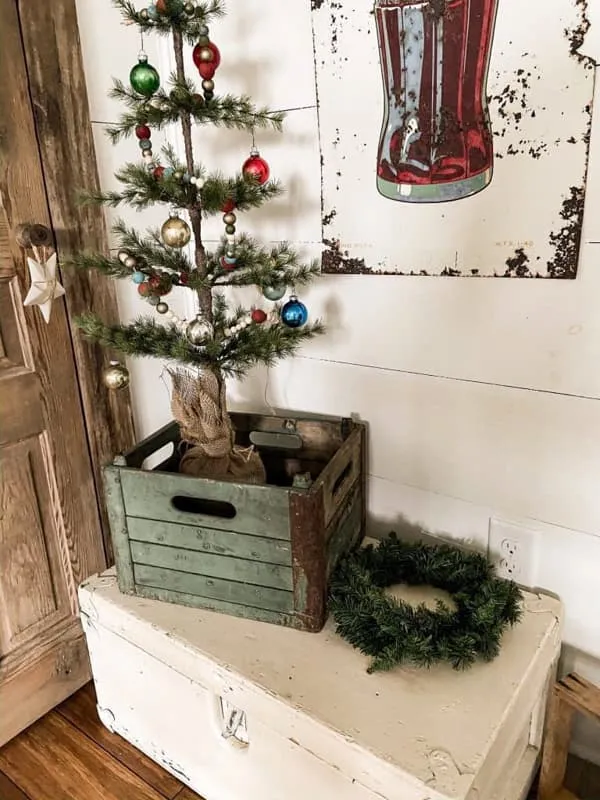
A distressed green crate at an antique store runs $35 to $80. A Dollar Tree wooden crate plus one can of sage-green spray paint and ten minutes with sandpaper comes in under $8 and looks nearly identical at a glance. The chippy white surface underneath can be a thrifted side table painted and sanded at the edges, or a stack of old books under a white cloth. The faux wreath and the metal wall sign are both dollar-aisle finds. Sparse trees like this one are also the cheapest to buy, since nobody wants them.
30. Blush and White Elegance Beside a White Brick Fireplace
- Measure the wall and mantel — a tree this full needs at least 24 inches of clearance from the firebox.
- Check the fireplace screen situation. A decorative screen covers the opening, so plan for that before styling the hearth.
- Confirm outlet access for the fairy lights; a battery pack tucked under the gifts works if the nearest outlet is across the room.
- Decide where the white-wrapped gifts go before buying ribbon — they’re doing structural work, not just decoration.
- Set a floral budget. White and blush floral clusters are the single most expensive element in this scene.
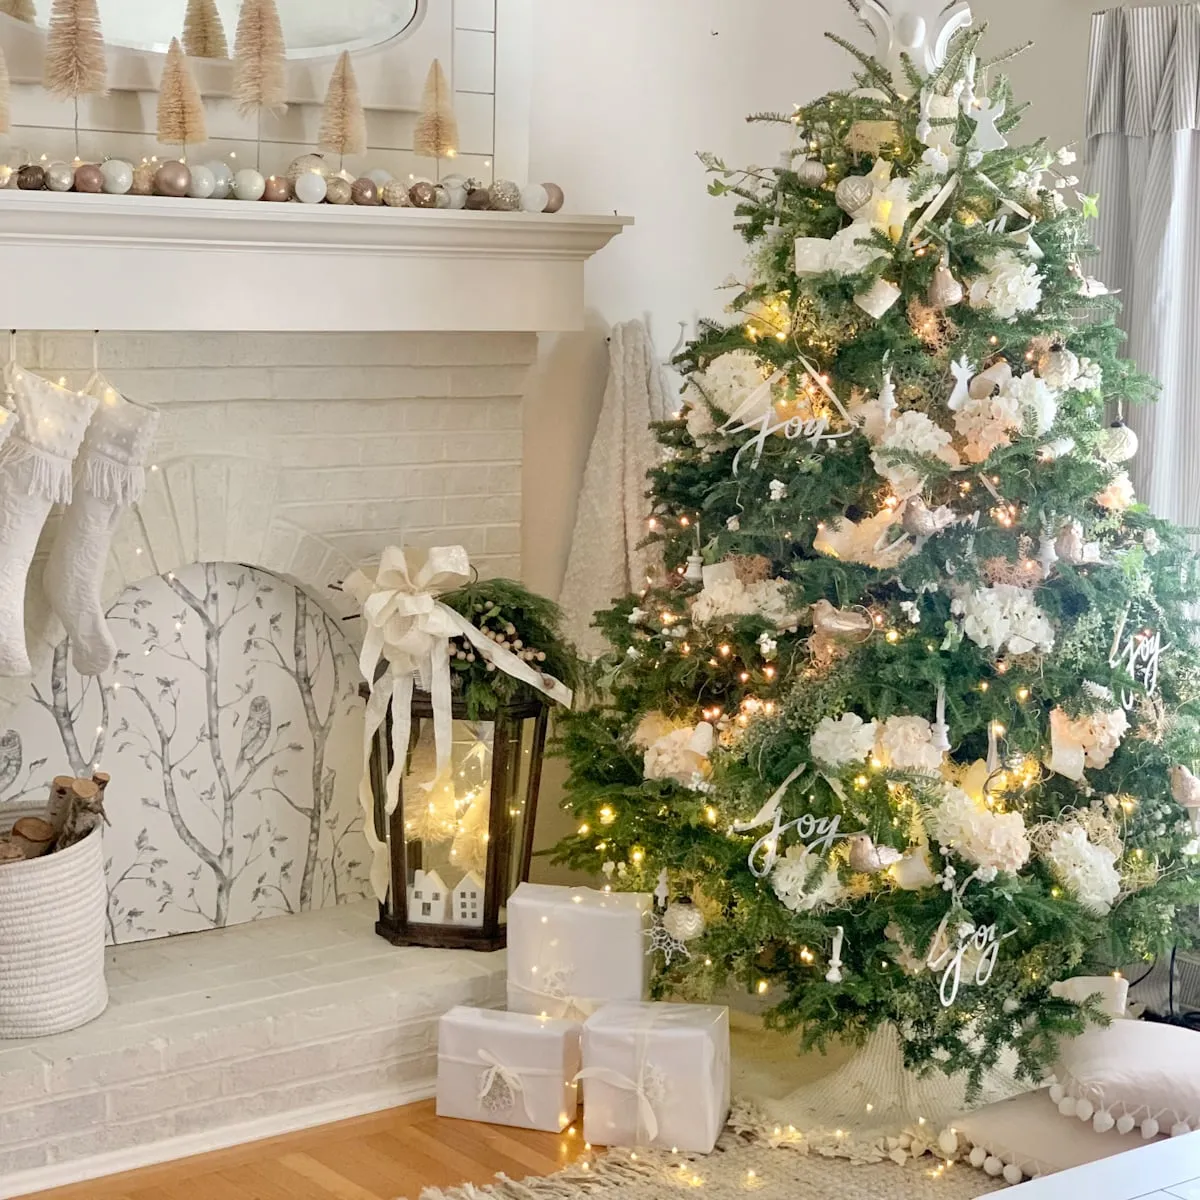
The color temperature is doing the work. Warm firelight against white and blush with dark green foliage and soft gold lights is a classic warm-cool pairing — the cool whites stop the fire from making everything look orange, and the fire stops the whites from looking clinical. Repetition matters too: blush bottle brush trees on the mantel, blush florals in the tree, pastel ornaments, then a rustic lantern holding miniature white houses at the hearth. Same idea, three times, three scales. That’s what makes a large display read as one thought.
31. Glass Tree With Hand-Painted Gold Branches
Clear glass disappears against a light wall. Set it on a dark wood slice — the matte brown edge gives the transparent form a boundary — and place a fairy light strand 6 to 8 inches behind it, slightly off-axis. The glass catches the light and throws tiny specular highlights, which is why this reads as expensive. If your surface is white or pale, add a dark tray underneath. And resist the urge to light the tree itself; backlighting is what makes glass work. Front light just makes it look like plastic.
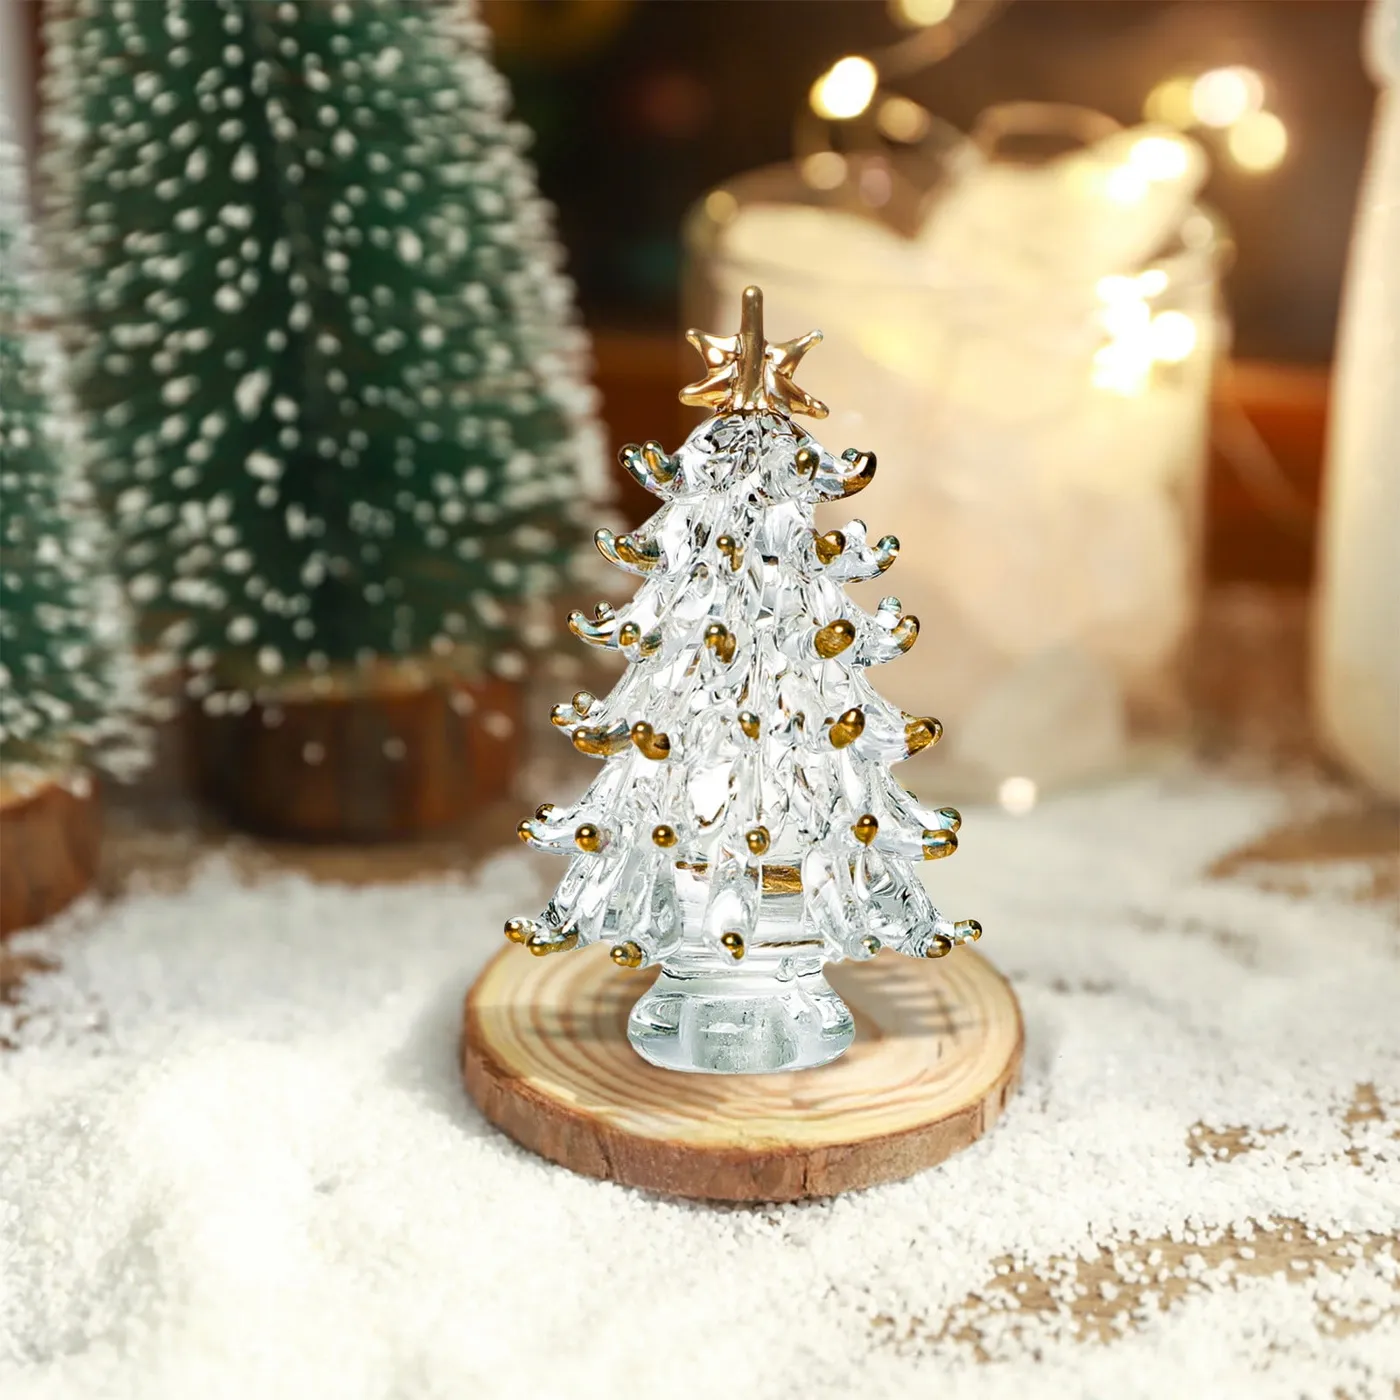
The gold painted accents on the branches are the one thing. A clear glass tree by itself is elegant but anonymous — you’ve seen a dozen. Hand-painted gold along the arms turns it into a specific object with a maker’s hand in it, and it matches the star topper instead of fighting it. It’s also the difference between a mass-produced figurine and something that reads like a small sculpture. Everything else here — the wood slice, the snow, the frosted minis blurred behind — is supporting that gold line.
32. A Conical Topiary in a Classical Urn
This works in an entry nook or beside a column where you’ve got at least 5 feet of height and a 20-inch-wide footprint. The light grey urn looks best at roughly 12 to 14 inches tall with a 10-inch opening, and the conical tree inside should top out around 30 to 36 inches — that puts the whole arrangement near 48 inches, the sweet spot for viewing from a doorway. In a low-ceilinged hall under 8 feet, drop the tree to 24 inches so the arrangement stays under 40.
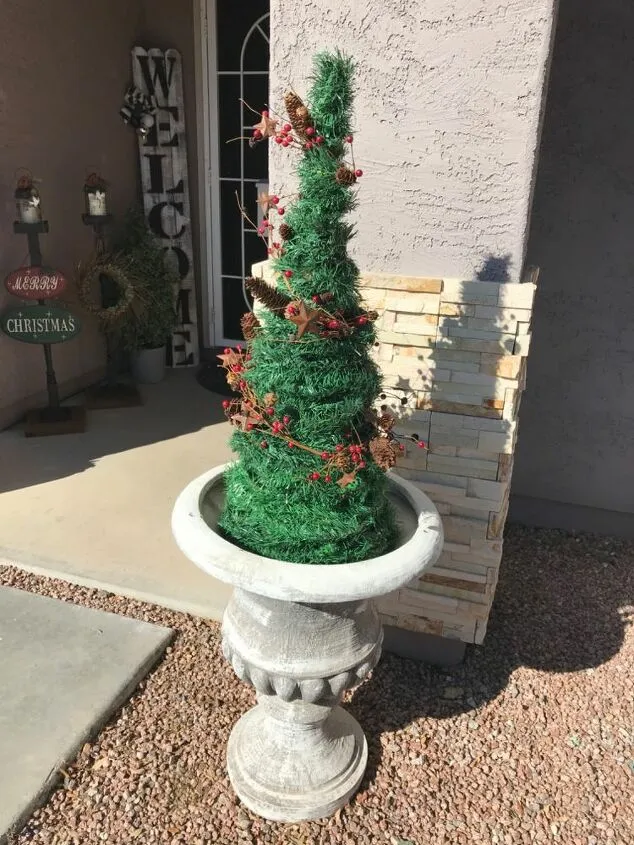
Two practical realities with an urn display. First, weight: an empty urn plus a 3-foot tree is a tipping hazard anywhere with foot traffic, so line the bottom with a bag of sand or gravel before you set the tree. Second, exposure — if this sits near an exterior door, wind and door swing will knock it over, and artificial berries fade fast in direct sun. Rotate the arrangement every few weeks so one side doesn’t bleach. And keep the garland off the floor; berries snag on shoes and pull the whole strand down.
33. Mini Tree Meets a Hot Cocoa Bar Station
- Lay a green, red, and white patterned runner across the surface first — it sets the boundary for the whole station.
- Set the mini tree at one end in a burlap-wrapped base, angled toward the center.
- Place a glass jar of cocoa mix at the opposite end so your hands have a reason to move across the table.
- Put the marshmallows in a star-shaped glass bowl in the middle, slightly forward.
- Frame the sign and lean it against the wall behind the jar, then scatter metallic-tipped pinecones between the pieces.
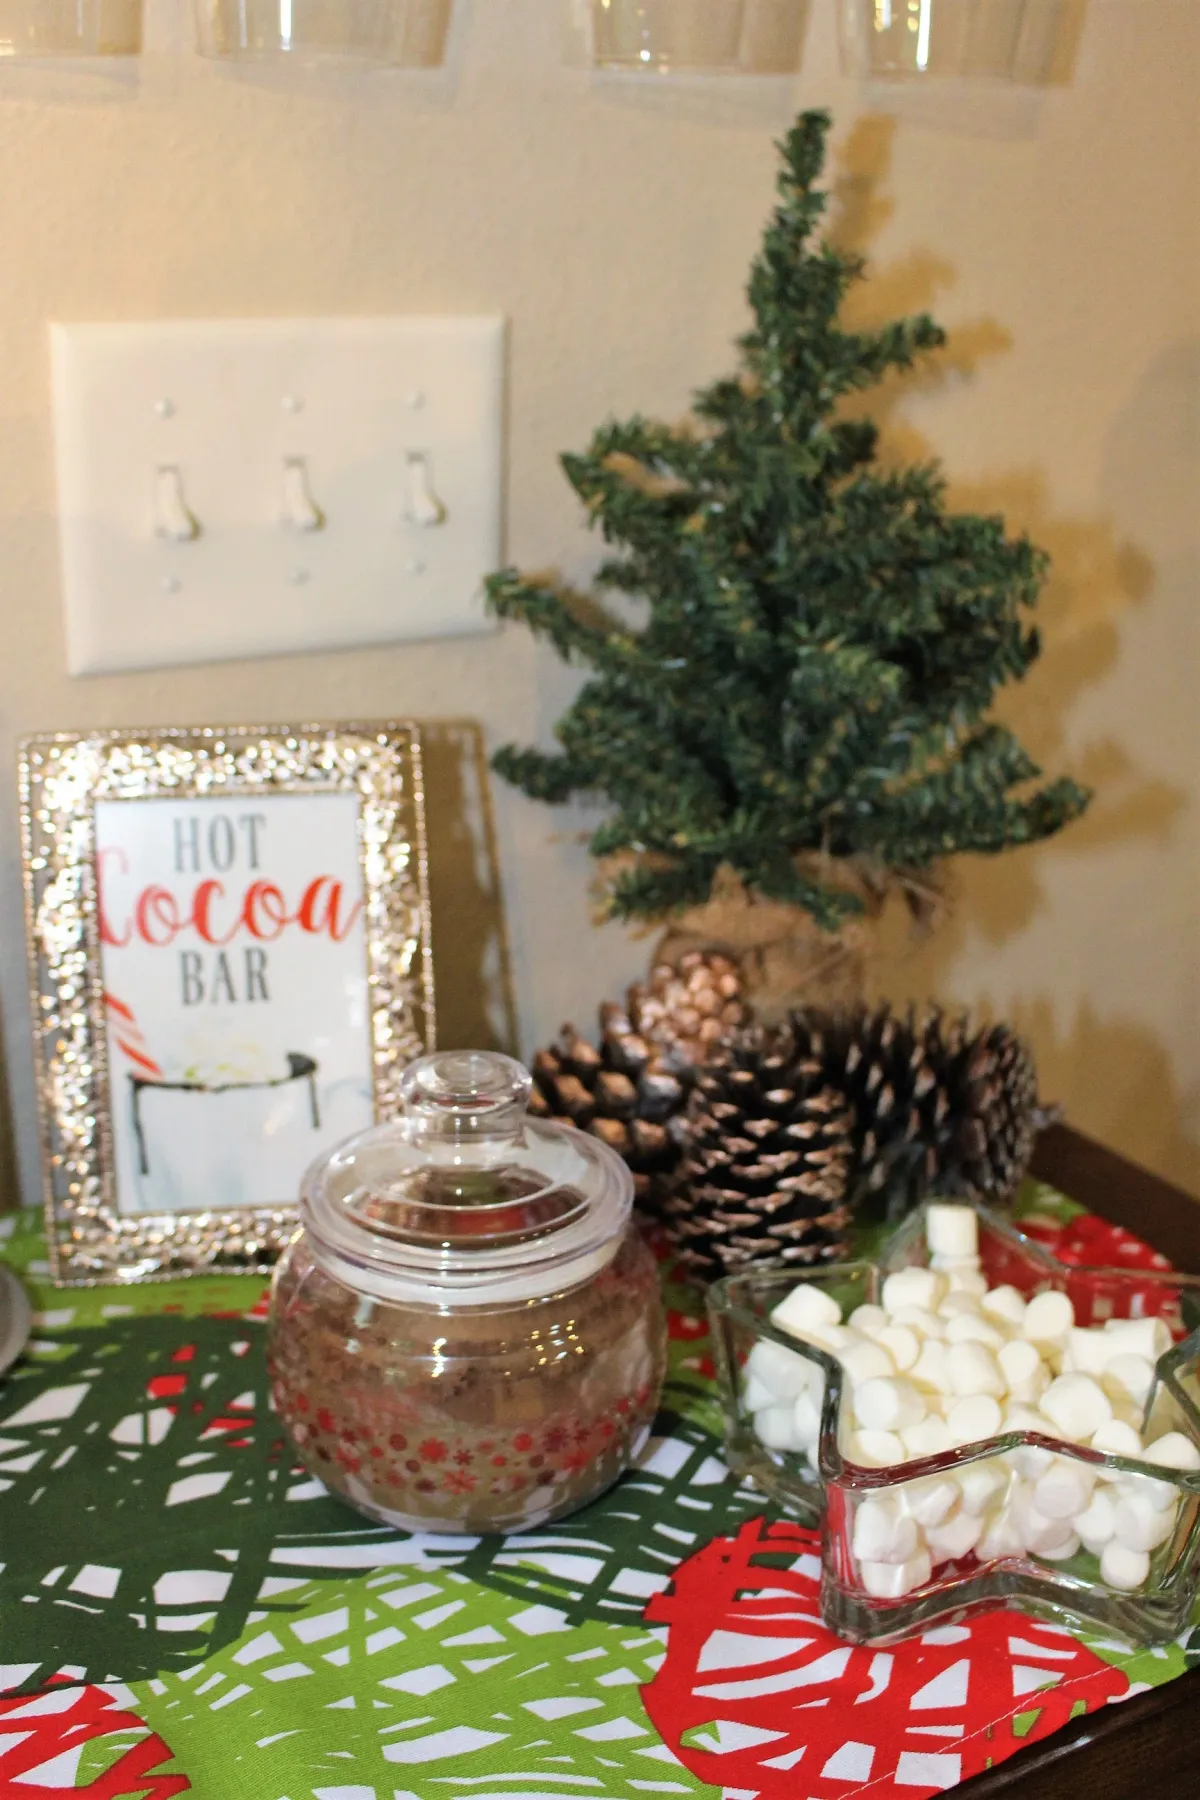
Twenty minutes, about $15 with dollar-aisle supplies.
Hot cocoa bars replaced the dessert table because they’re cheaper, self-serve, and photograph the same. In 2026 they’re a standard December-party setup, and adding a mini tree turns a drink station into a scene. The logic holds for anything you host: pick the functional thing people actually use, then style around it. That’s why this combination keeps working — the sign explains it, the cocoa does the work, and the tree helps it look like somebody cared.
Thirty-Three Tiny Trees, One Very Merry Shelf
None of this requires a big budget or a big room — just one small tree, a couple of deliberate choices, and the willingness to move something 3 inches to the left. Start with whichever idea matches a surface you already own, and let the rest of the display grow from there.
📌 Pin this guide to your Christmas board now — when December gets busy, you’ll be glad you saved it.