34 Jaw-Dropping Colored Christmas Lights Ideas for Your House in 2026 That Will Turn Heads

You know the feeling — three hours into a Pinterest scroll, phone at 12%, and every house with colored Christmas lights either looks impossibly expensive or like a grocery aisle exploded. Somewhere between those two is the display you actually want.
We spent serious time browsing Home Depot, Walmart, and Amazon so you don’t have to — the options here run from about $14 to $600.
Inside you’ll find 34 curated ideas, spanning warm white roofline outlining, classic multicolor C9 strings, RGB floodlight color washes, and app-controlled gradient LED strips. Budget and luxury versions sit side by side, and every idea has direct product links.
2026 is the year color-changing LEDs got genuinely affordable — the same tech that turned gradient lighting into a personality is now rewriting holiday exteriors.
Go ahead and save this one — you’re going to want to reference it. This post contains affiliate links; we may earn a small commission at no extra cost to you.
1. Warm White Architecture, Multicolor Garden: The Two-Zone Split
Two light colors, two jobs. The warm white strings stay on the hard architecture — rooflines, gables, balcony rails — where a single steady color reads as intentional structure. The multicolor strands go on organic shapes: trees, shrubs, anything that grows and shifts. That split is why this display reads as designed rather than dumped. Light the building in one voice and the landscape in another, and the eye always knows where to land.
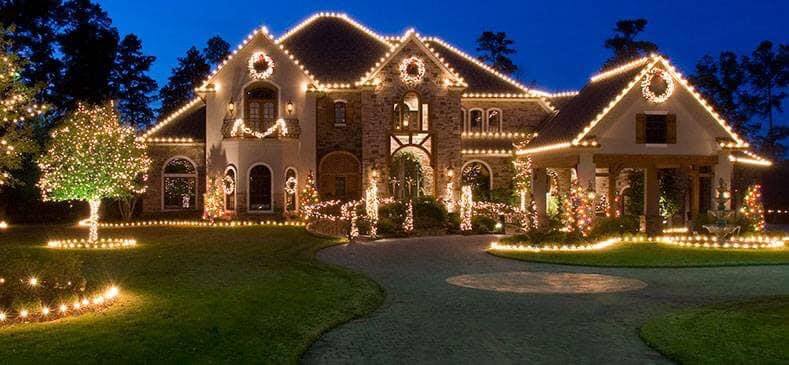
- Warm white roofline strings, 300 ft commercial grade: $90–$180
- Multicolor tree and shrub strands, 10–12 sets: $60–$140
- Lit wreaths, 3–4: $60–$200
- Extension cords, timers, clips, ground stakes: $45–$90
- Pathway border lights: $40–$110
Total: $295–$720
Budget alternative: buy C9 warm white in 100-ft spools and multicolor mini-lights at a big-box store in early November, and skip the wreaths in year one — you’ll land near $180.
2. Warm White Tracing Every Gable — and the Window Frames Nobody Bothers With
Clip spacing is what separates a crisp outline from a droopy mess. Use gutter clips every 12 to 18 inches, and pull the strand slightly taut as you go so each span has a shallow, even catenary — never a deep sag. Then run a single continuous strand around every window frame on the front facade at the same distance from the trim, about an inch off the casing. Uniform offset is what makes the whole house look drawn rather than draped.
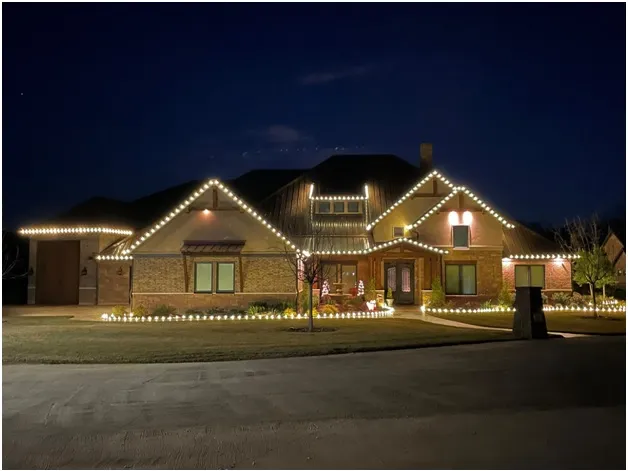
This look needs a facade with real geometry — roughly 45 to 90 linear feet of roofline, at least two gables, and two stories, or the outlining turns into one lonely line. On a one-story ranch, Idea #15 and Idea #25 read better because the color does the work instead of the architecture. Count your linear feet before you buy.
3. One Green Gable in a Sea of Red Floodlight
The green gable above the front door is doing more work than every red floodlight on the house. It’s the exception — one deliberate break in an otherwise monochrome wash, placed exactly at the entry so your eye travels straight to the door. Remove it and the red becomes flat and endless. If you copy one move from this display, copy the accent: pick your entry gable, light only it in the contrast color, and leave everything else alone.
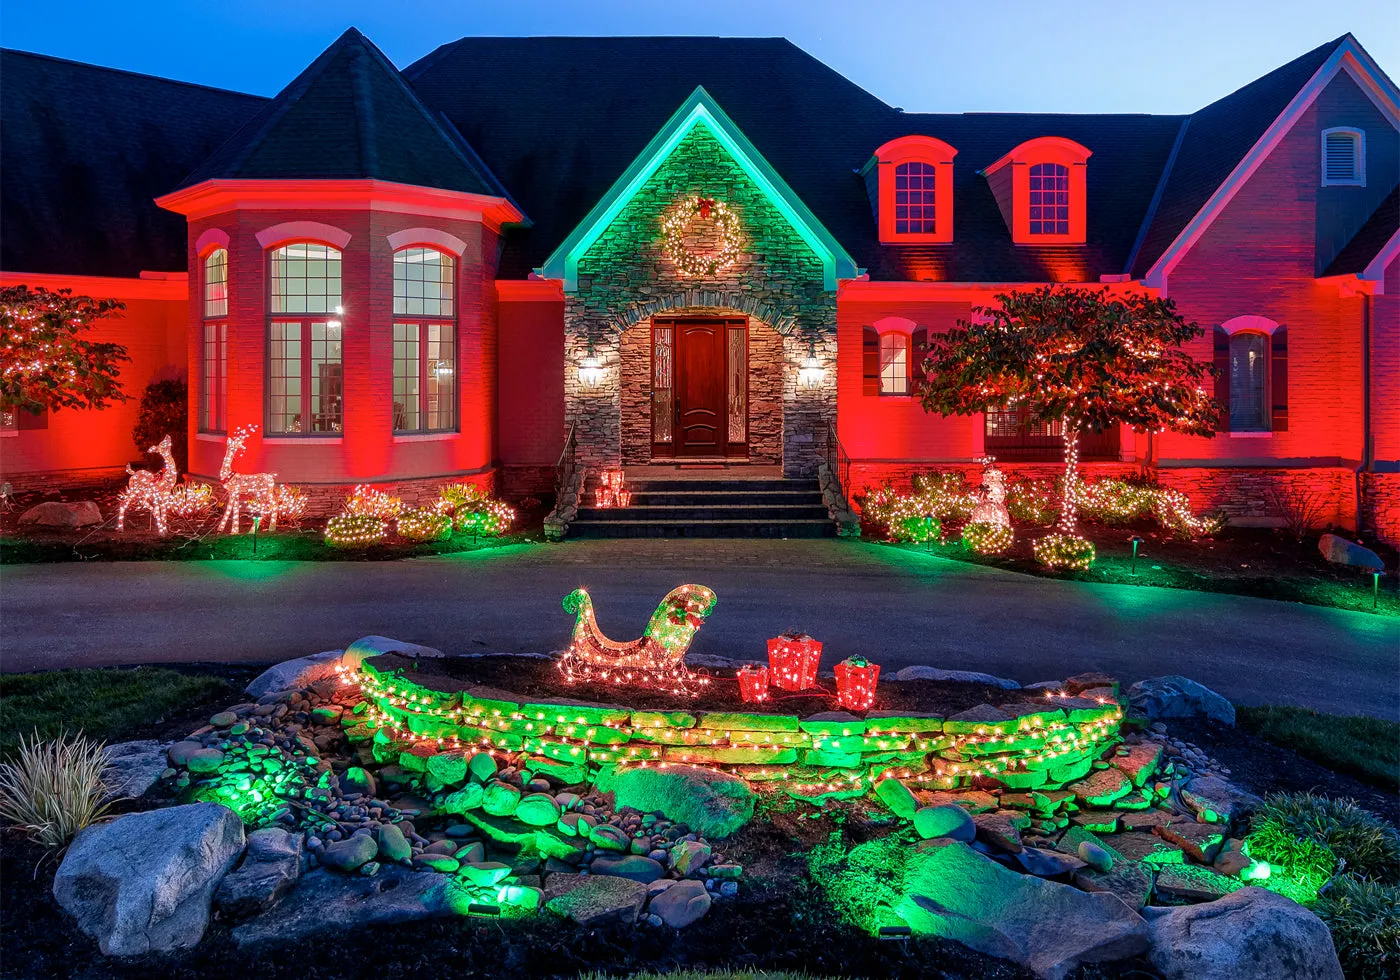
Colored floodlights spill, and they spill farther than you think. If a neighbor’s bedroom window sits within about 40 feet of your facade, they’ll get a red glow whether they asked for it or not. Aim fixtures downward at 30 to 45 degrees, keep them below the soffit line, and put the whole rig on a timer that shuts off at 10 or 11 pm. Keep total load under 80% of the circuit.
4. Red and Green Outlines That Play Off Terracotta Roof Tiles
The formula here is roughly 70% white stucco as the reflecting surface, 20% red, 10% green. Red outlines the long horizontal roofline runs and the arches; green is saved for the central gable and one vertical accent. Because stucco bounces light so generously, you can use about half the bulb density you’d need on dark brick and still get the same glow. Swap the palette by keeping the ratio — 70/20/10 works with white/blue/silver or cream/amber/red.
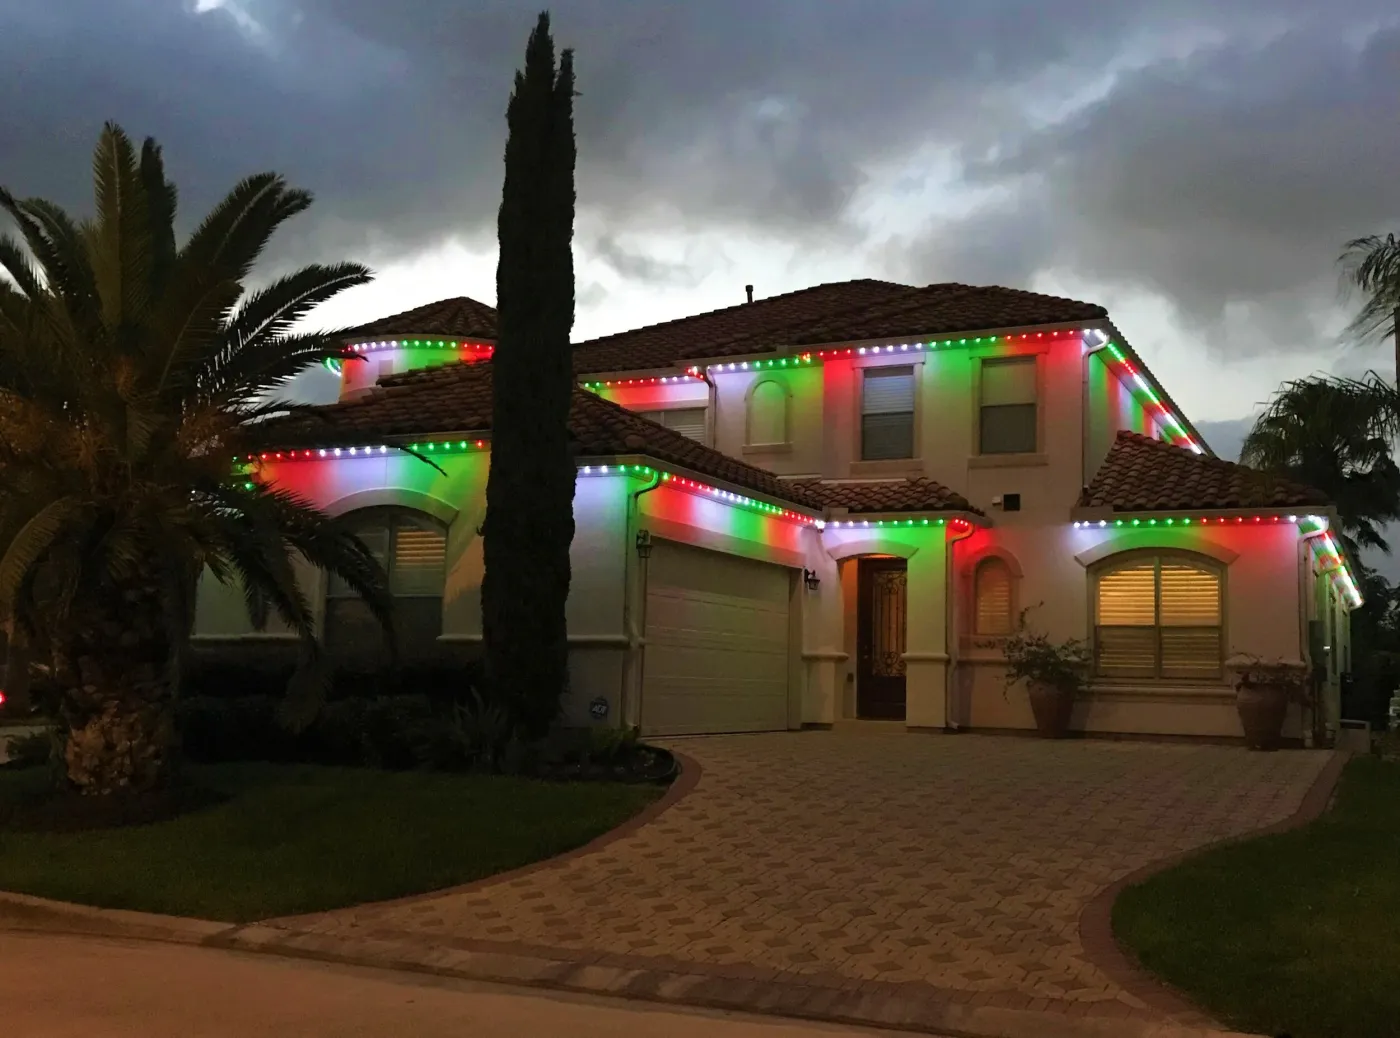
- Measure each arch from spring point to spring point, not straight across — arched runs need extra length.
- Set clips at the spring points first so both sides start level.
- Work from the center of the arch outward, feeding the strand by hand.
- Zip-tie a small loop of slack at each spring point to absorb tension.
- Test the run before you finalize the clips.
About 90 minutes per arch, $25–$40 in clips and cord.
5. Multicolor Icicle Lights Above Every Window, Not Just the Roofline
Icicle lights spent a decade as the punchline of holiday decorating, and they’re quietly back — but the 2026 version hangs above window heads as well as the roofline, which changes the whole read. Instead of one dripping fringe, you get a repeating rhythm across the facade. Multicolor versions are leading the revival because the alternating drips break up the shape. Expect this to hold: it’s cheap, it’s forgiving of imperfect rooflines, and it photographs beautifully.
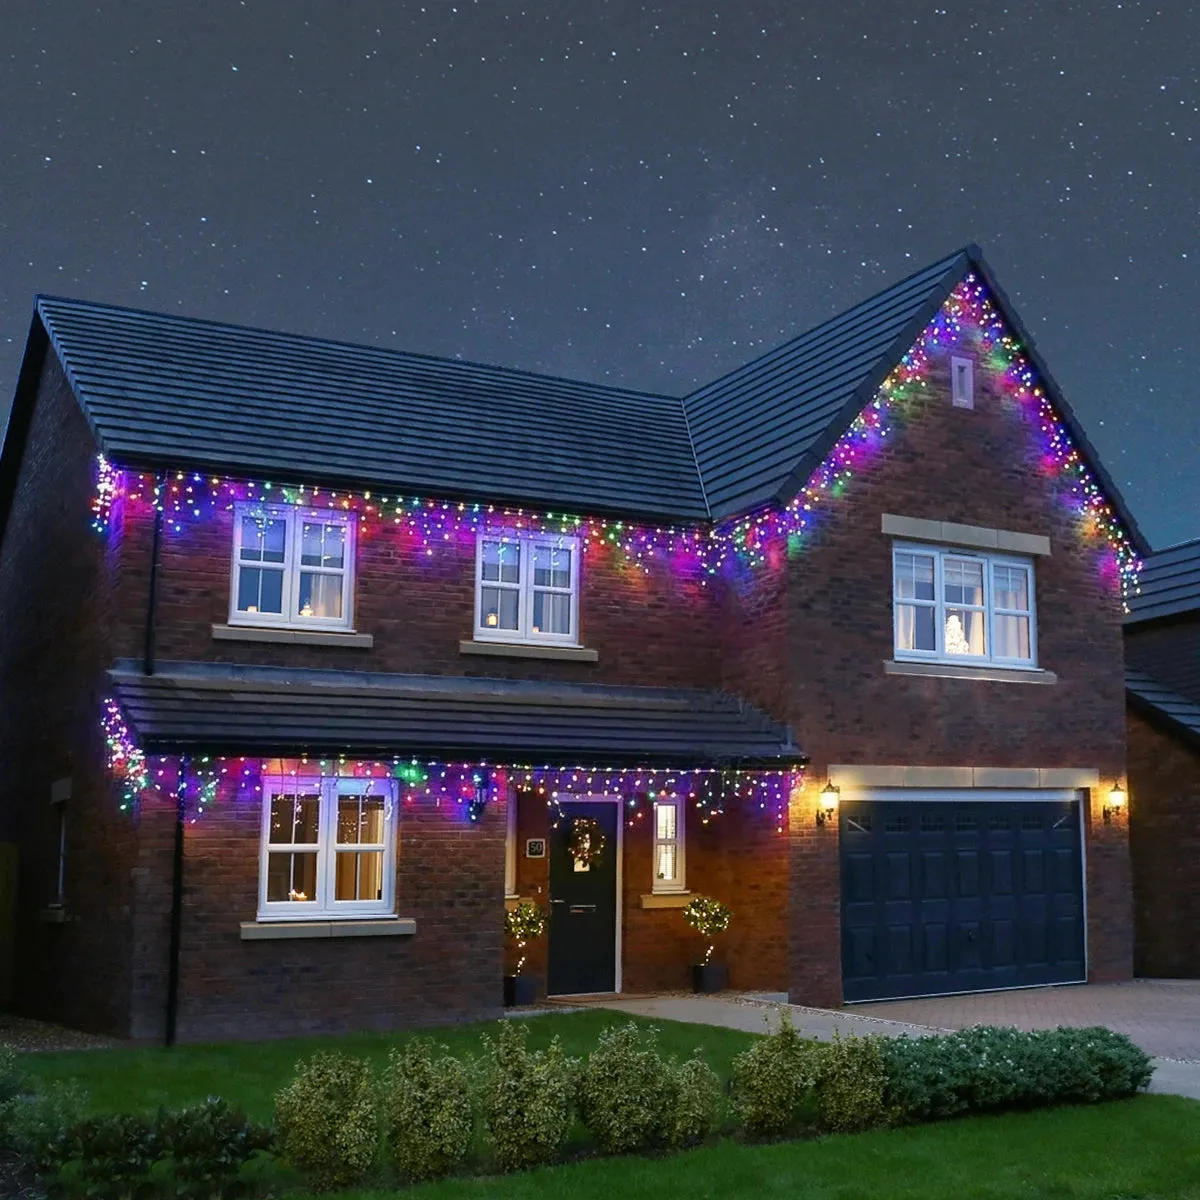
Drip length should relate to window height, not to whatever came in the box. For standard double-hung windows, a 12- to 18-inch drip looks deliberate; anything past 24 inches starts to crowd the glass, especially over a door. Hang icicles from a gutter or shingle clip so the top wire sits tight to the trim, and don’t overlap rows — doubled-up icicles just look tangled. Two rows maximum.
6. White Rooflines, Purple Floodlights: The Layered Modern Glow
- RGB LED floodlights, 4-pack: $80–$180
- White mini string, 200–300 ft: $50–$110
- App controller or Wi-Fi hub: $25–$60
- Stakes, waterproof splitters, outdoor cord: $40–$85
- Ground-level landscape uplights: $45–$120
Total: $240–$555
Budget alternative: three white floods on a single smart plug plus $30 of white string gets you about 70% of the drama for under $120.
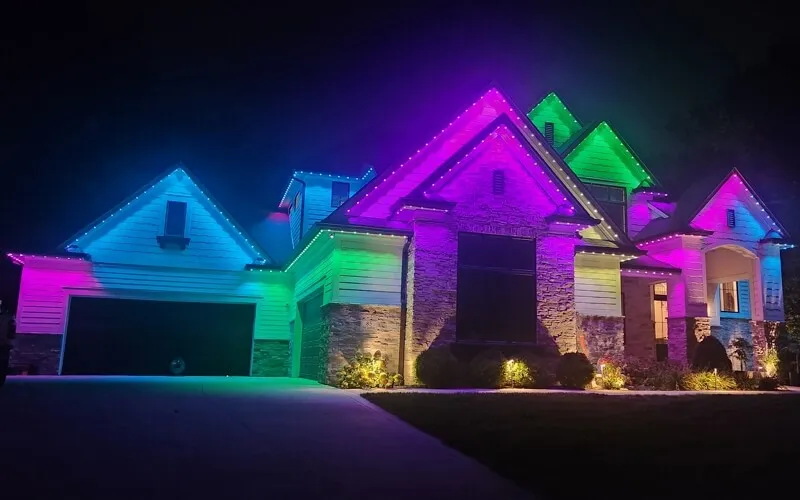
There are two completely different lighting techniques on this facade, and that’s the trick. String lights draw lines — they describe edges, rooflines, architecture. Floodlights create fields — they wash surfaces in flat color. Put them together and the building reads as fully lit rather than merely outlined. Split the work: never use floods to outline, never try to wash a wall with bulbs.
7. C9 Bulbs on Stakes Turning the Driveway Into a Runway
- Measure your driveway edge and walkway in linear feet, then divide by 24 to get how many stake lights you need at 2-foot spacing.
- Add up total wattage on each circuit — C9 bulbs draw far more than mini-lights.
- Check for irrigation lines and buried sprinkler heads before you drive a single stake.
- Confirm your outdoor outlets are GFCI and have weatherproof covers.
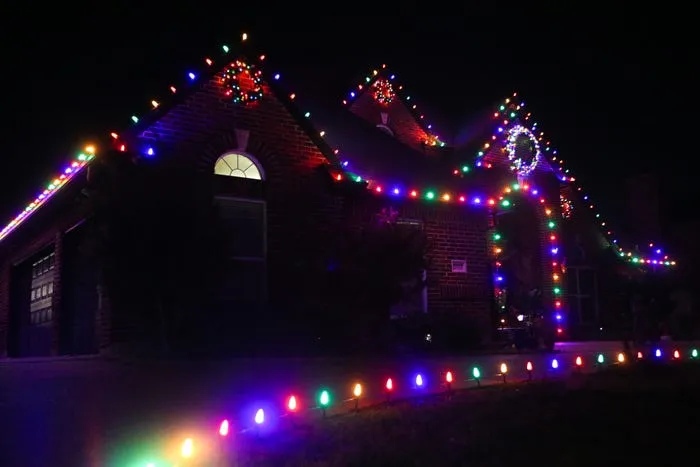
The vertical light runs up the corners of the brick are the element I’d fight to keep. Everyone outlines the rooflines — that’s the default move. Running a clean strand straight up each architectural upright gives this house a skeleton, and it’s what makes the horizontal runs feel anchored instead of floating. Pull the verticals and the whole display loses its framework.
8. LED Strips That Bleed Purple Into Pink Across the Eaves
Roughly 60% pale siding acting as the screen, 30% gradient LED strip in purple-to-pink, 10% stone left dark. The gradient only works because the surrounding surface is light — the same strip on dark brick would swallow most of the color. Keep the transition long: program the shift across at least 40 feet of run so the eye reads purple melting into pink rather than two separate zones. Swap the pair to blue-to-teal and the math holds.
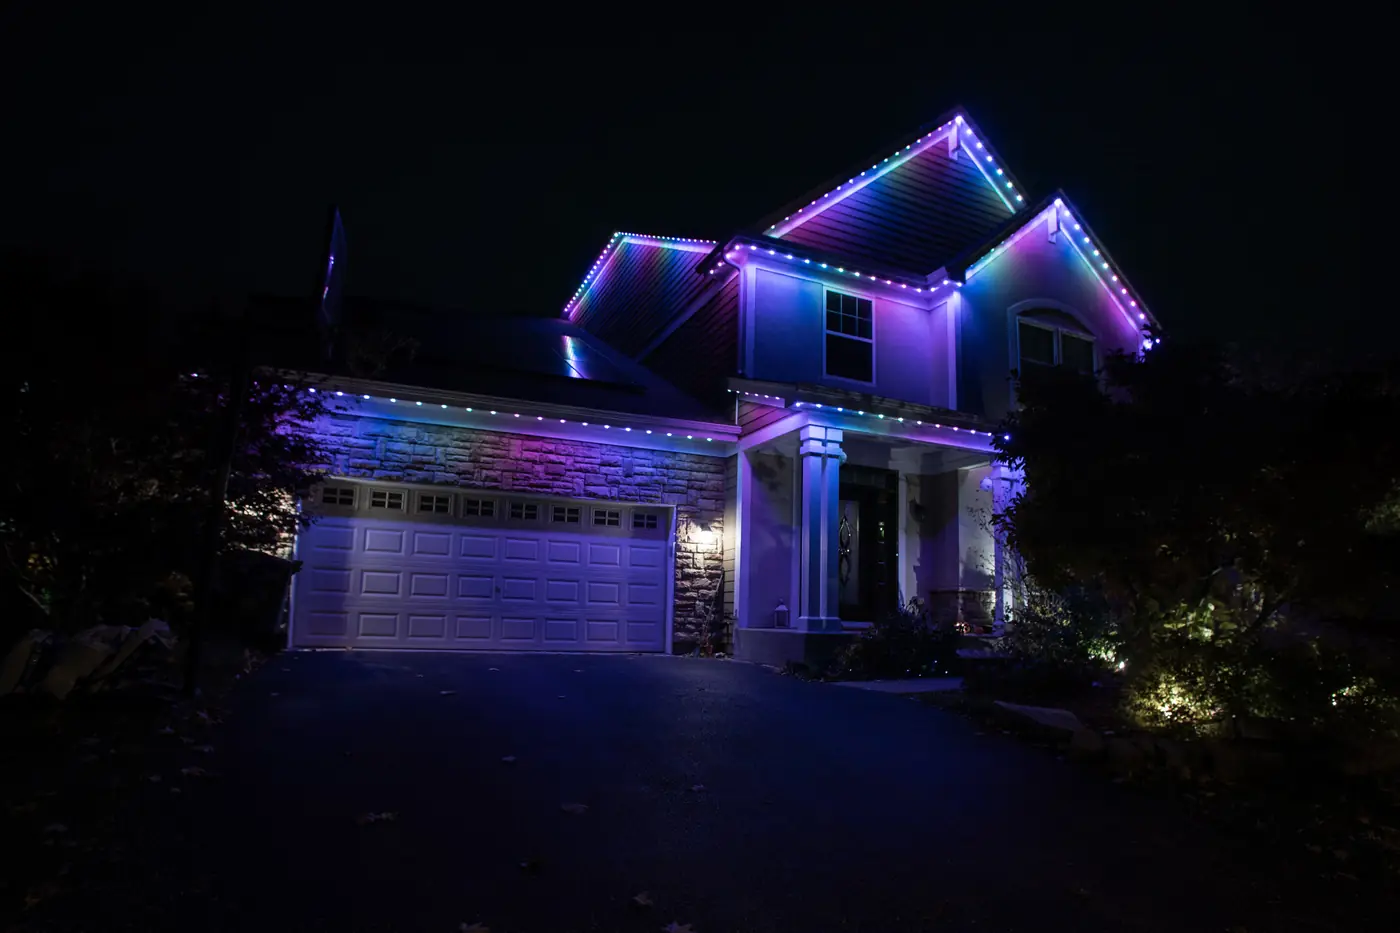
Adhesive-backed LED strips are the least permanent option on this list. Factory tape fails in cold — many strips let go below about 20°F — so plan on aluminum channel or gutter clips and treat the tape as a helper, not the mount. Buy IP65 or better for anything exposed. Expect to replace a strip every two to four seasons, and check the power supply each fall, because the controller usually dies before the LEDs do.
9. White Trees, Multicolor Eaves: Mixing Two Light Colors on Purpose
This works on a facade from about 35 to 70 linear feet, and it needs a yard deep enough for at least three mid-size trees or large shrubs to carry the white light. On narrow city lots, cut it to two trees and let the multicolor eaves run the show. If your frontage is under 30 feet, Idea #18 keeps things simpler. The rule: one white element per 12 feet of frontage, or the white starts to look random.
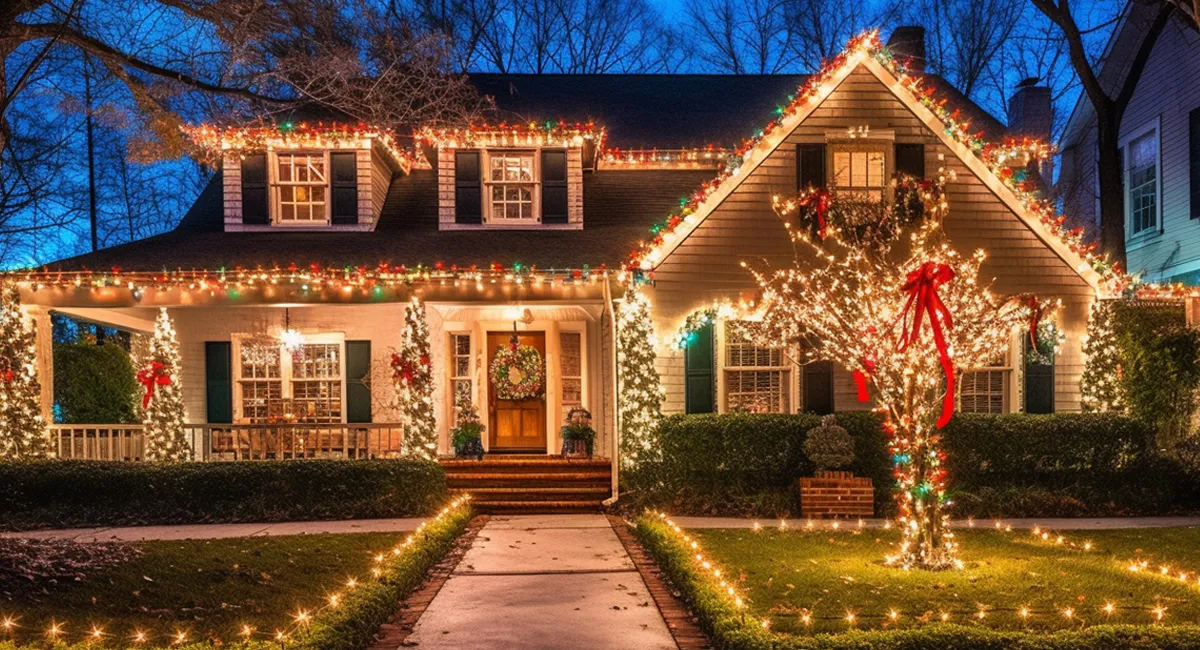
Bows and wreaths are where holiday décor pricing goes feral. Big-box red bows run $3–$8 each; buy plain ribbon by the roll and wire your own loop for about $1.25 a bow. For tree lights, 100-count white mini sets from Walmart land around $4–$7 apiece, and Facebook Marketplace in mid-November is full of people who overbought last year. Realistic spend for this whole front: $150–$260.
10. A Curved Turret Outlined in Pure White, No Color at All
A turret is a vertical problem, so solve it vertically. Run the strand up one side of the curve, across the cap, and down the other, using clips at 12 inches instead of the usual 18 to keep the curve smooth — tight radii hide sloppy spacing fast. Don’t try to wrap; outlining reads cleaner. And resist adding color here. This facade works because the turret is drawn, not decorated.
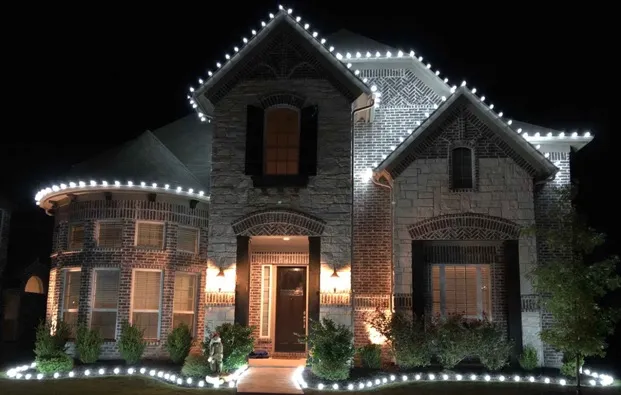
Total restraint is the whole idea. Every element is white: rooflines, gables, turret, and the globe lights marking the walk. Because nothing competes, the eye reads the architecture instead of the bulbs, and the glow on the ground picks up the same temperature as the rooflines so the whole picture stays in one key. Test this at home by photographing your display in black and white — if it still looks good, it’s working.
11. All-Blue Rooflines With White Deer on the Lawn
The blue-wrapped tree is the anchor, and it’s why this works. Blue is a cool, recessive color — on its own it can look thin and chilly outlining a roofline. Wrapping one big mass in the same blue gives the color weight and volume, so the perimeter reads as part of a composition instead of a thin blue thread. If you only have budget for one element this year, do the tree.
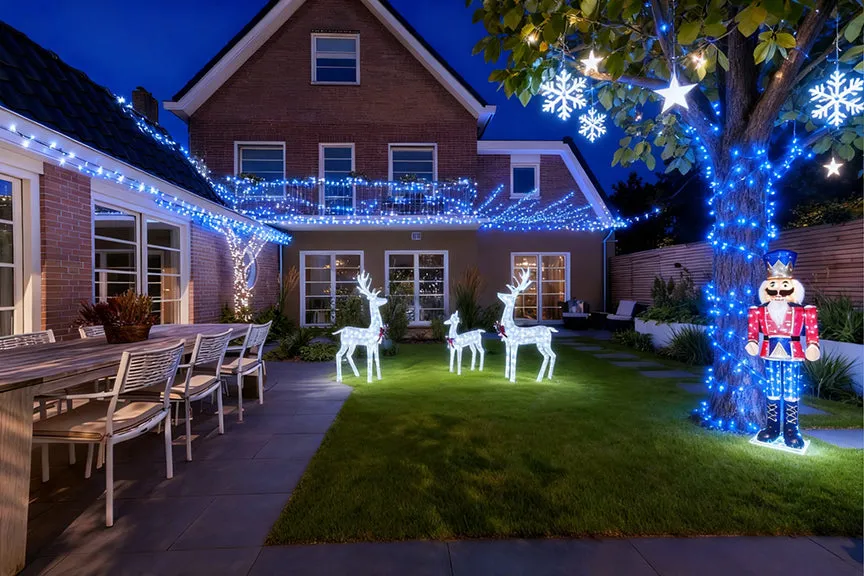
- Blue LED string lights, 8–10 sets: $55–$130
- White light-up deer, three: $90–$240
- Light-up nutcracker, 4–5 ft: $70–$180
- Snowflake and star window lights: $35–$90
- Timers, stakes, extension cords: $30–$70
Total: $280–$710
Budget alternative: wrap the tree in blue and buy one deer — about $110 delivers the spirit of the look.
12. Two Bare Trees Wrapped Tight in Red, Green, Blue and Yellow
Dense wrapping is not free for the tree. Bulbs pressed against bark hold heat, and on young or thin-barked trees that can mean damage; keep strands loose enough to slip a finger under and stop wrapping above the first major branch. Use LED only — incandescents run hot enough to scorch. A wrapped tree also means an extension cord across the lawn and a trip hazard after dark, so run the cord along the edge of the drive, never straight out from the trunk.
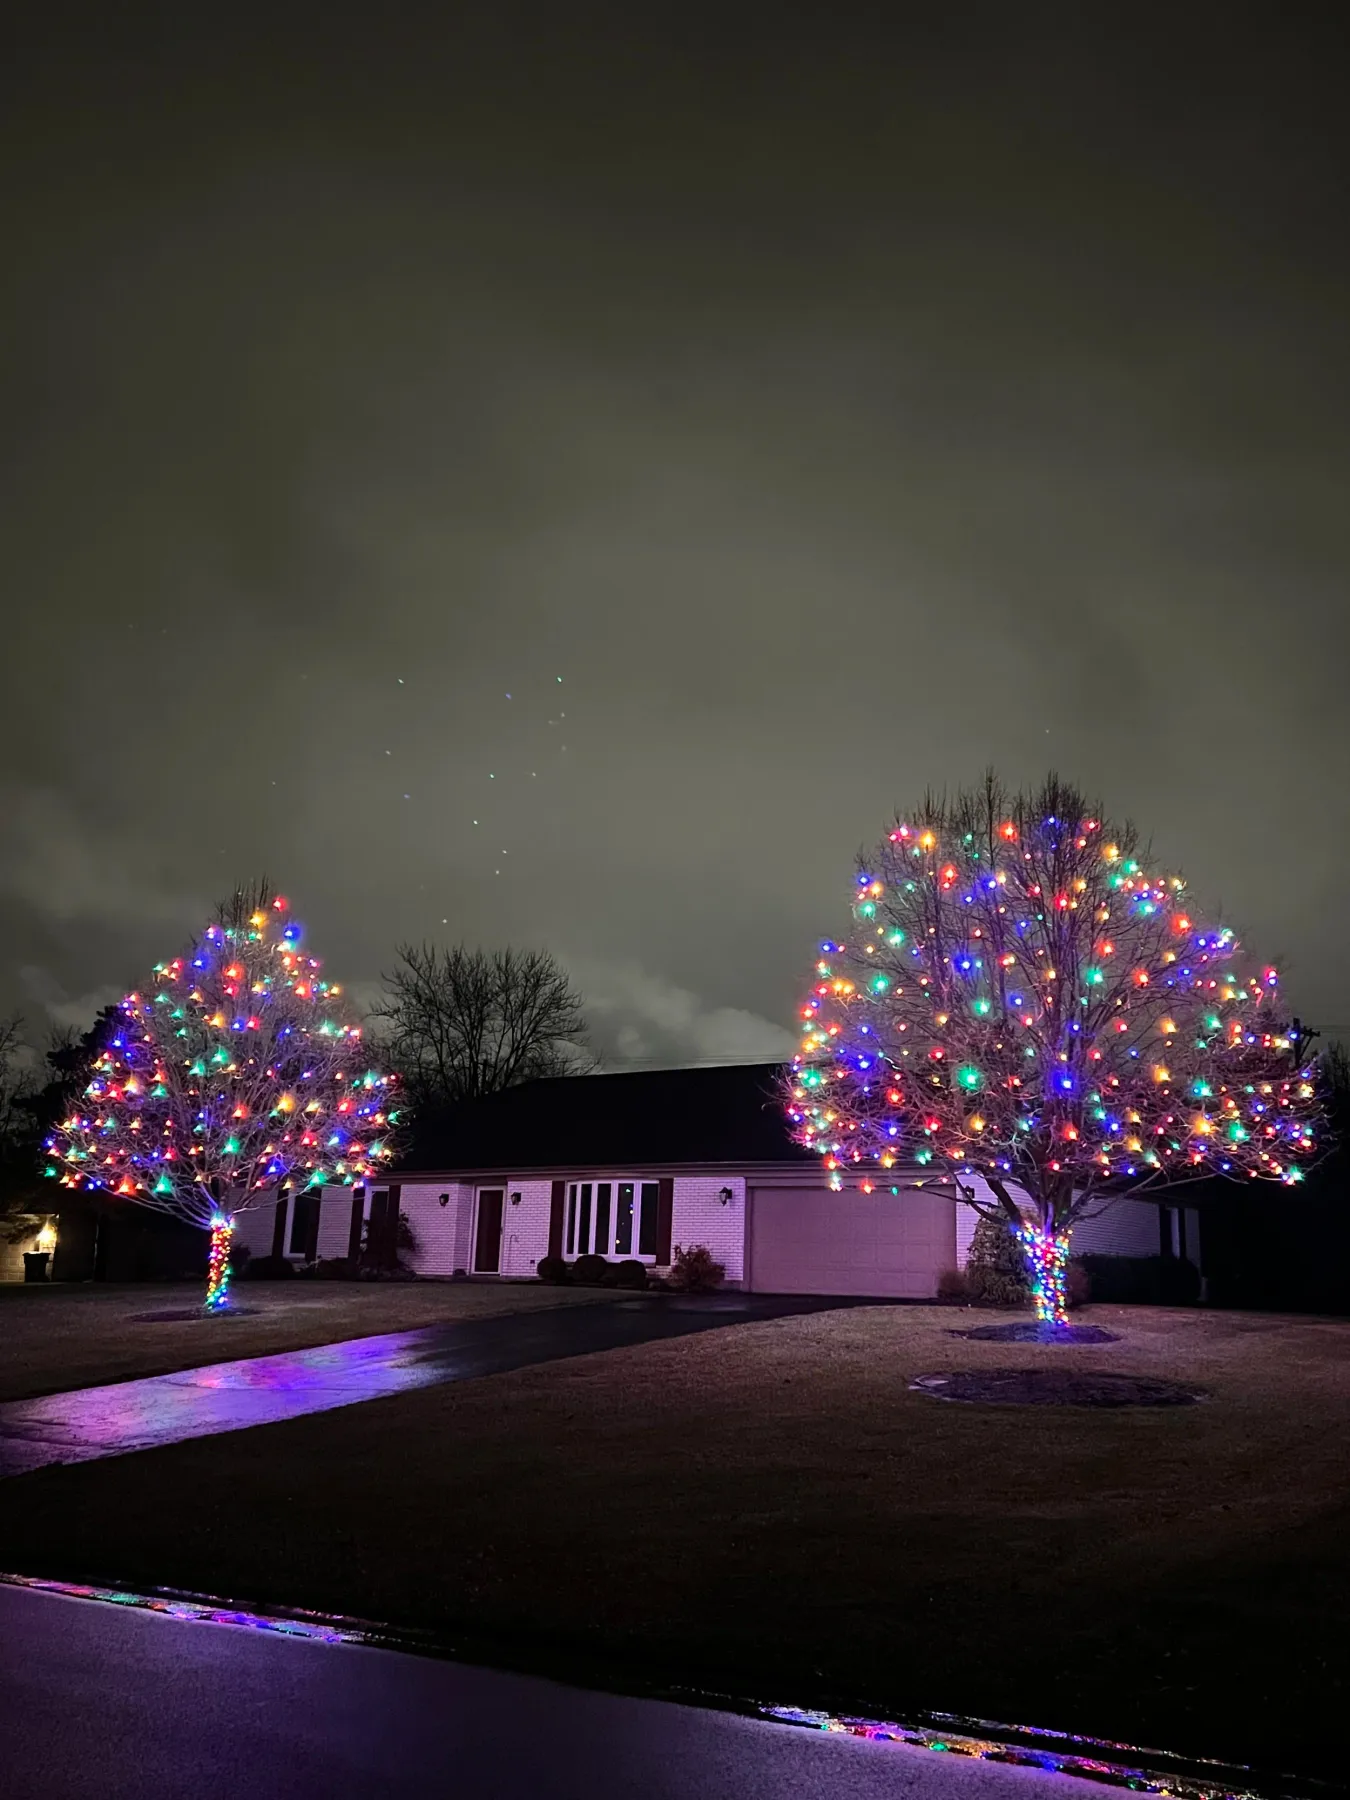
- Start at the base and work upward, never downward.
- Wrap in a spiral with 4–6 inches between turns at the trunk, widening as you reach the branches.
- Keep the strand loose — light tension only.
- Test every set before it goes on the tree.
- Secure the top end with a small zip tie, not a knot.
Roughly 45 minutes per tree; plan $30–$60 in lights per medium tree.
13. Blue Rooflines, White Icicles, and a Yard Full of Characters
Yard characters have moved from inflatable to lit sculpture, and it’s the single biggest shift in holiday decorating over the past three years. LED-molded Santas, snowmen, and teddy bears now cost a quarter of what they did in 2022 because the tooling finally matured. The driver is simple: characters photograph as clearly in a phone snapshot as they do in person, which is exactly what gets pinned and shared in 2026.
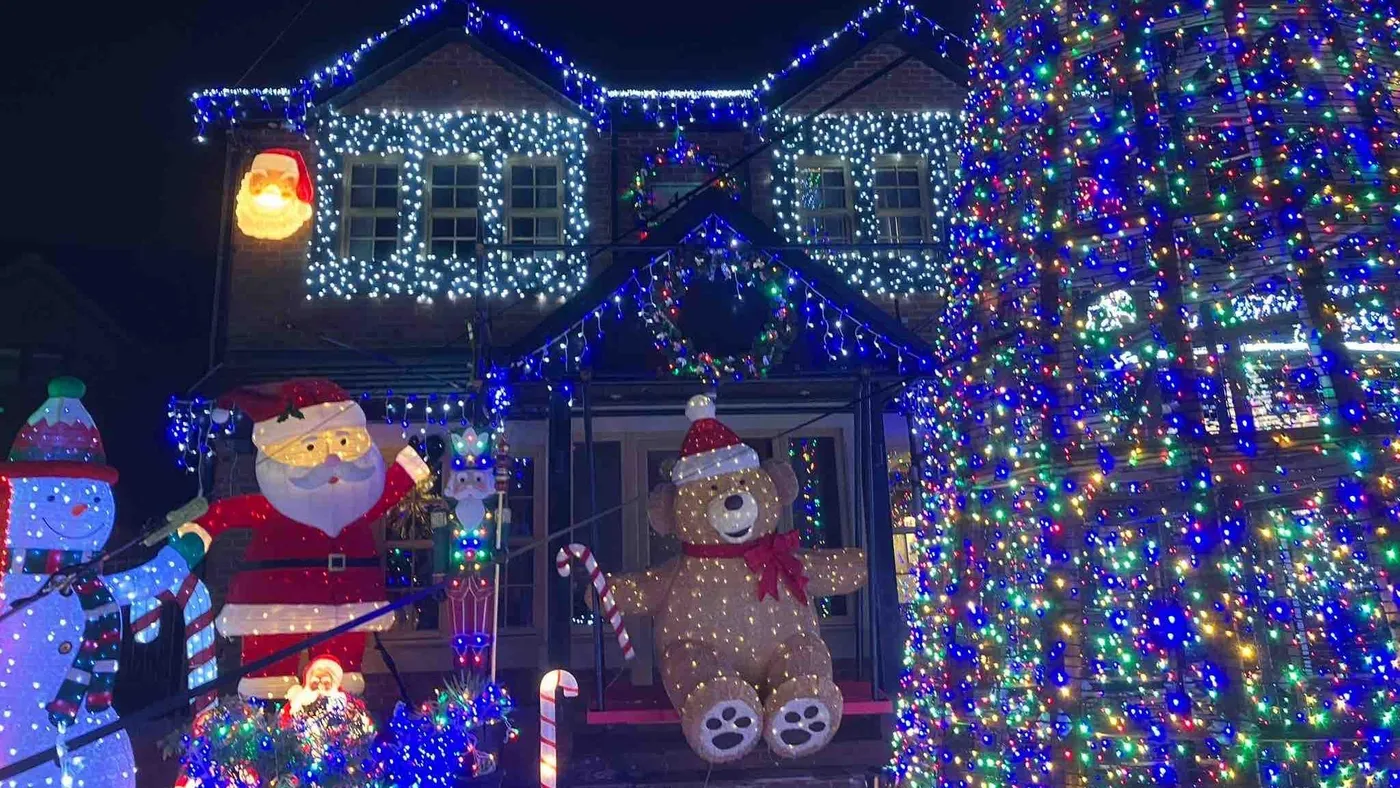
Character figures are the easiest thing on this list to buy used. Marketplace and estate sales in early December are full of light-up Santa and snowman molds at $25–$60, versus $120–$250 new. Icicle sets run $8–$14 per 300-count string at Walmart and Home Depot in early November. Skip the giant light cone in season one and build toward it — see Idea #22 for how to sequence a yard that grows.
14. Multicolor Outlines on a Split Facade — Stone on One Side, Siding on the Other
Two materials, two reflectances, so budget light differently: about 55% of this facade is dark stone that eats light, 45% is pale siding that throws it back. Put slightly denser bulb spacing on the stone side, or the siding will look twice as bright. The purple, blue, and pink glow is literally the house bouncing color back at you — the lighter the surface, the more saturated the wash. The same formula holds for cream/gray or warm white/amber.
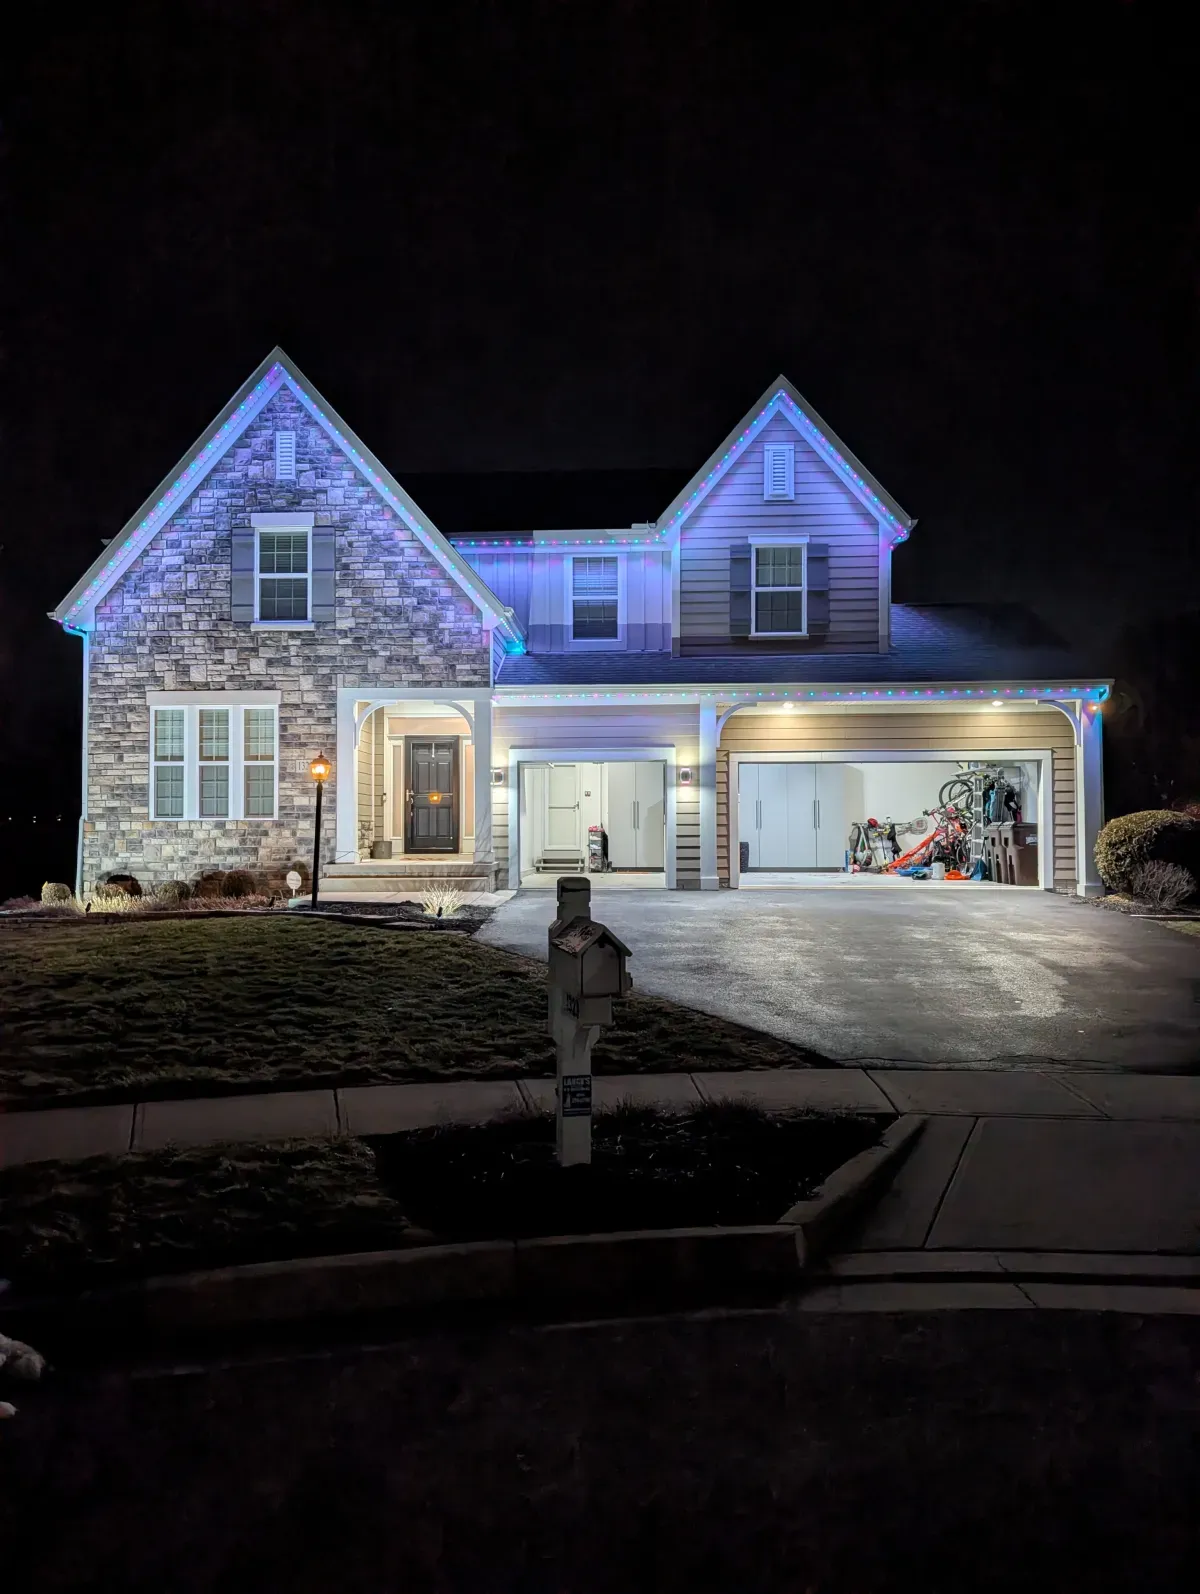
Mix materials and you’ll get a brightness mismatch nine times out of ten. Stand across the street after dark and compare the two halves — if the siding glows and the stone looks dim, don’t add more lights to the stone. Instead, drop the bright side a few percent with a dimmer, or switch that half to a lower-lumen set. Averaging up the dim side just doubles your load for no visual gain.
15. Neon Green and Magenta Uplights on White Horizontal Siding
Colored uplights need a pale surface to work, and white horizontal siding is the best screen there is. The alternating green and magenta read as two distinct bands because the siding’s horizontal shadow lines break the wash into stripes. On brick or dark stain, the same fixtures would go muddy and you’d lose the separation entirely. If you love saturated color, this is the surface to do it on.
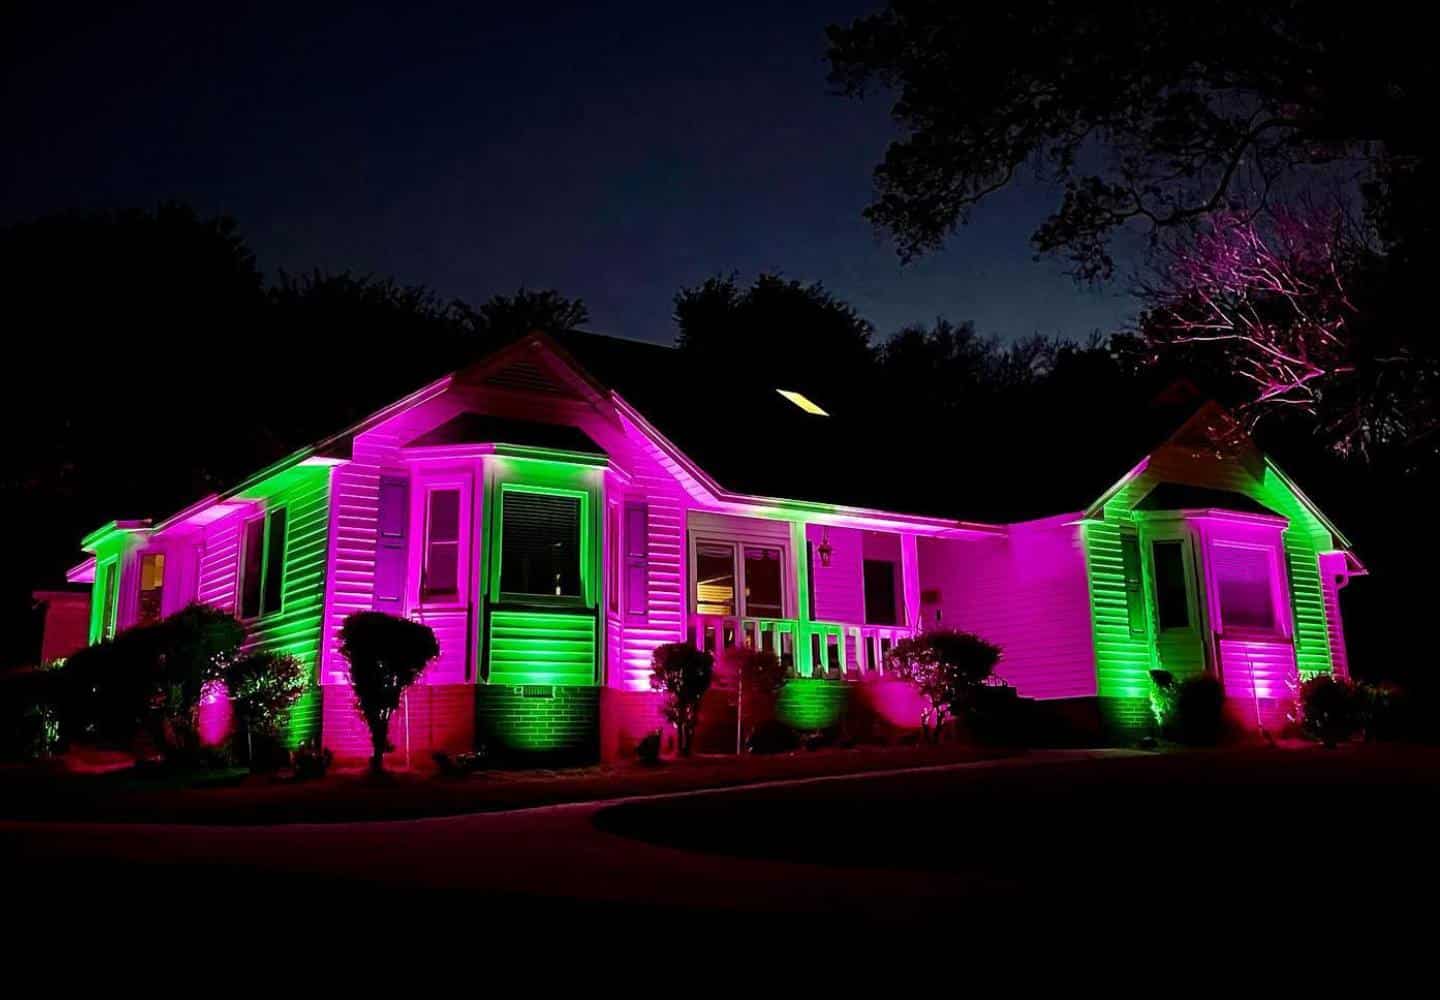
This technique is forgiving on size — it works from a 900-square-foot ranch up to a 2,500-square-foot two-story, because you’re lighting wall planes rather than outlining architecture. You need at least 8 feet of unobstructed wall per fixture. Stake fixtures 12 to 24 inches out from the foundation and aim them about two-thirds of the way up the wall. If your facade has heavy ornament, Idea #3 is a better fit.
16. App-Controlled Multicolor Exterior Kits: What to Check Before You Buy
Smart multicolor kits are the fastest-growing category in holiday lighting, and also the one with the most disappointed buyers. The app is the weak point: if the manufacturer stops updating it, your lights become a dumb strand with a weird plug. Check whether the system uses Matter or at least works with a major ecosystem, whether scenes are stored on-device, and whether the controller can be replaced on its own. A cheap kit you can’t fix is a landfill subscription.
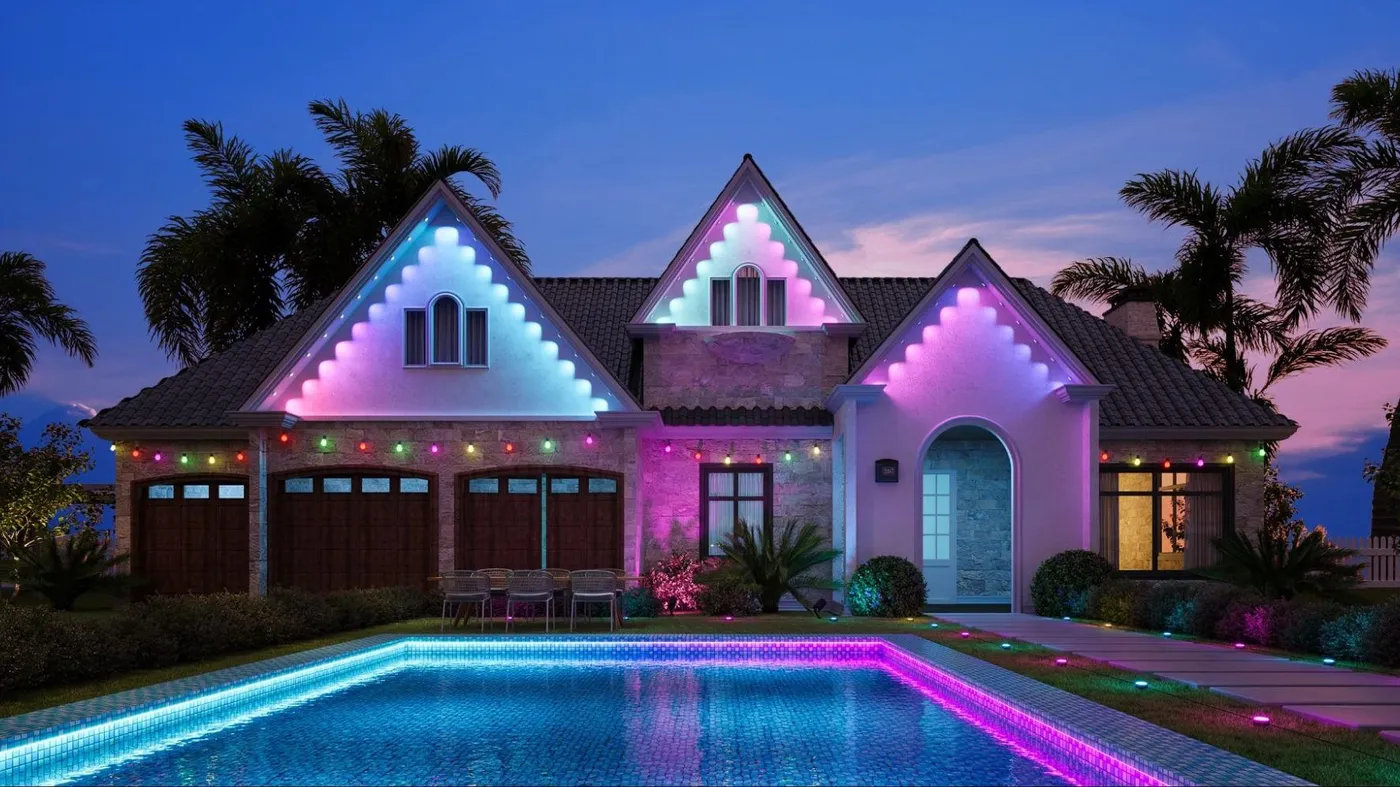
- Confirm the kit’s total runnable length and how many strings can chain off one power supply.
- Check IP rating — IP65 minimum for anything that gets rained on.
- Verify the app supports scheduling without a cloud account, in case servers go dark.
- Measure from your outlet to the farthest corner and add 20%.
- Decide now whether you want one color at a time or gradients.
17. Blue-to-Teal Gradient Against Dark Horizontal Siding
Gradients live or die on how many addressable pixels you have. For a clean blue-to-teal flow across a roofline, you want a strip with at least 30 LEDs per meter — 60 per meter is better if the run is over 40 feet. Fewer pixels means visible banding, where the eye can pick out each color step. Set the transition length to at least eight feet per color shift; anything faster reads as a glitch rather than a gradient.
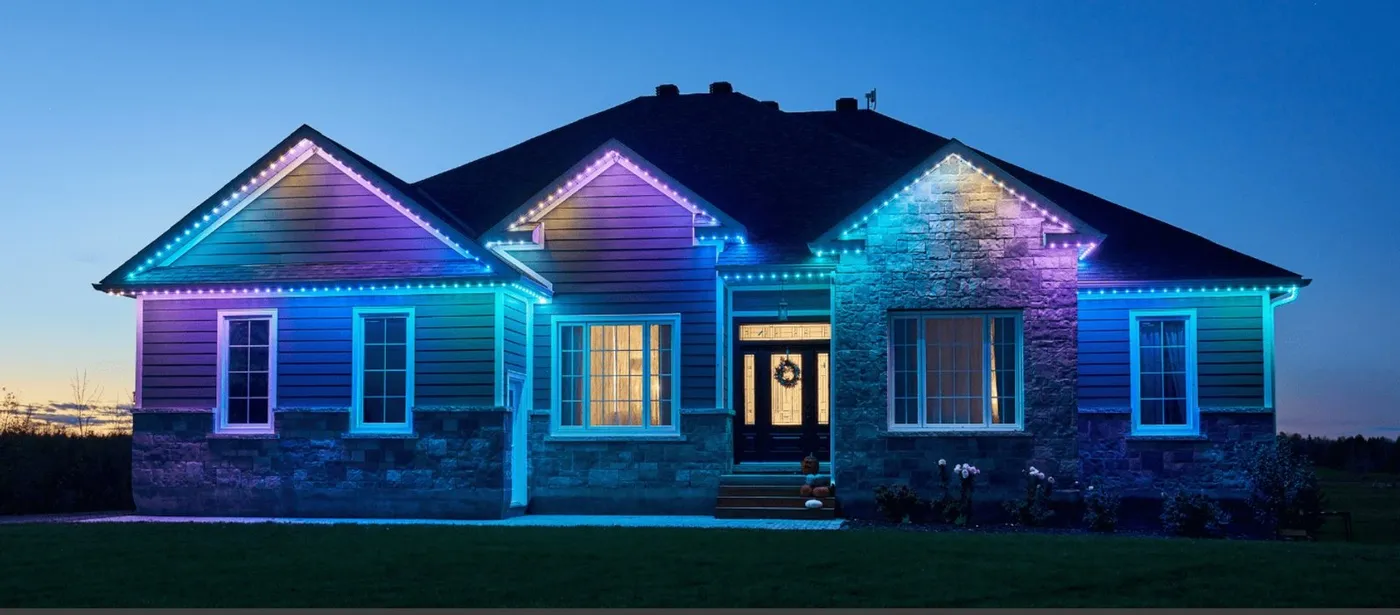
The warm interior light behind the windows is what makes this facade feel like a home instead of an installation. Every exterior element is cool — blue, purple, teal against dark siding. The golden rectangles of the windows are the only warm notes, and they pull your eye to exactly the right place. Before you add a single strand, turn on your interior lamps and leave a few on a timer. They’re part of the display.
18. All-Red Roofline Lights Bouncing Off Red Brick at Dusk
Red bulbs fade faster than any other color, because red LEDs and their phosphor coatings take the most UV abuse. Expect noticeable shift after about three seasons on exposed rooflines — a set that started crimson will bleed toward pink or orange. Store red sets out of direct sun and label them, because once they’ve faded you can’t match them to new ones. And if you’re hanging in freezing weather, let the strand warm to room temperature first so the insulation doesn’t crack.
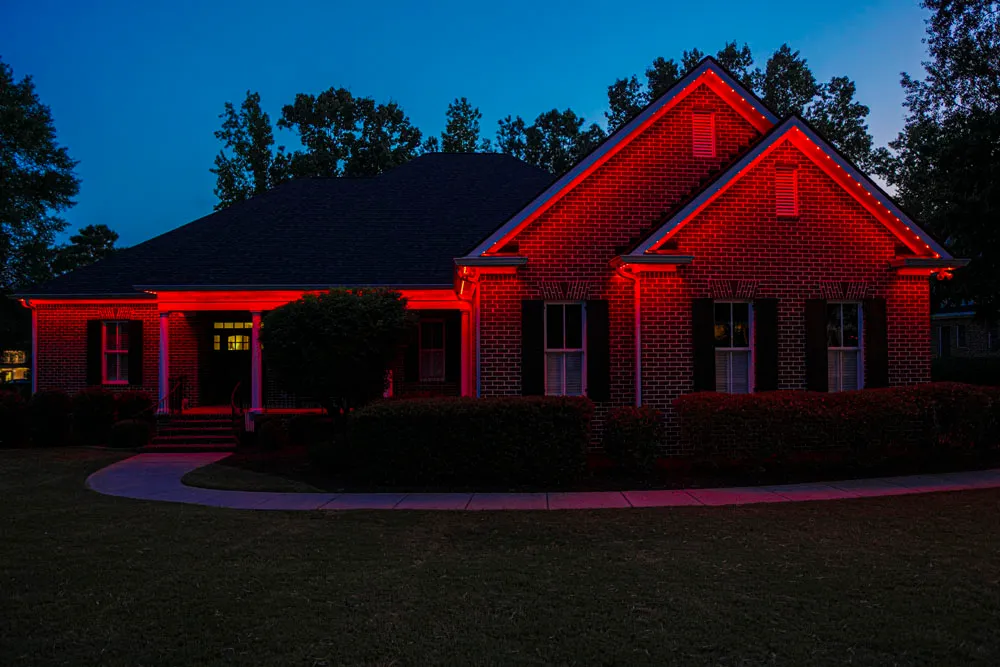
One color, two temperatures: roughly 80% red light and 20% the ambient dusk blue doing the framing. The red reads as monochrome because there’s nothing to compare it to — that’s the lesson. Deep blue twilight makes warm red look richer, while a black sky makes it look flatter. Time your display to switch on at civil twilight, roughly 30 to 45 minutes after sunset, rather than waiting for full dark.
19. A Victorian Porch Draped in Garlands, with Life-Size Nutcrackers on the Snow
- Warm white string lights, 500+ ft: $110–$220
- Lighted garland for porch rails, 3–4 runs: $90–$260
- Life-size nutcracker figures, 2: $200–$600
- Light-up snowman: $80–$200
- Illuminated JOY sign, ornaments, stakes: $60–$150
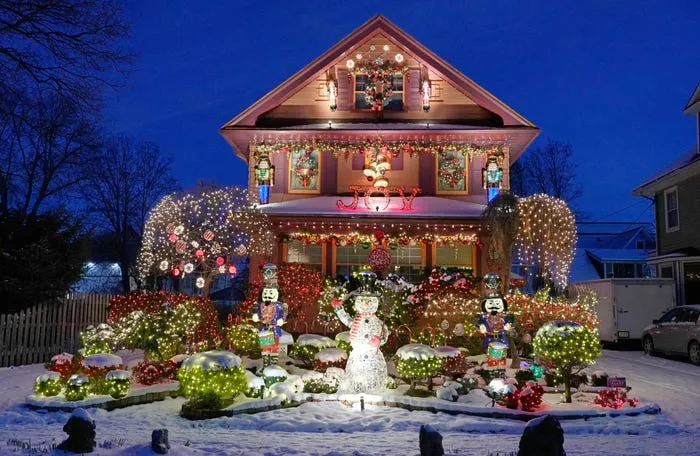
Total: $540–$1,430
Budget alternative: homemade garland from $30 of artificial pine roping plus $25 of lights, and one nutcracker instead of two, lands you near $250.
Snow and displays are a rough combination. Water finds every connection, so keep every plug off the ground — a brick or a stake-mounted outlet box, not a puddle. Use GFCI on any outdoor circuit, and check that your timer is rated for wet locations, because most indoor timers aren’t. Weigh or stake the tall figures: a 5-foot lit nutcracker is a tipping hazard in wind.
20. Alternating Red and Green Bulbs, Ground Spotlights Doing the Rest
- Decide the pattern first: red-green-red-green, or red-green-green for a softer alternation.
- Mark your start point and always begin with the same color so both ends of the facade match.
- Unspool a short run on the ground and check the sequence before you climb.
- Clip at 15 inches so the pattern stays visually even.
- Spot-check at night from the street, not from the ladder.
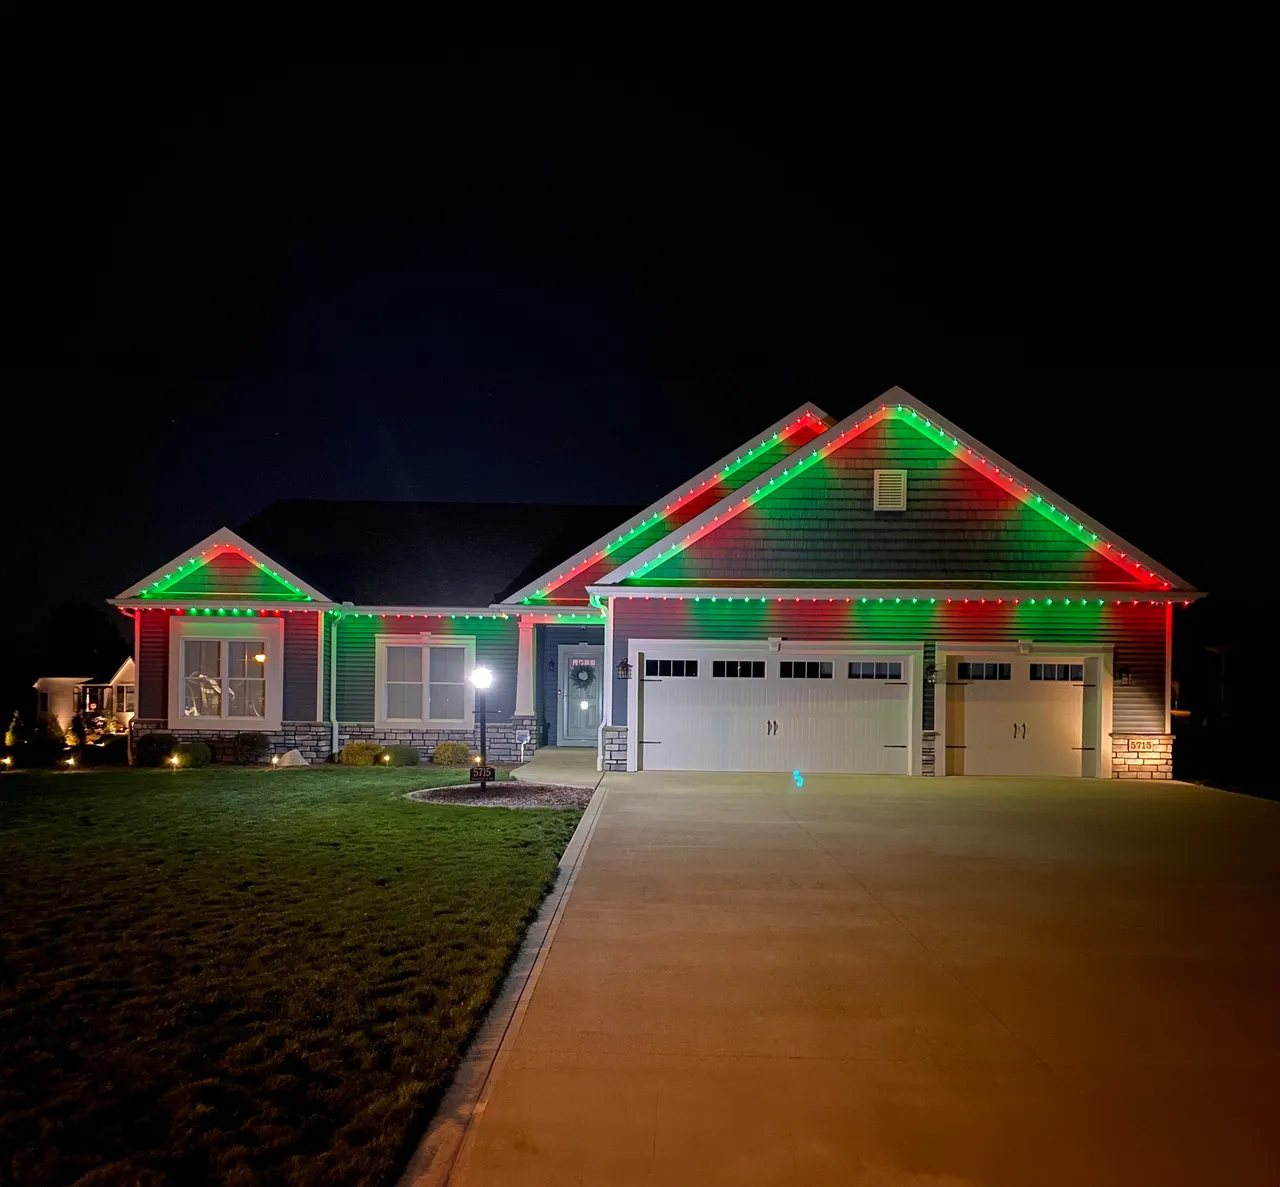
About 2 hours for 60 feet of roofline; $40–$80 in bulbs and clips.
Alternating patterns need length to register — under about 30 linear feet, the eye can’t complete a cycle and it just looks striped. That’s why the technique suits facades of 40 to 80 feet with multiple gables. The ground spotlights are doing the heavy lifting on light volume, which is also what lets the facade stay readable if you only finish part of the roofline this year. On smaller frontage, see Idea #25.
21. Red and Pink Uplights on Stucco, Blue and Purple in the Trees
Think in two separate zones: 60% of the color budget goes to the wall wash in red and pink, 40% to the landscape in blue and purple. The stucco is light and warm-toned, which is exactly why pink and red read as saturated instead of muddy. Blue and purple go into the trees, where they contrast with the warm masonry rather than fighting it. Cool wash on warm walls, cool tones against cool surfaces — keep those pairs matched and you can swap freely.
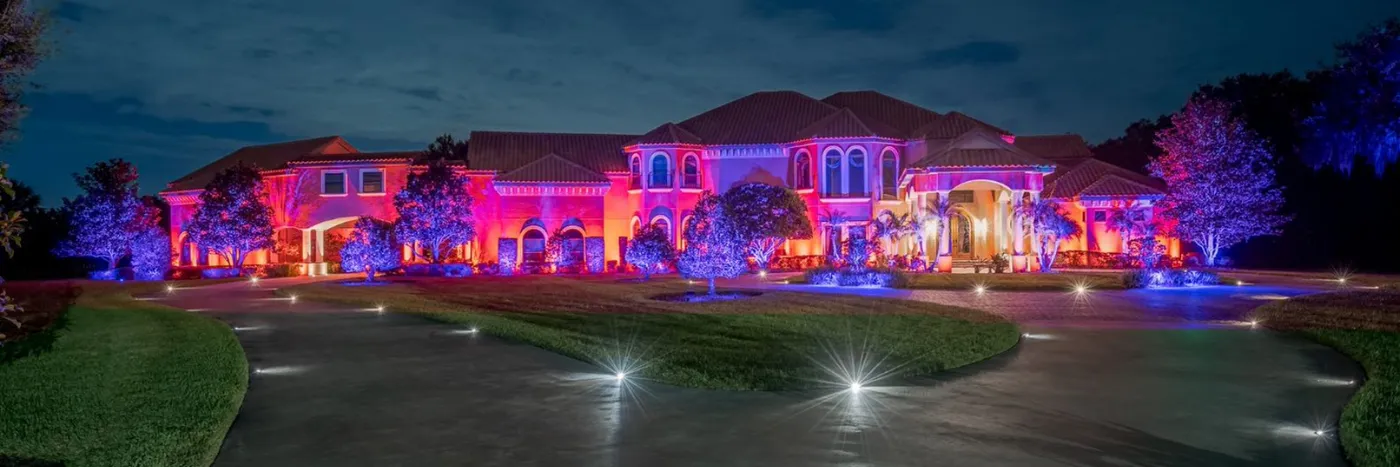
Colored landscape lighting has escaped the holiday season entirely — it’s now a year-round fixture category, and that’s why it looks more polished in 2026 than it did five years ago. Fixtures got better beam control, which means color lands on the tree instead of spraying the whole yard. Expect restrained up-and-down washes to keep growing, and more people buying fixtures once and changing colors by phone every November.
22. The Everything-Everywhere House: Dense Color and Yard Décor
Maximalist yards are the cheapest per square foot, because volume comes from inexpensive items. Inflatables: $30–$70 each at Walmart. Light-up pathway candy canes: $15–$25 for a set of five. NOEL and Believe signs: $20–$40. Lit reindeer: $40–$90. Wrapped trees: about $30 of lights each. The house itself is usually 1,500 to 3,000 bulbs, roughly $150–$300 in mini strings. It’s a slow acquisition, not one purchase.
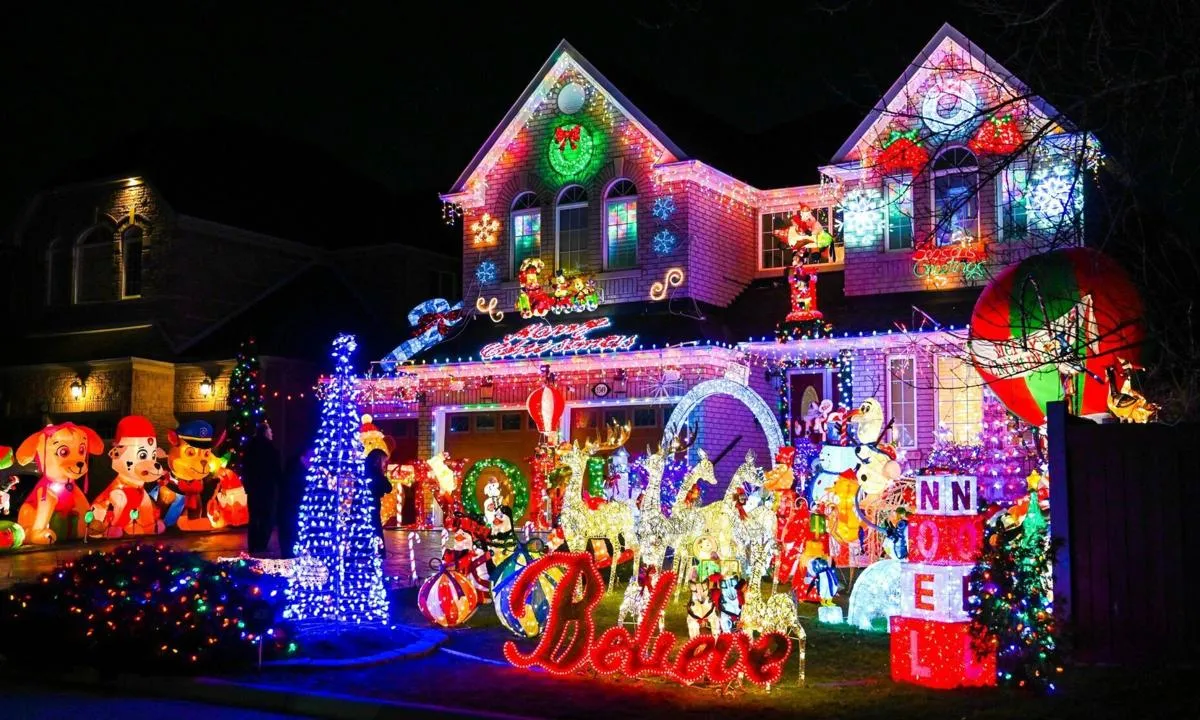
Even in a maximalist yard, you need one focal point per 10 feet of frontage — and no more. Pick the anchor pieces first, place them, then fill gaps with small items. If you buy décor before the anchors are set, you end up with a lawn that’s evenly loud everywhere and has nothing to look at. Stagger heights too: ground figures under 3 feet, mid figures 3 to 5, and one taller element. Flat height is what makes a display feel like a pile.
23. Multicolor Strings Tracing Windows — and Lit Wreaths in Each One
Repetition is the whole mechanism. Same bulb, same spacing, same wreath, over and over, and the house develops rhythm instead of chaos. Notice the color sequence stays consistent too — if the strings were random, the repetition would collapse. Lit wreaths inside each outlined window frame double the pattern, turning the facade into a grid. That grid is why a busy multicolor scheme still reads as calm and orderly from the street.
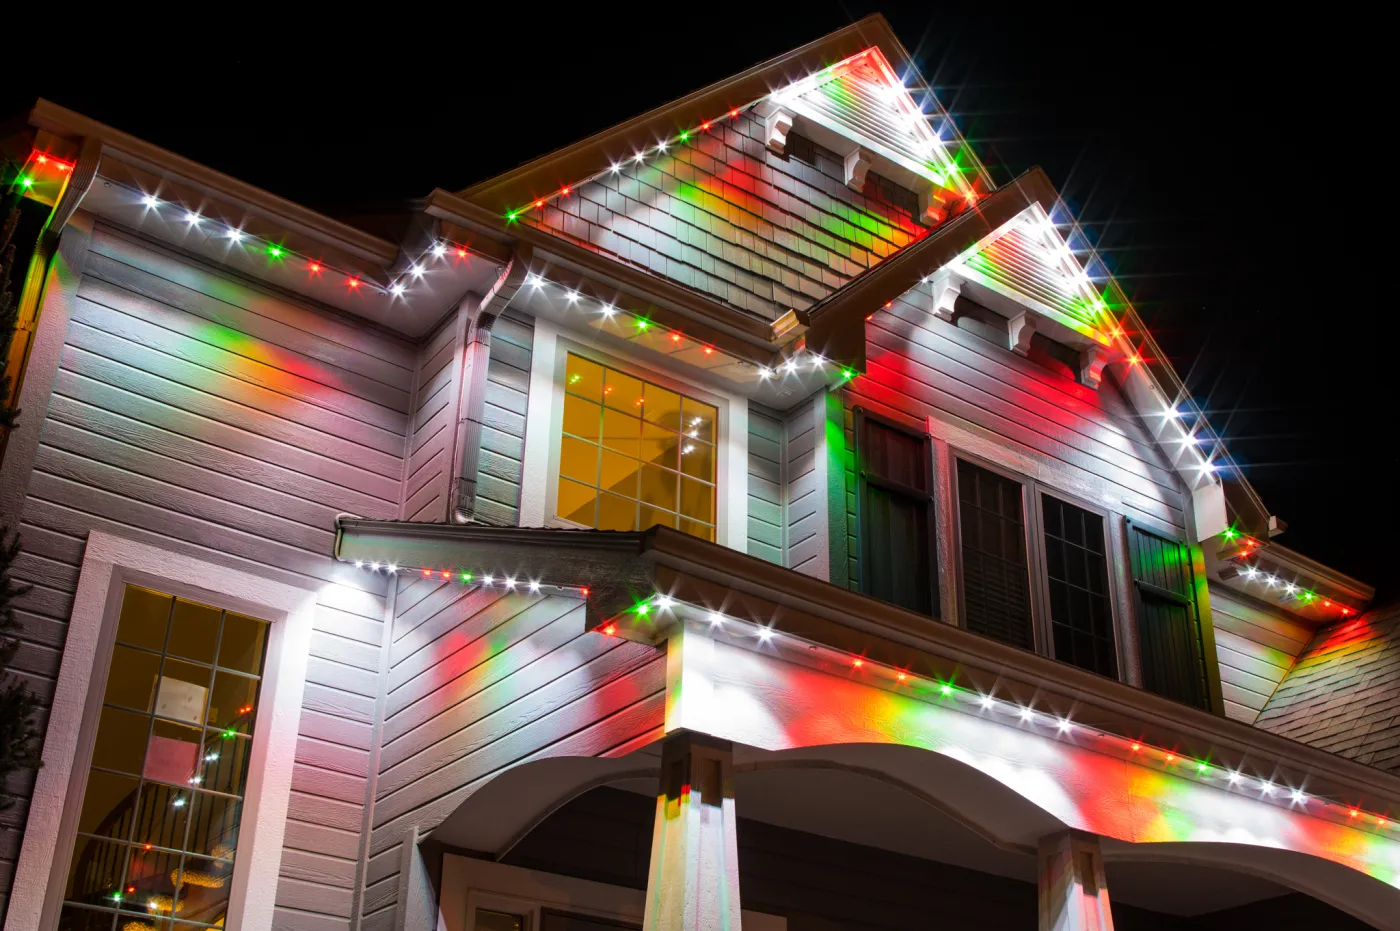
Snow is the variable nobody plans for. Light strands under a snow load can pull clips off the trim, so on sloped roofs use clips rated for the weight and avoid laying strands in roof valleys where snow slides. Keep the controller and connections above the snowline. And be honest about takedown — a display this dense takes two to three hours in cold weather. If you’re not up for a January afternoon on a ladder, simplify the upper levels.
24. Color-Changing LEDs Cycling Through Red, Green, Blue and Purple
Color-changing effects need slower timing than you think. A 30-second cycle across a whole house looks fast and chaotic; 3 to 5 minutes per transition reads as a slow, expensive-looking shift. Set your controller to the longest transition the app allows, then match your reindeer figures to a fixed warm white so they never change — one stable element keeps the display from feeling like a screen. Group your zones by floor so gables change together.
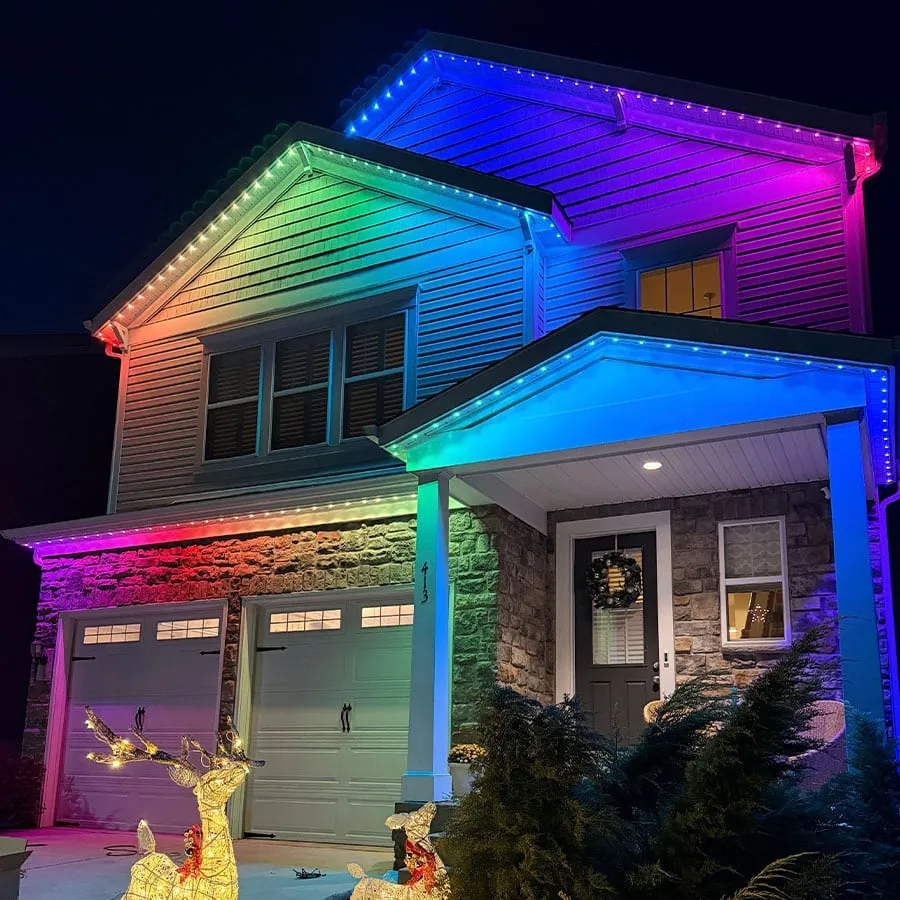
- Map the house into three to five zones on paper before you power anything up.
- Assign one controller per zone, or one per floor if runs are short.
- Program a single baseline color first and hold it for a week before adding effects.
- Set the transition time to 3 minutes or longer.
- Save the look as a scene so a power blip doesn’t reset everything.
Programming night: about 2 hours. Controllers: $25–$60 each.
25. Big C7/C9 Bulbs — The Ones That Actually Read From the Street
Bulb size is the whole point. Mini-lights give you a soft glow that reads beautifully at 20 feet and disappears at 60. C9 bulbs at 1.5 to 2 inches each are visible from across the street and from a moving car, which is genuinely how most people will experience your house. If your goal is being seen rather than photographed, size beats quantity every time — 300 C9 bulbs will outperform 3,000 minis.
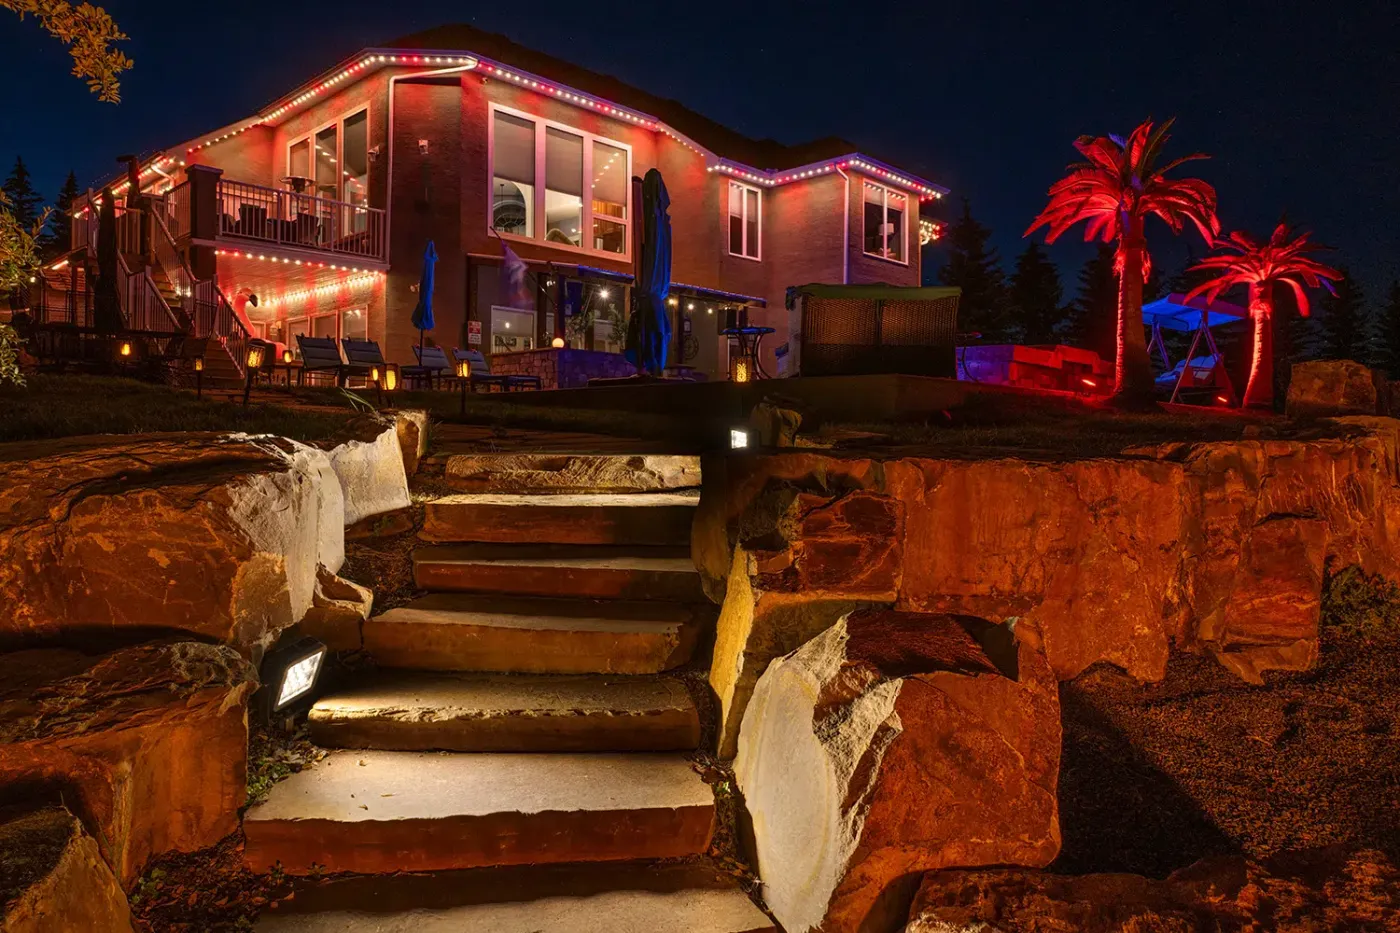
C9 bulbs mean maintenance. Each socket is a failure point, and incandescent C9s burn out one at a time, so plan on replacing 5 to 10 bulbs a season. LED C9s last far longer but cost roughly twice as much up front and are still not immortal in cold. Glass C9s break; plastic ones fade. Store them in labeled coils, keep spares of every color, and test each string on a table before it goes on the roof.
26. Red-Washed Brick on One Side, Blue and Purple Porch on the Other
This one needs a specific asset: a facade with a clear horizontal break, ideally two stories, 50 to 90 feet of width, and a porch wide enough that the columns catch color. The two-color split works because the porch creates a physical division — without it, the change looks accidental. If your front elevation is one flat plane, skip this and try a single-zone gradient like Idea #8.
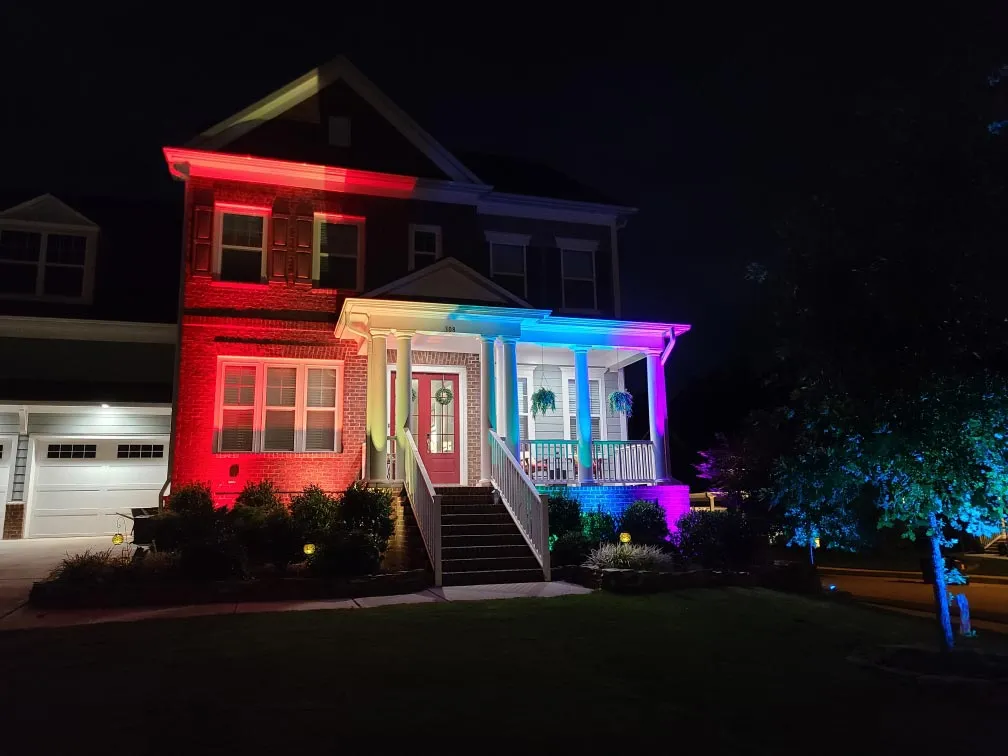
- RGB floodlights for brick wash, 3–4: $70–$180
- Blue and purple fixture set for porch and landscape: $80–$200
- White accent fixtures for garage and porch: $40–$90
- Lit wreath: $30–$90
- Outdoor-rated splitters, stakes, cord, timer: $45–$95
Total: $265–$655
Budget alternative: two color-changing floods on the brick, one blue on the porch — $110 all in.
27. Warm White Rooflines, Rainbow-Wrapped Trees, and a Gnome by the Steps
- Hang warm white on the roofline and dormers first — that’s your base layer.
- Wrap the two front trees in multicolor, starting low and spiraling up.
- Add garland to the porch rail, then weave a short white strand through it.
- Light one evergreen near the door and leave the rest unlit so it has contrast.
- Place figures last, and keep them out of the walk path.
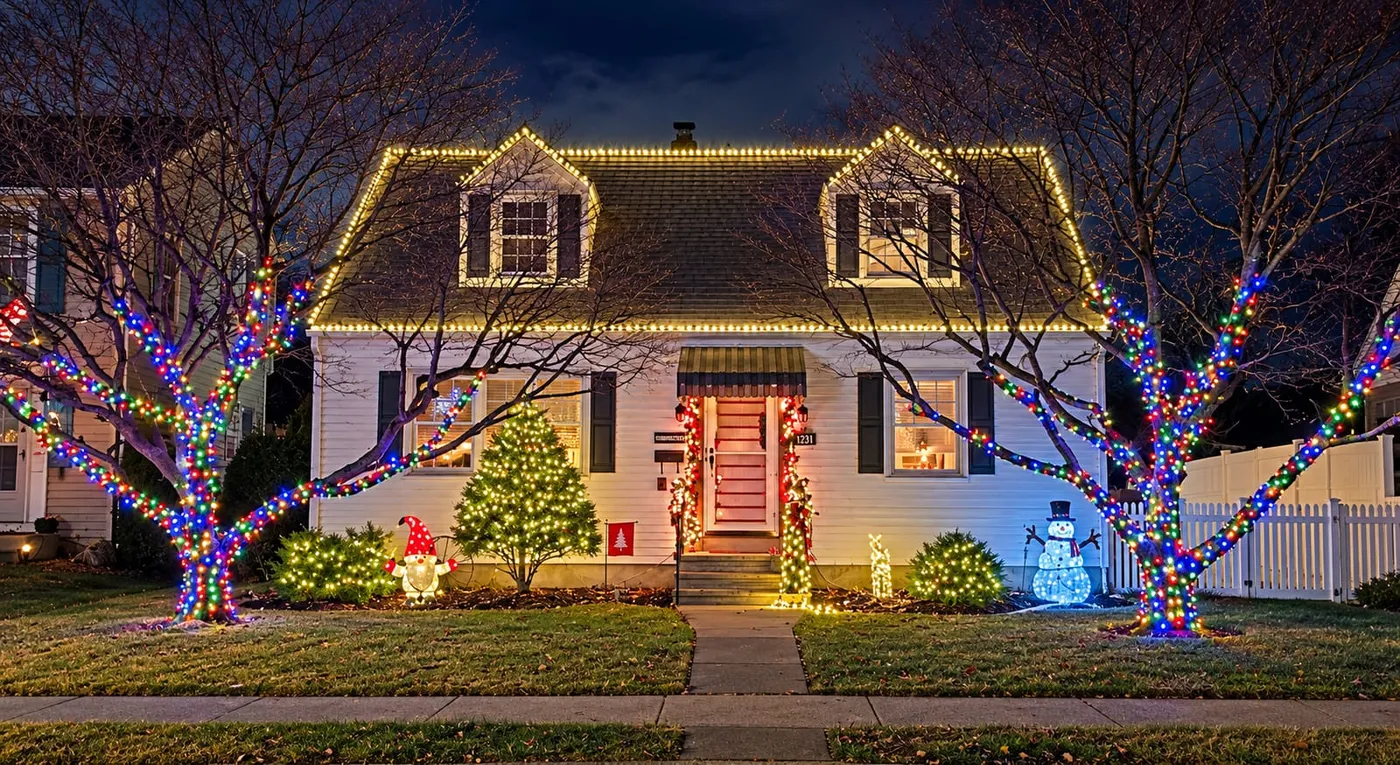
One long weekend; expect $200–$400 in materials on a house this size.
Gnomes and light-up figures are where Target and Walmart win — $30–$60 for a 2-foot lit gnome, versus $120 at a holiday specialty store for something nearly identical. Garland roping runs $12–$20 for 9 feet, and a $20 warm white net light wrapped through it beats pre-lit garland at $60–$90 per run. Trees: 300-count multicolor mini sets at $8–$12 each, usually four to six per tree.
28. Rainbow Cluster Lights: The Timer-Set Rainbow Look
Cluster lights — many tiny LEDs on a brown wire, packed at three to four times normal density — have quietly become the go-to for homeowners who want maximum brightness from a minimum number of strands. Multicolor cluster versions are especially popular in 2026 because the tight spacing blends the colors into almost a continuous ribbon, which is the look people spent years faking by doubling up cheap strings.
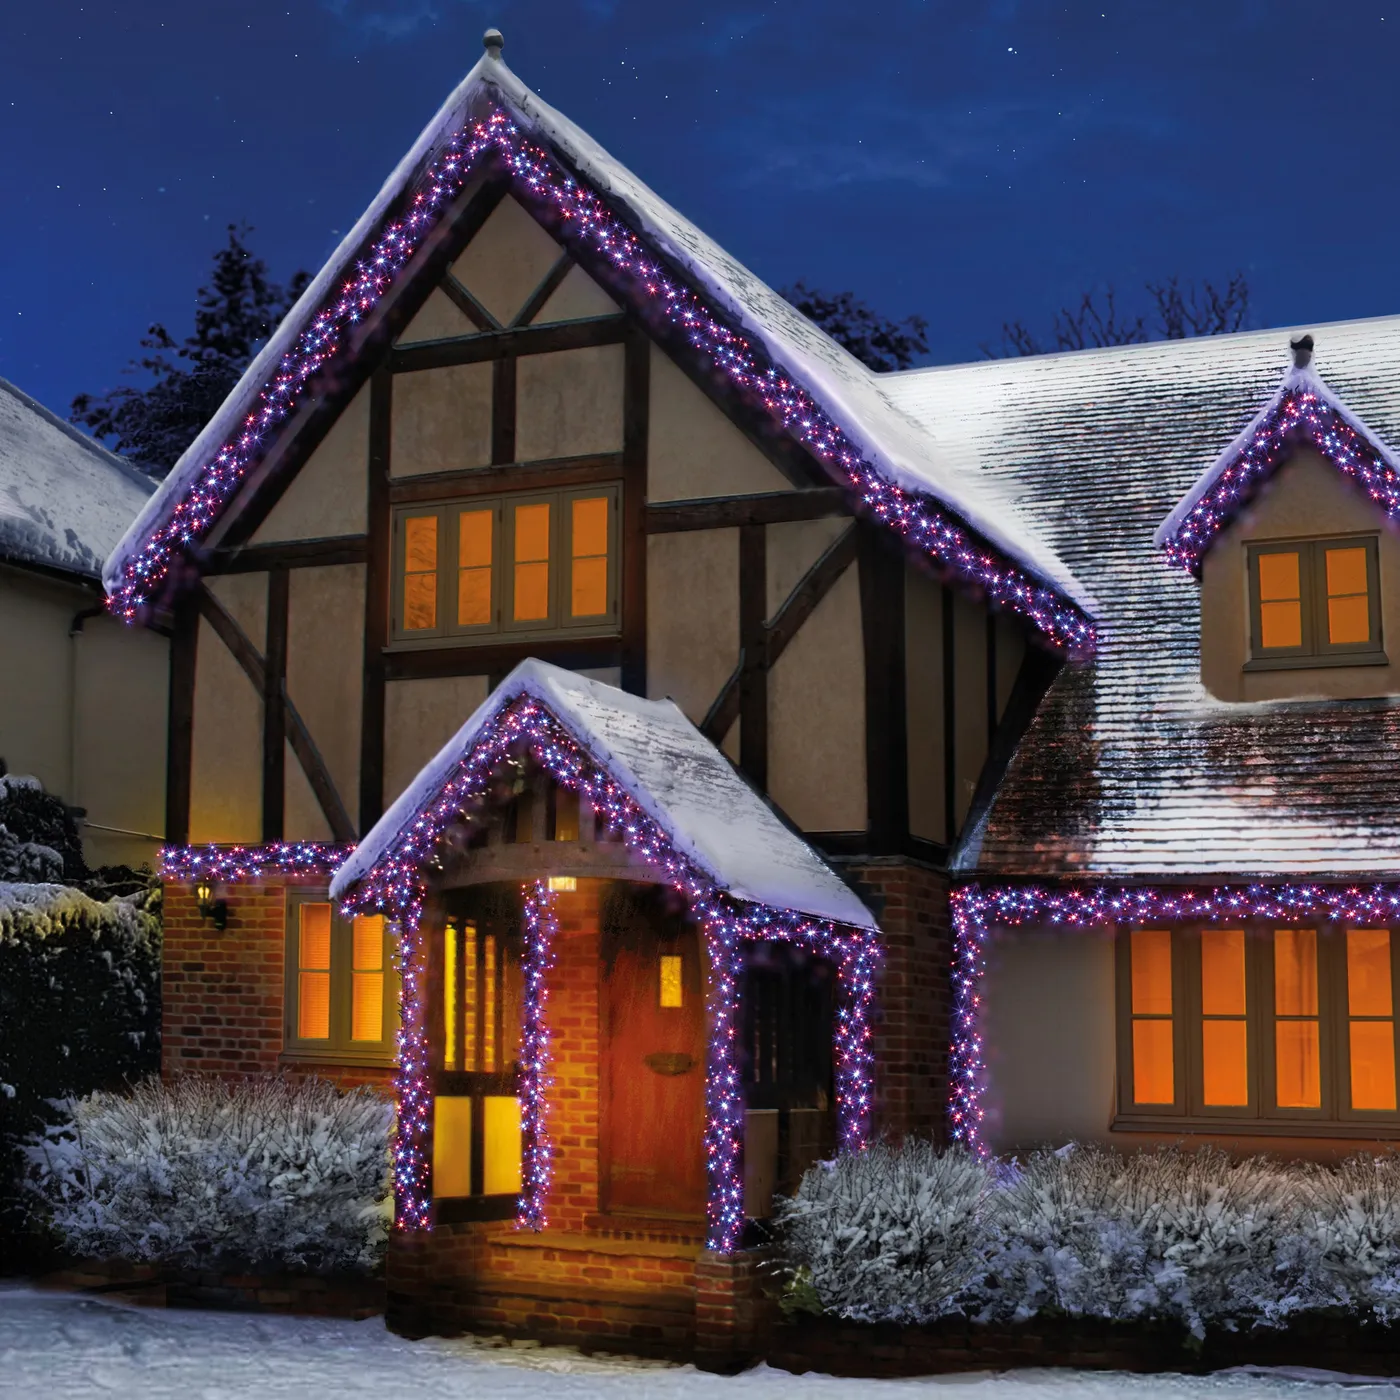
Cluster lights run about 480 to 1,000 LEDs per 10 feet, versus roughly 100 for a standard string, so the density formula changes completely: buy about 40% of the strand length you normally would and get a brighter result. Set the multi-action controller to a slow fade rather than a chase, and keep the color count to four or fewer. Beyond four colors at this density, everything reads as one muddy rainbow.
29. The Maximalist Lawn: Candy Cane Arches, a Train, and a Roof Band
- Count your outdoor circuits and add up total wattage with everything on at once.
- Map walk paths and keep every cord off them — no exceptions with kids or delivery drivers.
- Walk the yard at night and mark where figures will catch headlights from the street.
- Decide your takedown date now, and whether you have dry storage for everything.
- Talk to your neighbor before you put figures on a shared sightline.
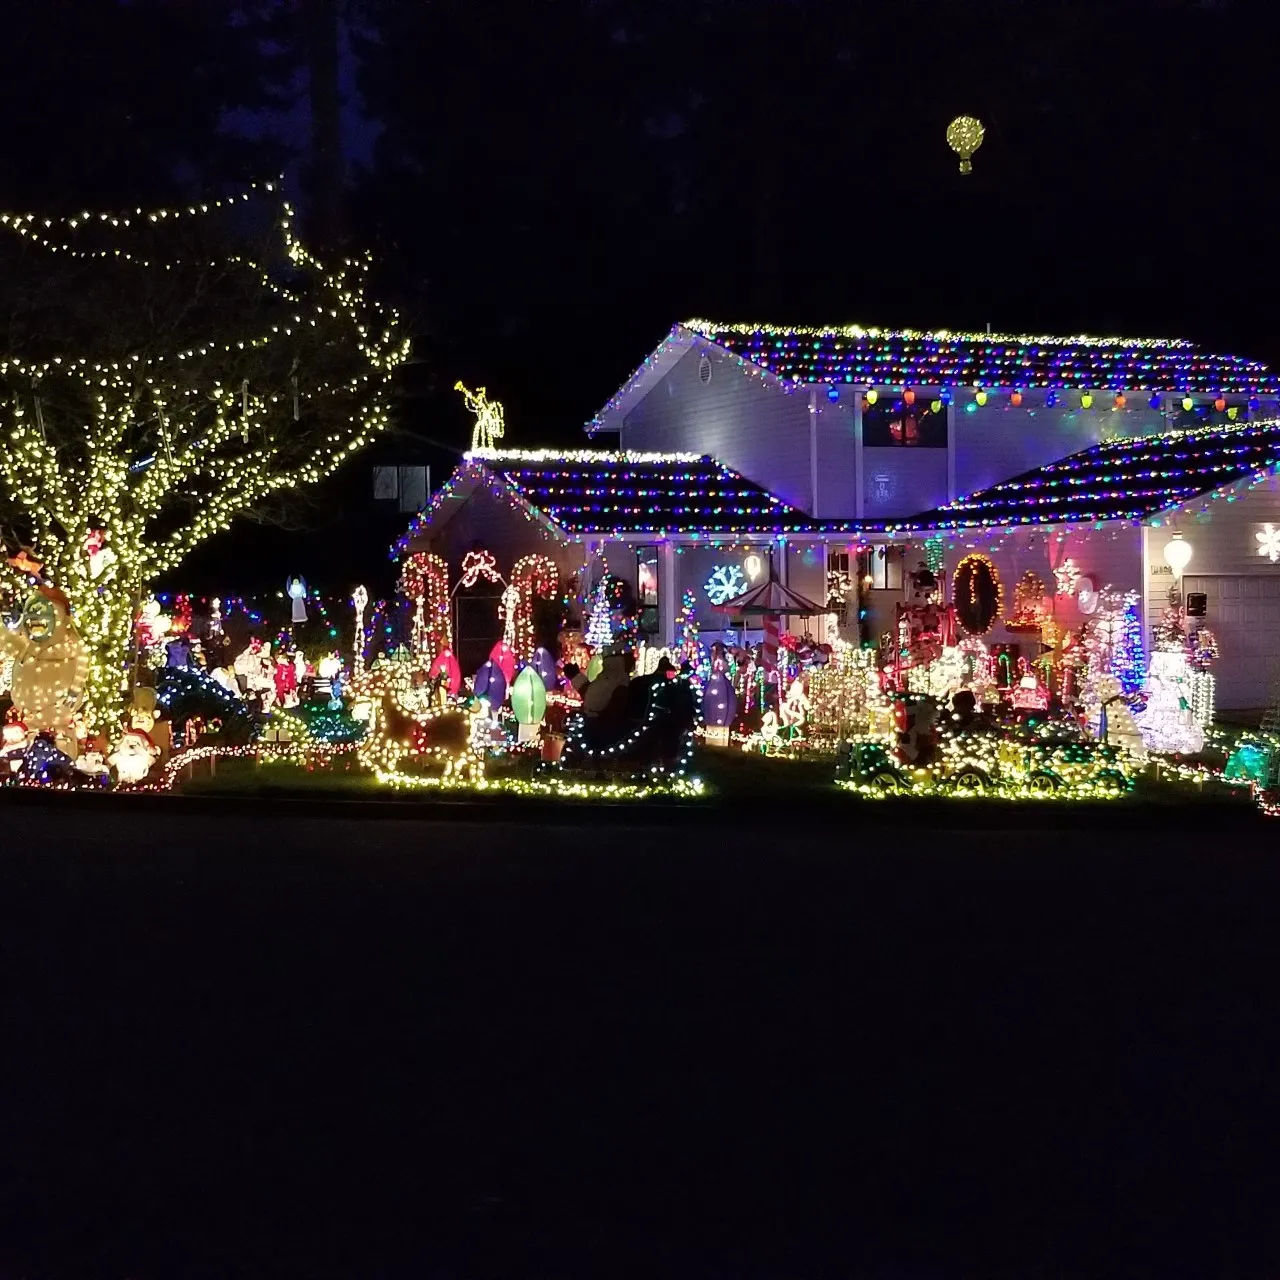
There’s a hidden structure under all that noise. Warm white does the roofline band and the big tree, multicolor handles the lawn figures, and candy cane arches frame the entry like punctuation. Without the warm white band up top, the whole yard would read as one undifferentiated pile of color. The band gives the eye a place to rest — that’s the difference between maximalist and messy, at 5 figures or 50.
30. Two Neighboring Houses Going Full Multicolor — Together
- Multicolor mini-lights, 2,000–3,000 bulbs: $130–$280
- Inflatable Santa with sleigh and reindeer: $130–$300
- Giant lit snowflakes, 2–3: $60–$180
- Lighted candy canes and lollipops, 12 pieces: $50–$120
- Red facade projection light: $45–$130
- Cords, stakes, splitters, timers: $60–$140
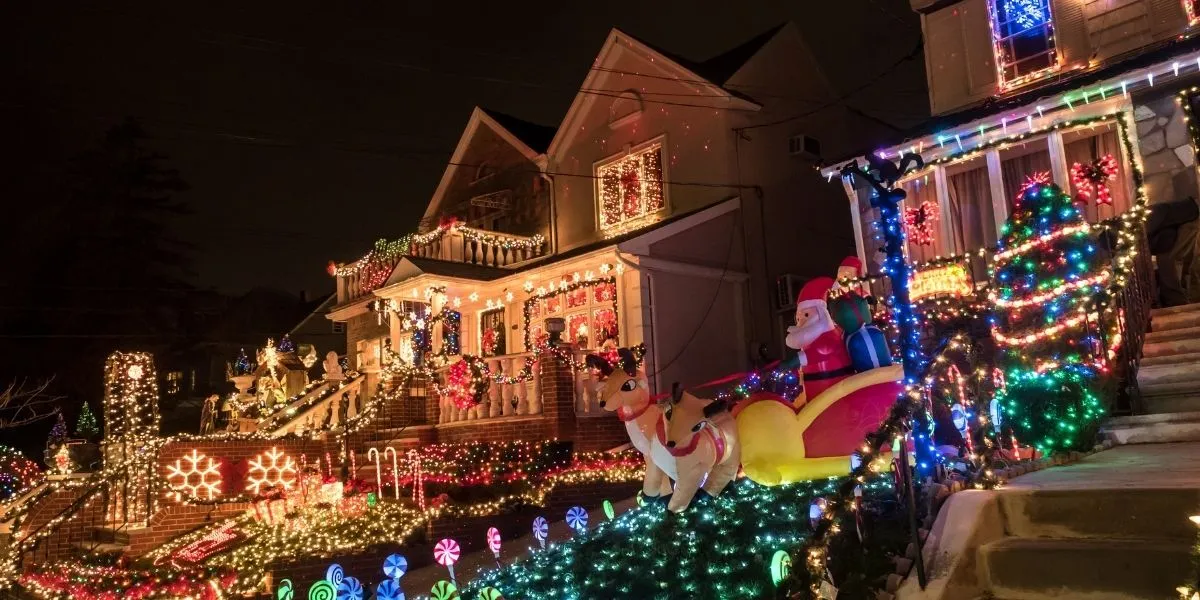
Total: $475–$1,150
Budget alternative: skip the projection and split the inflatable cost with your neighbor — around $320 all in.
Two houses lit together need one shared rule or they’ll fight. Agree on a dominant color temperature and a common start time, then let each house keep its own accents. Also stagger your cycles: if both houses run the same chasing pattern at the same speed, the street turns into a visual strobe. Different speeds on shared colors looks intentional; identical speeds look like an accident.
31. Red, White and Blue Perimeter Lights on a Modern Farmhouse
Roughly 60% cool white perimeter lights, 25% blue, 15% red — and the ratio matters more than the colors. Red is used sparingly because it’s the warmest, most attention-grabbing note. Even spacing, not bulb count, is what makes this look precise: evenly spaced points along a clean roofline read as architectural detail rather than decoration. Swap the recipe to warm white plus amber plus a touch of gold and the same formula gives you a completely different mood.
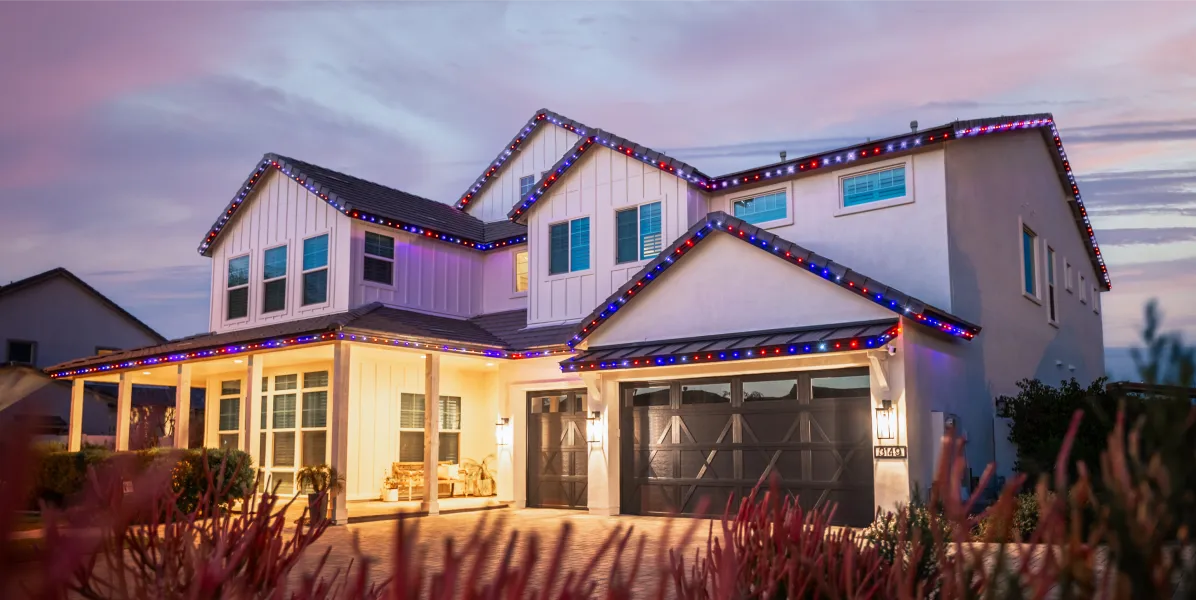
Red, white, and blue reads patriotic, not Christmas, to a lot of people, and that’s a feature or a bug depending on your street. Know your audience. If you want a holiday read with the same precision, swap red for crimson and blue for teal. One more thing: cool white bulbs look stark next to warm sconce lighting, and this facade has both. Warm the perimeter to 3000K or switch the sconces to daylight.
32. Red and Amber Roofline Lights at Dusk by the Water
Red and amber are the most forgiving pair in roofline lighting because they sit next to each other on the color wheel — no vibration, no clash, and both hold up against a dusk sky. Alternate them one-to-one rather than in blocks; blocks read as two separate installations instead of one intention. And buy a single brand for both colors, because reds and ambers from different manufacturers are rarely the same temperature, and the difference shows up at night.
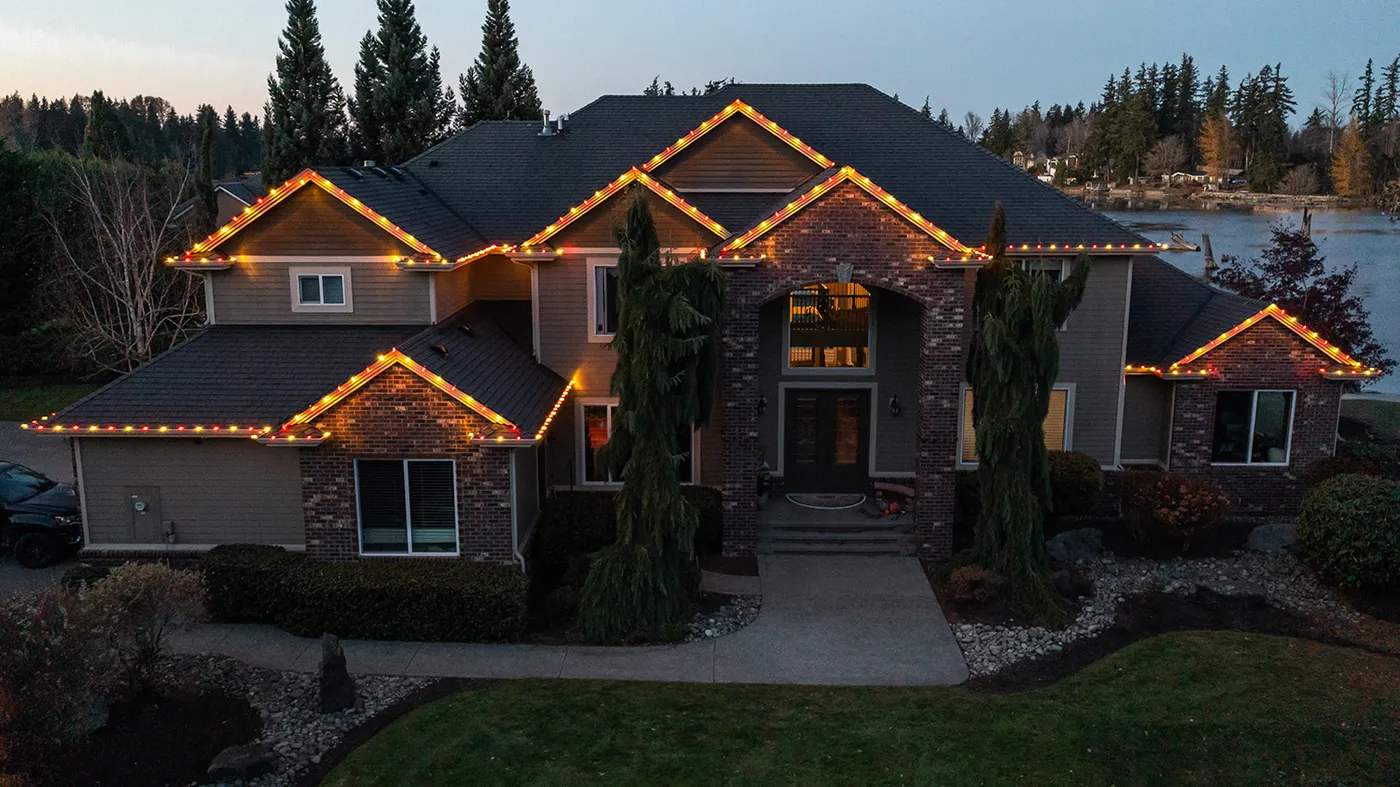
Roofline outlining scales almost linearly with house width. For a 40-foot facade, 150 to 200 bulbs at 3-inch spacing; for 80 feet, 300 to 400. Multi-gabled homes like this one need roughly 15 to 25% extra length, because gables add both up-and-over runs and corner returns. Waterfront or open-lot houses also benefit from a dusk start time — the residual sky glow softens the red and hides the hard line where your display ends.
33. Alternating Red and Green on a Modern Overhang, Lit Steps Below
The white accent lights on the steps and landscaping are the element I’d never cut. The red and green bulbs get all the attention, but without low white lighting the house floats in space — nothing connects the display to the ground, and walking up to the front door feels like stepping into a void. Ground-level white anchors the composition and makes the entry feel safe. It costs almost nothing and does more than any extra strand.
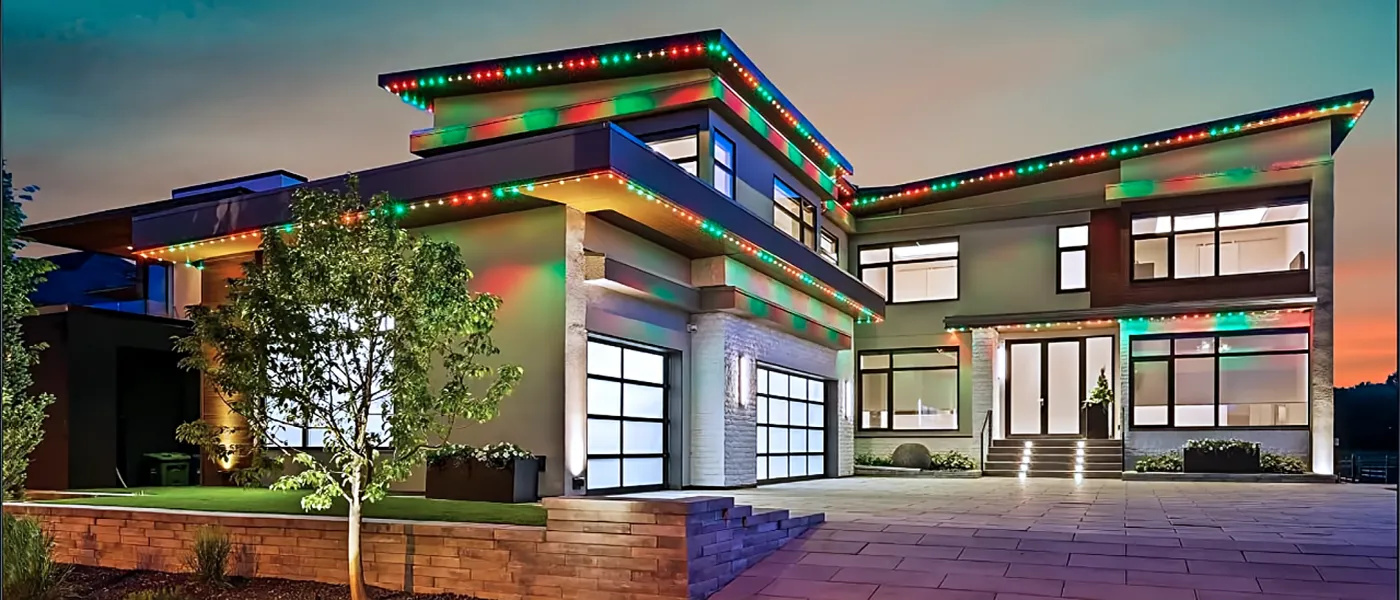
- Measure your overhang runs and add 10% for corner returns.
- Alternate red and green at every socket, starting and ending with the same color.
- Use the dark-framed window trim as your alignment guide — run the lights just above it.
- Put the step lights on a separate circuit or smart plug so you can dim them independently.
- Test everything at dusk, when you’ll actually see it.
Around 3 hours for a two-story facade; $60–$140 in materials.
34. Classic C9 Rooflines with Red and Green Floodlights at Ground Level
Classic C9 strings are the best deal in holiday lighting over a five-year horizon. A 100-foot spool of LED C9 with sockets runs $70–$140 and lasts for seasons; mini-lights at $8 a string will cost you more by year four because they fail in the cold. Ground-level floodlights are the cheapest color per square foot: three fixtures at $25–$50 each, one red and two green, cover an entire brick face. Total, $150–$300.
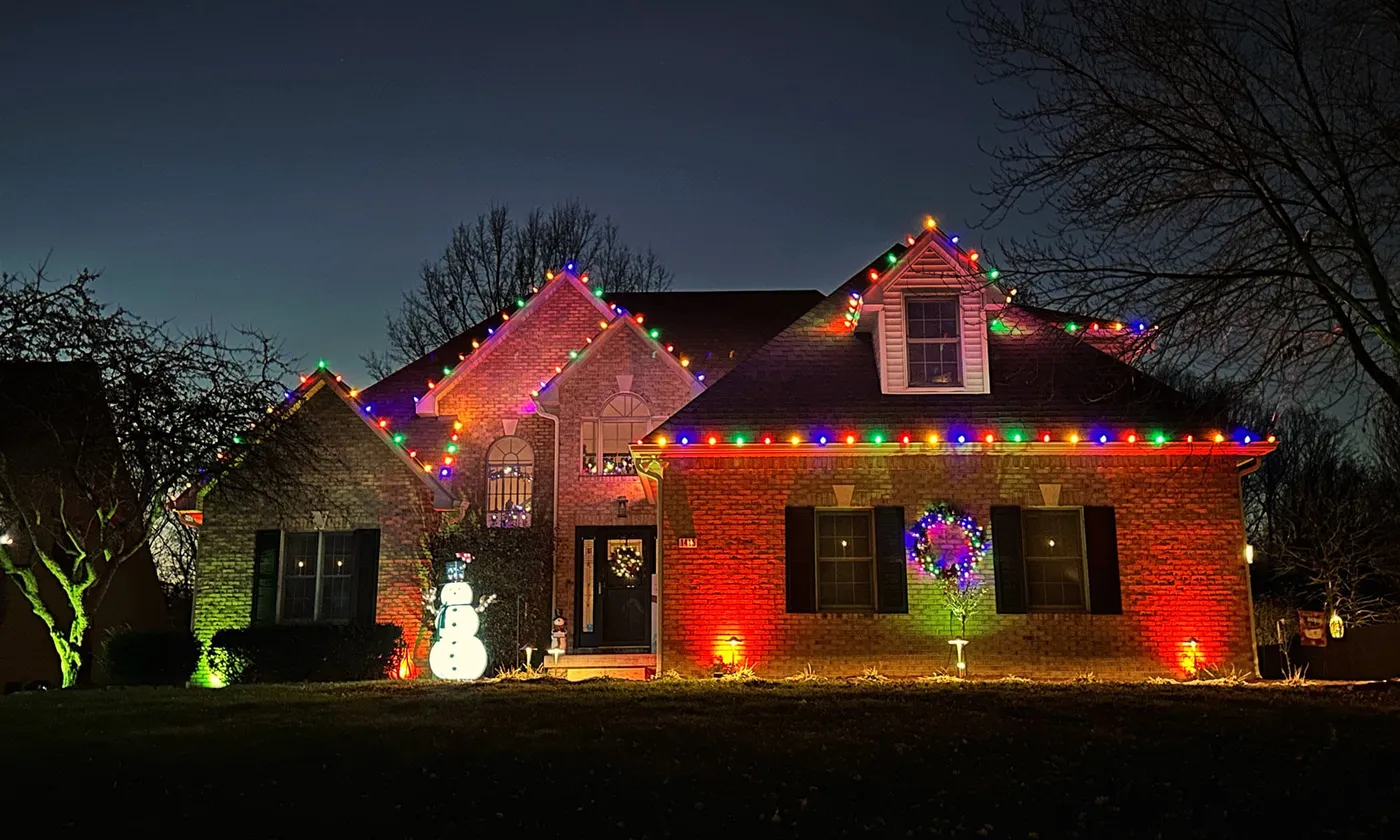
- Verify your ladder reach before planning a roofline — C9 clips add height.
- Count total sockets and confirm the circuit can handle the amperage if you go incandescent.
- Measure each gable run separately; don’t estimate from the ground.
- Decide where floodlights sit so beams hit wall, not sidewalk.
- Buy two spare bulbs of every color.
Make Your House the One the Whole Street Slows Down For
Start with one zone — a roofline, a porch, or a single tree — get the color temperature right, and let it run for a week before you add anything else. You’ll learn more from one lit weekend than from a month of scrolling, and you’ll buy smarter because of it. Whatever you build this year, build it so it looks good from the sidewalk at 20 feet, because that’s where almost everyone will see it.
📌 Pin this guide to your Christmas Lighting board now — come November, you’ll want the measurements, the price ranges, and that spacing rule back in front of you.