You know that feeling when you finally spot a Christmas village setup that looks like it belongs in a real home instead of a department store window? Same. So we went hunting.
After filtering through hundreds of options across Michaels, Target, Etsy, Walmart, and Facebook Marketplace, we narrowed it down to 39 ideas that actually deliver — from $4 dollar-store houses to $180 tiered displays.
Inside you’ll find rustic farmhouse villages, whimsical pastel ceramics, nostalgic traditional towns, and full-on glitter glam, with budget and luxury versions compared side by side so you can see exactly where the money goes.
2026 is the year villages moved off the shelf and under the tree — Pinterest is full of people building them on ladders, trays, and cake stands.
Go ahead and save this — you’re going to want to reference it. And stay until the end, because we break down the mistakes that quietly ruin these displays.
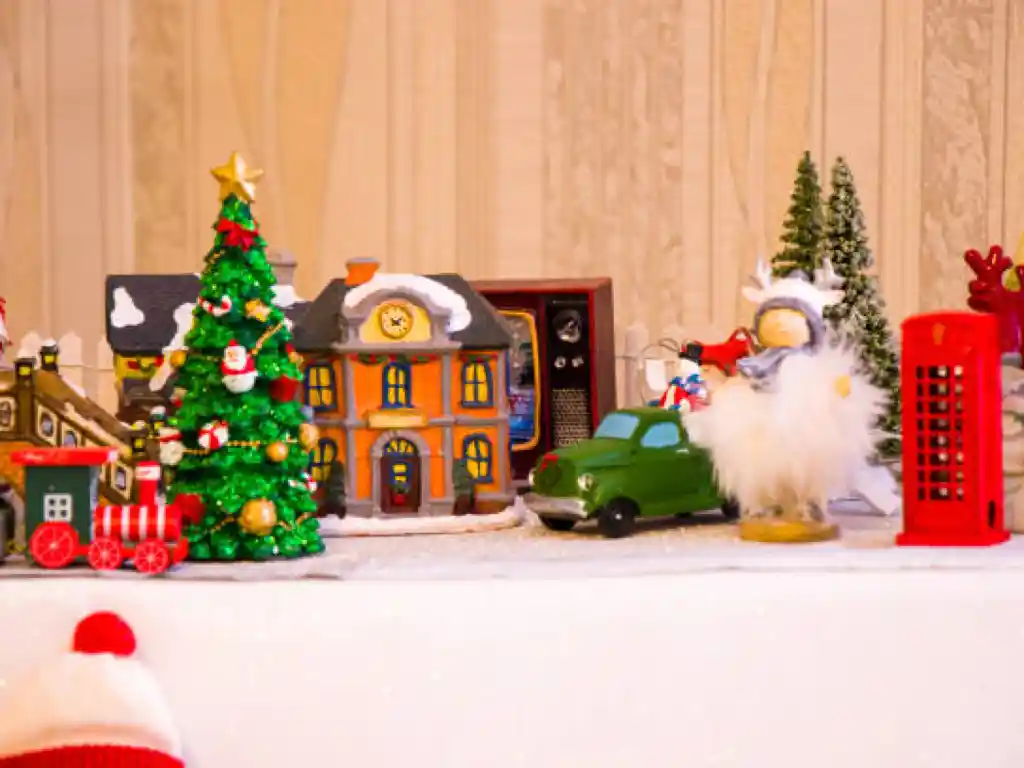
1. A Clock-Tower House Anchoring a Glittery Toy Town
That orange clock-tower house does the heavy lifting. Without it, the glittery white surface, red telephone booth, and green vintage toy car read as a pile of cute objects instead of a town. Every village needs one landmark that’s taller and a different color — place yours rear-center and let the small pieces cluster around it.
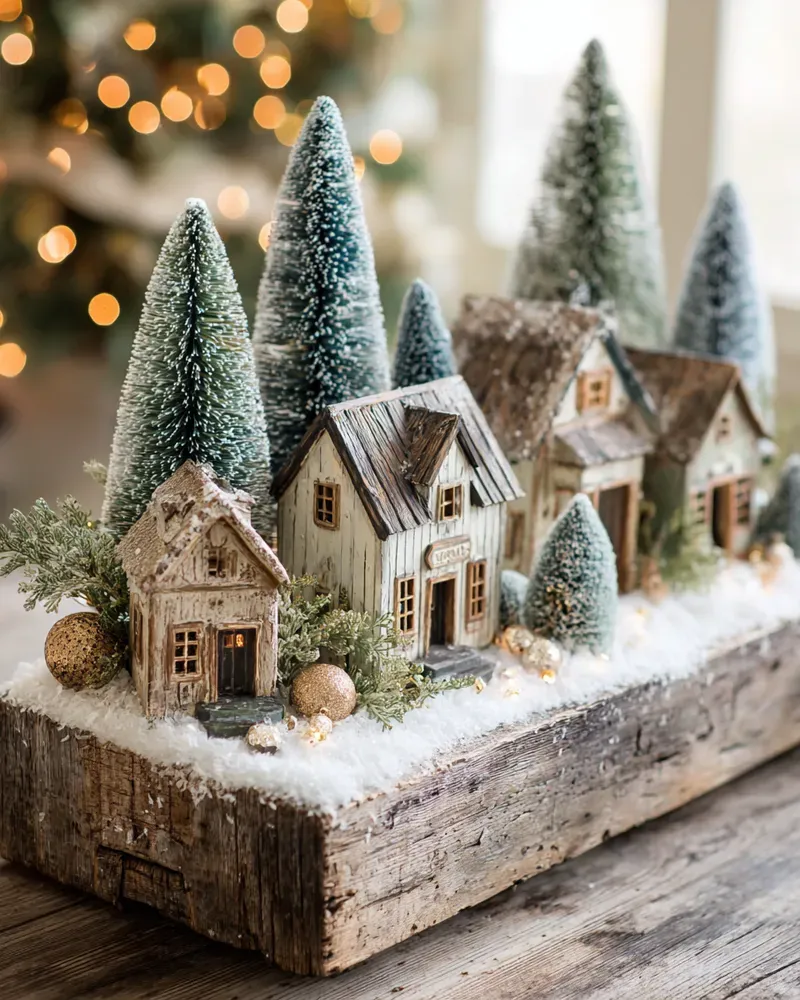
2. Rustic Houses and Frosted Bottle Brush Trees on Raw Wood
Bottle brush trees look store-bought when they’re all the same height. Group them in odd numbers — three, five, seven — and stagger them by at least 2 inches, tallest at the back. The frosted trees here step up from 3-inch minis to a 10-inch one, and that single tall tree keeps the raw wood block from going flat.
3. A Snow-Dusted Tree Farm Village Under Multicolored Lights
- Houses and signage: $25–$70
- Multicolored string lights: $8–$20
- Flocked evergreen trees: $12–$35
- Train, figures, snow base: $15–$40
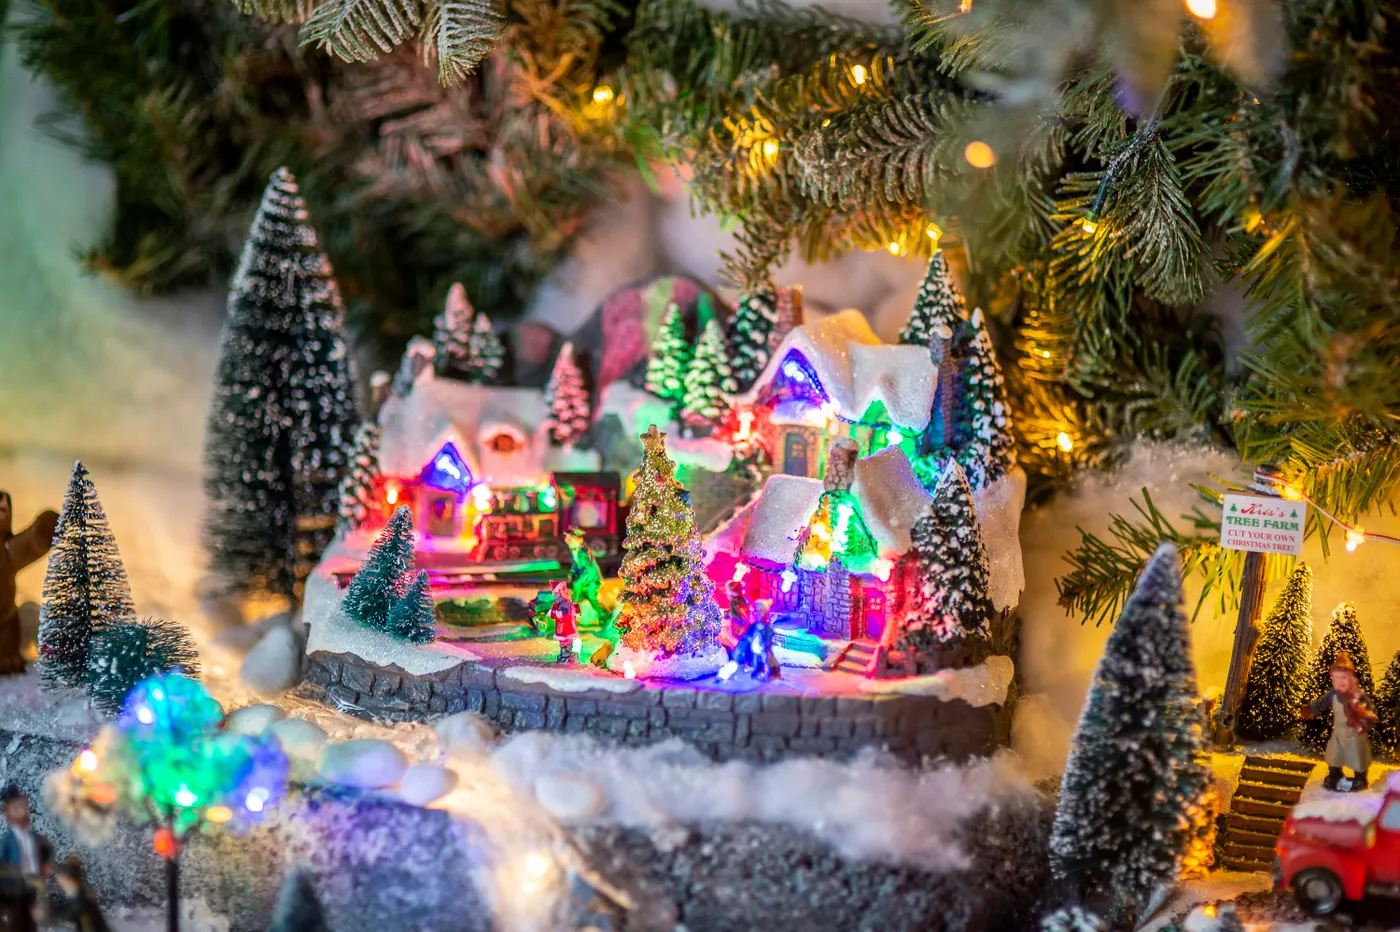
Total: $60–$165. Budget alternative: one warm string of lights plus dollar-store flocking gets you most of the way for under $40.
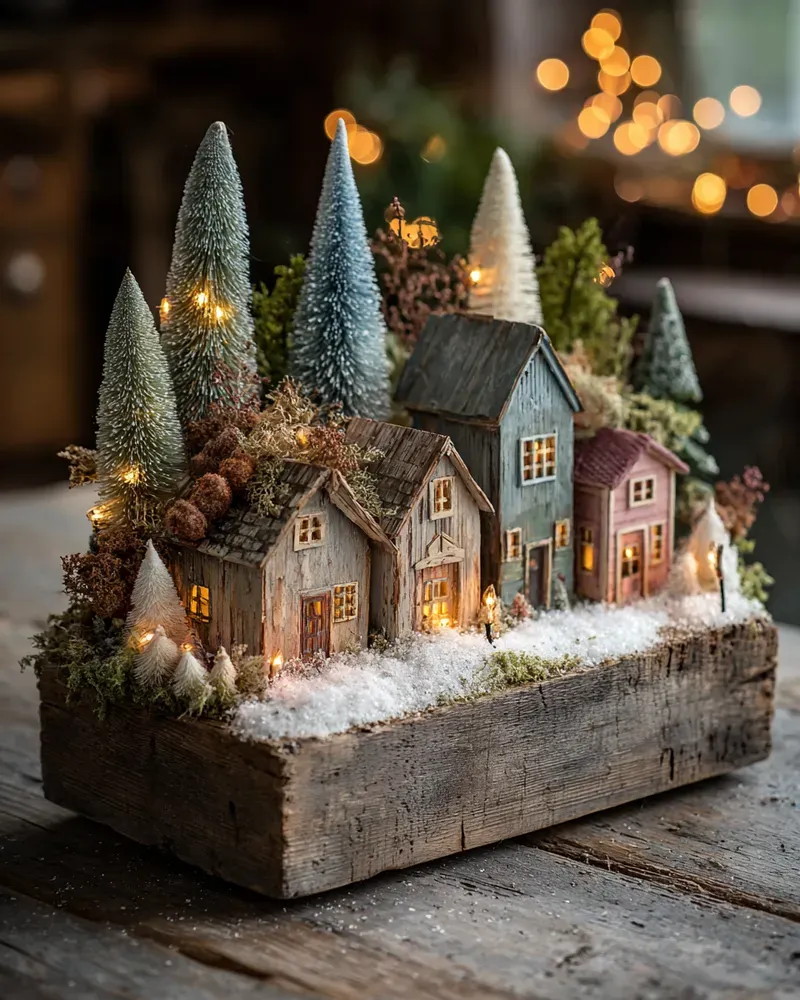
4. A Distressed Wooden Box Becomes a Tiny Snowy Town
A distressed wooden box hides cords beautifully, but it also traps heat. Use LED fairy lights only — the incandescent kind warms the moss and berries until they crisp. Also check the box’s wall height before you buy houses: a 4-inch lip will hide the bottom third of anything shorter than 5 inches.
5. Warm Yellow Windows Glowing Through a Snowy Brick Village
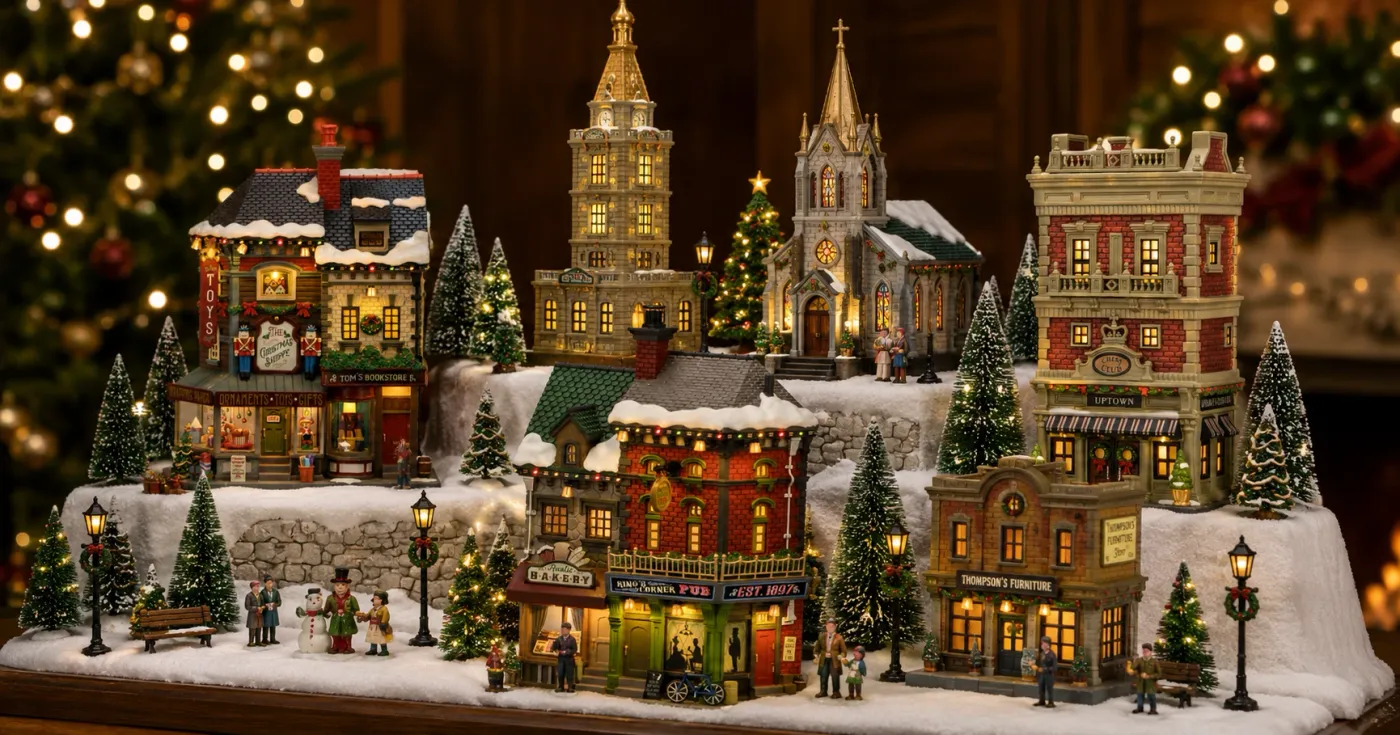
Three light planes do the work here: windows glowing from inside, streetlights on the snow, and a soft blur of holiday lights behind. That layering is why the brick and tan stone buildings feel like a town at dusk instead of a shelf of models. Keep your brightest light in the middle distance, never at the front edge.
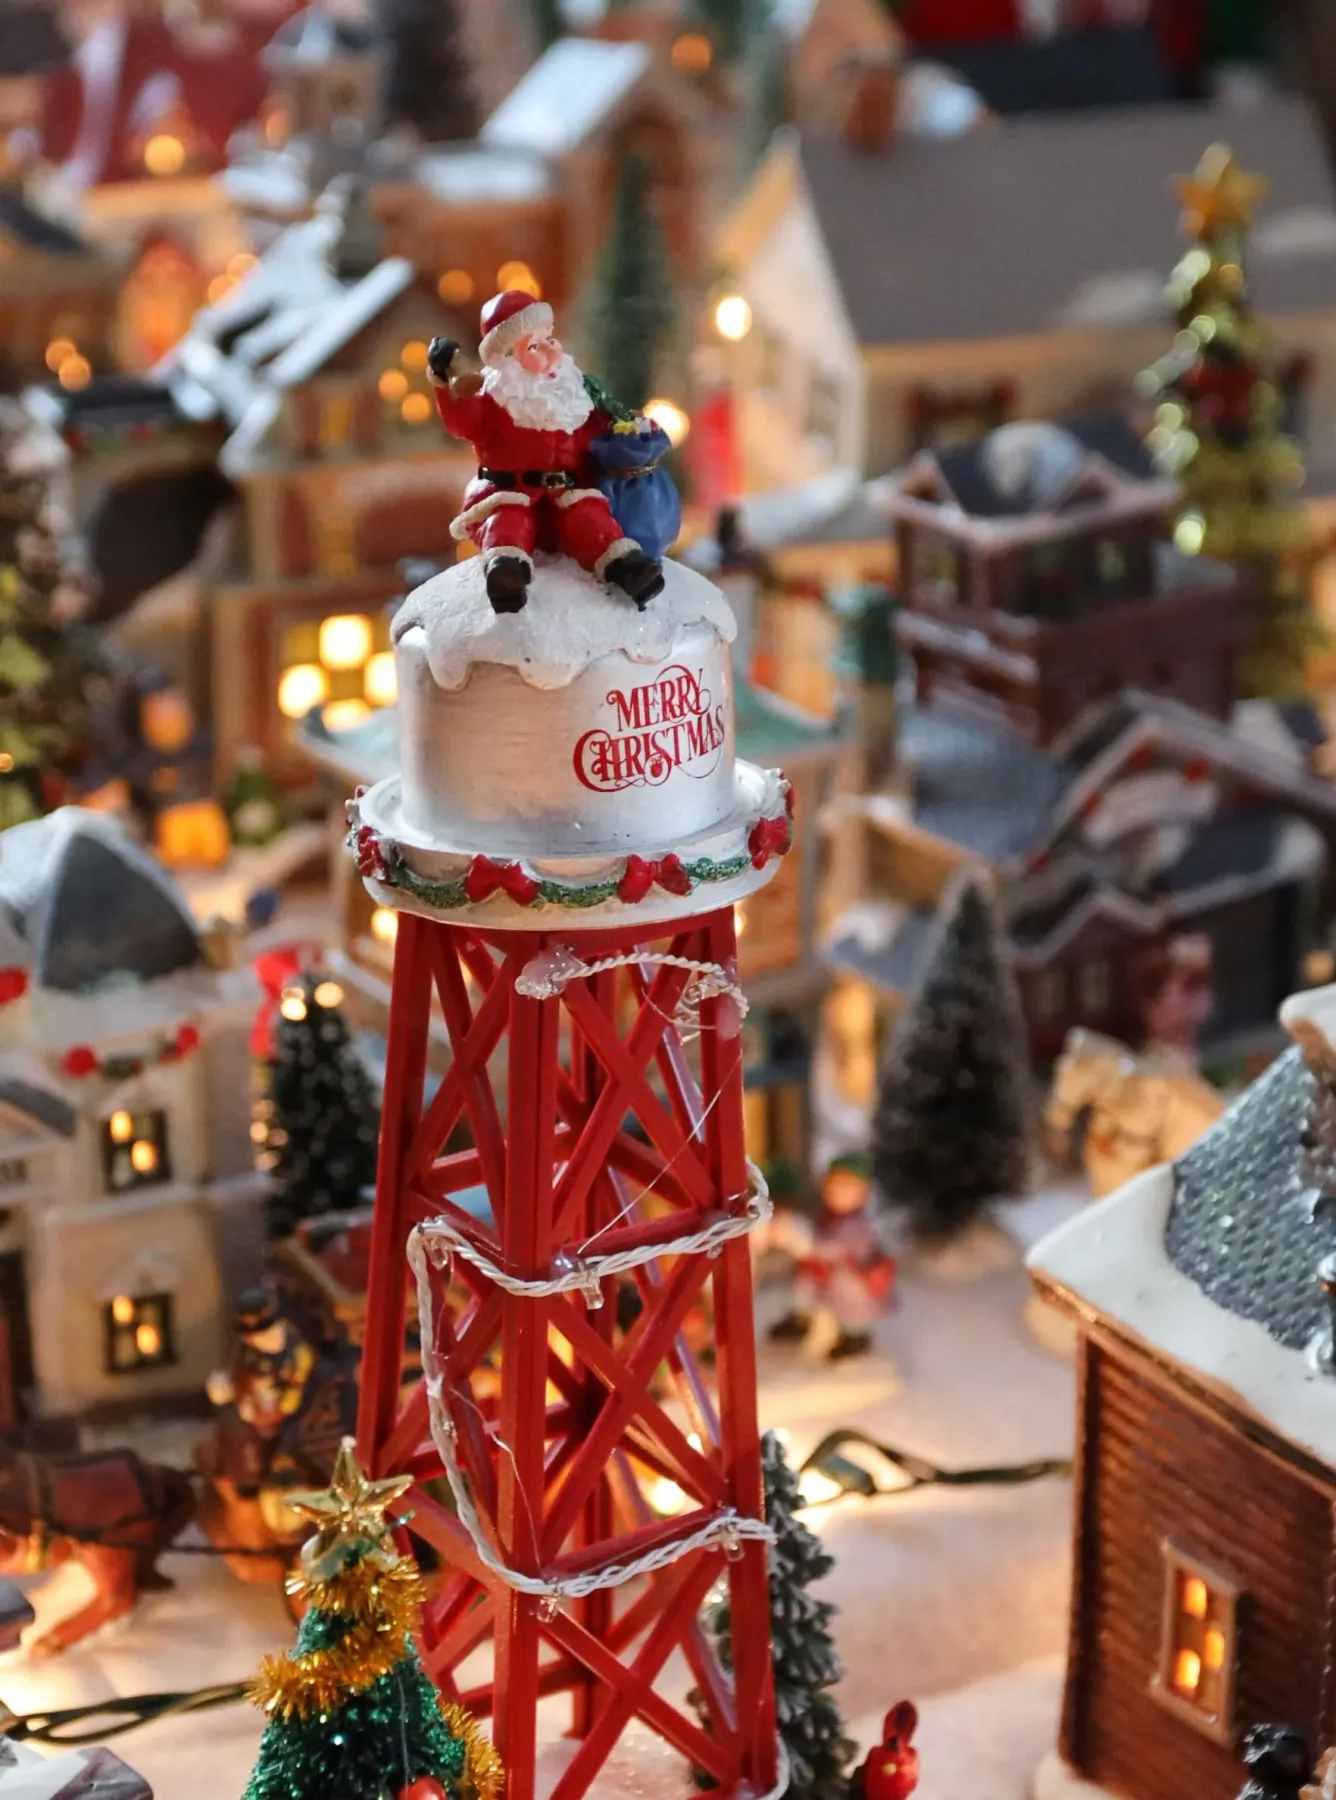
6. Santa Perched on a Red Lattice Tower Draped in Garland
Vertical displays read as clutter unless the eye can travel. Give the red lattice tower a clear 10 inches of empty air above Santa’s head, and keep the tower’s string lights spaced about 4 inches apart. Tighter than that and the green garland and red bows disappear into one glowing red blur.
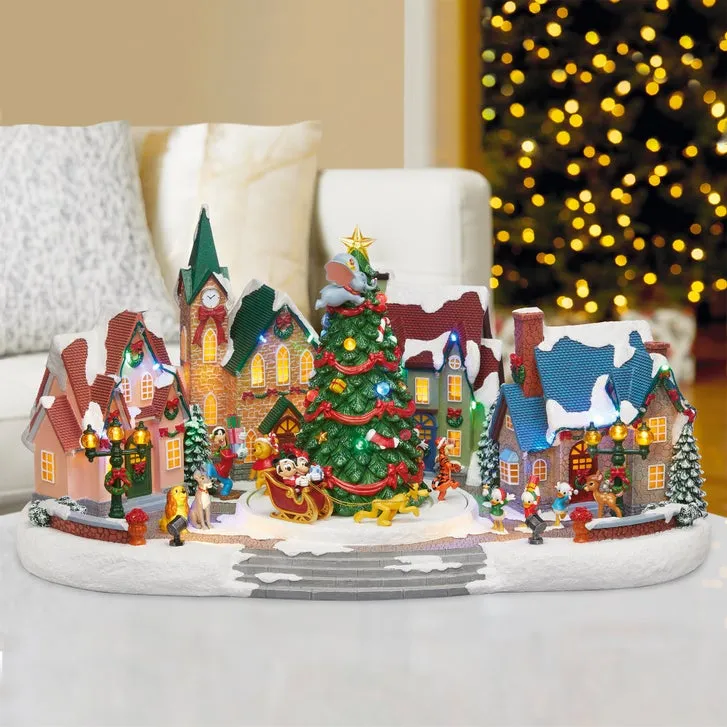
7. A Disney Character Village With an Elephant Topping the Tree
Character-driven villages are the 2026 answer to the classic Dickens set — interest in themed village displays has climbed every November for three years running. The elephant perched at the top of that lit tree is delightfully odd and completely on trend: collectors are treating villages like a personality shelf, not a period piece.
8. Multi-Tiered Village Rising Up a Dark Wood Cabinet
Tiered risers need a footprint of at least 36 inches wide and 18 deep, and they want a dark backdrop — the black wood cabinet against the white wall is doing exactly that job. Skip tiers if your ceiling is under 8 feet and the top shelf sits above eye level; you’ll only see undersides.
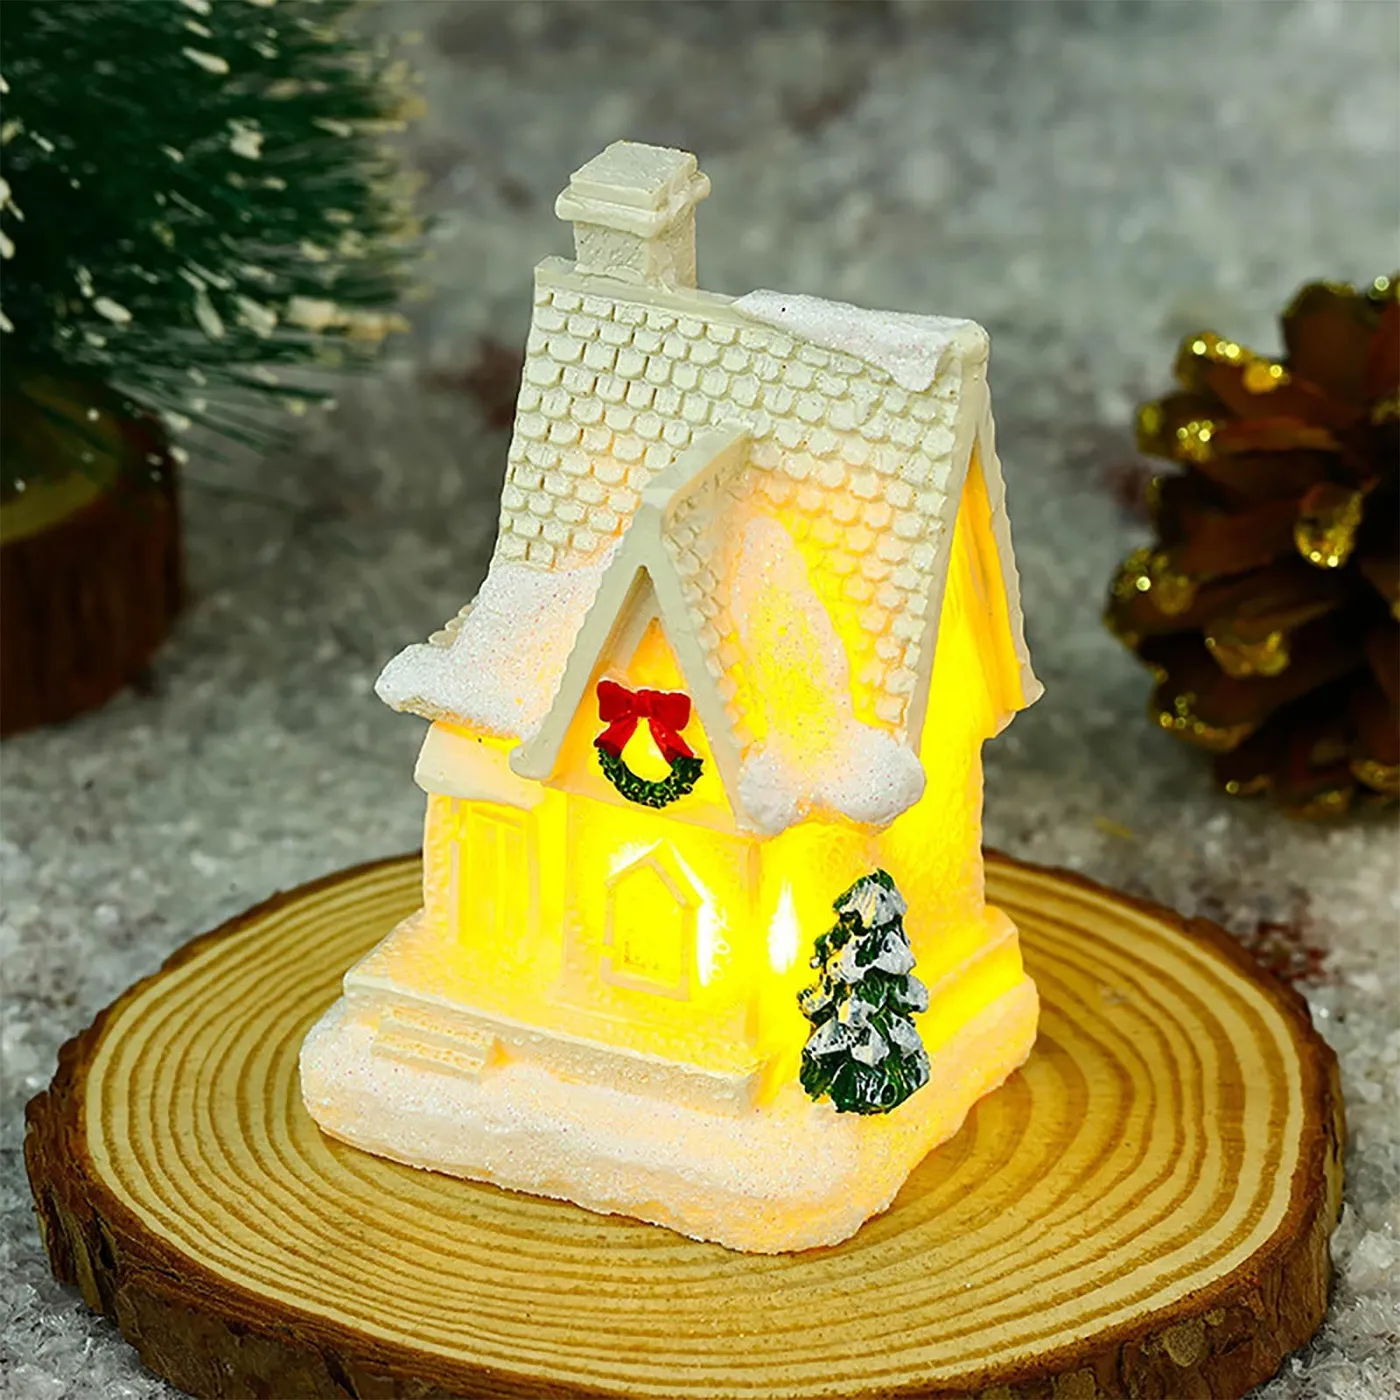
9. One Glowing House on a Wood Slice With a Glittery Pinecone
The round wood slice. A glowing house on a bed of white granules is pretty; the same house on raw wood, flanked by a glittery pinecone and a frosted tree, looks collected instead of purchased. The bark edge gives the warm window light something to sit against. One slice, one house, three objects total.
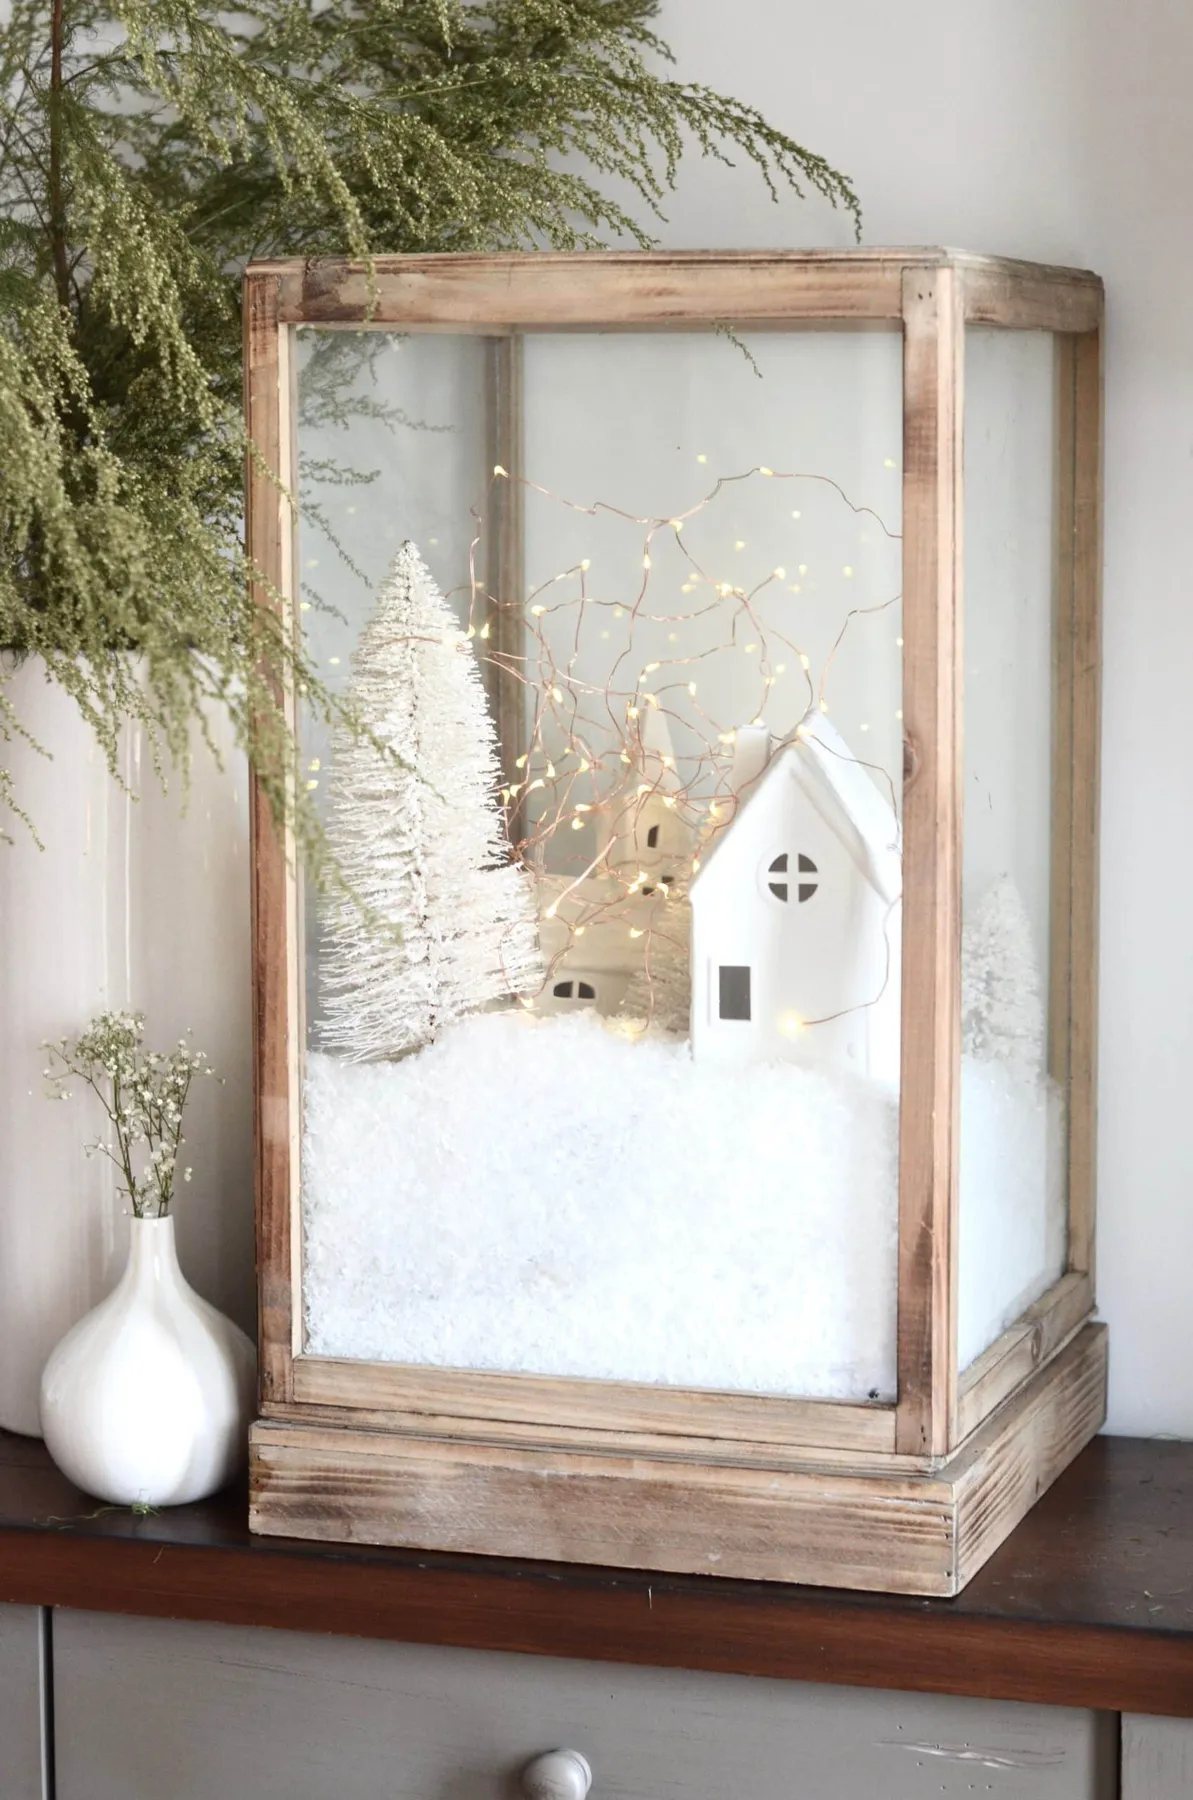
10. White Ceramic Houses Tucked Inside a Glass Display Box
Glass display boxes keep dust off — and trap humidity in. If the white ceramic houses feel clammy or fog, crack the door for a few hours a week. Compare with Idea #2: open rustic displays need a soft-brush dusting every two weeks, but they never get that closed-in smell.
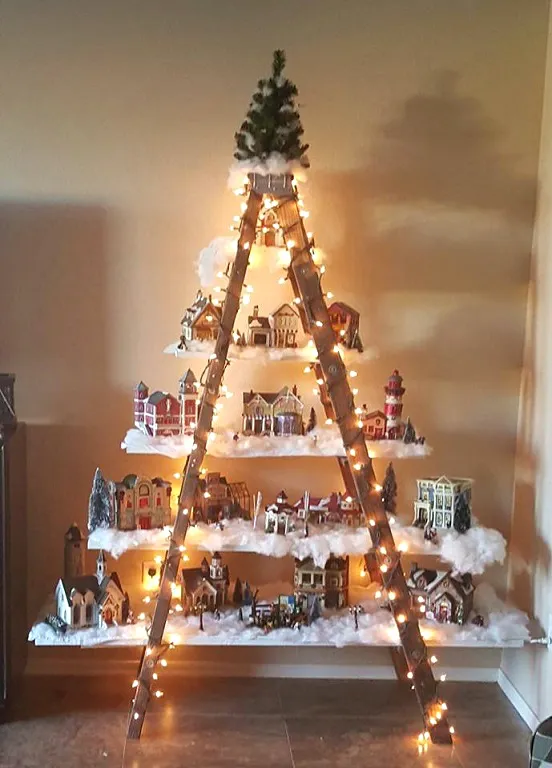
11. A Thrifted Village Climbing the Rungs of a Ladder
Ladder displays are the cheapest village base going. A thrifted wooden ladder runs $10–$25 on Facebook Marketplace, and mismatched houses from estate sales average $3–$8 each. Paint them all one color — matte white or aged cream — and the mix of eras disappears. Five houses, roughly $60.
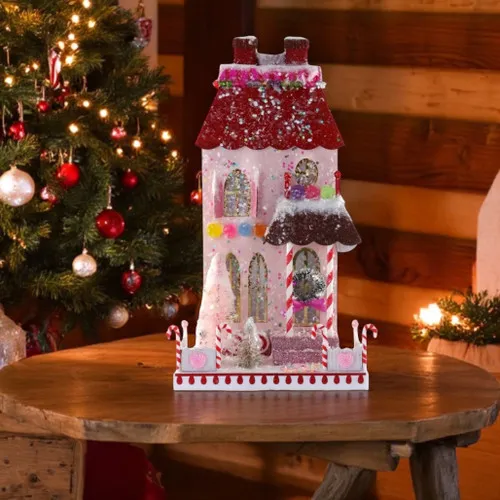
12. A Pink Glitter Gingerbread House With Candy Cane Pillars
The formula is 70% pink glitter + 20% red glitter + 10% white and green accents. Swap pink for mint and the red roofs for silver, and this turns into a frosty pastel gingerbread. Keep the candy cane pillars and pom-pom details neutral — they’re the punctuation, not the sentence.
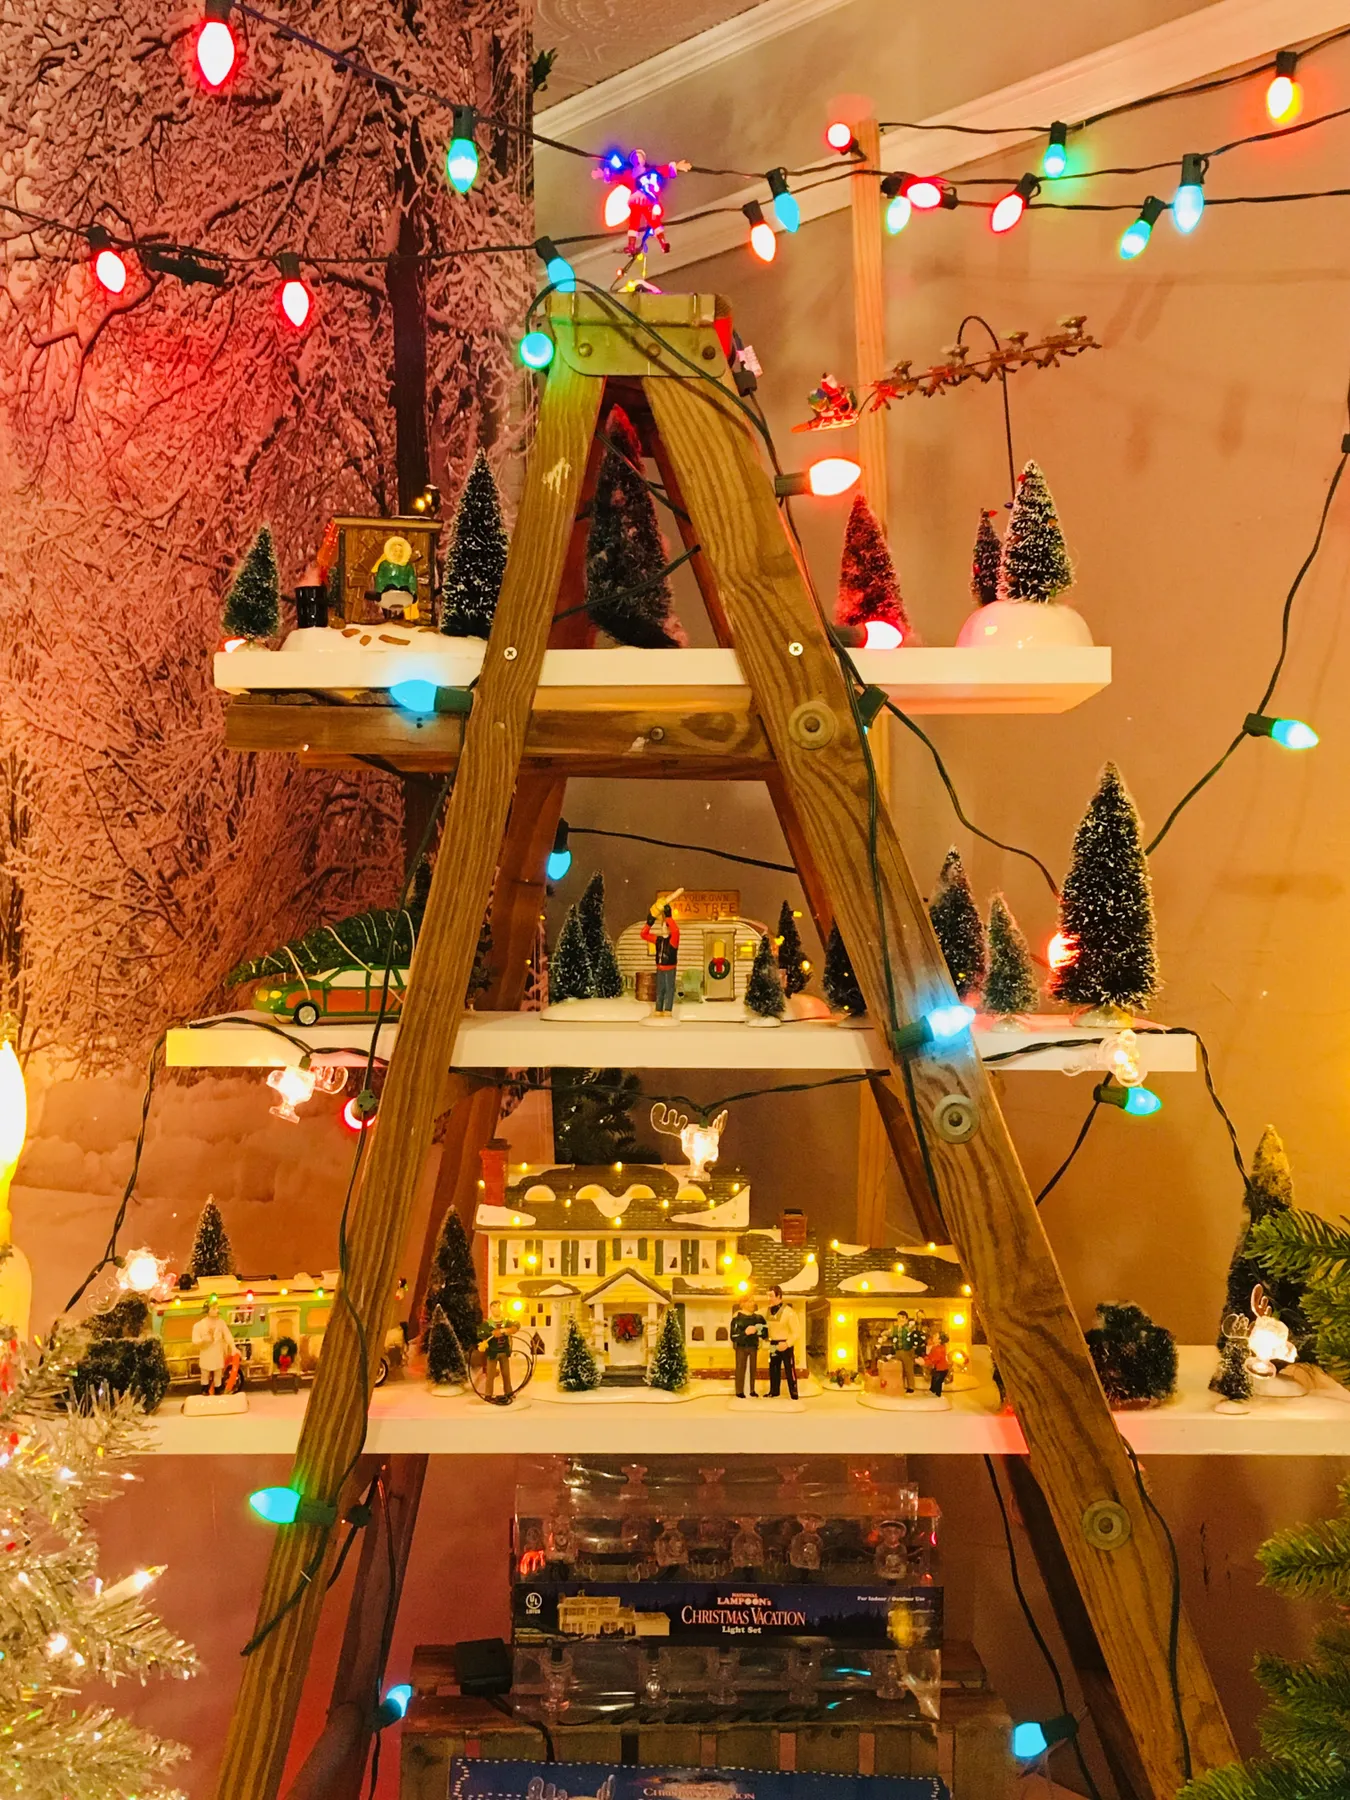
13. An A-Frame Ladder Framing Multicolor Bulbs and Snow
Big bulbs belong on the frame, tiny lights belong in the snow. On this A-frame ladder the large multicolor bulbs outline the structure so the white shelves read as one object, while the village itself stays softly lit. Keep oversized bulbs at least 6 inches from the smallest houses or they blow out the miniature scale.
14. A Red Pickup, a Snowman, and a Village on Light Wood
Build a snowy base that doesn’t shed:
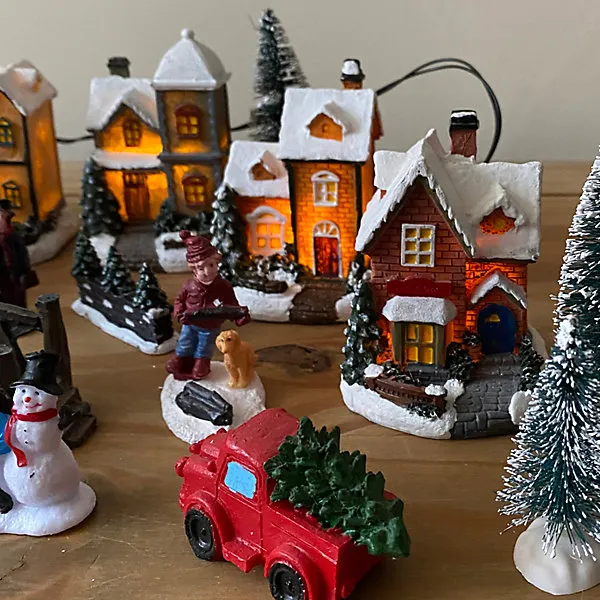
- Cut 1-inch foam board to your table depth.
- Coat it with matte Mod Podge and press on fine faux snow.
- Let it cure 24 hours, then brush off the loose bits.
- Set the truck, snowman, and dog on top and glue only the flat-bottomed pieces.
About 90 minutes plus drying, under $20.
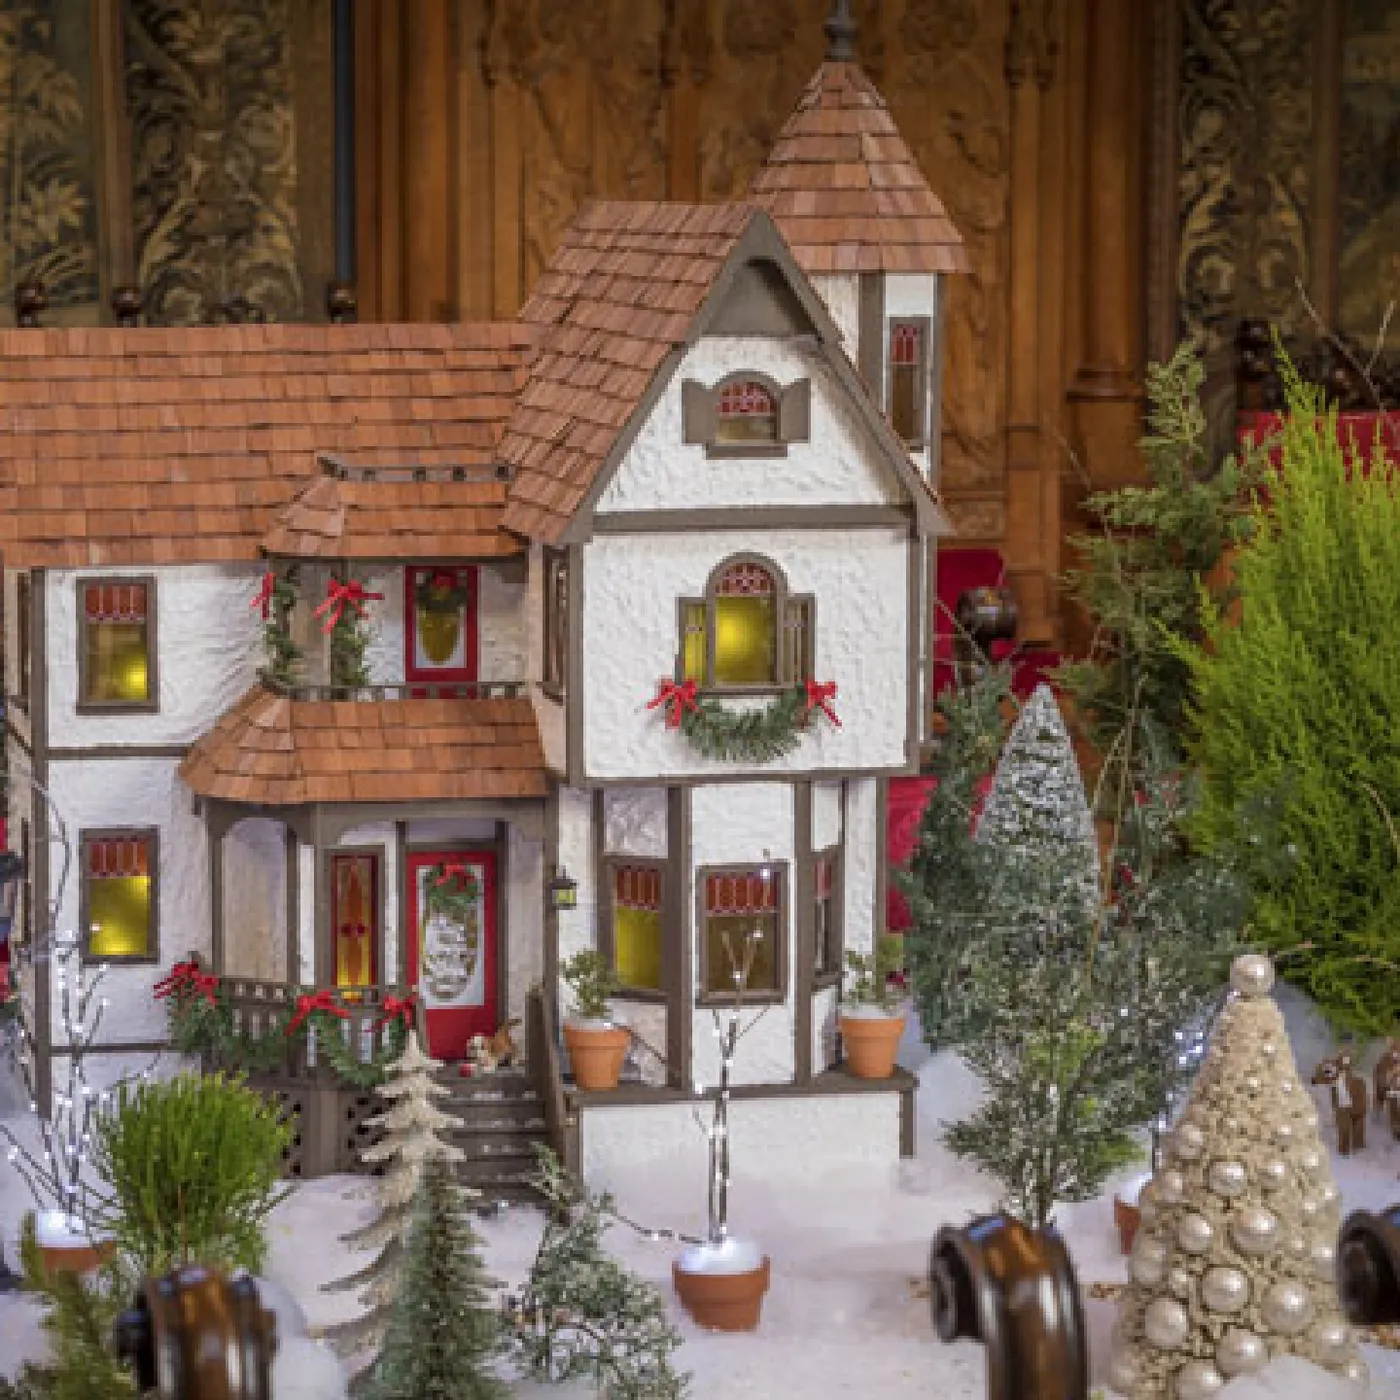
15. A Tudor House With a Turret Glowing on a Snowy Street
The white stucco walls and dark timber framing give this two-story house a strong horizontal beat, and the turret interrupts it on a diagonal — that’s why your eye lands on the glowing windows instead of the roofline. Red bows repeat at every window and door, so the decoration feels intentional rather than sprinkled on.
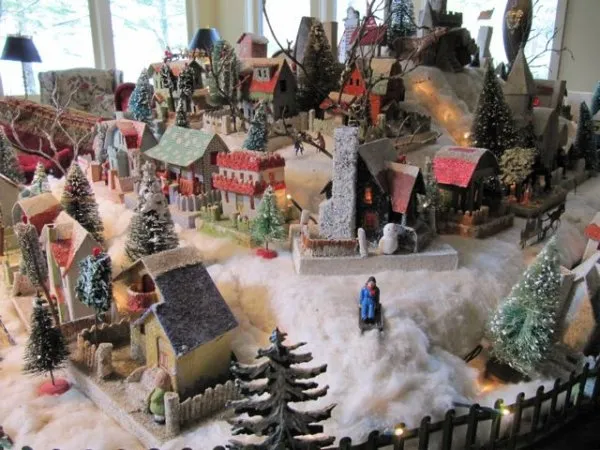
16. A Multi-Level Village With Churches, Fences, and Warm Windows
Multi-level builds with fences, churches, and scattered figurines need a table at least 30 inches deep — anything shallower and the front row takes a tumble during dusting. If your space is tighter, drop to a single level and push the fences to the back as a backdrop instead of a border.
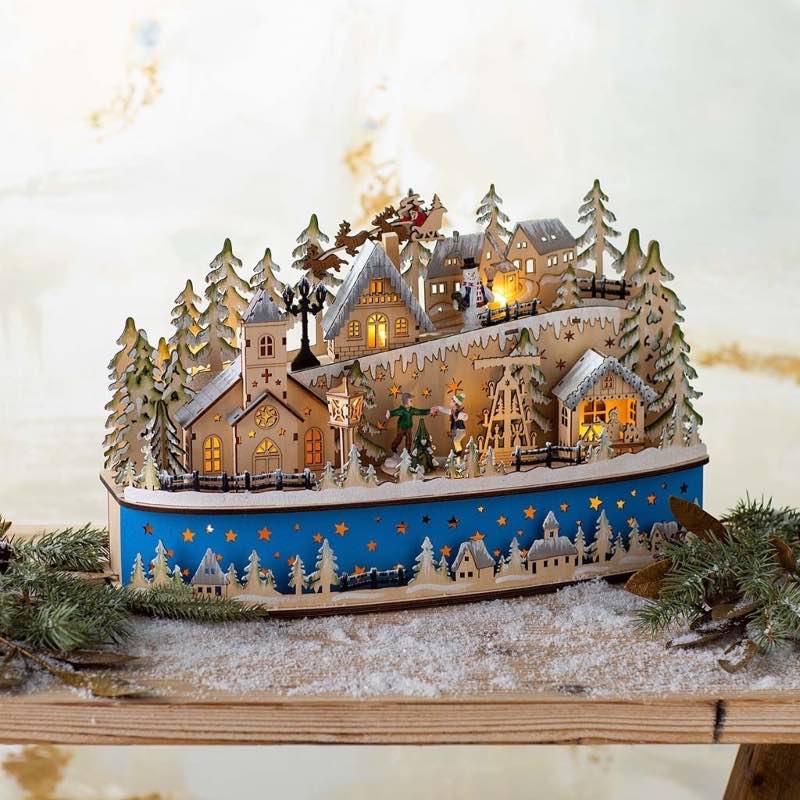
17. A Blue Cut-Out Base With Santa, Skaters, and Star Motifs
The bright blue base with star cutouts. Wood houses with warm lights are everywhere; that saturated blue turns the whole thing into a night sky the village is sitting on — and it’s the piece most people would skip. Cut the stars with a craft knife, prime the wood, then do two coats of glossy blue so it catches the lights.
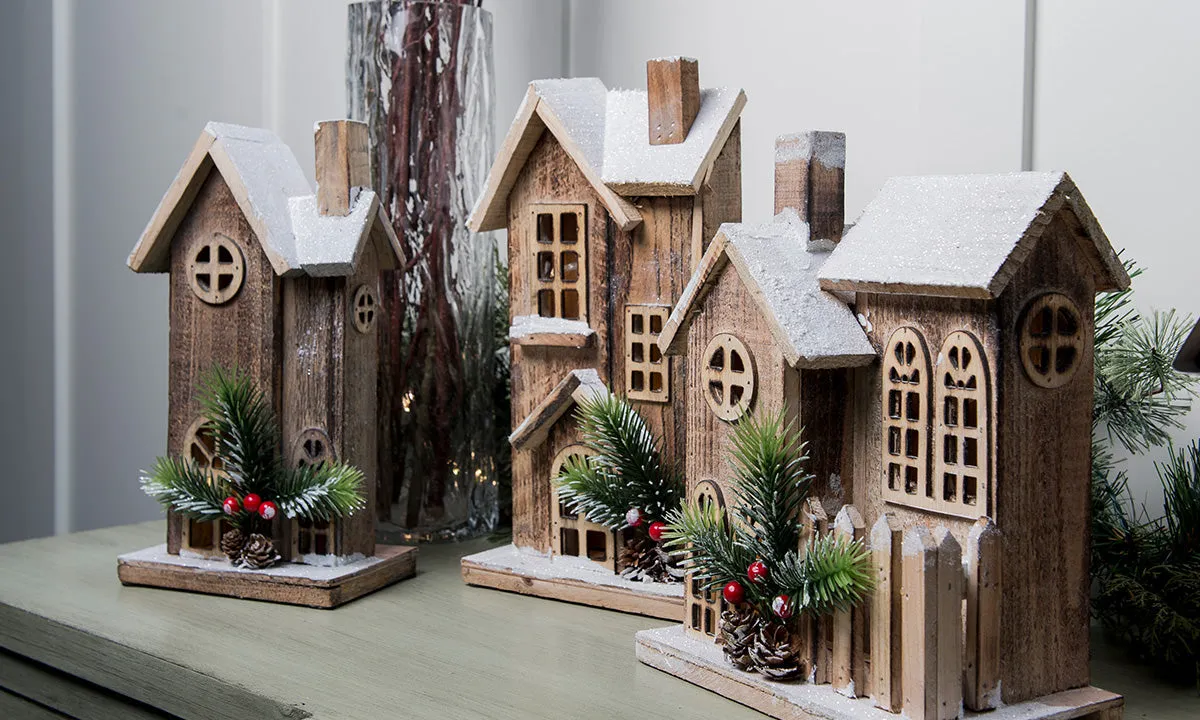
18. Rustic Wooden Houses With Glittered Roofs and Pine Sprigs
Glitter snow looks cheap when it’s applied evenly. Brush a thin line of tacky glue along the roof ridge, the chimney cap, and the base edge only, then dip. Leave the walls bare so the cut-out windows glow clean. Real snow lands on horizontals — that’s the whole trick.
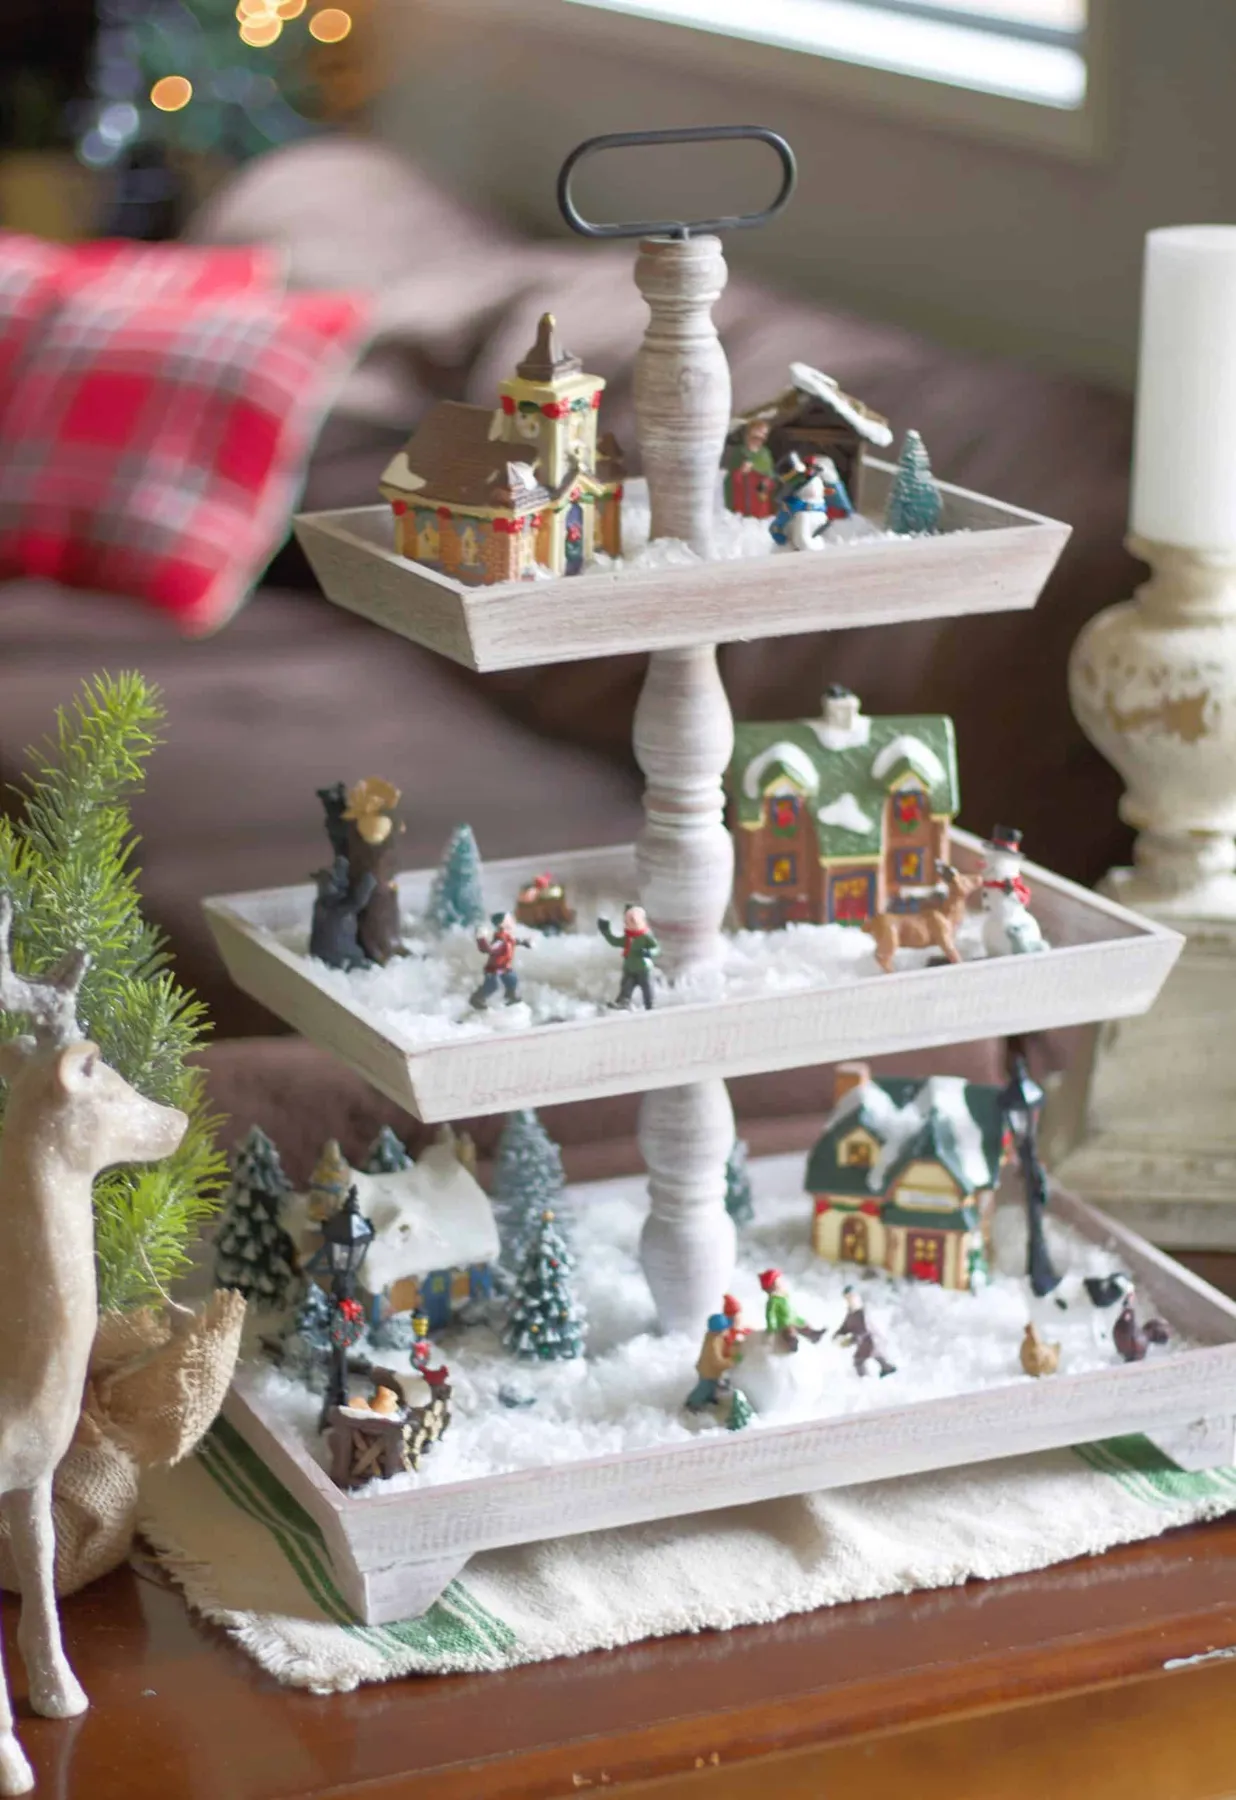
19. Three Distressed Tiers of Snow, Houses, and Tiny Lives
Three-tiered trays are charming and top-heavy. Load the heaviest houses on the bottom, keep every tier under 4 pounds, and never set the tray on a tablecloth — one nudge and the whole village goes. A rubberized shelf liner under the tray solves most of the problem for about $6.
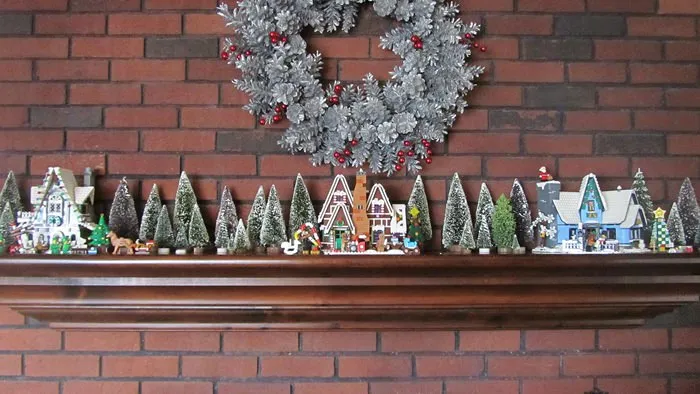
20. A Brick Mantel Village Under a Silver Frosted Wreath
Read this mantel as 55% red brick + 25% frosted green + 15% white and silver + 5% gingerbread brown. The brick wall does most of the color work, which is why the houses stay in whites, soft blues, and silver. On a white wall, add a deep green garland before you add a single house.
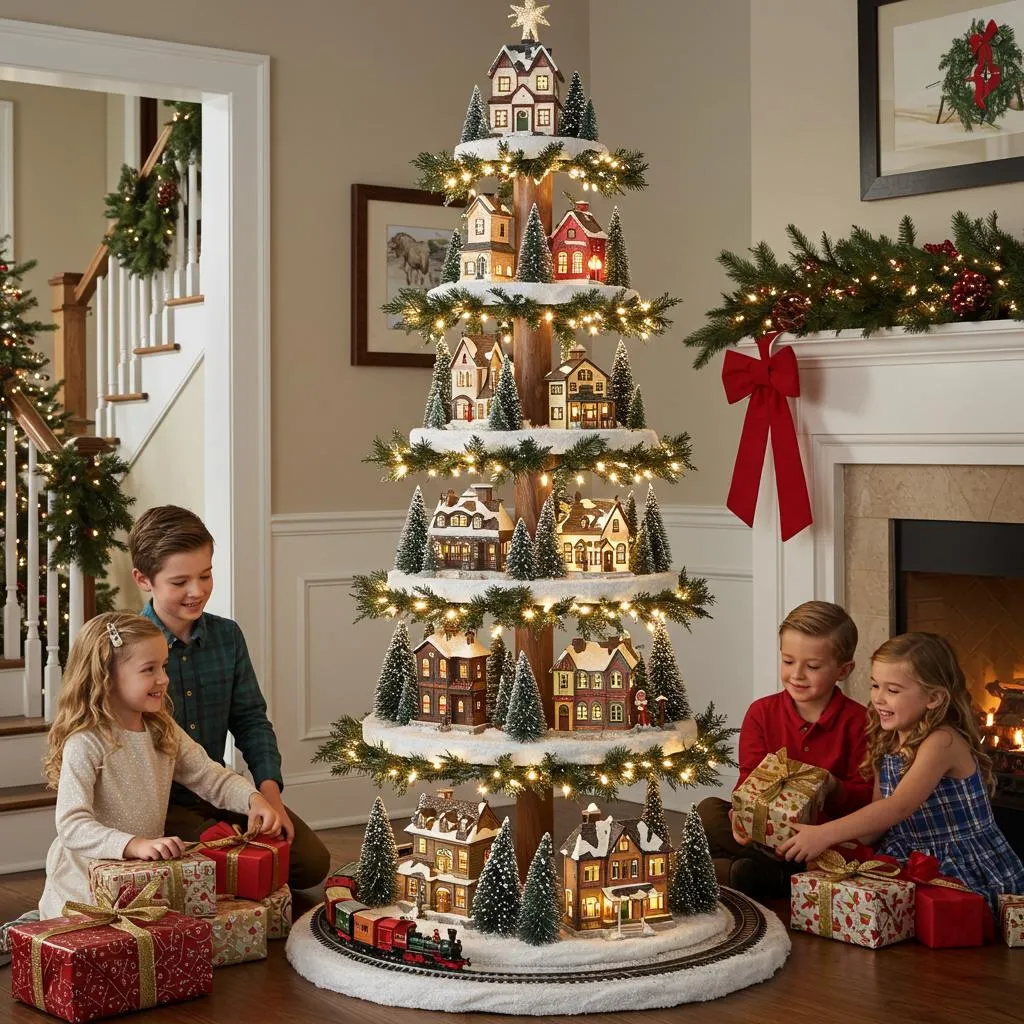
21. A Village Grown Inside a Wooden Christmas Tree Silhouette
A tree-shaped riser wants 5 feet of clear wall and 24 inches of depth, mostly because of the train loop at the base — the track alone eats 8 inches. Compare with Idea #8, where tiered risers sit on a cabinet and skip the track entirely, saving that whole footprint.
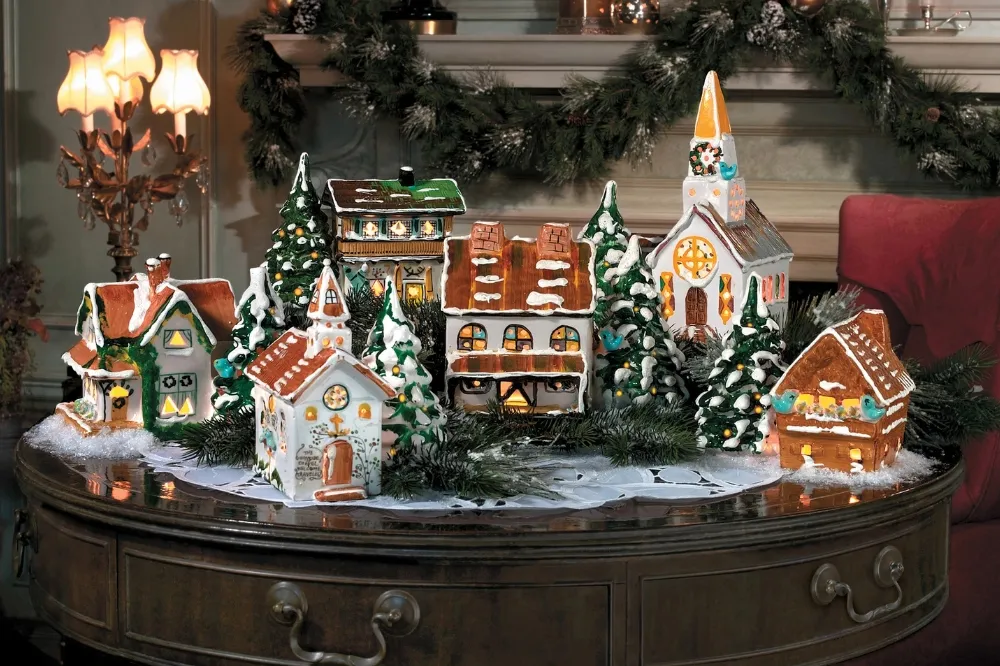
22. Lit Ceramic Houses on Lace and Glitter Over Dark Wood
Ceramic houses chip, and glitter sheds every time you move them. Handle them by the base, not the roof, and store each one wrapped in tissue inside its own zip bag. The lace mat is the sneaky part — machine wash cold, air dry, or the glitter never comes out.
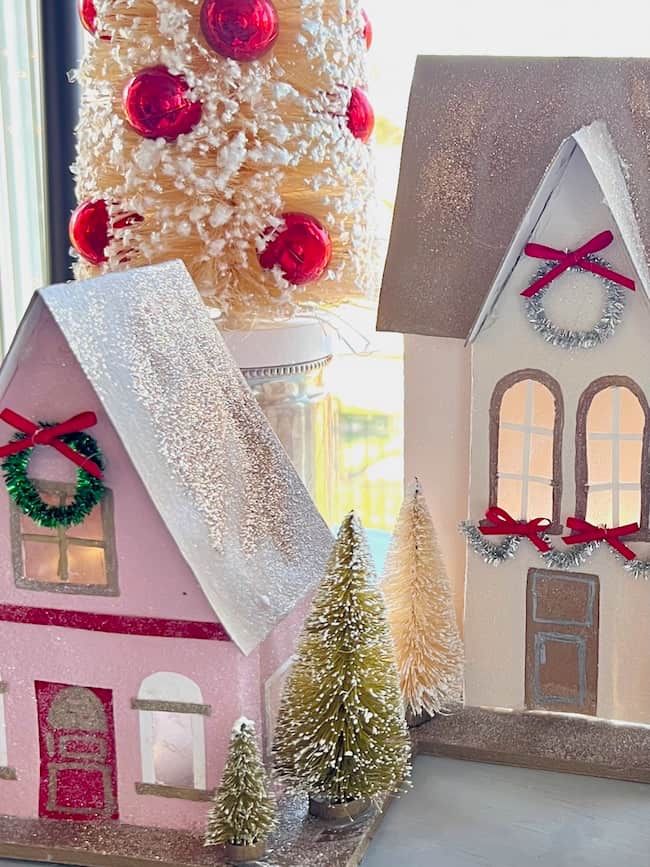
23. Pink and Cream Glitter Houses With Miniature Bottle Brush Trees
Glitter houses are one of the few DIYs where homemade beats store-bought. Paper mache or cardboard houses run $1–$3 each at craft stores, craft glitter is about $4 a jar, and a bag of mini bottle brush trees is roughly $8. Two houses and three trees, under $25 — versus $40–$70 for ceramic versions.
24. A Pink Camper Ornament With a Light-Up Wreath
Make a light-up camper ornament:
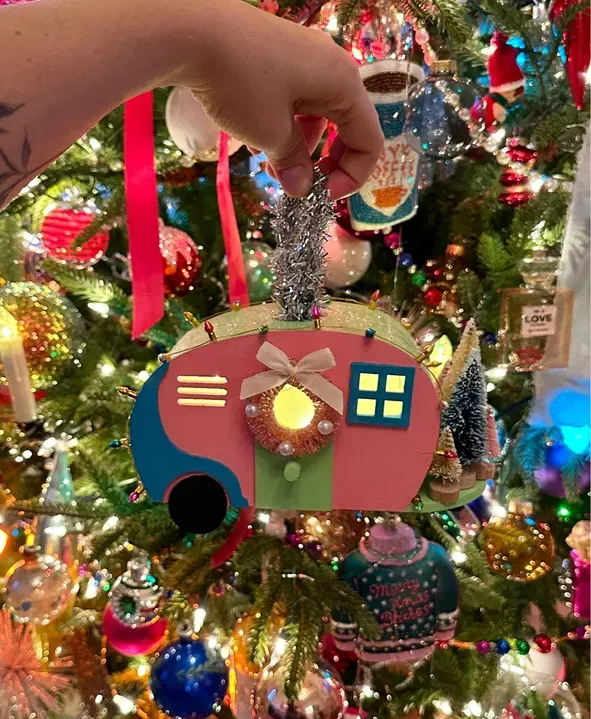
- Paint a blank wood camper pink with a mint green roof.
- Drill a 3/16-inch hole where the wreath will sit.
- Thread a micro LED through from the back.
- Glue a tiny wreath over the light and add a wire hanger.
Roughly an hour, about $8 per ornament.
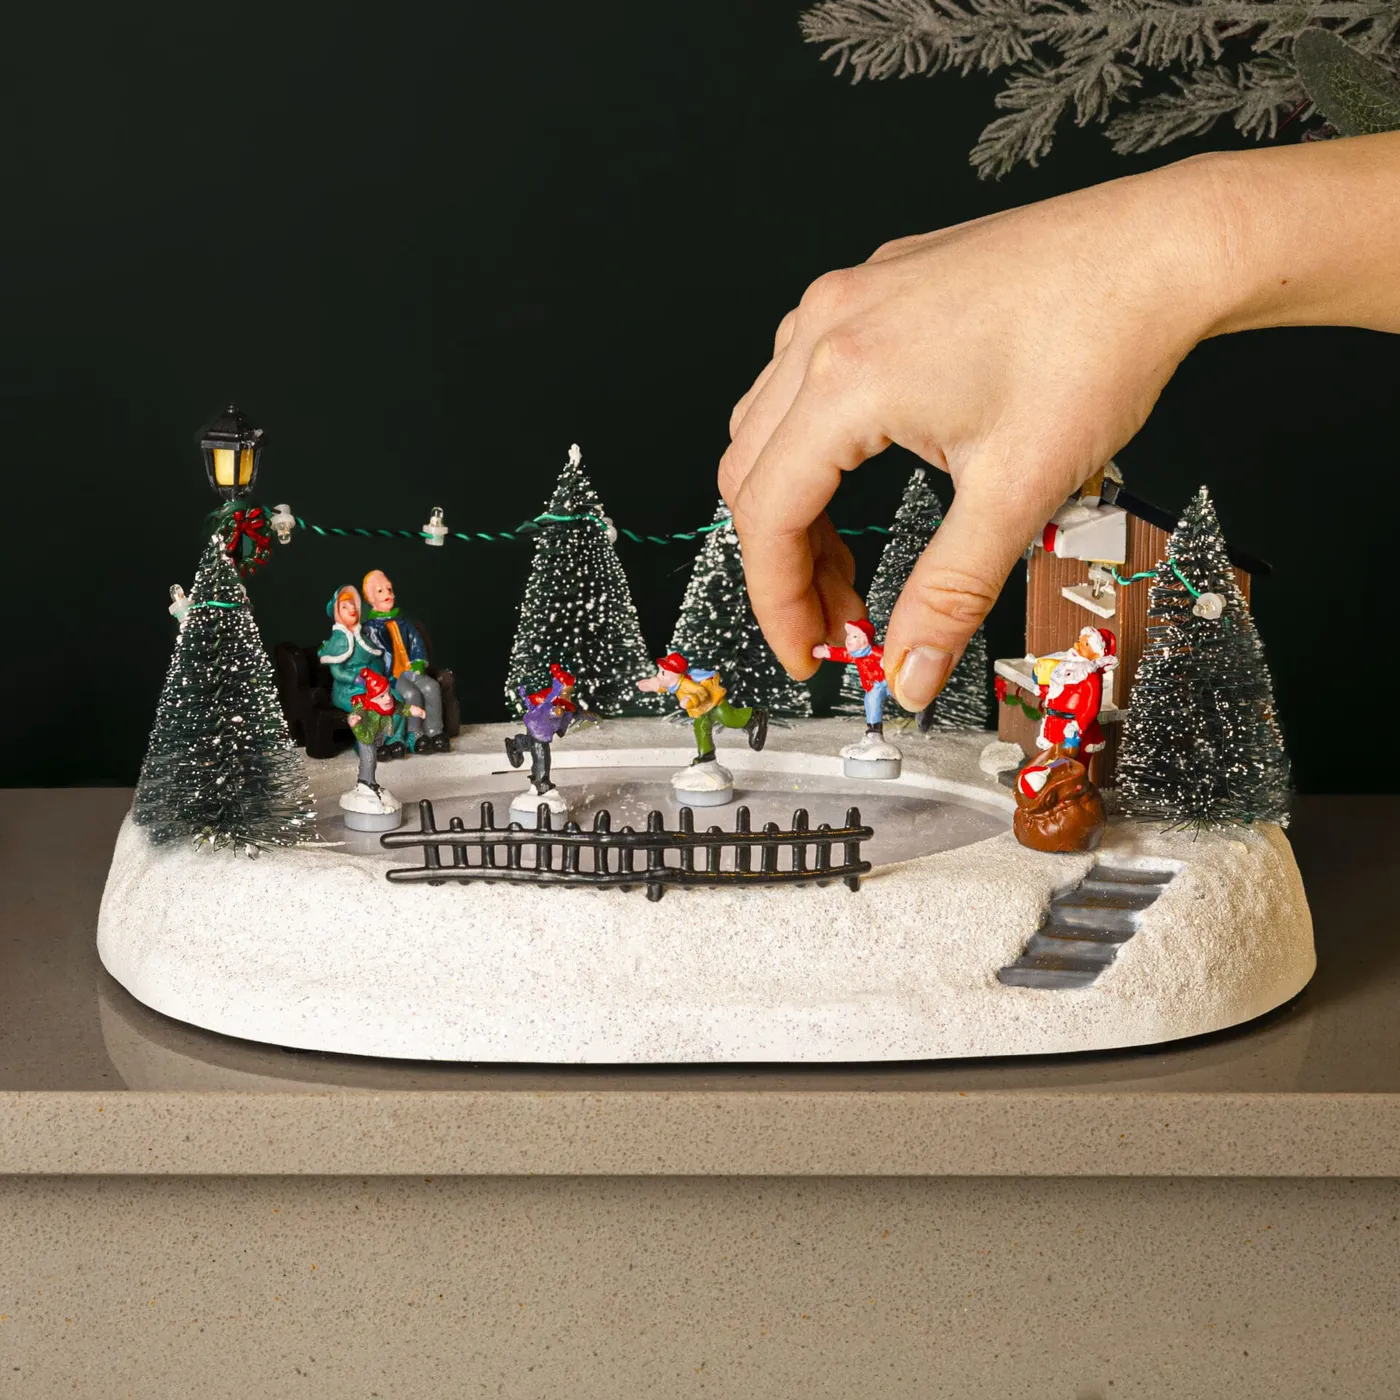
25. An Ice Rink Village With Skaters and a Bench for Two
An ice rink gives a village a center of gravity — and it’s a flat surface, which is the hardest thing to fake in miniature. The skaters here are clustered rather than spread out, and that small crowd is what makes the lamppost and the dark frosted trees feel like a place people actually go.
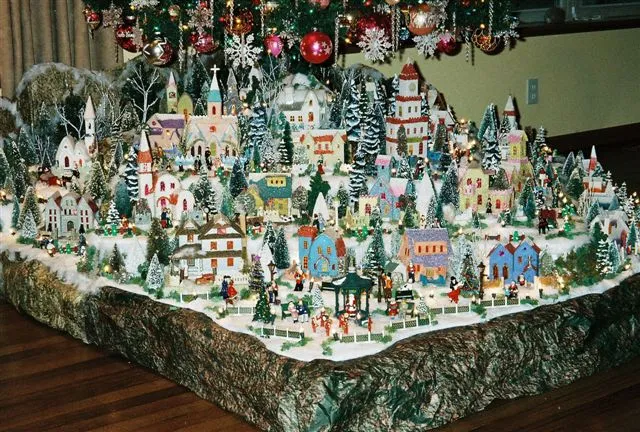
26. A Pastel Village Spilling Out From Under the Tree
Putting the village under the tree rather than on a shelf is the shift that’s been building since 2024 — it turns the display into part of the gift ritual instead of a tabletop collection. Pastel houses also signal the broader move away from strict red-and-green toward soft, vintage-inspired palettes.
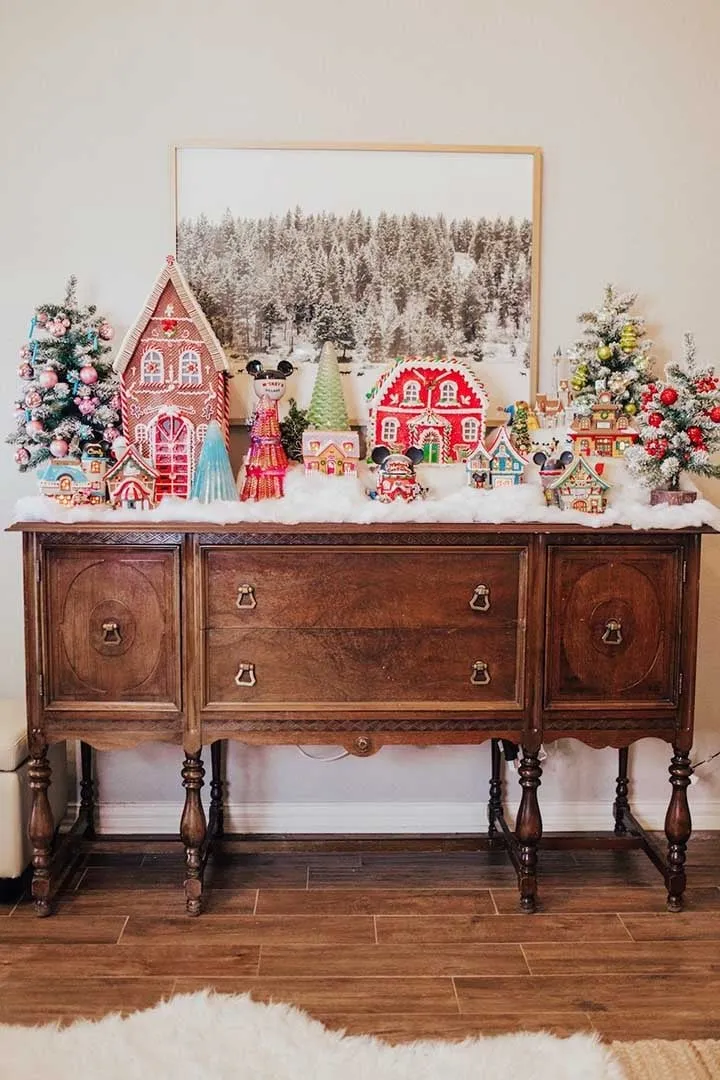
27. A Mickey Mouse Village on a Carved Wood Buffet
The framed snowy forest print behind the village. Without it, the houses and Mickey figures sit on a buffet; with it, they sit in a landscape. That backdrop gives the artificial snow something to continue into, and it’s the cheapest upgrade in the whole setup — a $20 frame and a printed forest photo.
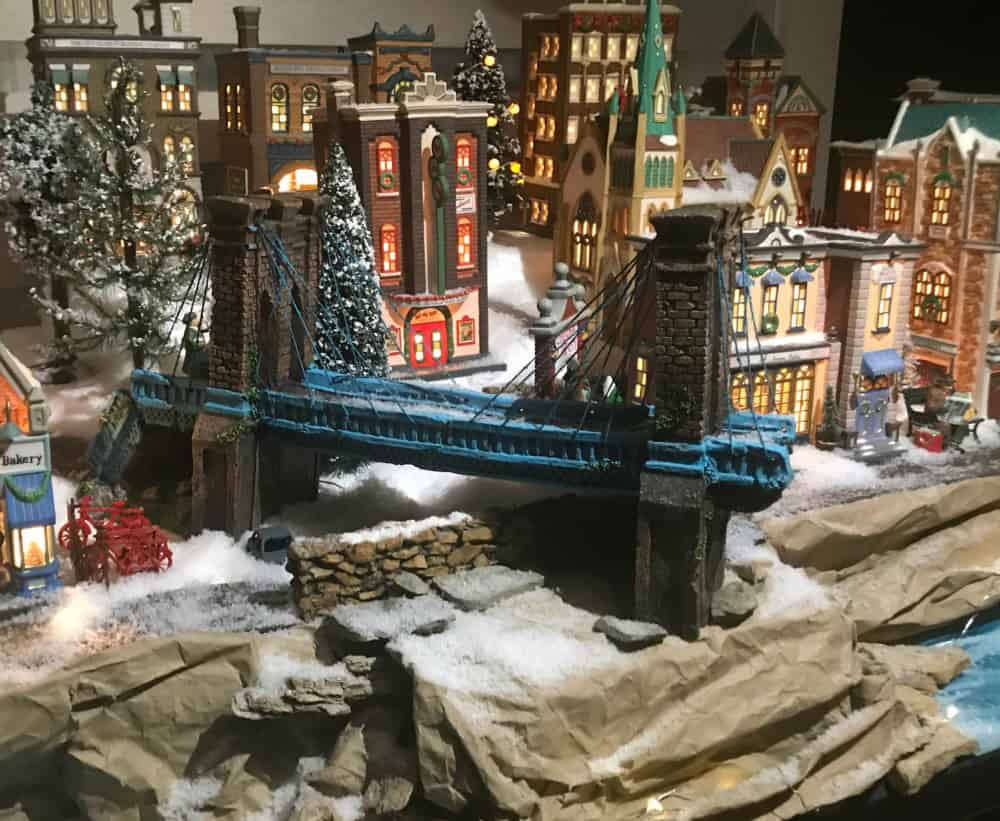
28. A Blue Suspension Bridge Over Crumpled Paper Hills
Crumpled brown kraft paper under faux snow is the oldest trick in display work — it makes hills for pennies and weighs nothing. Crumple it loosely, not tightly, so the ridges stay soft, then sift snow over the top with a flour sifter. Two sheets, one minute, and the bridge suddenly has a valley to span.
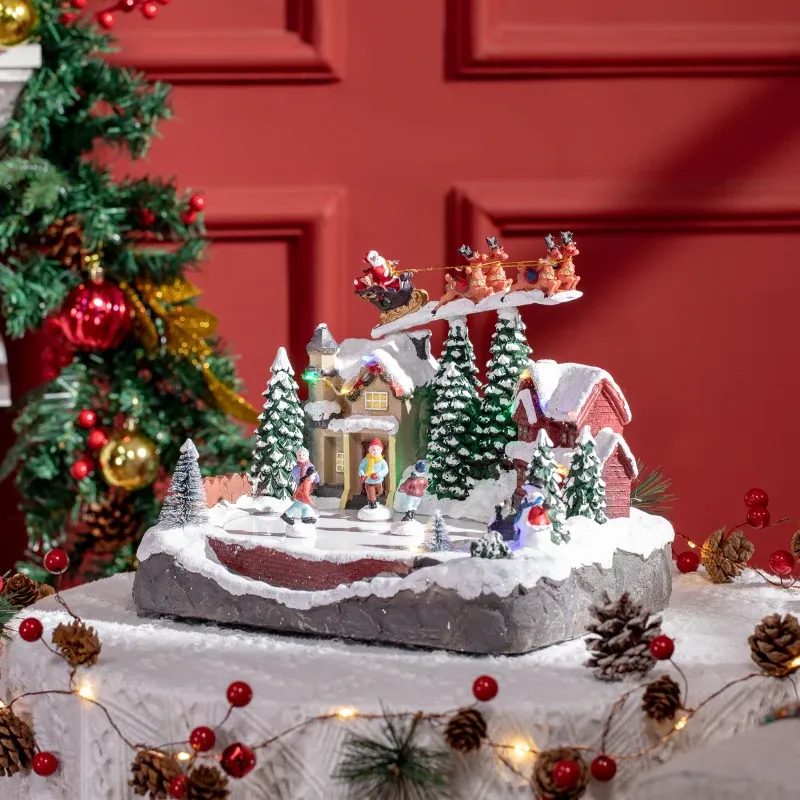
29. Santa Flying Above a Snowy Village on a Red Paneled Wall
Aim for 60% white snow and sky + 25% warm light + 10% red + 5% green. That ratio is why the flying Santa reads instantly against the red paneled wall — the red is already in the palette, so he doesn’t fight it. On a neutral wall, swap that panel red for the deeper green of the trees.
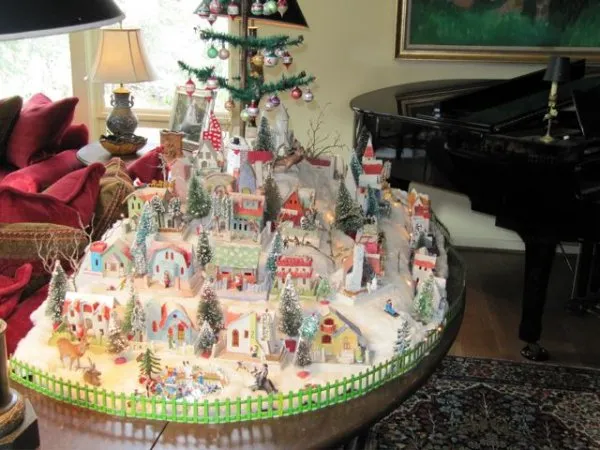
30. A Round-Table Village Ringed by a Green Picket Fence
A 48-inch round table handles a two-level village with a picket border comfortably. Under 36 inches and the fence disappears off the edge. If your table is a 30-inch bistro, drop to one level and run the picket fence as a semicircle at the back — it frames the scene without eating floor space.
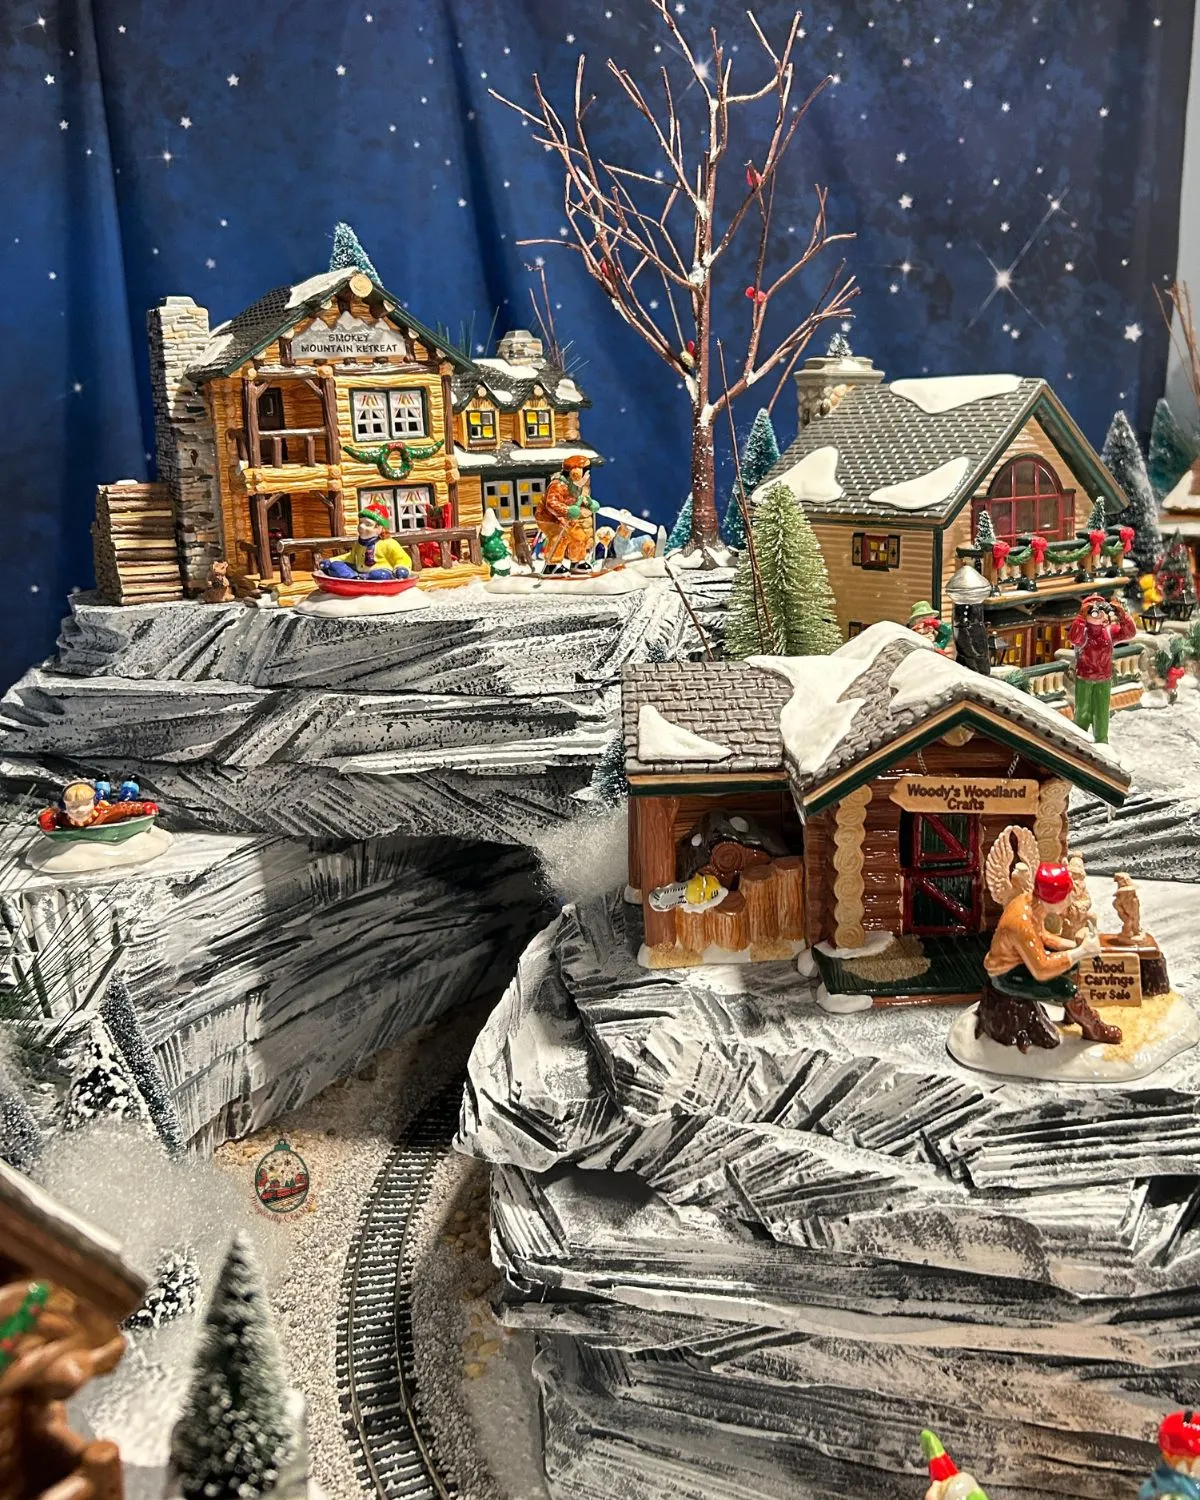
31. Lodge Buildings, a Train Tunnel, and a Starry Blue Backdrop
Sculpted rock formations look fantastic and crumble if you look at them wrong. If you build hills from insulation foam and plaster cloth, keep the whole thing on a rigid board you can lift in one piece, and never store it in a hot attic — the foam warps above 90 degrees and the train tunnel closes up.
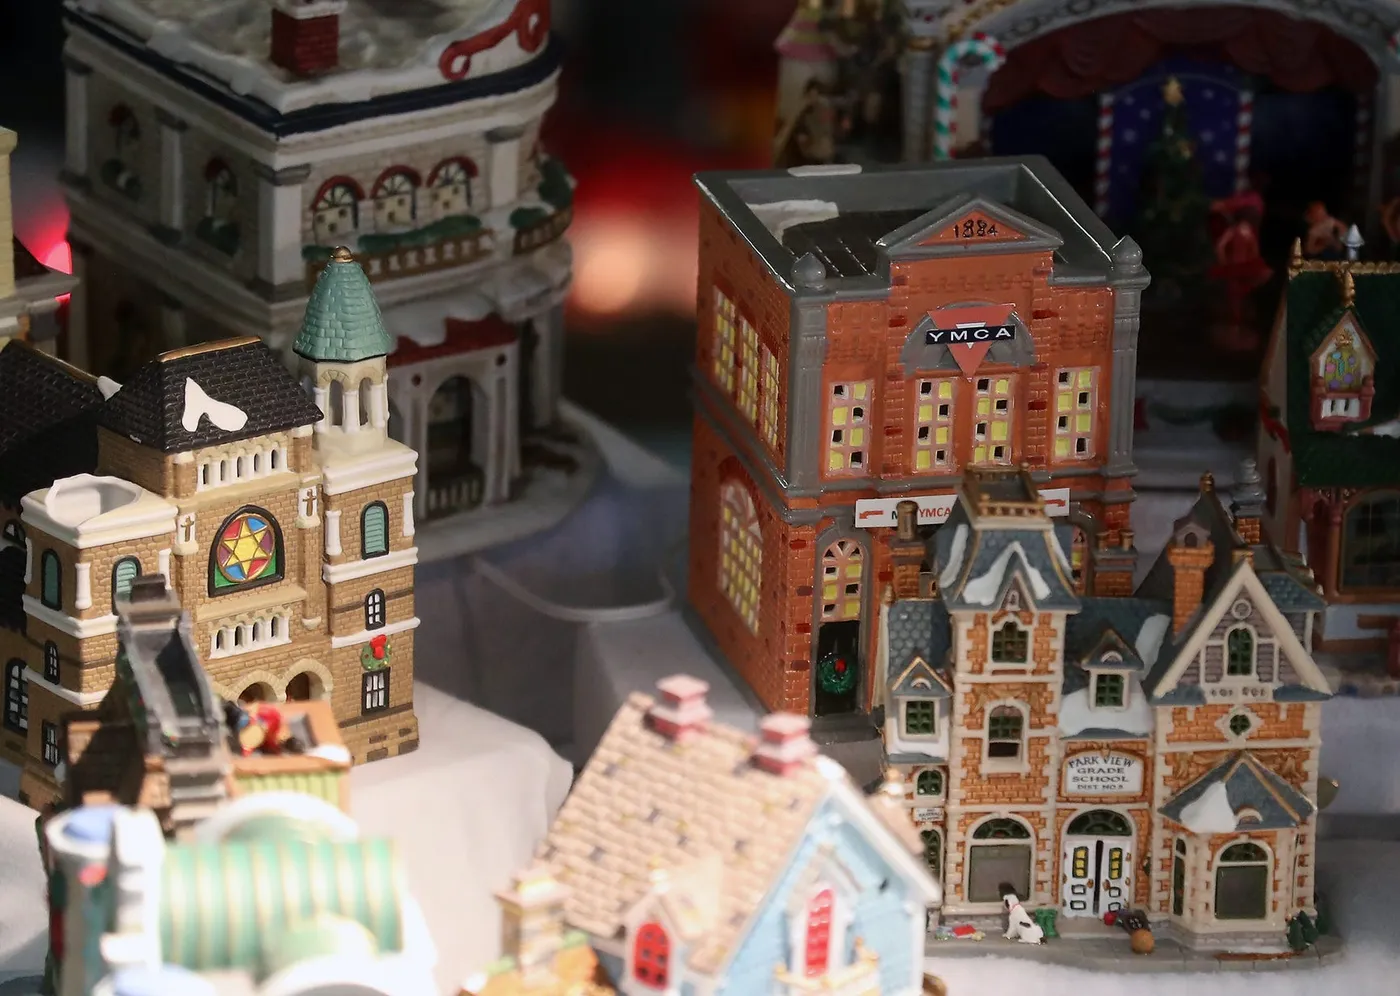
32. A Brick YMCA and Grade School Lit Up in Miniature
Real landmarks make miniature villages feel local. The orange brick YMCA, the grade school, the stained glass — you recognize them before you read anything, and that recognition holds attention longer than another generic cottage. Snow lands only on ledges and rooftops, which is why the brick pattern still reads underneath.
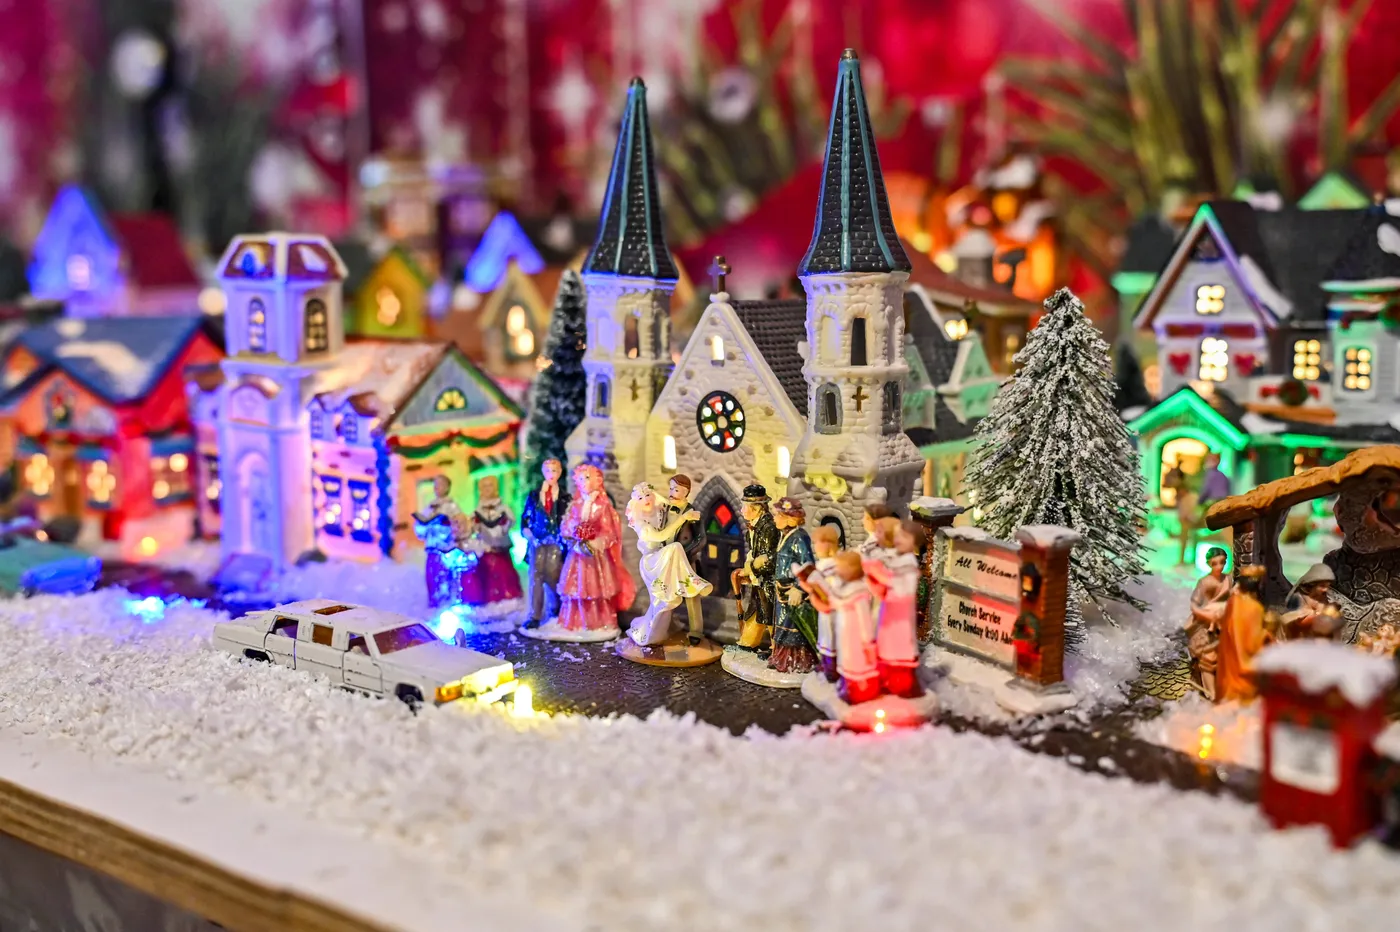
33. A White Limousine Rolling Through a Lit Church Village
You can get the bustling-town feeling without a single collectible. Dollar Tree and Walmart sell houses for $1–$5, string lights run about $3, and artificial snow is roughly $4 a bag. Twenty pieces lands near $45. For a warmer palette, borrow the brick-and-silver approach from Idea #20.
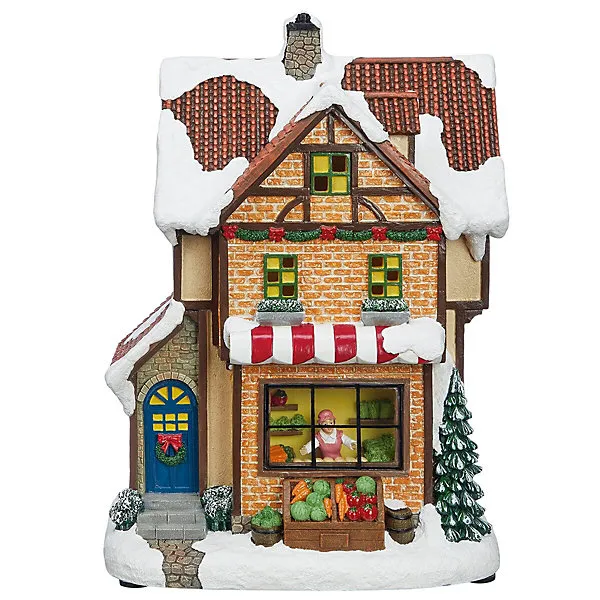
34. A Snow-Roofed General Store With a Produce-Stuffed Awning
Miniature storefronts come alive when the display window has something in it. Here the vendor and vegetable crates sit behind the glass under a red-and-white striped awning, which is what makes the building read as open for business. Add one 1-inch figure and three tiny crates to any empty storefront.
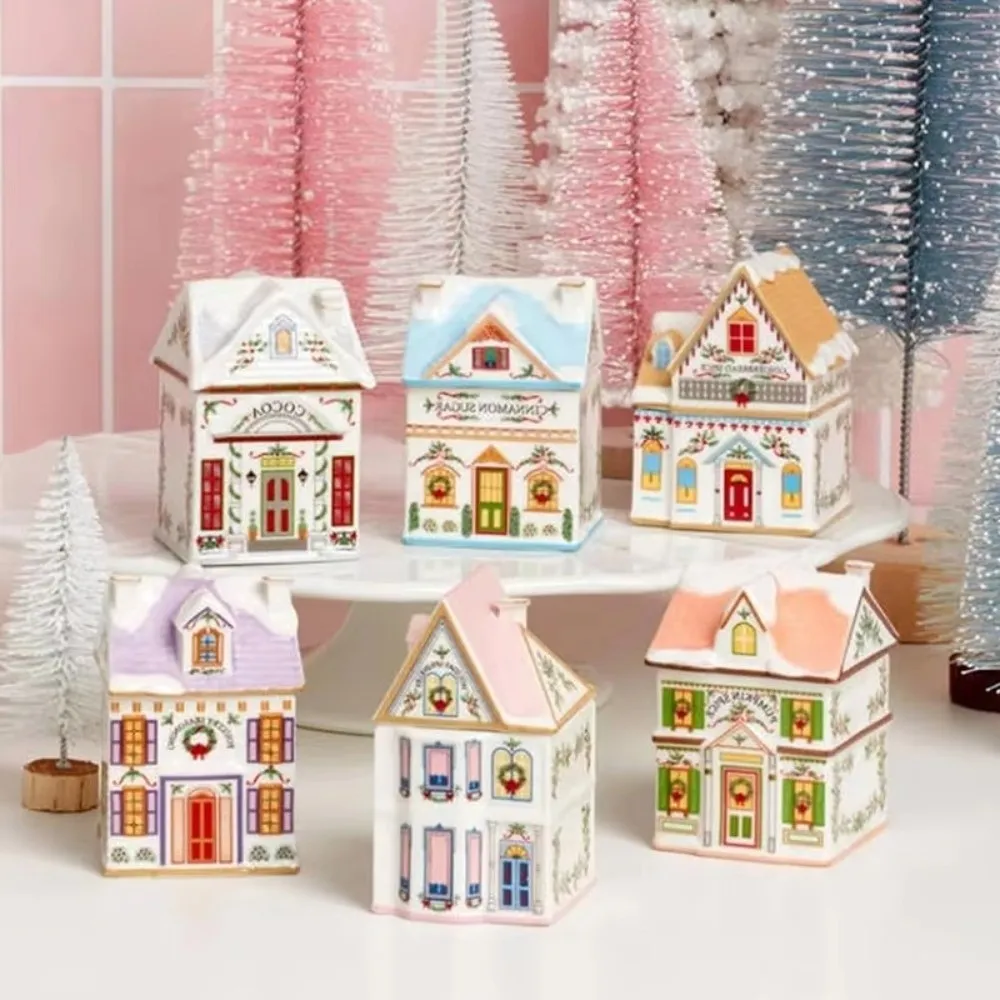
35. Pastel Ceramic Houses Stacked on a White Cake Stand
The white cake stand. Six pastel houses in a row on a shelf is a collection; stacked on a footed stand with pink and blue bottle brush trees tucked behind, it becomes a vignette. The stand also lifts the pastels off a white table, which is why the snow-covered roofs don’t vanish into the background.
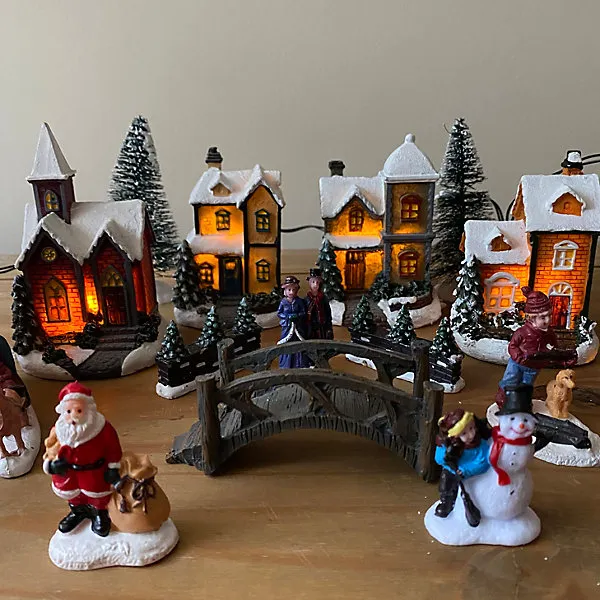
36. A Bridge, a Snowman, and Santa in a Snow-Dusted Scene
Figurines are the first thing to go missing and the first to break. Sleigh runners, the snowman’s twig arms, tiny bridge railings — all snap. Handle them with tweezers when you reposition, and photograph your layout in December so you can rebuild it next year without guessing where everyone stood.
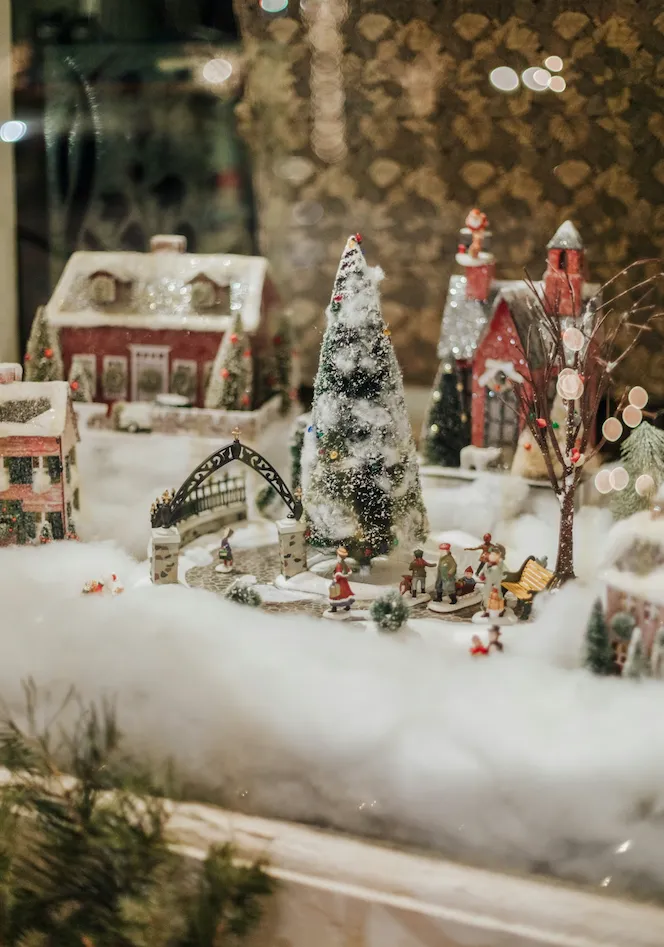
37. Red Glitter-Roof Houses Behind a Black Wrought-Iron Arch
Glitter roofs look gorgeous in daylight and slightly dull at night, because glitter doesn’t transmit light. If you want glow here, run a warm micro light under the front eaves rather than relying on the roof itself. Keep the black archway away from the snow — it shows every fingerprint and dust fleck.
38. A Cream Stone Church With a Stained Glass Window
Age a ceramic church convincingly:
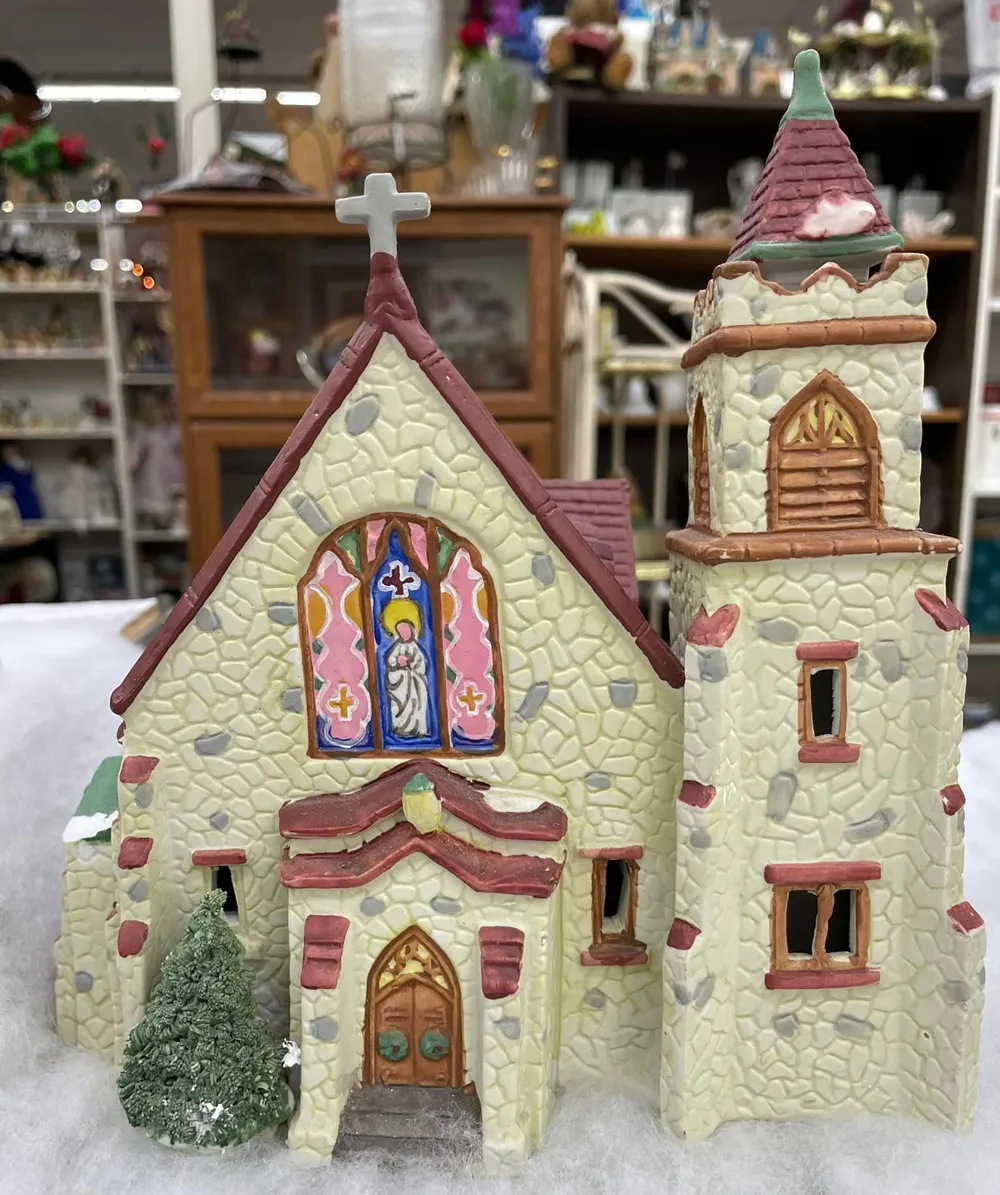
- Paint the walls cream and let them dry fully.
- Stipple texture with a sponge and slightly darker beige.
- Tap maroon on the roof edges with a nearly dry brush.
- Fill the window with translucent glass paint, then seal everything in matte varnish.
About two hours, under $15.
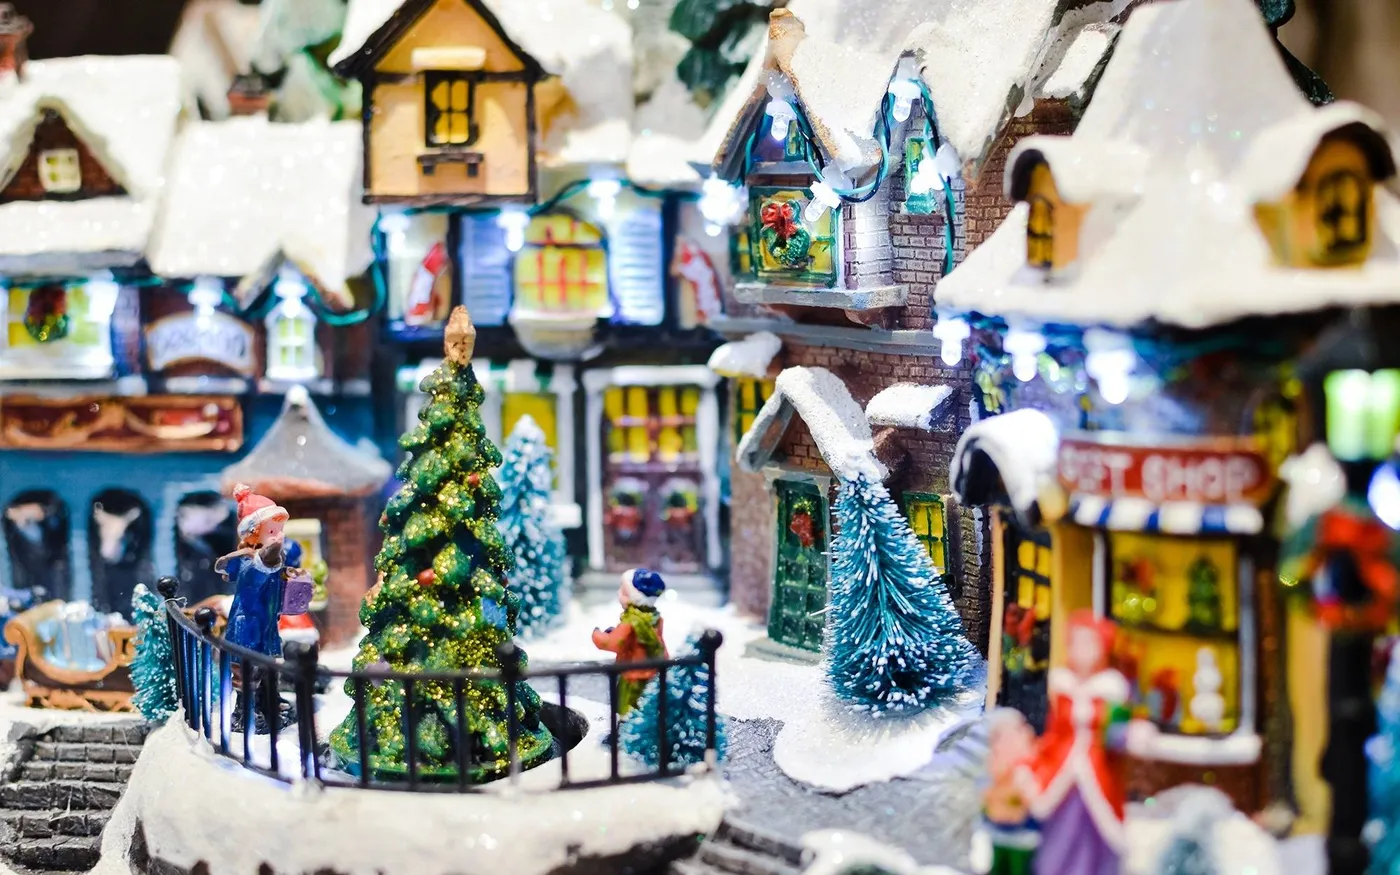
39. White Glitter Snow and Blue-Green Frosted Trees Everywhere
Count the palette: roughly 45% white glitter, 25% forest and blue-green trees, 20% brick and roof browns, 10% red and warm glow. That’s a classic village ratio — snow heavy, greens supporting, red as punctuation only. Push the red past 15% and the sparkle disappears under the noise.
Build a Village You’ll Actually Want to Unpack Next Year
Start with one landmark, one light source, and one honest look at your table depth — the rest of the village tends to figure itself out from there. Whether you’re going thrifted and homemade or all-in on pastel ceramics, the setups people love most are the ones that look like somebody lives there.
📌 Pin your favorite version now so it’s waiting for you when the boxes come down in November.