31 Jaw-Dropping Christmas Window Ideas for 2026 That Will Enchant Your Guests and Neighbors

You know that feeling when you finally find the window idea that looks exactly right for your space — and then realize the version in the photo would require a team of elves and a second mortgage? Most Christmas window roundups are built on store displays nobody can actually replicate at home. This one isn’t.
After filtering through hundreds of options across Etsy, Target, Anthropologie, Terrain, and Wayfair, we narrowed it down to 31 ideas that actually deliver — and they run from a $6 sheet of window clings to a $480 statement wreath, so there’s a real entry point no matter what you’re working with. You’ll find traditional, whimsical, rustic-natural, and modern jewel-toned looks, and budget and luxury versions are compared side by side so you can see exactly what the extra money buys.
Why now? Window decorating has shifted hard toward hand-painted and stenciled glass for 2026 — it’s renter-friendly, it comes off with a razor blade in January, and Pinterest has been rewarding it all year.
📌 Save this to Pinterest for later — you’ll want to revisit these ideas.
1. Golden Cone Trees and Neon Stars in a Jewel-Box Window
Two things are doing all the heavy lifting here. First, contrast: those tall golden fabric cones are matte and warm, while the hanging star outlines glow cold electric blue. Warm against cool, solid against outline — the eye keeps bouncing between them. Second, scale repetition. The cones step down in height across the sill and the stars shrink as they climb, so the whole window reads as one tapering rhythm instead of a pile of decorations piled up behind glass.
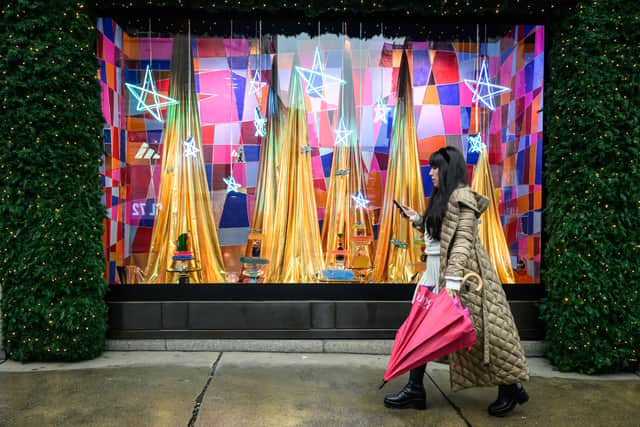
The color formula is roughly 50% saturated mosaic backdrop, 25% metallic gold, 15% neon, and 10% deep green frame. That last 10% matters — the illuminated foliage hugging both edges acts like a mat around a painting and keeps the neon from bleeding into the storefront glass. To shift the mood, keep the percentages and change the hues: a navy mosaic, copper cones, and icy white neon would give you the same energy at a much cooler temperature.
2. Trace a Gingerbread Village Straight Onto the Glass
This is the most forgiving project in the whole roundup — a white window marker, a printed template, and about an hour.
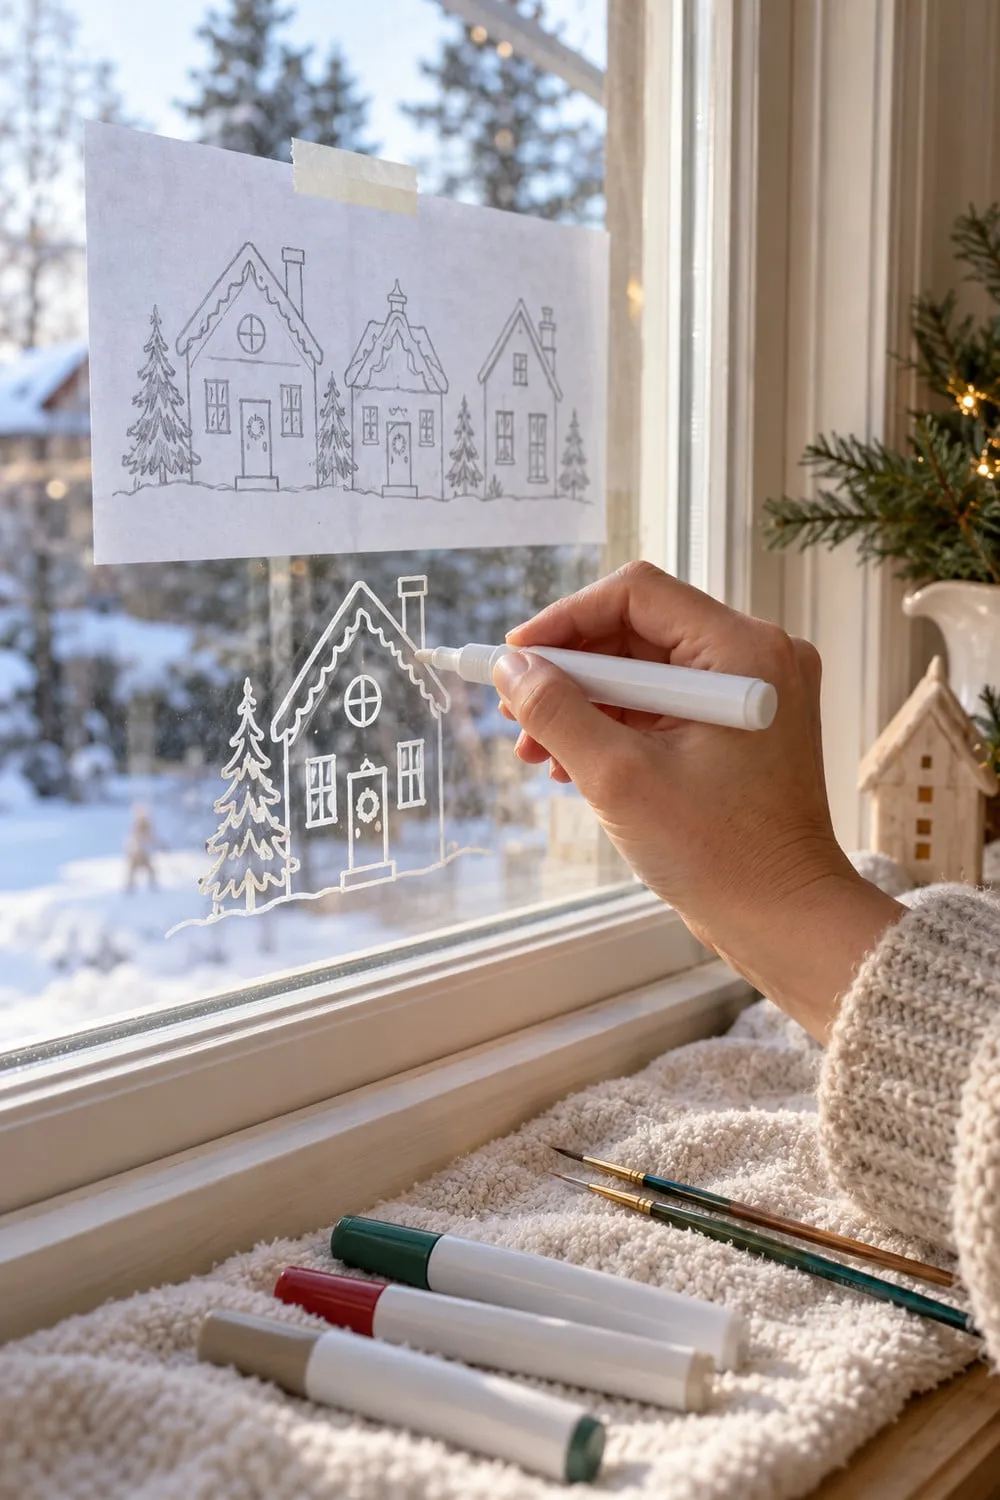
- Print your house and tree shapes at full size and tape the template to the outside of the glass.
- Trace the outline in white marker, working top to bottom so your hand never rests on wet lines.
- Pull the template off and thicken the outline; add a scalloped roofline and simple window squares.
- Fill in snowdrifts along the bottom edge with short horizontal strokes.
- Let it set for ten minutes, then dot tiny snowflakes into the negative space.
Marker and printing together run under $15.
Work on the outside of the glass, not the inside. Marker on interior panes picks up kitchen grease and cooking film and will bead and skip; exterior glass gets rained on but it’s clean and takes ink evenly. If you must work indoors, wipe the pane with rubbing alcohol and let it dry fully. And resist outlining everything at one thickness — a quarter-inch line for the house and a thinner line for trees and snowflakes gives the drawing depth without extra effort.
3. A Plinko Board of Rolling Ornaments Behind Red Glass
The kinetic board is the whole show. Take it away and you still have a nice red display with a candy cane and some baubles — pleasant, forgettable. Keep it and people stop walking. The slanted board lets silver and gold spheres roll and settle into the pegs, so the window is never the same twice, and that small bit of movement is what pulls people in from thirty feet away. Everything else — the gear-motif backdrop, the braided rope, the pile of ornaments at the base — exists to frame that one mechanism.
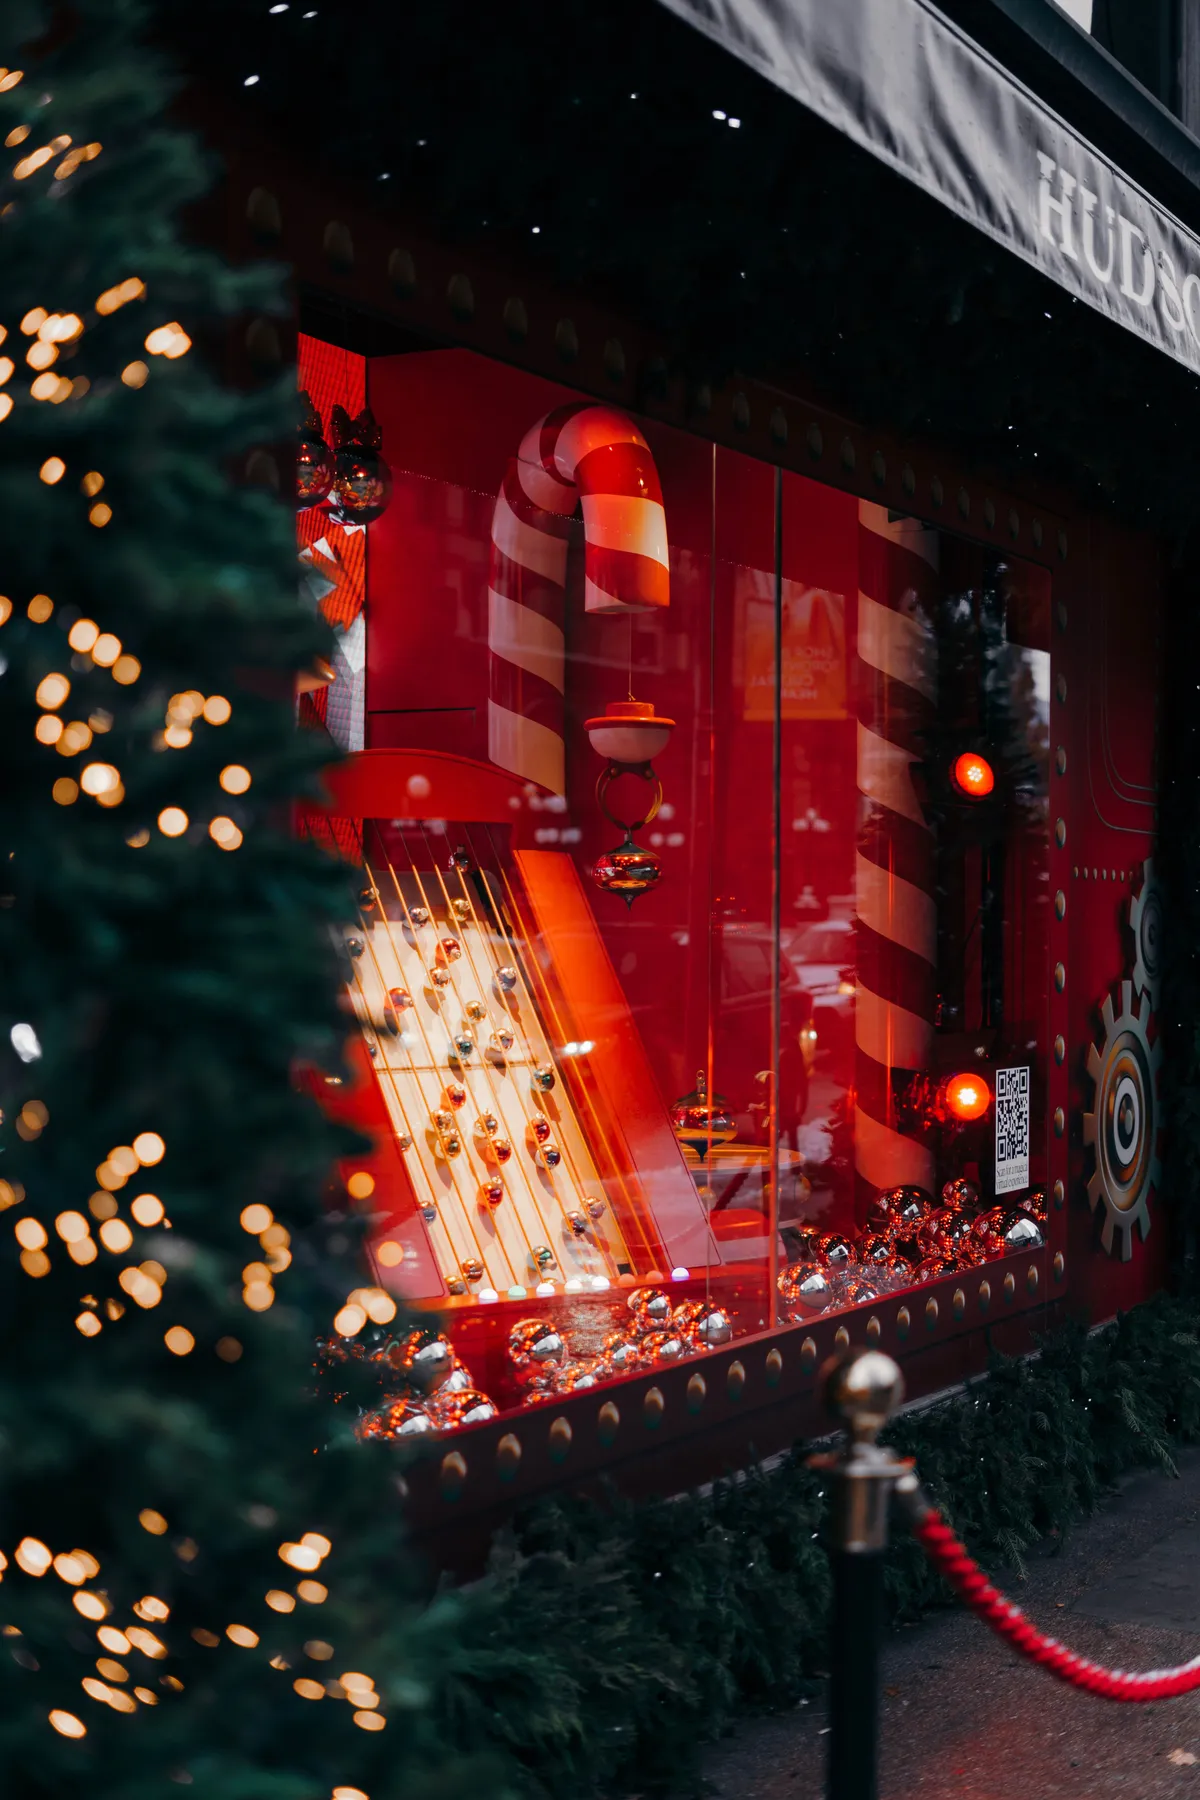
Storefront windows have been drifting toward experience design since 2024, and 2026 is the year it went mainstream: retailers want a photo moment, not a static display, and kinetic elements are the shorthand for that. For a home version you don’t need a full pegboard rig — a shallow framed board propped behind the glass with a few loose ornaments resting on it gives you most of the effect for a fraction of the build.
4. A Wreath in Every Window of a White Brick Colonial
Symmetry at this scale only works if you plan the power first. Check these before you buy a single wreath:
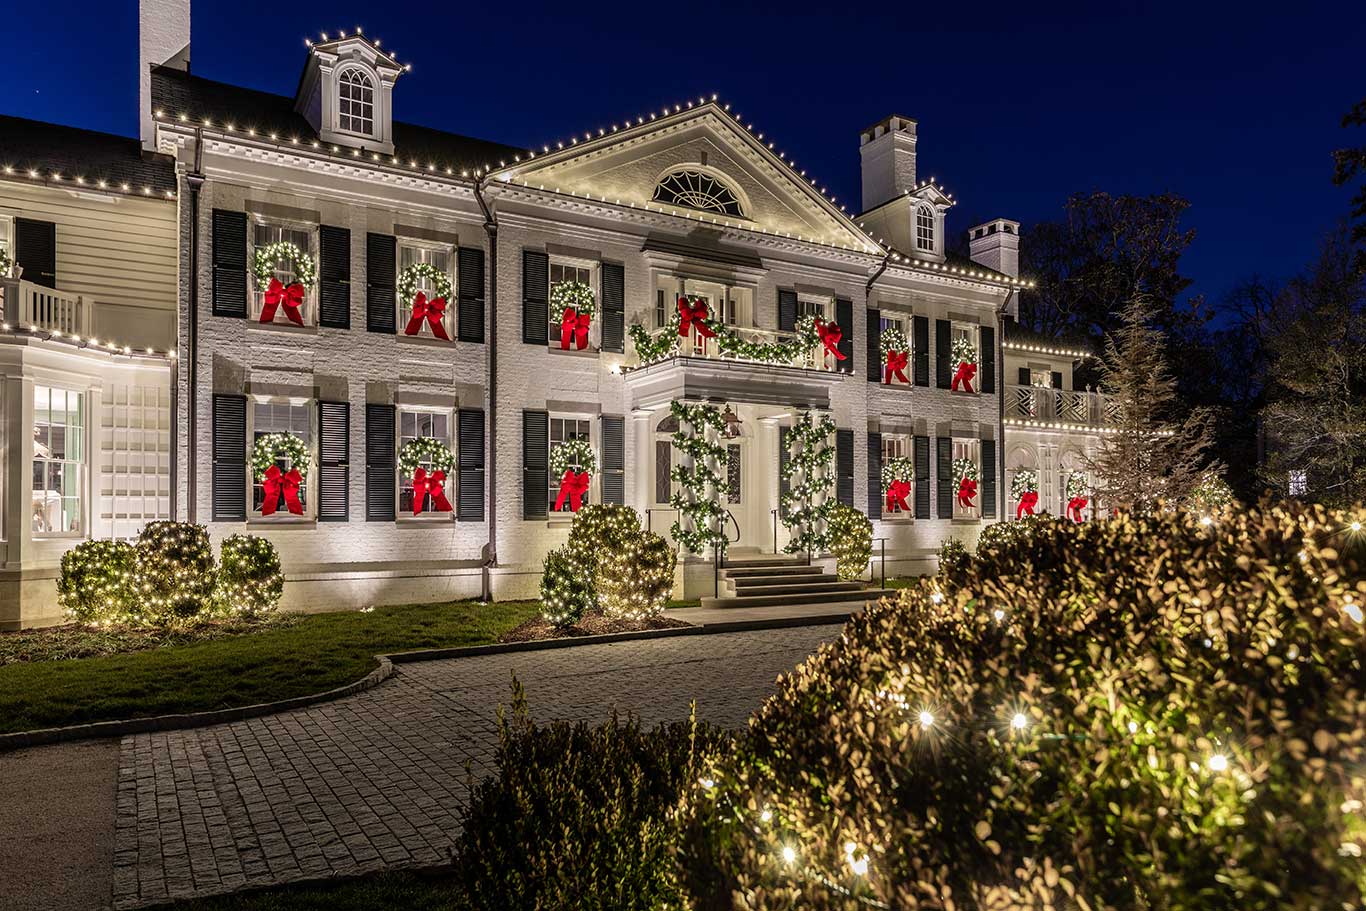
- Count your windows and confirm each has an exterior outlet or a discreet extension run.
- Measure the glass opening, not the frame — wreaths should span about two-thirds of the visible pane.
- Note which way each facade faces; north-facing garlands stay green longer than south-facing ones.
- Test one wreath and one strand of lights after dark before committing to the full set.
Warm white string lights are the low-maintenance hero here, but the greenery is where your weekends go. Real boxwood and fir dry out and drop needles within about three weeks in heated air; quality faux garland with a UV coating lasts five or six seasons and costs less over time than replacing fresh each December. Budget $60–$120 a year for fresh versus a one-time $200–$400 for good faux. The wreaths themselves just need a rinse and a dry storage bin in January.
5. Paper Stars and a White Forest Silhouette on the Sill
- Illuminated paper stars, set of 3–5: $40–$120
- White paper forest silhouette, or DIY cardstock: $15–$45
- Grey textured sofa and cushions: $700–$1,800
- Off-white shaggy rug: $120–$350
- Round tiered glass coffee table: $180–$450
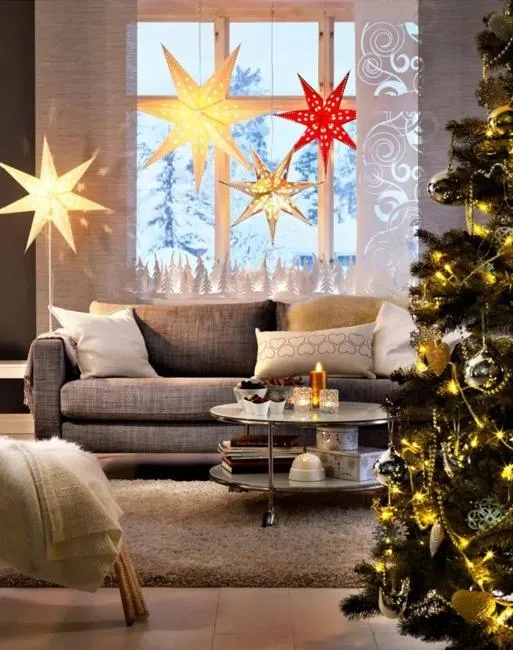
Total: roughly $1,055–$2,765 — and the window itself is the cheapest part of the whole room. Budget alternative: craft-store paper stars at $6 each, a cardstock forest cut by hand, and a thrifted shag rug bring the window vignette in under $60.
Hang the stars at three different heights and keep the lowest one at least 6 inches above the sill line. The instinct is to center them, but a staggered triangle — high left, mid right, low center — reads as intentional and lets the white paper forest breathe underneath. Use clear monofilament tied to a small cup hook screwed into the window casing rather than tape. Tape gives up in cold weather, and you’ll find your stars behind the sofa in February.
6. Nutcracker and Ballerina Framed by Painted Red Drapes
Roughly 45% red, 25% gold, 20% white, and 10% black-and-pink accent. The red does the framing, the gold does the ornament, and the white snow does the breathing room — that ratio is why it reads theatrical instead of cluttered. Swap the red for deep emerald and the gold for brass and you get the same arch-shaped composition with a completely different mood. If you go that route, keep the black linework; the painted outlines are what give the whole thing its storybook quality.
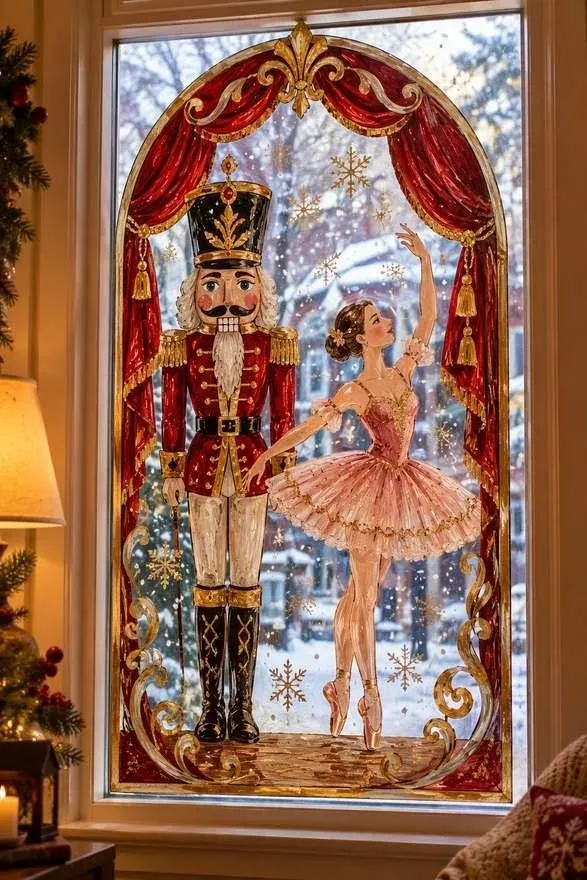
The arch is the one thing. Without that curved painted frame, this is just two figures on glass. The arch creates a proscenium — it tells your eye this is a stage, look here — and it solves a practical problem too, because it visually fills the awkward upper corners of a tall window that nothing else would reach. Sketch the arch first at full scale on paper, tape it up, and step back across the room before you commit any paint to the glass.
7. A Nostalgic Tree-and-Toys Vignette Beside a Green Door
The charm here is depth, not stuff. Build it in layers:
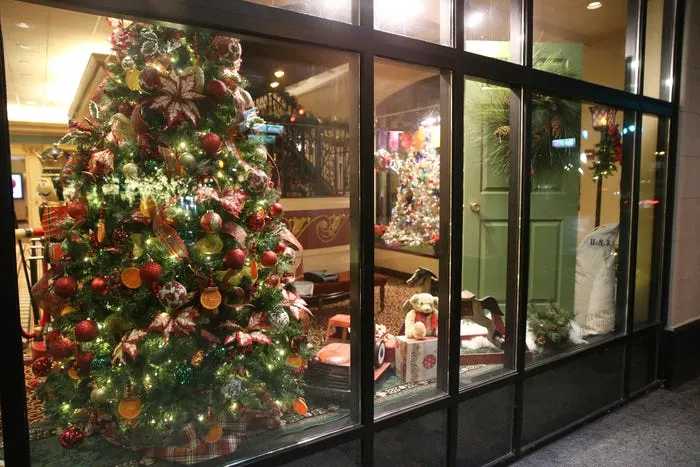
- Set a green paneled door flat against the back of the window as your backdrop.
- Place the tree left of center so it overlaps the door frame by a few inches.
- Hang ornaments in clusters of three rather than evenly — plaid ribbon first, then baubles.
- Add dried orange slices last, pushed toward the outer branches where light hits them.
- Group the toys at the base on the right, all facing slightly inward.
Plan on two hours once the tree is standing.
The $15 version of this exists. Thrift stores and Facebook Marketplace are full of vintage wooden toys and rocking horses in November — people clean out attics and price them to move. A green-painted plywood panel stands in for the paneled door, craft-store plaid ribbon replaces designer trim, and dried orange slices cost about $3 if you dry them yourself in a low oven. Under $60 versus $250–$400 new, and the wear on secondhand toys is exactly what sells the nostalgia.
8. A Hand-Painted Winter Woodland With Deer and Lamplight
Hand-painting a window scene is slower than the videos make it look — expect three to four evenings, not one. Two things will trip you up: dark backgrounds show every streak, and white paint over black needs two or three coats before it stops reading grey. Plan your layers back to front and let each one dry completely. Also, this only sings after dark from outside. In daylight it’s a white outline on glass, so don’t judge it at noon and panic.
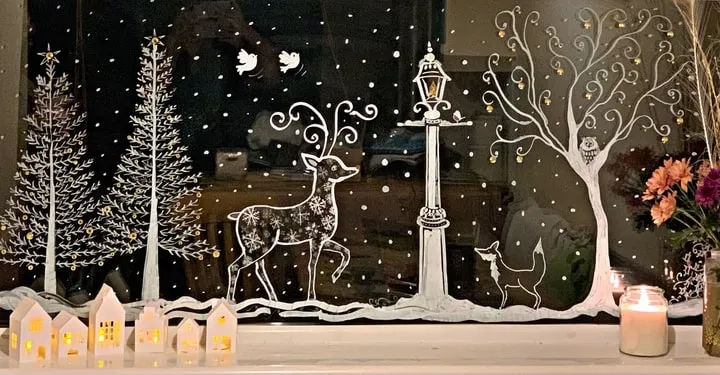
Put your light sources low. The miniature white houses and jar candles sitting below the sill are what make the painted scene glow from underneath, and that upward light is why the deer and trees look backlit rather than flat. Use battery votives inside the paper houses — no cord, no heat near paper, about $12 for a set of six. Keep the gold accents to roughly one in ten elements so they read as sparkle instead of glitter.
9. A Pink Candy Tree Flanked by Two Tall Nutcrackers
Pink Christmas has been climbing on Pinterest for three seasons, and 2026 is when it finally settled into a real palette — blush and cream rather than hot magenta. What makes it stick is the pairing: candy colors alone read childish, but set against deep green, gold, and two very traditional nutcrackers, the pink becomes the surprise instead of the whole personality. This is the candy-colored cousin of Idea #6 — same theatrical instinct, lighter mood.

- Two 4-foot nutcracker figures: $120–$300
- Pink artificial tree, 4–5 ft: $60–$180
- Candy-shaped ornaments, set of 12–20: $25–$70
- Artificial snow blanket and spotlights: $50–$105
Total: roughly $255–$655 before the clock, which is usually borrowed from another room. Budget alternative: repaint a thrifted tree with blush spray paint and shop post-holiday nutcrackers at half price.
10. Ornaments Suspended at Random Heights Behind a Multi-Pane Window
Vary the drop lengths by at least 3 inches, and hang the lowest ornament so it clears the sill by 4 to 6 inches. Even spacing is what makes this look like a store display instead of a home. Use clear fishing line tied to the window’s top casing or a tension rod tucked behind the frame, and put a tiny dot of museum putty where each line meets the frame so a draft doesn’t send everything swinging into the glass.
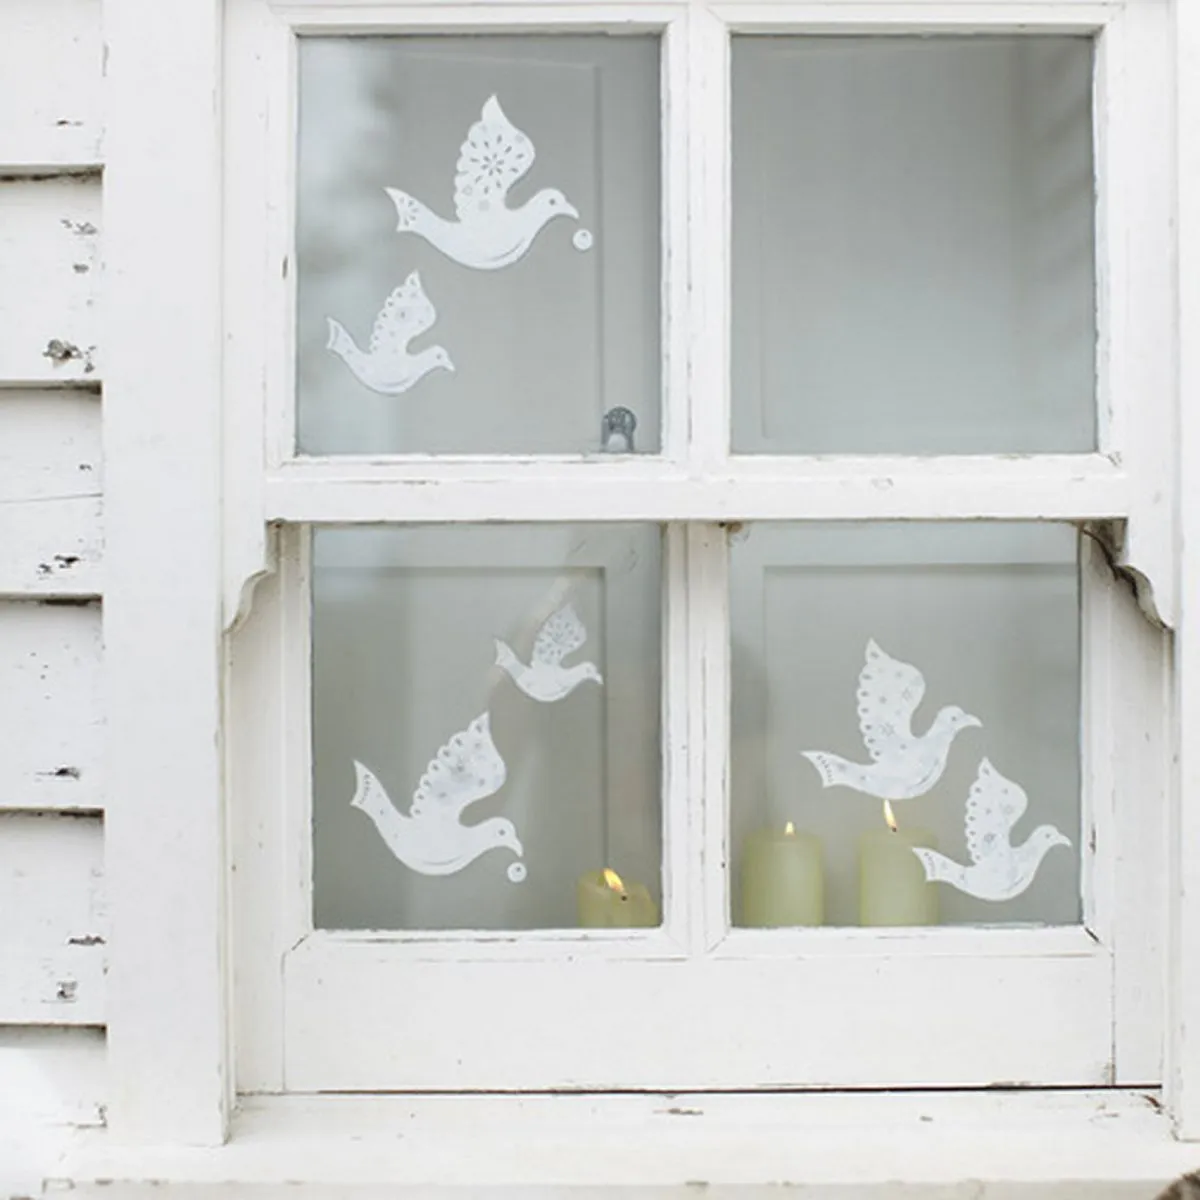
This idea needs height more than width. It works best on windows at least 48 inches tall, and it’s the rare decoration that actually improves on a wide multi-pane window 60 inches across or bigger, because the grilles give the hanging pieces a grid to play against. On a small bathroom window it will just look crowded. If your window is short and wide, look at Idea #13 instead — that arched composition handles low ceilings better.
11. Fairy Lights on a Black Frame Above a City Skyline
Fairy lights on a window frame look magical in photos and slightly sad when the battery pack dies in week two. Use a plug-in strand with a timer, or rechargeable batteries you’ll actually remember to swap. Also think about what the lights reflect in: bare black frames and night glass show every bulb as a doubled dot, which is beautiful, but sheer curtains half-drawn will diffuse it into a soft glow that photographs even better. Test both before you commit.
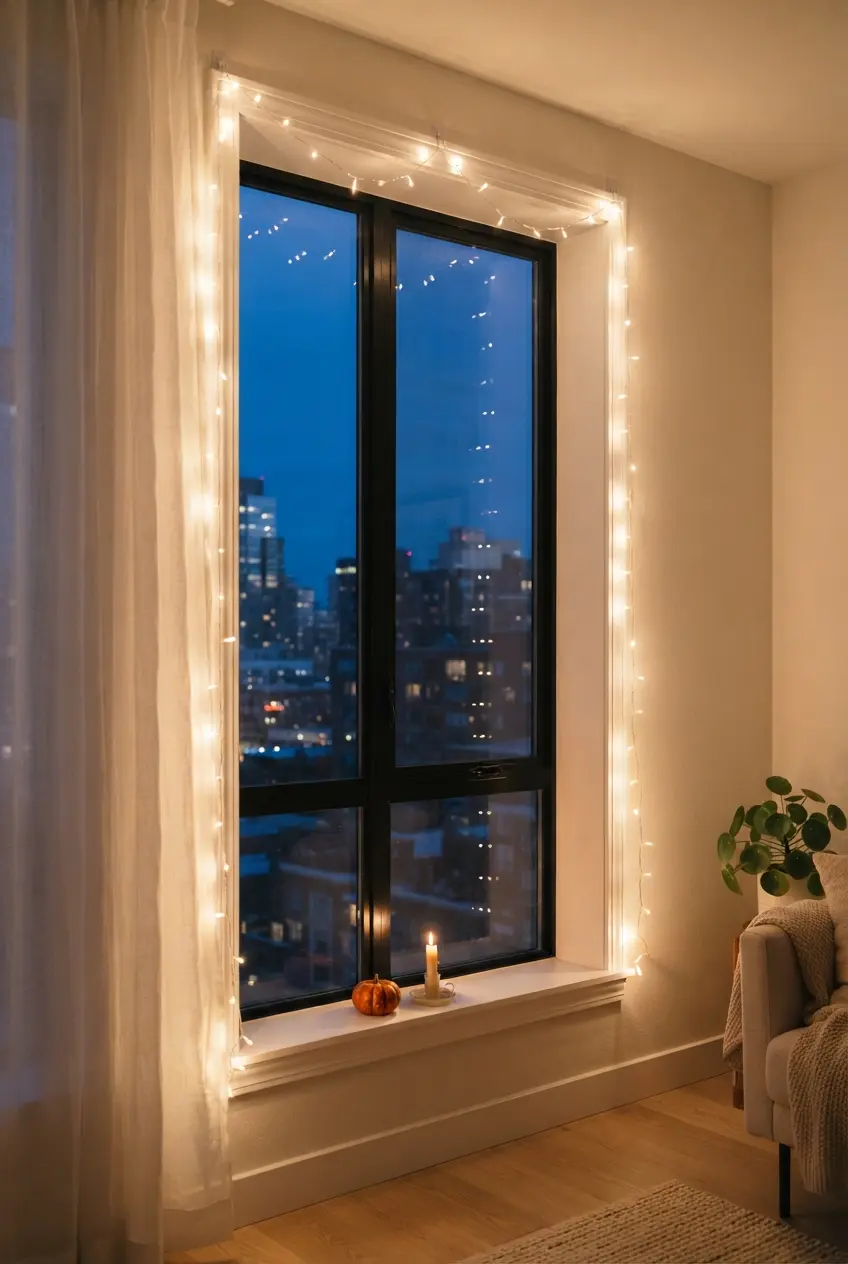
- Warm white fairy lights, 33 ft, plug-in with timer: $18–$40
- Sheer white curtain panel: $15–$45
- Cream pillar candle and holder: $12–$35
- Small seasonal accent: $5–$15
Total: roughly $50–$135 — the least expensive full-window look in this entire list. Battery strands from IKEA run about $8 and skip the outlet entirely.
12. A Hand-Drawn Snowy Town Decal Above a Candlelit Sill
- Clean the glass and let it dry — decals lift immediately on a smudged pane.
- Cut the decal sheet into individual houses, stars, and streetlights so you can place them freely.
- Set the largest house first at the lower third, then build outward and upward.
- Overlap rooflines slightly to fake depth; flat rows read as stickers.
- Smooth each piece from the center out with a credit card to kill bubbles.
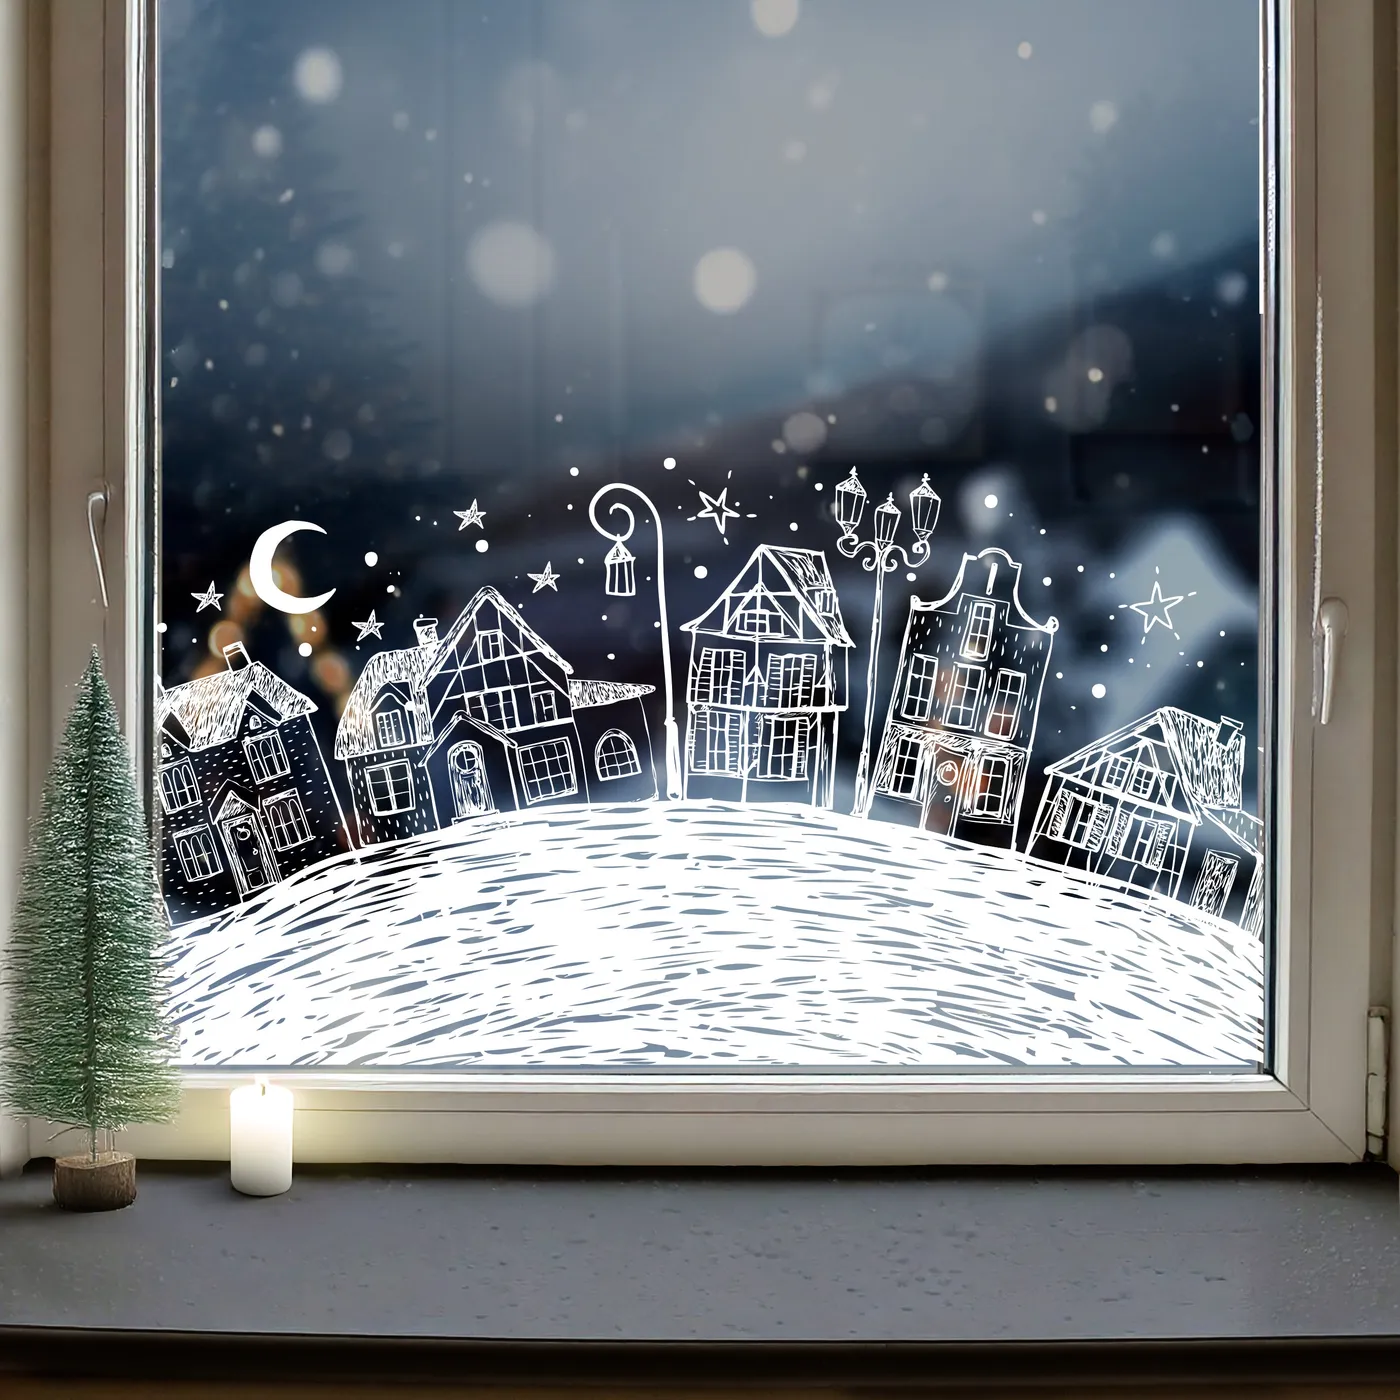
About 30 minutes of work, and the decal sets run $10–$25.
Dollar-store window clings and a freehand white marker get you most of the way there for under $10. The trick is editing: buy two cheap sets and use only the houses, stars, and moon, tossing the reindeer and snowmen that make it look like a classroom. A $6 bottle-brush tree and a $4 pillar candle finish the sill. Under $25, versus $80–$150 for a curated decal set plus styling pieces.
13. White Stars and Reindeer Under a Tall Arch
The arch. An arched window is a gift, and most people fight it by hanging one wreath in the center and calling it done. Here the stars follow the curve — small at the top, larger as they descend — so the architecture is echoed rather than ignored. The white trees and reindeer stay low and grounded on the faux snow, giving the curve something to sit above. Remove the arch and it’s a nice white display; keep it and the window becomes a snow globe.
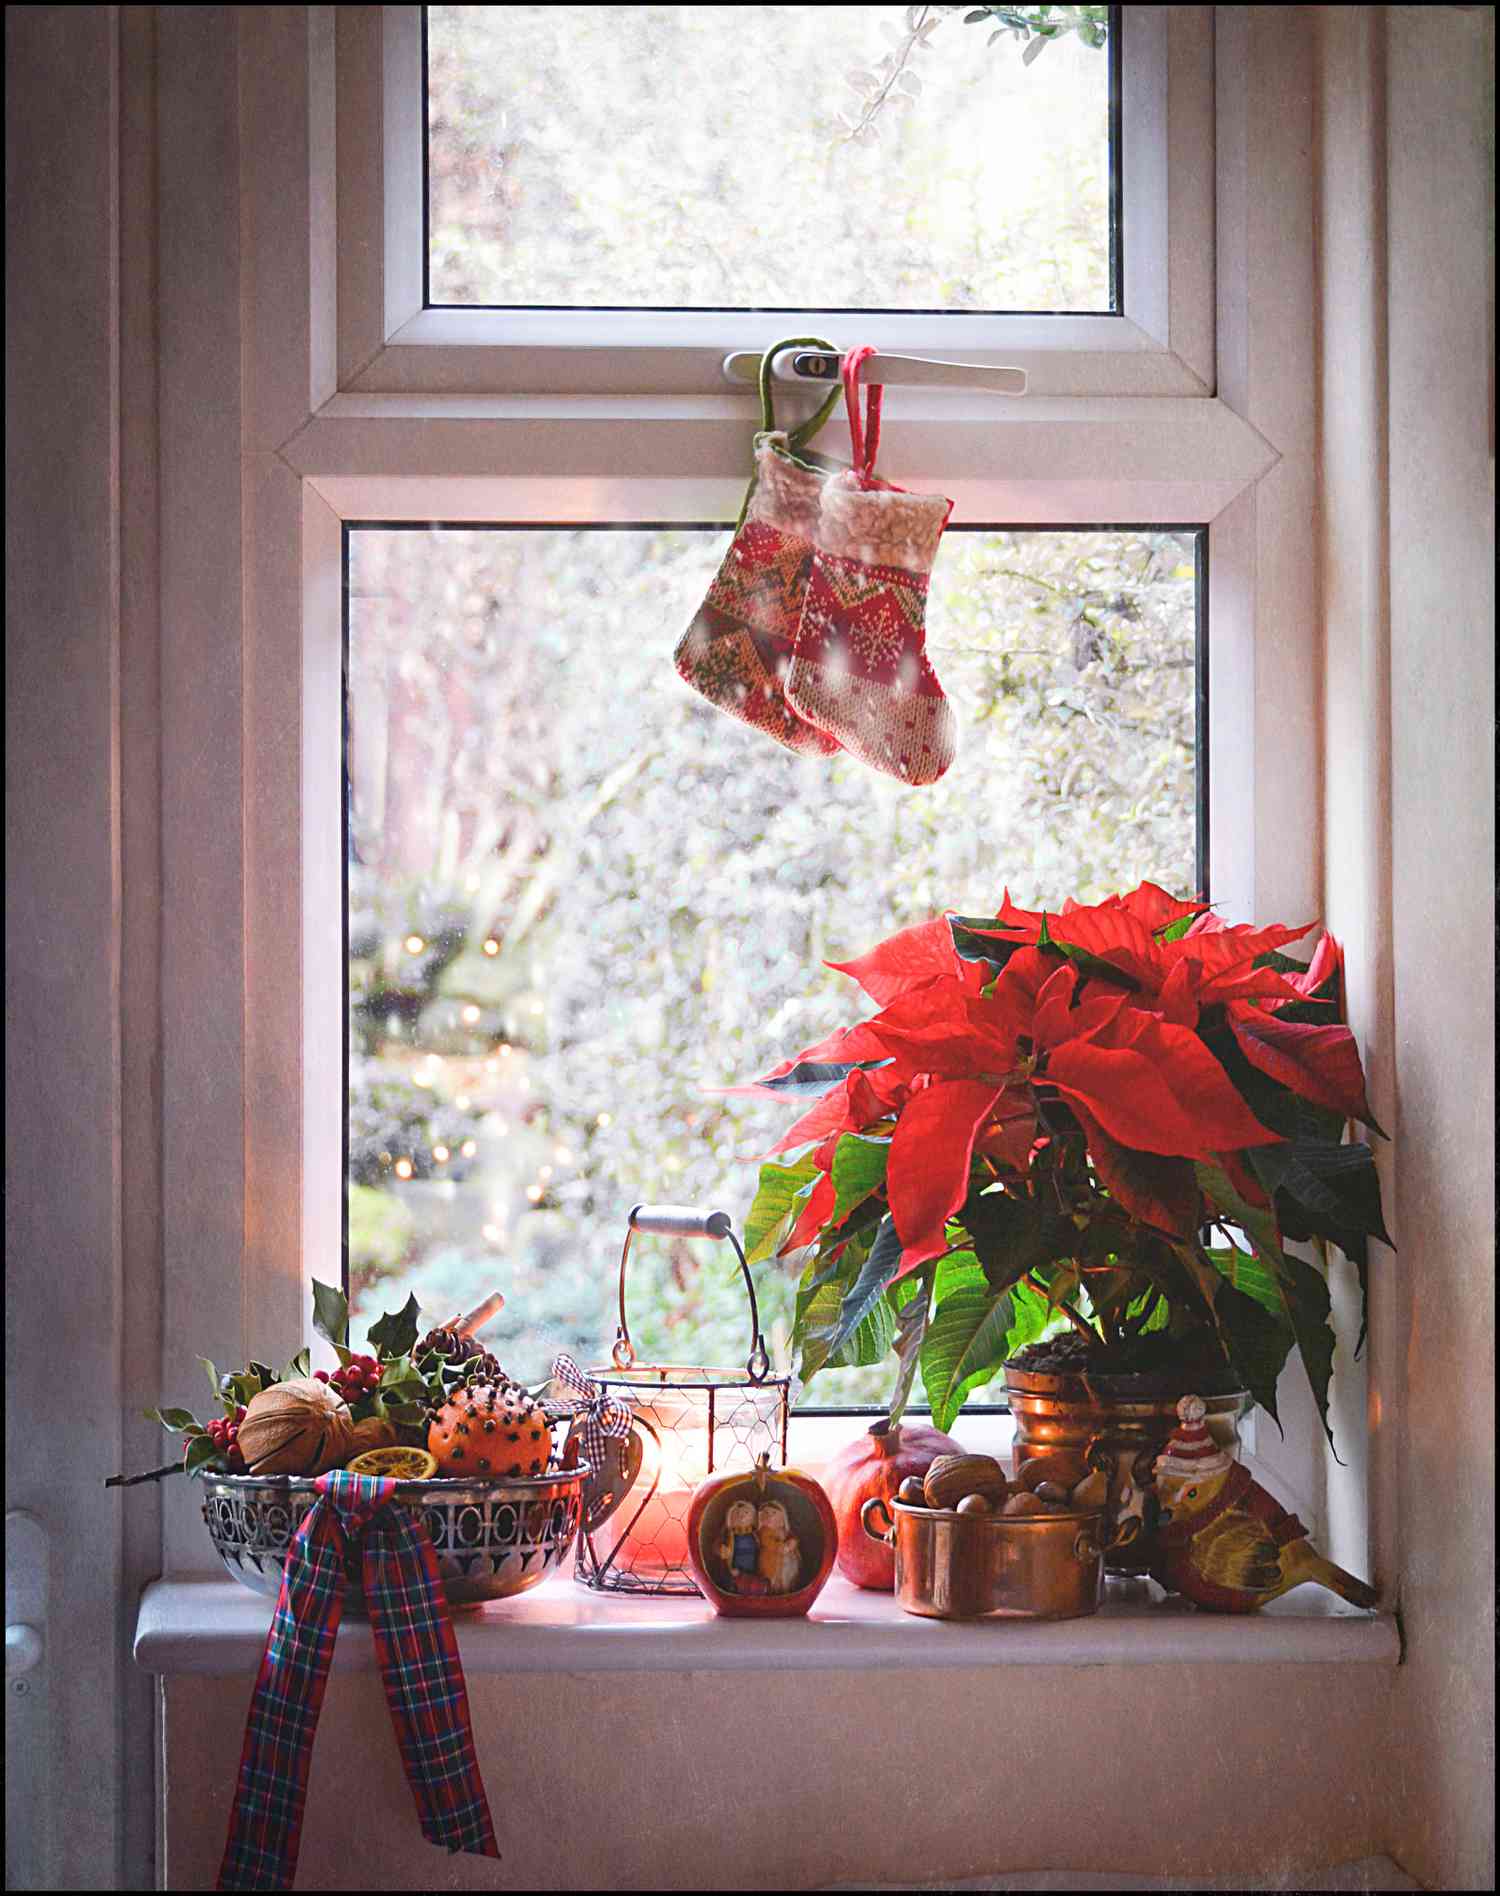
Ninety percent white and silver, ten percent warm light. That’s it. The discipline is what makes it read elegant instead of washed out: no red, no green, no gold ornaments sneaking in. To shift the mood, change the light temperature rather than the palette — warm bulbs give you the cozy version, cool white gives you a crisp alpine look. Add texture instead of color, in the form of flocked trees, ribbed glass, and matte reindeer.
14. A Garland-Framed Door with a Plaid-Ribbon Wreath
- Measure the door frame width — garland should extend 6–8 inches past each side, not stop at the trim.
- Confirm an exterior outlet within reach, or plan a discreet cord run along the trim.
- Check that the door still opens fully with garland on the frame.
- Verify your wreath hanger clears the top of the door and the weatherstripping.
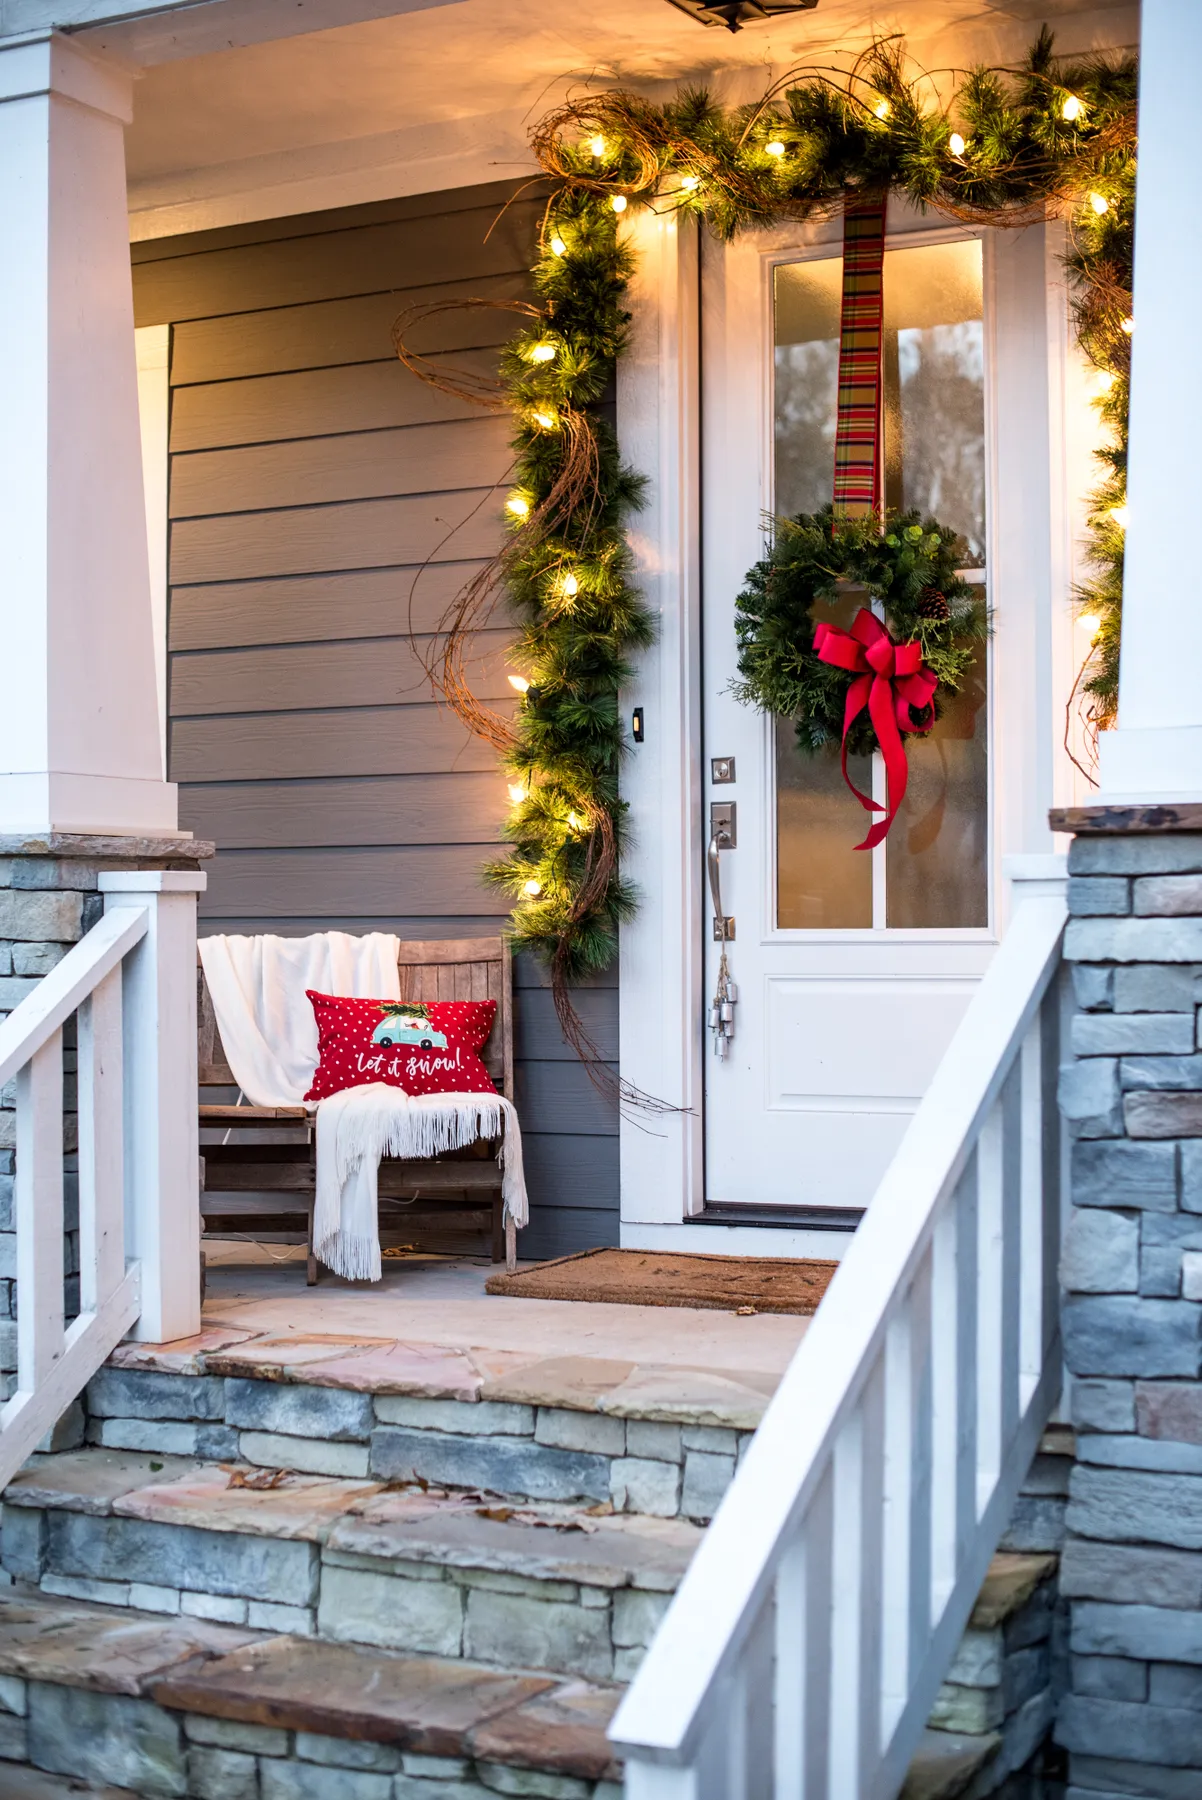
Wire your garland with lights before you hang it, then weave in three or four natural brown branch stems at uneven intervals. Those bare twigs are what separate a designer garland from a drugstore one — they break the green into irregular silhouettes against the siding. Zip-tie the garland to a screw eye at each corner rather than draping it over nails; gravity will sag it into a sad U by New Year’s otherwise.
15. A Window Box Packed With Evergreen, Berries, and Tiny Houses
- Line the box with a plastic liner and fill halfway with damp sand for weight and moisture.
- Stick upright evergreen bundles into the sand first, tallest at the back.
- Tuck berry clusters and magnolia leaves between the greens, angled outward.
- Nestle miniature houses into the greenery at different depths.
- Finish with cardinal and bird figurines perched on visible branch ends.
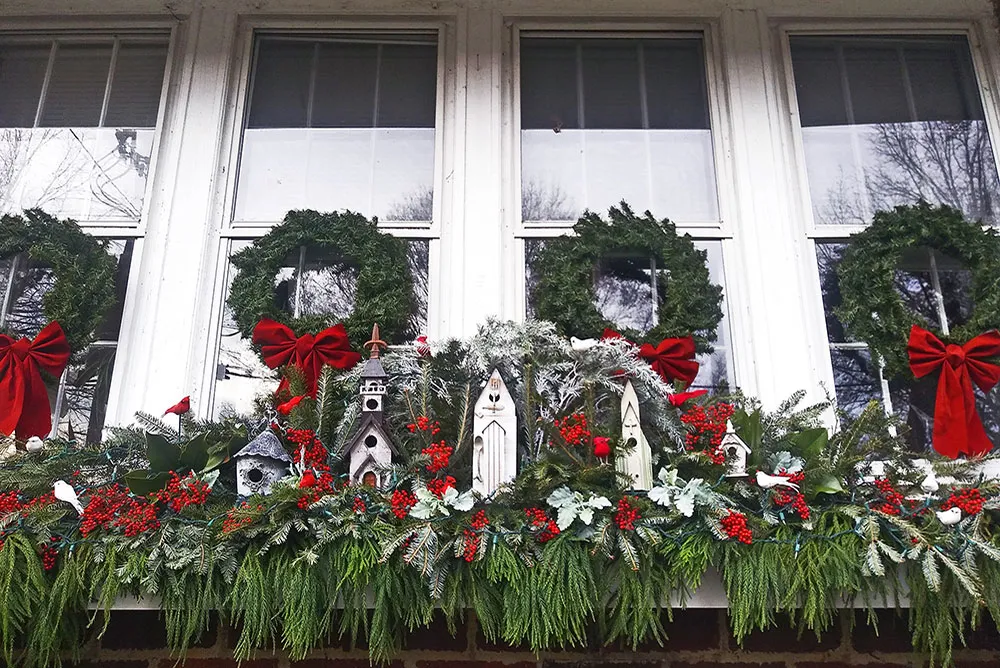
Ninety minutes of work, and greenery runs $40–$90 depending on whether you forage.
Fresh evergreen in a window box is beautiful and thirsty. Check moisture every three days — a dry box drops needles within a week — and expect the arrangement to hold four to six weeks in cold weather, less if it faces sun. Red berries can stain light siding when they fall, so shake them loose before installing. Good faux cedar and pine picks look convincing from the street and reappear every December for a decade.
16. A Tree Lit in Warm White and Electric Blue Behind Dark Grilles
Sixty percent warm white, thirty percent saturated blue, ten percent dark frame. The dark grilles matter as much as either light color — they give the eye somewhere to rest between two competing temperatures. Swap the blue for deep red and you get a completely traditional look from an identical tree; swap it for amber and the whole window turns golden. Keep the ratio and you can’t really miss. Push the accent past 40% and it starts to feel like a fairground.
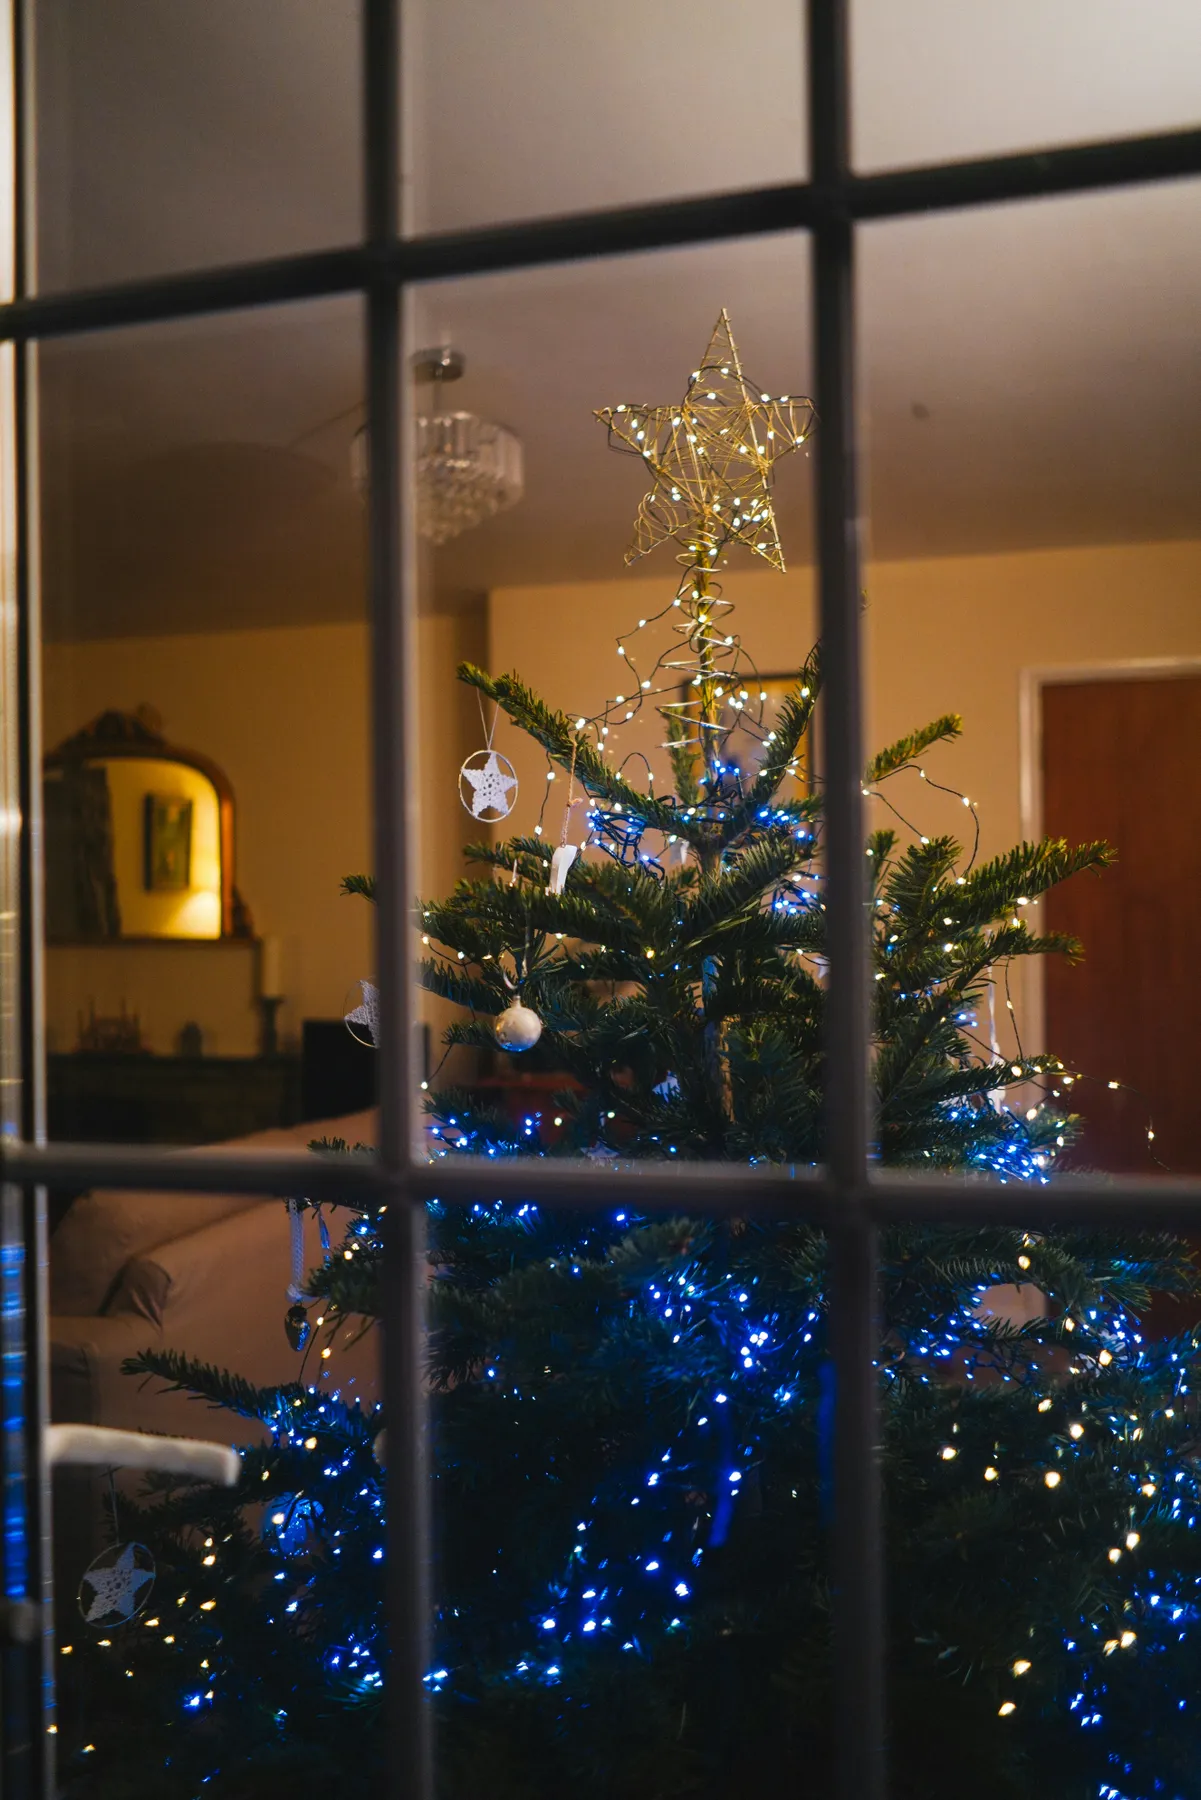
Blue lights on a tree are divisive — some people see ice and elegance, others see a 1998 rec room. Before committing, buy one strand and look at it against your tree at night from the sidewalk, which is the only view that matters for a window display. Also worth knowing: blue LEDs photograph cooler and more purple than they look in person, so if you’re styling for photos, go one shade warmer than feels right in the room.
17. Pinecone Gnomes on the Sill of a Dark Panelled Wall
Anchor garland to the frame’s top corners with small screw eyes, never tape — on dark wood the residue is invisible until you take it down in January and find a shiny rectangle. Drape in a shallow swag rather than a straight line; 8 to 10 inches of drop at the center is plenty. And keep the sill arrangements asymmetric. Two matching gnomes flanking a matching deer is the fastest way to make a beautiful rustic window look like a catalog page.
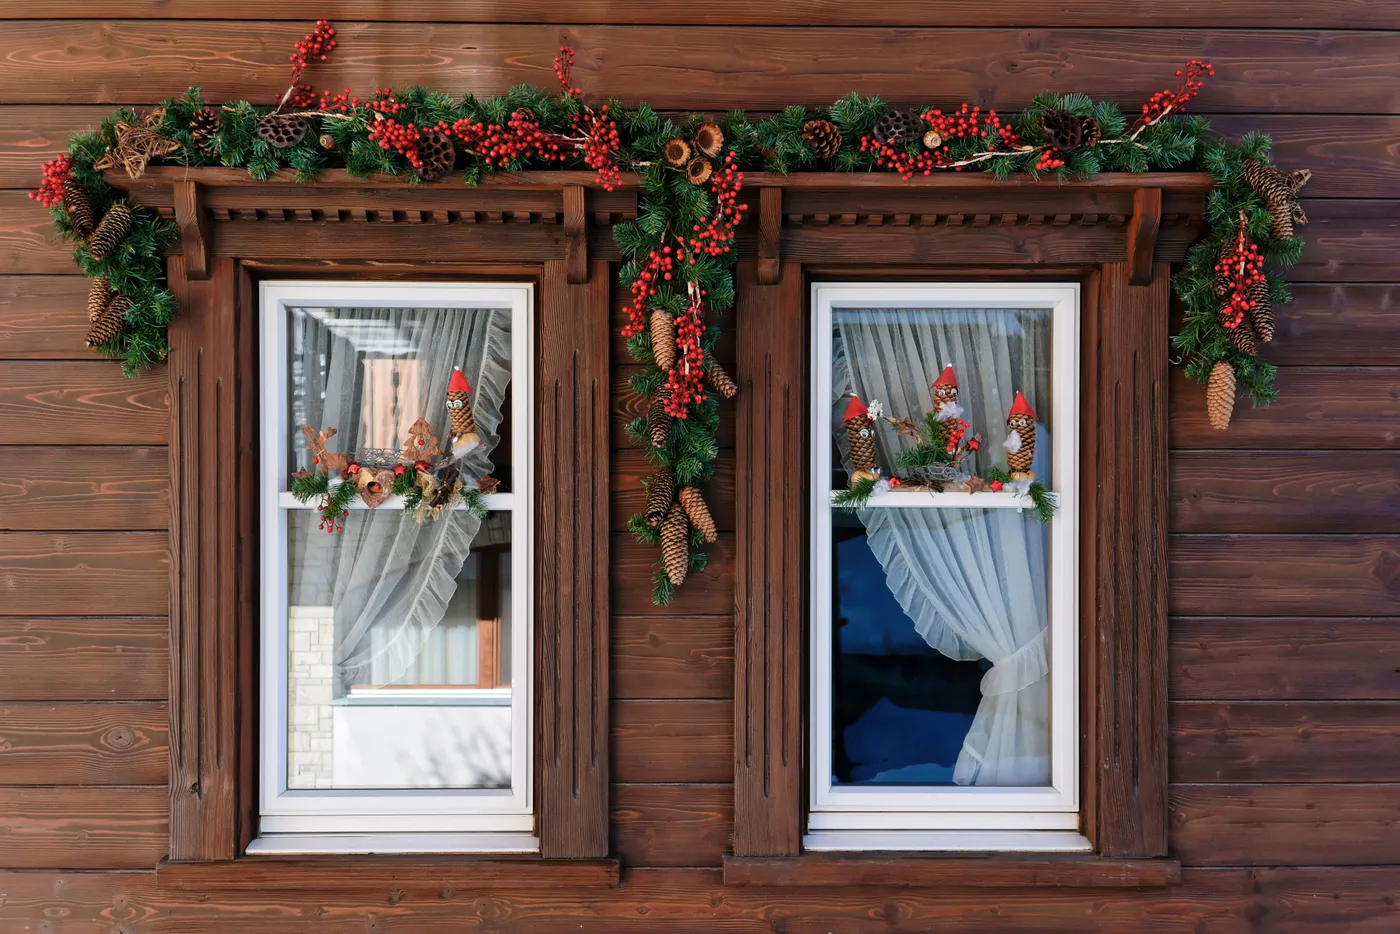
- Pine garland, 9 ft: $30–$90
- Red berry sprays and pinecones: $15–$40
- Two pinecone gnomes: $25–$60
- Wooden deer figures: $12–$35
- Sheer ruffled curtain panels: $30–$70
Total: roughly $112–$295, and the gnomes are the only truly optional part.
18. A Densely Layered Display Lit in Warm White and Blue
This kind of density needs volume. It works in windows at least 36 inches wide and 48 inches tall, and it genuinely needs a recessed sill or a bay — a flush window with no ledge has nowhere to build the layers. If your window is shallow, cut the display down to two tiers instead of four and let the blue snowflake lights carry the top half alone. Small openings handle a lighter touch far better.
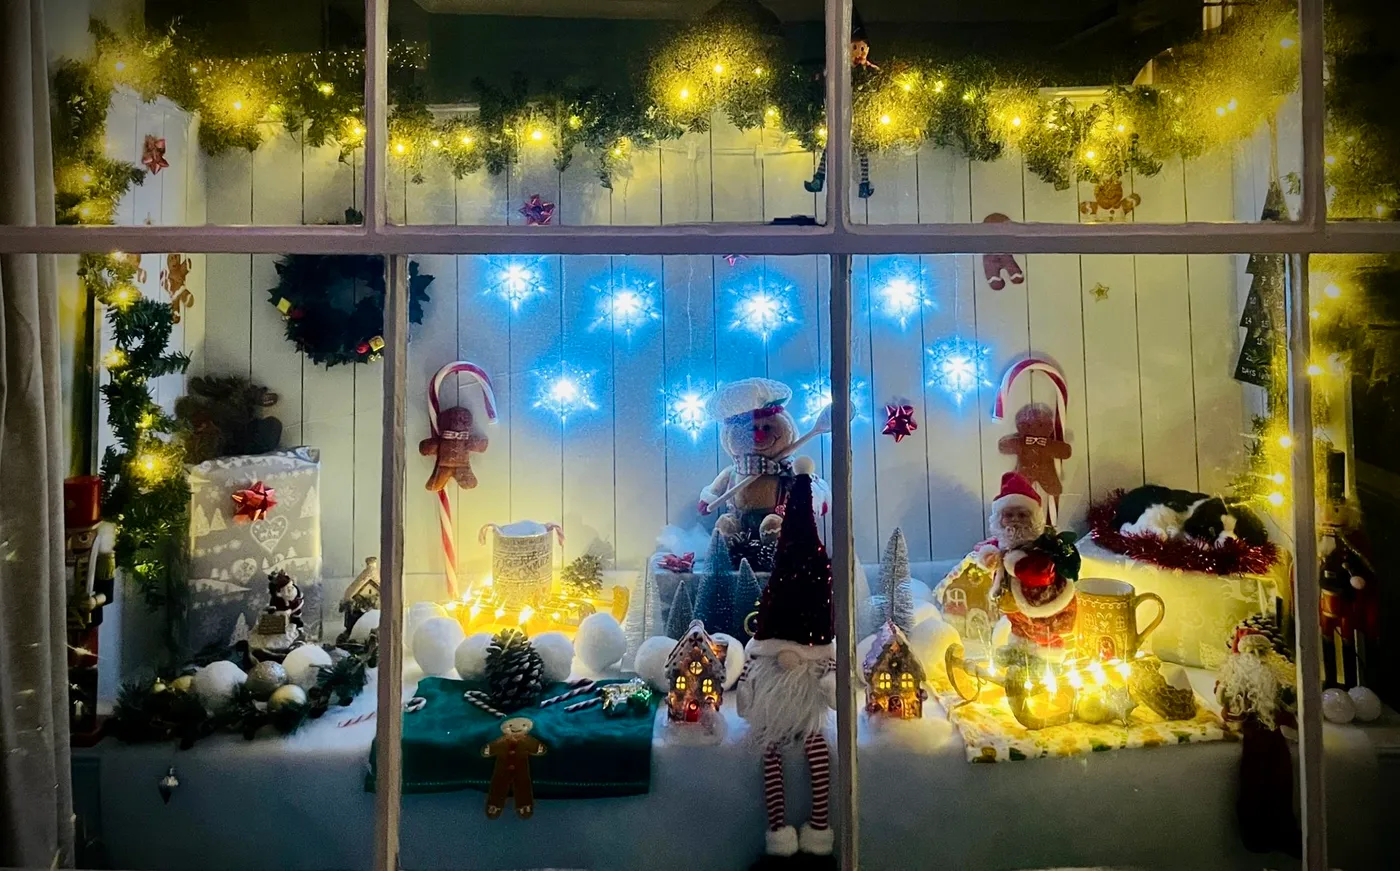
Depth, not volume. There are three distinct planes here — the panelled wall with garland at the back, blue snowflake lights in the middle, figurines and faux snow at the front — and each one is lit separately. That separation is why it reads as a scene rather than a shelf of stuff. The other trick is light color zoning: warm white up top, cool blue below. Different temperatures at different heights keep the eye moving instead of letting everything blur into one bright rectangle.
19. A Frosted Snowman and Stars Glowing From Behind
- Tape a snowman and star stencil to the outside of the glass.
- Dab frosted-glass spray or watered white acrylic with a sponge, not a brush — stipple for texture.
- Pull the stencil while the paint is still slightly tacky to keep edges crisp.
- Add a second, lighter pass of flecks around the border for a frost-crawl effect.
- Place warm lights behind the pane and check it from outside after dark.
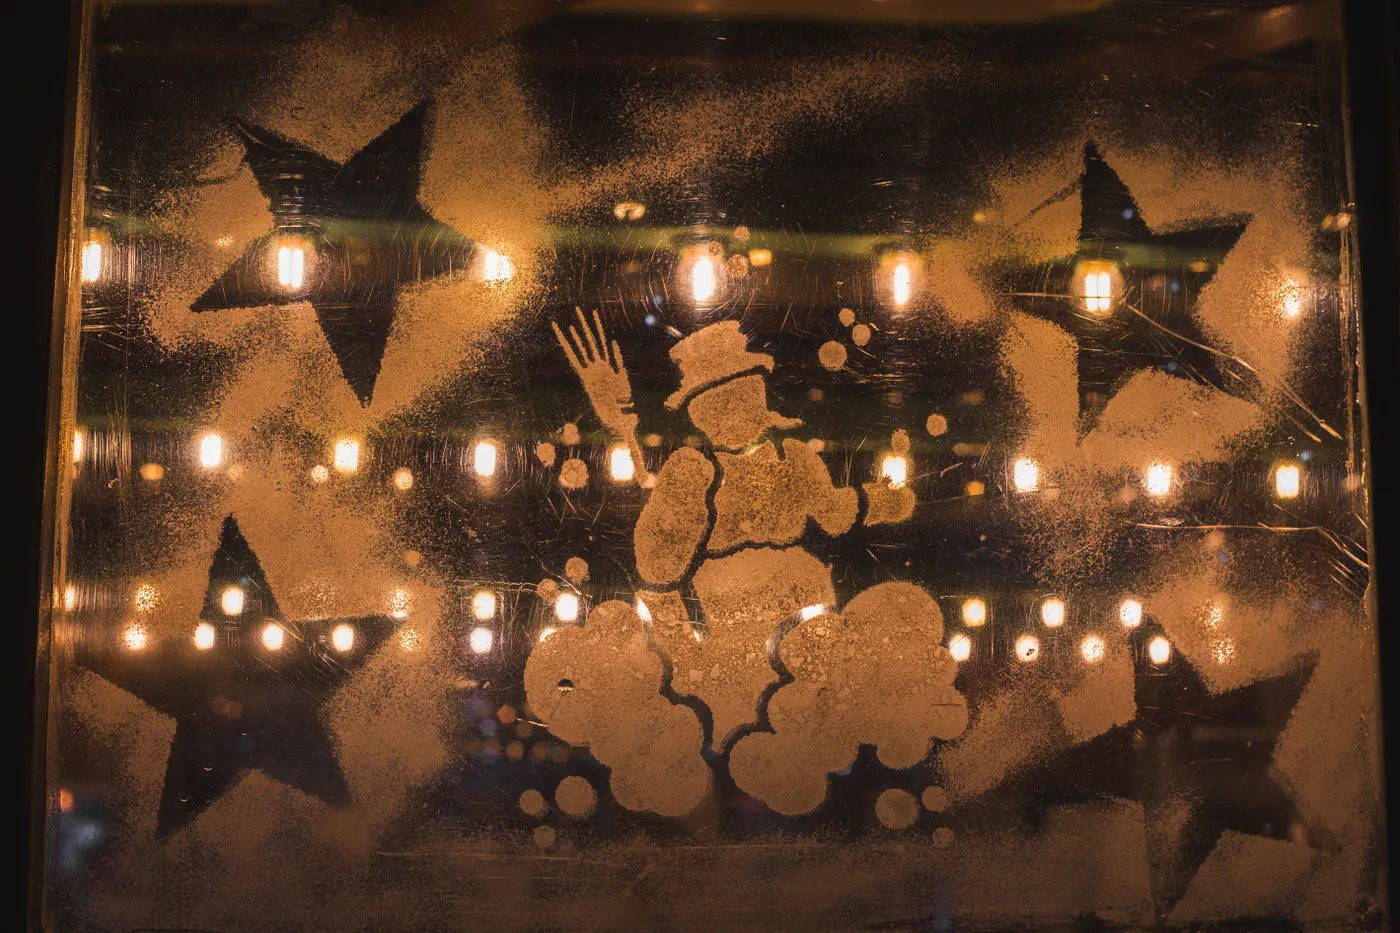
Under an hour, and supplies cost $12–$25.
Frosted and stenciled glass is having a moment because it solves a real renter problem: it looks custom, costs almost nothing, and comes off with a razor blade in January. Pinterest searches for stenciled window treatments have climbed steadily since 2024, and by 2026 the look has matured past snow spray everywhere into deliberate graphic shapes. The bokeh of lights behind the frosted pattern is the whole point — that soft amber blur makes it feel like a memory instead of a craft project.
20. A Lit Twig Tree, Wrapped Gifts, and a Cut-Out Lantern
- Lighted twig tree, 2–3 ft: $30–$80
- White ceramic lantern with cut-outs: $20–$55
- Gift wrap, ribbon, and boxes: $15–$40
- Faux snow or white fabric: $12–$30
- Battery votive candles: $10–$20
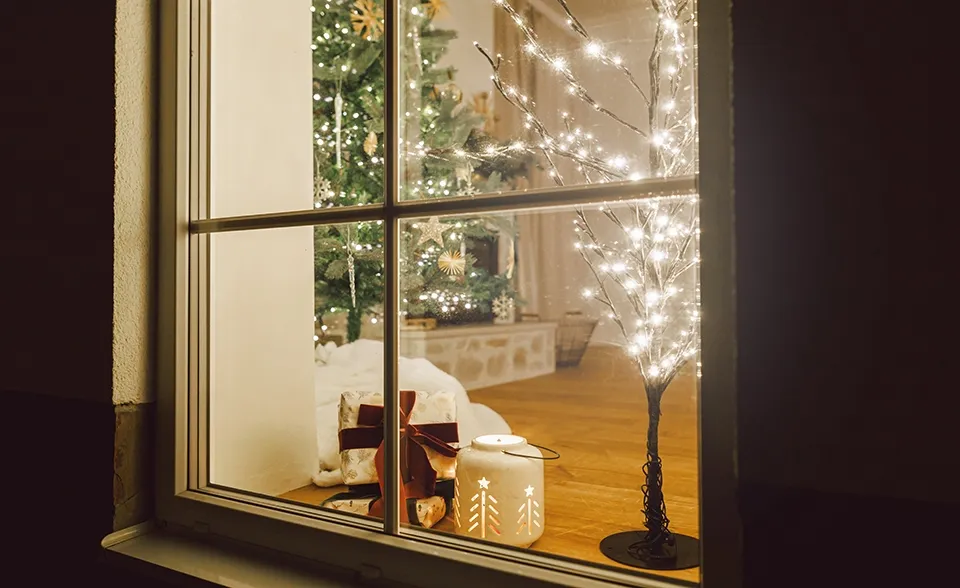
Total: roughly $87–$225, and the gifts double as storage for whatever you’re actually giving this year.
The lantern is the one thing. Twig trees and wrapped gifts are everywhere; the pierced ceramic lantern with star and tree cut-outs is what gives this window its silhouette. When the candle inside is lit, it throws star-shaped light across the sill and up the wall behind — a pattern no string light can make. Buy one with cut-outs on all four sides so it works from the street and from inside the room, and set it slightly off-center so the pattern lands on the wall rather than the floor.
21. A Green Door, Striped Awning, and a Lit Tree Beyond
The composition is doing something clever: three verticals — two display windows and a central door — and the eye is walked left to right and back again. The tree glows from behind the door glass, which makes the entrance the focal point without a single decoration on the door face itself. Garlands frame the side windows and echo the awning’s stripes with their red ornament clusters, so the color repeats in three places without ever feeling repetitive.
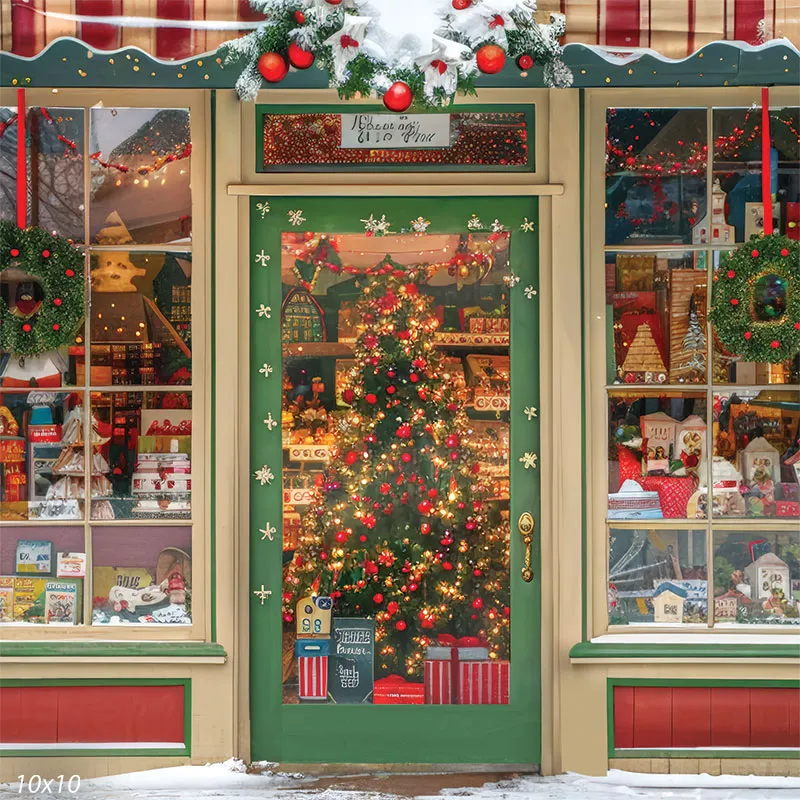
Roughly 40% cream and warm white light, 30% forest green, 20% bright red, 10% gold. The cream awning is what keeps this from becoming a wall of green and red — it’s a neutral buffer between the saturated elements, and it’s the piece most people would forget to plan. Swap the red for burgundy and the gold for brass and you have a more grown-up version of the exact same structure.
22. Gingerbread Decals and Candlelight on a Dark Wood Sill
Faux snow on a sill looks amazing and hides a multitude of sins — until it collects dust, which it will within about three weeks. Shake it out monthly and store it in a zip bag rather than a bin where it picks up lint. Lit pillar candles next to polyester snow is a genuine fire concern; use battery pillars with a flicker effect instead. They cost $15–$30 a pair and nobody from the street can tell the difference.
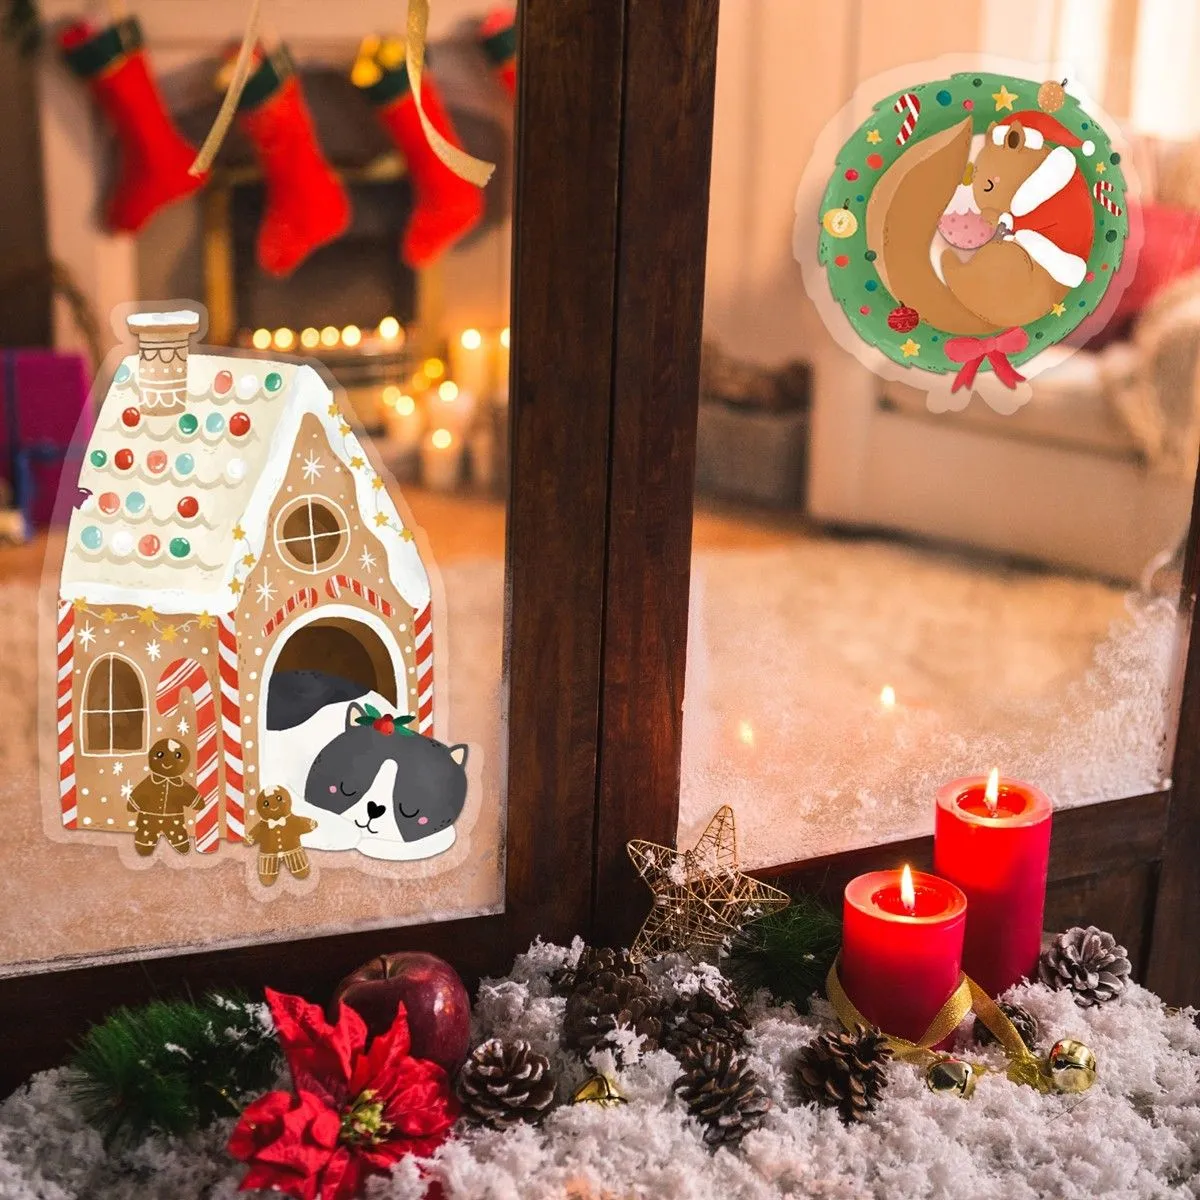
The whole sill costs less than a nice bottle of wine. Decals run $8–$15 for a mixed sheet, faux snow is $5–$12 a bag at any big-box store, and pinecones are free if you have a park nearby. Battery pillar candles are the one place to spend. Poinsettias in December run $6–$14 at grocery stores — buy the small ones, they scale better on a sill than the giant ones do.
23. Vintage Santa Figures Under Floating Gold Ornaments
It’s the ceiling of ornaments. Everything at eye level is white, cream, and wood — Santas, polar bears, rocking horses — and then a dense cluster of gold and red spheres hangs overhead, so the display has a sky. Without them the eye only travels horizontally and the window loses half its height. To copy it at home, hang 15 to 20 spheres at staggered lengths using clear line and cup hooks, and leave a hand’s width of clear air between each one.
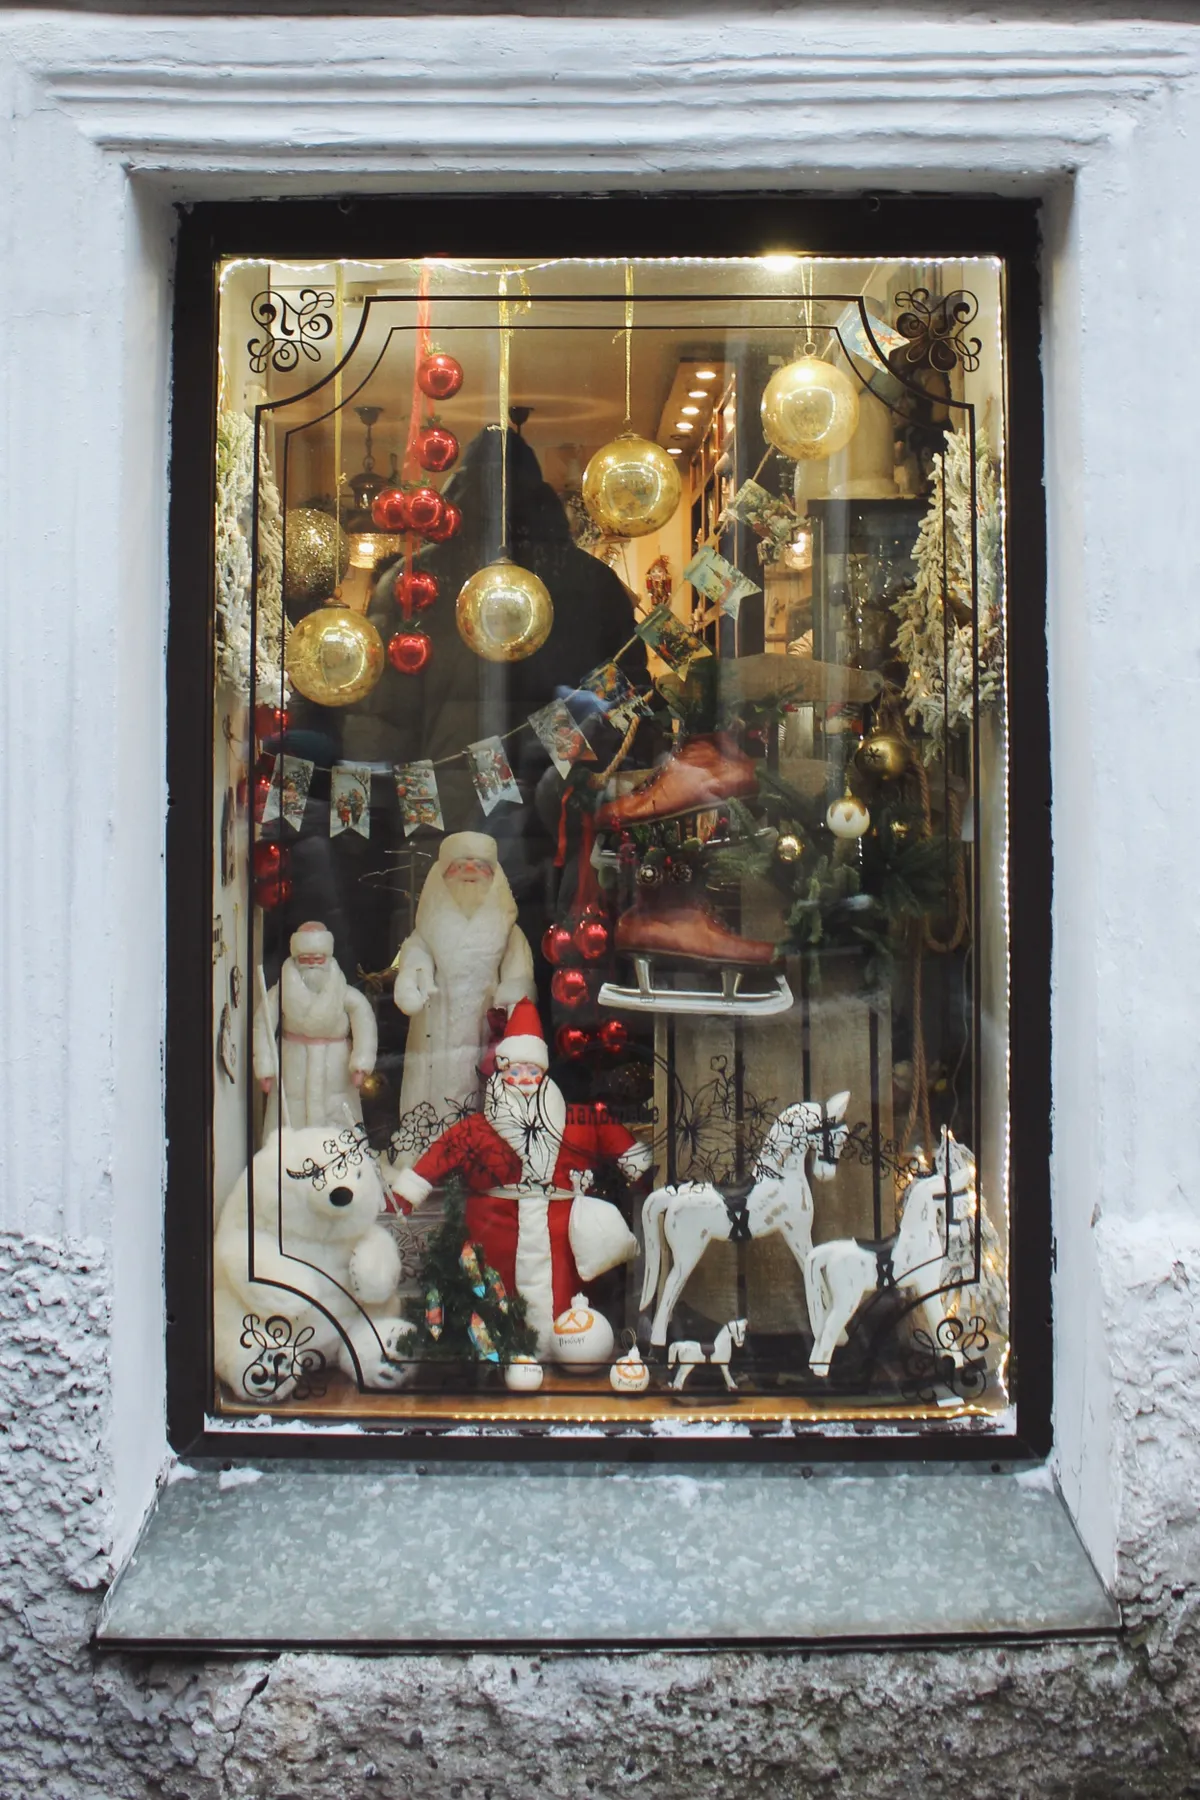
Large ornaments overhead are lovely and slightly high-maintenance: they spin in drafts, so budget for a fishing swivel or a dab of putty to keep them from rotating into each other and chipping. Metallic finishes scuff easily — handle them with cotton gloves and store them individually in tissue rather than loose in a bin. Dust is the enemy of gold; a dry microfiber pass once a season keeps the shine, while a wet cloth will dull the finish permanently.
24. A Window Box of Evergreen, Magnolia Leaves, and Curling Branches
Use three greens, not one: an upright pine, a soft fir, and something feathery like cedar. The mix gives you three needle textures, which reads as expensive from ten feet away. Tuck magnolia leaves so their glossy brown undersides face out — the warm bronze against deep green is the detail people can’t name but always notice. Soak pinecones in water for an hour before arranging so they close up, then let them dry in place and reopen into the greenery.
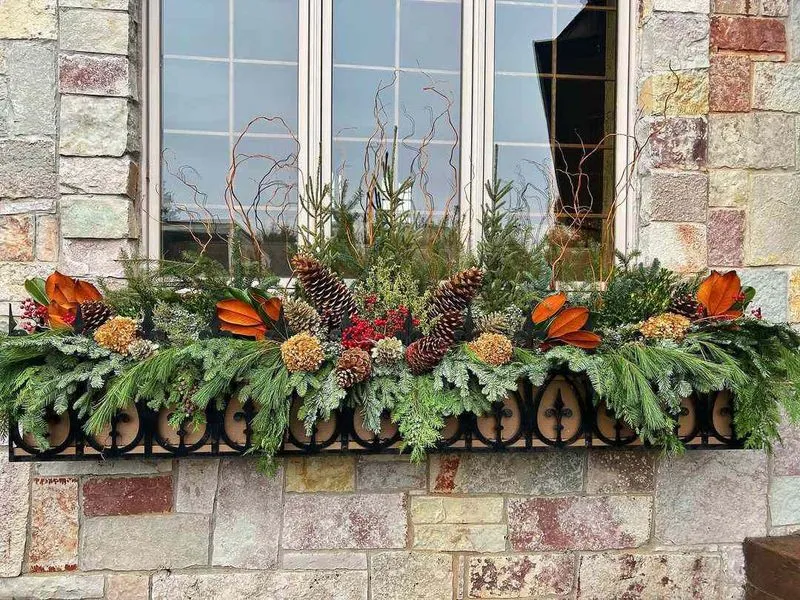
Contrast in every direction. Upright evergreens against cascading branches, matte needles against glossy leaves, round pinecones against the sharp metal of the window box, deep green against reddish orange. Nature does this instinctively, which is why a haphazard armful of branches often beats a carefully spaced arrangement. The curly branches escaping at the top are doing real work too — they break the box’s straight edge and reach toward the panes, tying the composition together.
25. Three Gingerbread Figures Behind Checkered Curtains
- Wooden gingerbread figures, set of 3: $30–$75
- Red and white checkered curtain panels: $25–$60
- Fairy lights for the railing: $15–$35
- Wooden crates and wicker baskets: $20–$50
- Large candy cane prop: $12–$30
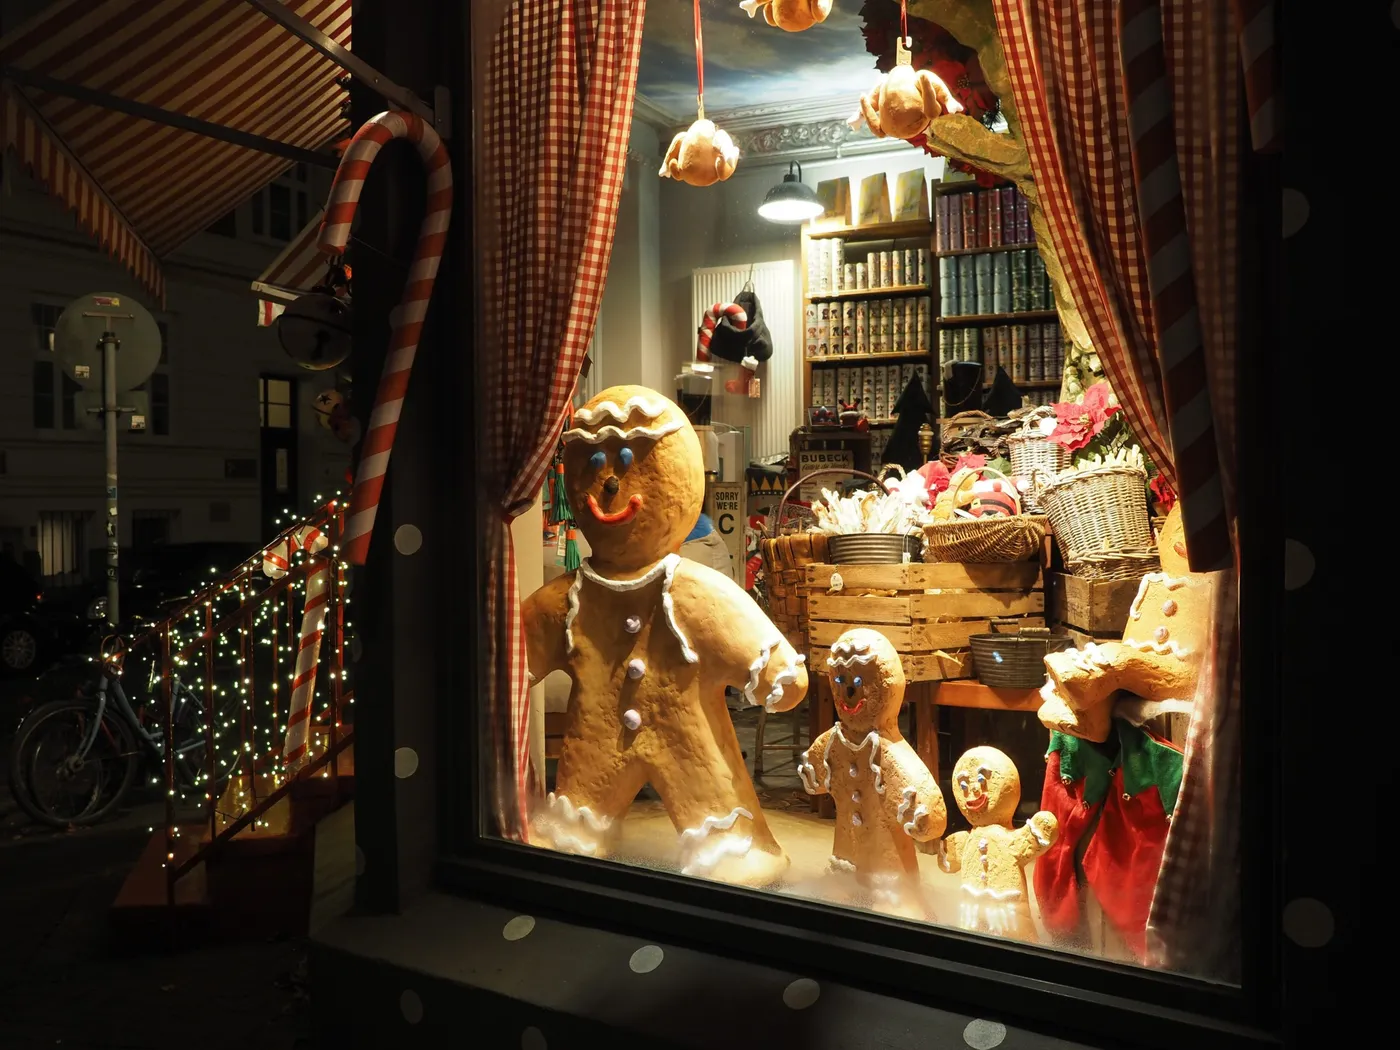
Total: roughly $102–$250, and the crates are probably already in your garage.
Checkered fabric by the yard costs $8–$12 and a tension rod holds it with zero hardware. Cut the gingerbread family from quarter-inch plywood or sturdy cardboard, paint them brown, and pipe details with a white paint pen — the whole trio lands under $20 in materials and an afternoon. Compare with Idea #9, which runs on the same candy-land instinct with a bigger budget and a taller tree.
26. A Flocked Tree Against Floor-to-Ceiling Forest Windows
This only works when the window is genuinely large — floor-to-ceiling glazing 8 feet wide or more, with a ceiling height of at least 9 feet. In a normal 8-foot room, a flocked tree in front of a big window blocks the very light you’re decorating for. If your view is smaller, treat the window as a backdrop and pull the tree a few feet back, as in Idea #5, where the window does the decorating and the tree does the lighting.
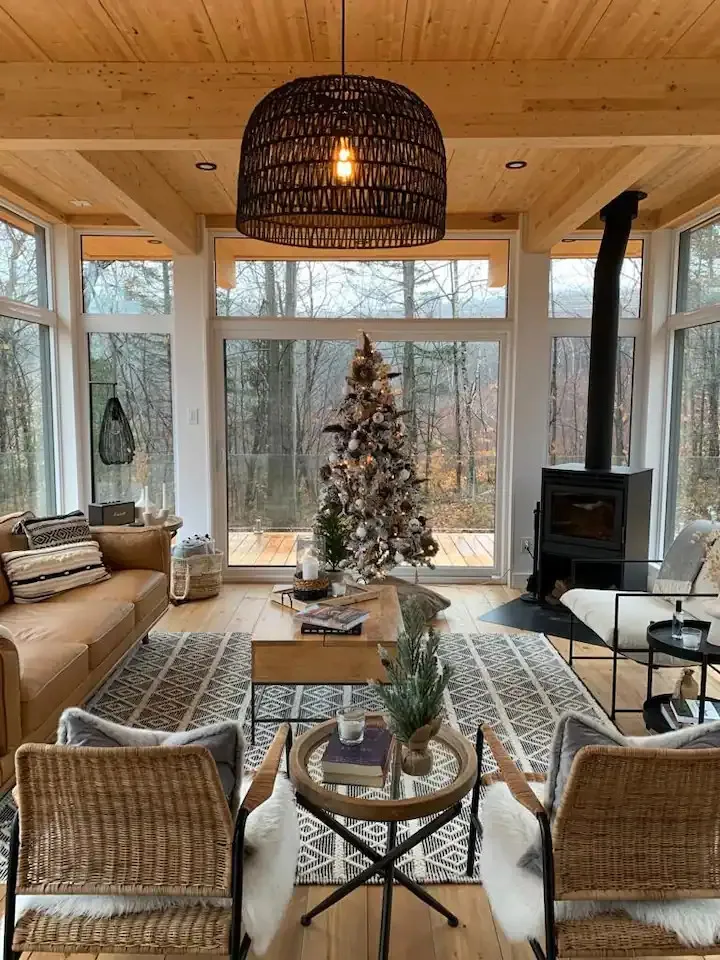
The window is the decoration. Everything inside is deliberately low-contrast — tan leather, light wood, black metal — so the winter forest outside reads as the focal point instead of competing with a red-and-green room. Notice the one move that makes it cozy: a freestanding fireplace centered on the glass. It puts warm firelight against a cold view, and that temperature contrast does more for the mood than any garland could.
27. One Oversized Lighted Wreath on a Dark Window
Size up. A wreath on a large window should span about two-thirds of the glass width — a small wreath on big glass looks like a doorknob. For a 48-inch window that means a 30-to-32-inch wreath, which is bigger than most people buy. Hang it from a single screw eye centered above the frame, and swap the standard hook for a doubled length of ribbon so the wreath sits flush against the glass instead of swinging.
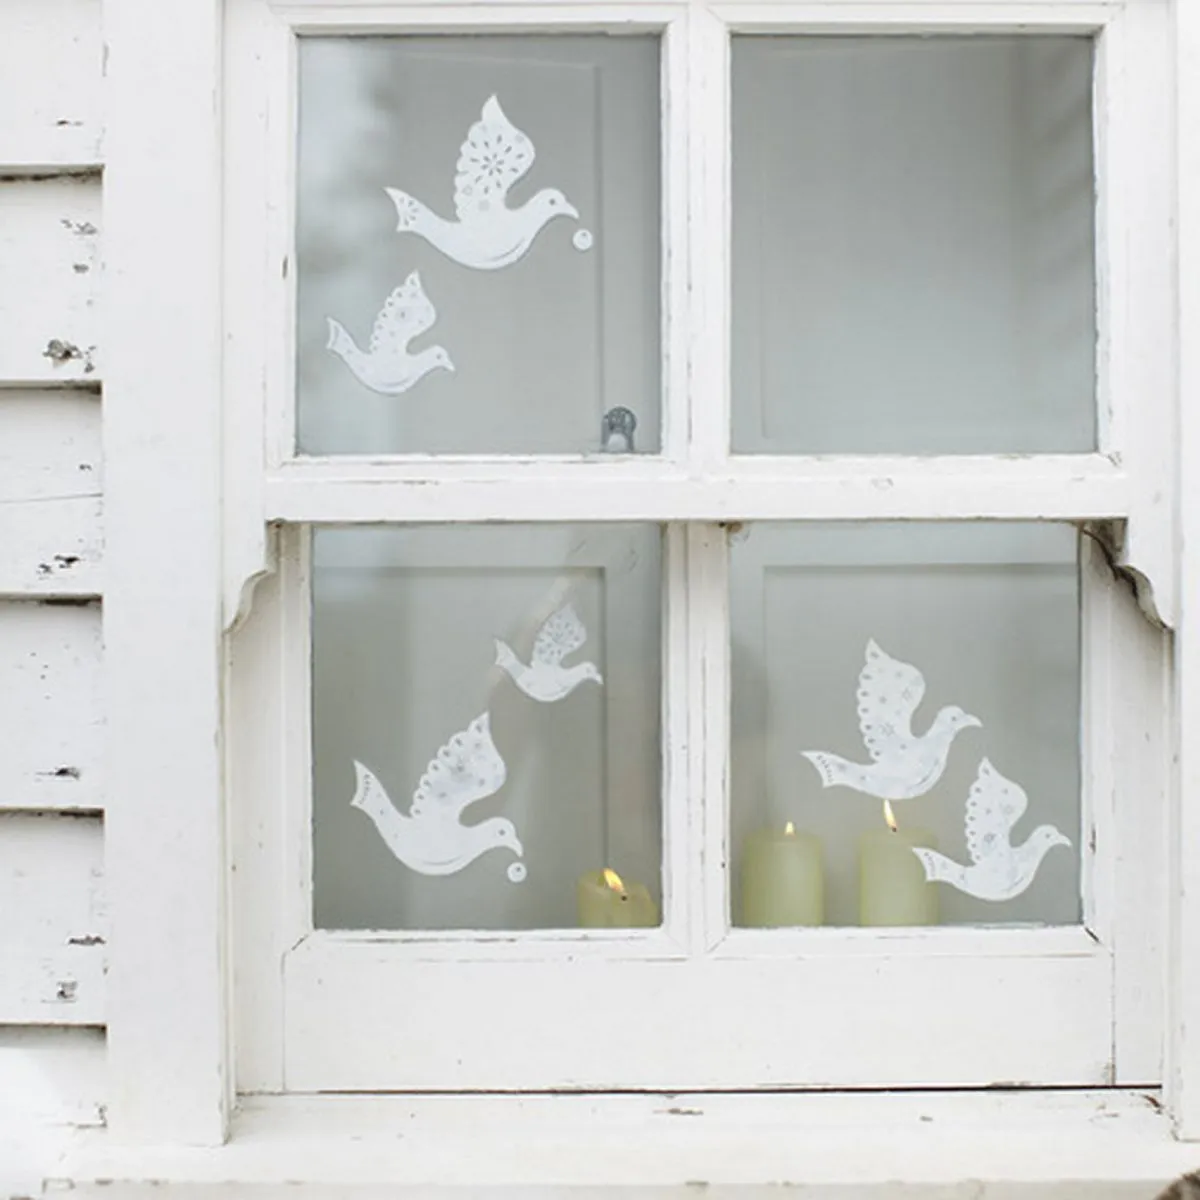
A 30-inch wreath from a craft store with a coupon runs $35–$60, a 33-foot strand of battery warm white lights is about $12, and gold baubles come in multipacks at $10–$18. That’s around $70 versus $250–$400 for the designer version. The bow is the tell — buy wide wired ribbon and make a proper eight-loop bow rather than a single knot. The Idea #4 approach is this same logic multiplied across a whole facade.
28. A Multi-Tier Village and Carousel Behind Dark Frames
- Build risers from boxes wrapped in white paper so the tiers read as snow banks.
- Place the carousel at the center tier — it’s the only moving part, so it earns the focal point.
- Cluster villages in odd numbers on each level, three or five houses per tier.
- Run warm lights behind the buildings, never in front, so the glow comes from within.
- Finish with scattered figures and trees at the front edge for scale.
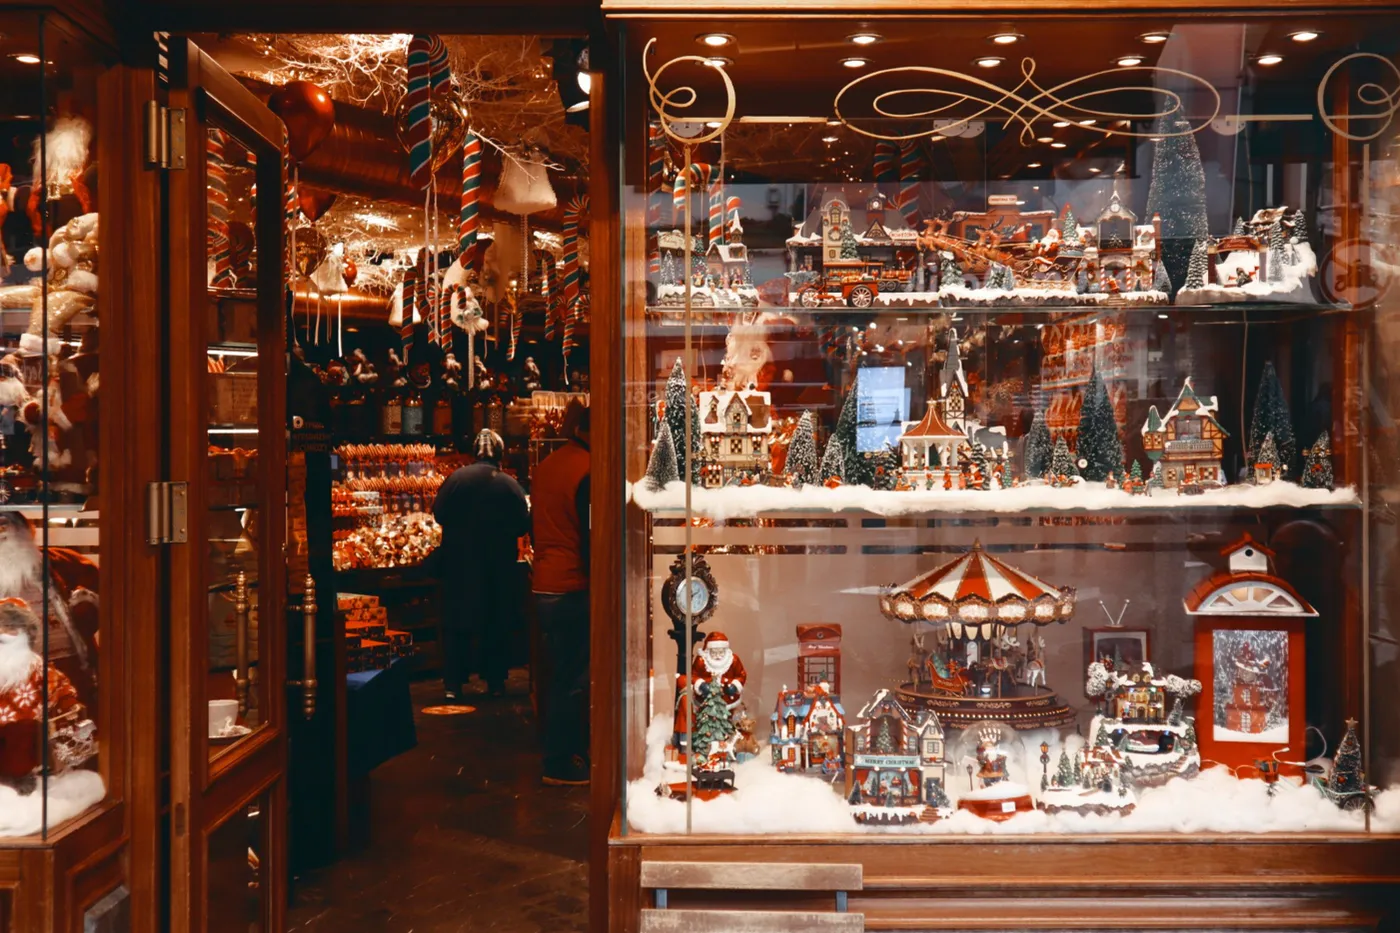
A full afternoon, and it’s the kind of thing you rebuild and improve every year.
The carousel is the one thing. Villages are nostalgic but static, and a village display without movement starts to look like a museum case. The carousel gives the eye a destination and a reason to stay — plus it establishes scale, so the tiny houses suddenly read as genuinely small. If you can’t find one, anything with implied motion works: a tiny ice rink with skaters, a moving train, even a strand of lights that pulses.
29. Green Baubles Suspended Above a Pine-Branch Table
Seventy percent sage and beige, twenty percent natural wood, ten percent dark green. Notice what’s missing: no red, no gold, no glitter. The palette is quiet enough that the hanging ornaments become the only saturated thing in the frame, which is why a dozen of them feel like plenty. To warm it up for the holidays, swap the sage ribbon for olive velvet and add cream candles rather than introducing a new hue. This formula punishes color more than pattern.
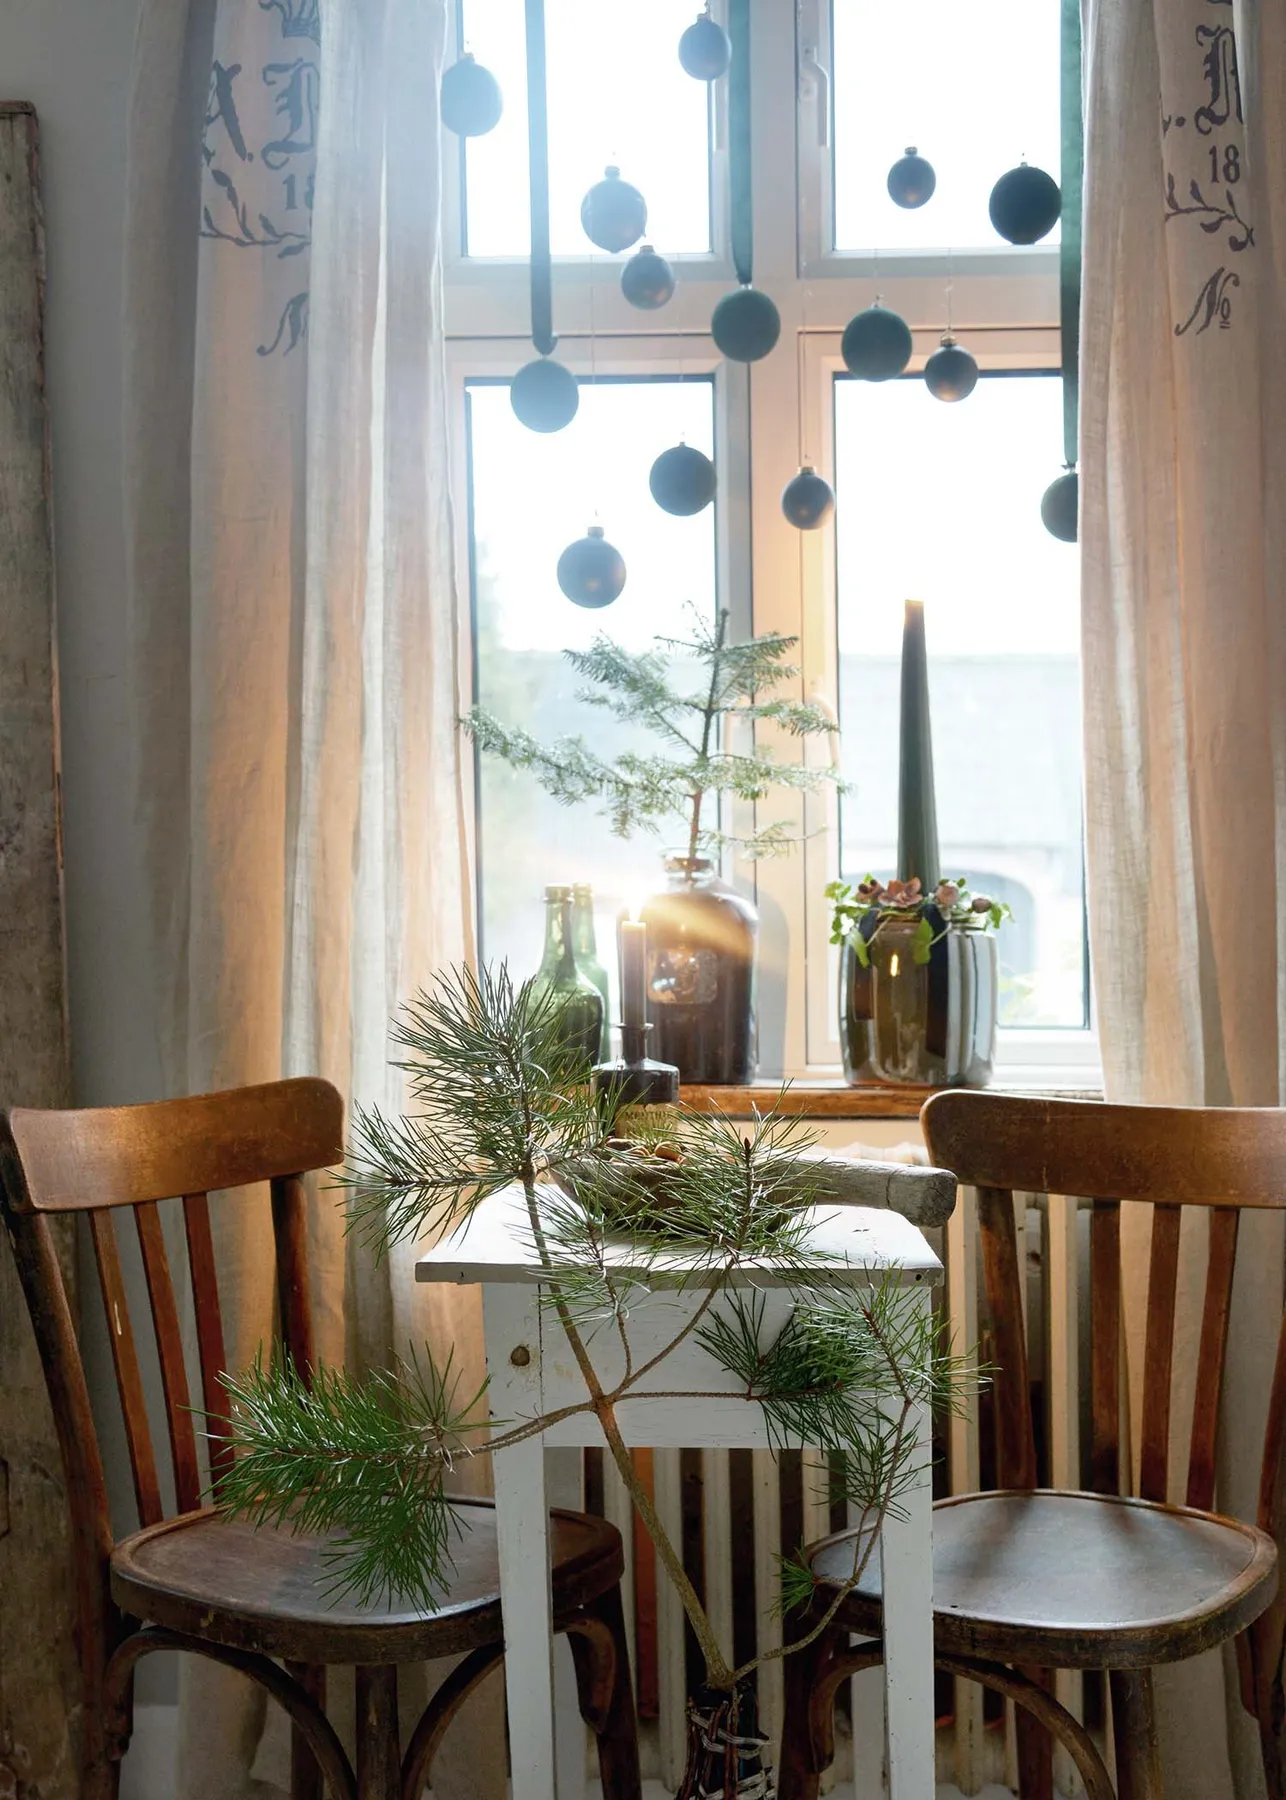
Ornaments hung from ribbons on a window look weightless in photographs and are, in practice, a small engineering project. Wide ribbon bows slip, so add a dab of hot glue where the ribbon meets the ornament cap. Light-colored linen curtains behind dark green glass will show every smudge, so plan to wash those panels before December. And check the ribbons after a week — cotton and linen both stretch under weight and your careful heights will drift.
30. Snowflake Clings Under a Strand of Multicolored Lights
This is the $25 window. Snowflake clings are $3–$8 a sheet at any grocery store in December, a multicolored strand runs $8–$15, and a small artificial tree is $15–$30 at a big-box store. Buy two sheets of clings and use only the snowflakes and dots — mixing in Santas and reindeer is what makes these look cheap. Walmart and Target both mark them down hard the second week of December, so it’s worth waiting if you’re not hosting early.
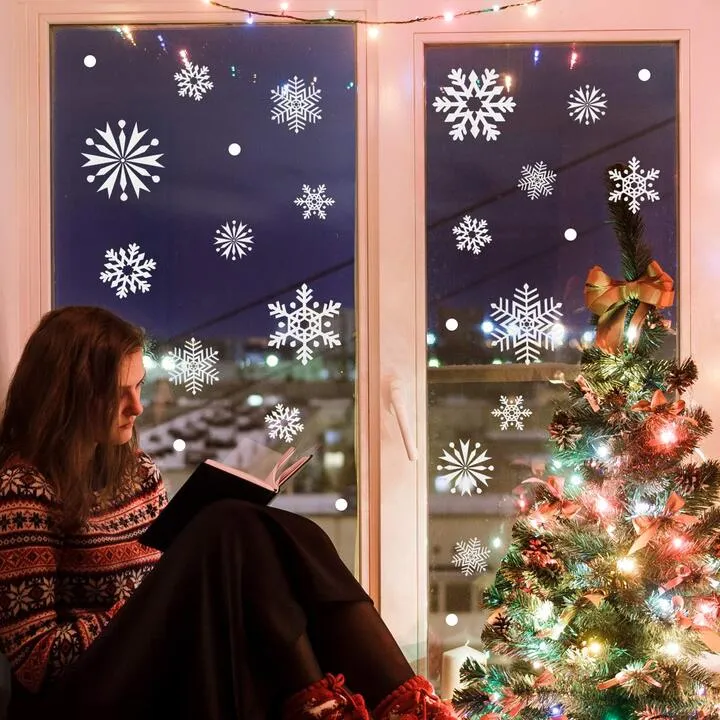
- Measure the window width so your light strand reaches with slack to spare.
- Check the outlet location — you need one within cord distance or a battery strand.
- Wipe the glass with vinegar and water; clings won’t stick to cold, dirty panes.
- Confirm the tree’s footprint fits the sill or floor space beside the window.
31. A Sleeping Cat, a Squirrel, and Snow on the Sill
The cat. There’s a gingerbread house and a wreath and all the usual cast, but the tiny sleeping cat curled on the porch of the decal is what makes people lean in. Whimsy works best when it’s specific — a generic snowman is forgettable, a cat asleep in a doorway is a story. If you’re buying decals, look for sets with small narrative details and place them at eye level where kids and adults can actually find them.
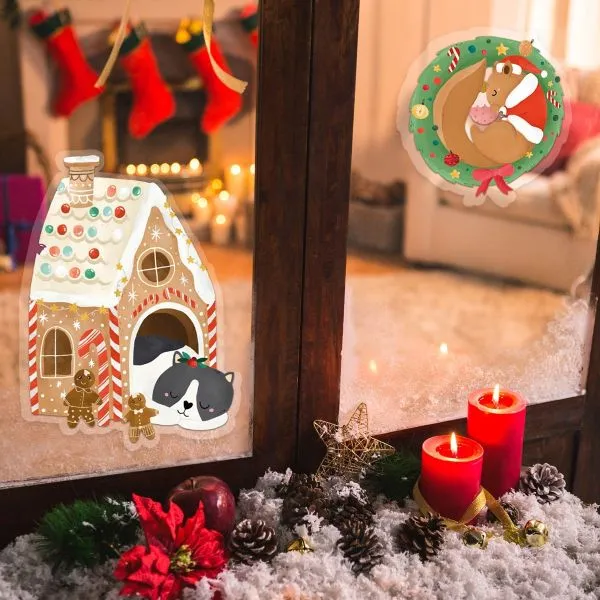
- Decal set with gingerbread house and animals: $8–$20
- Artificial snow, 2 bags: $10–$24
- Battery red pillar candles, pair: $15–$30
- Pinecones, foraged or bought: $0–$12
- Small red poinsettia: $6–$14
- Gold star and bell ornaments: $8–$18
Total: roughly $47–$118 for a sill that looks styled rather than decorated.
Your Window Is the Only Stage You Get All Year
You don’t need a storefront budget or a designer on speed dial — you need one strong idea, the right light temperature, and the discipline to edit. Start with the simplest version of whichever idea made you stop scrolling, live with it for a night, and add only what the window is missing.
📌 Pin your favorites now so future-you isn’t standing in the craft aisle in the dark on December 20th.